
3 Ways to Allow Remote Assistance Connections to This Computer Windows 11
This post introduces how to enable “Allow Remote Assistance connections to this computer” on Windows 11. Besides, it also introduces an Remote Assistance alternative for remote support. Keep reading if you’re interested.
By Ellie / Updated on December 13, 2024
Does Windows 11 have Remote Assistance?
Does Windows 11 have Remote Assistance? Windows 11 indeed offers the functionality of Remote Assistance. This feature empowers you to grant access to a trusted individual who can remotely address any issues on your Windows 11 PC, regardless of their physical location. Additionally, it allows you to extend remote support to others, no matter where you are situated. With Windows Remote Assistance, you can facilitate seamless troubleshooting and problem-solving without being physically present.
How to enable “Allow Remote Assistance connections to this computer” on Windows 11 & 10
In order to utilize Remote Assistance, it is essential to enable the option labeled "Allow Remote Assistance connections to this computer" on both Windows 11 and Windows 10. Below, we present three straightforward methods to accomplish this:
Way 1. Enable Remote Assistance connections in System Properties
Step 1. Press the Windows key and the "R" key simultaneously (Win + R) to open the Run dialog box.
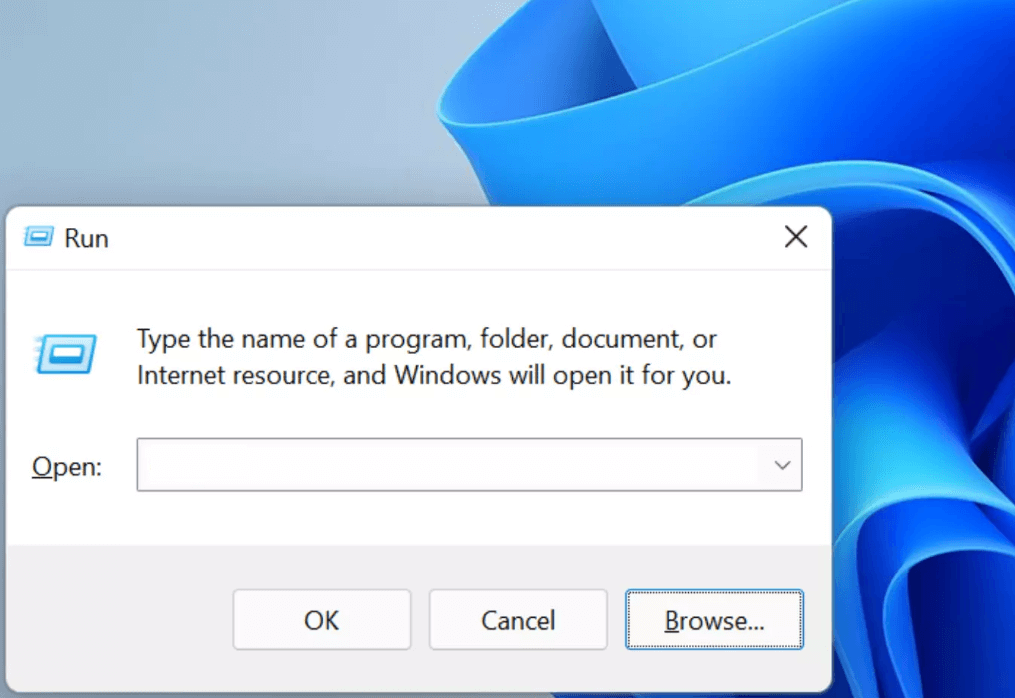
Step 2. Type "SystemPropertiesRemote.exe" into the Run dialog box and press Enter. This action will launch the System Properties window.
Step 3. Within the System Properties window, navigate to the "Remote" tab.
Step 4. Locate the checkbox that says "Allow Remote Assistance connections to this computer" and make sure it is checked. Click on the "OK" button to save the changes.

Way 2. Enable Remote Assistance connections in Local Group Policy Editor
Step 1. Open the Run dialog box. Type "gpedit.msc" into the Run dialog box and press Enter. This action will launch the Local Group Policy Editor.
Step 2. Within the Local Group Policy Editor, navigate to the following policy location:
Computer Configuration > Administrative Templates > System > Remote Assistance > Configure Solicited Remote Assistance
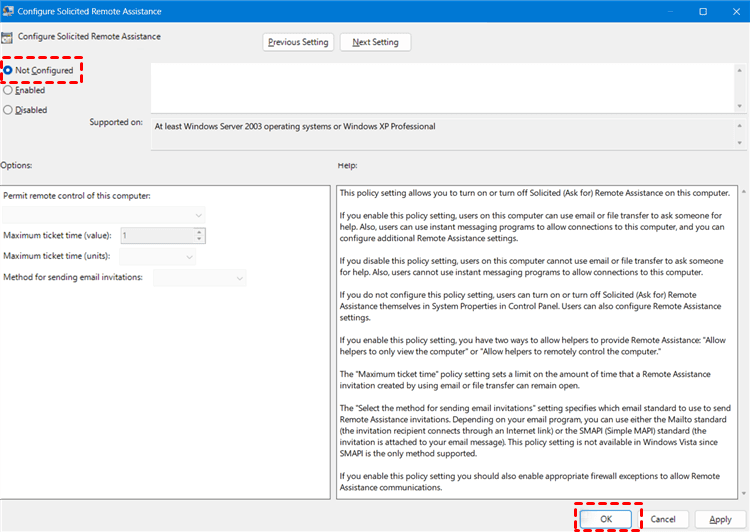
Step 3. Once you have reached the specified location, double-click on the policy labeled "Configure Solicited Remote Assistance".

Step 4. In the policy settings window, select the "Not Configured" option. This will enable Remote Assistance connections. Click on the "OK" button to save the changes.
Way 3. Enable Remote Assistance connections in Registry
Step 1. Open the Run dialog box. Type "regedit" into the Run dialog box and press Enter. This will open the Registry Editor.
Step 2. Within the Registry Editor, navigate to the following location:
HKEY_LOCAL_MACHINE > SYSTEM > CurrentControlSet > Control > Remote Assistance
Look for a DWORD value named "fAllowToGetHelp".
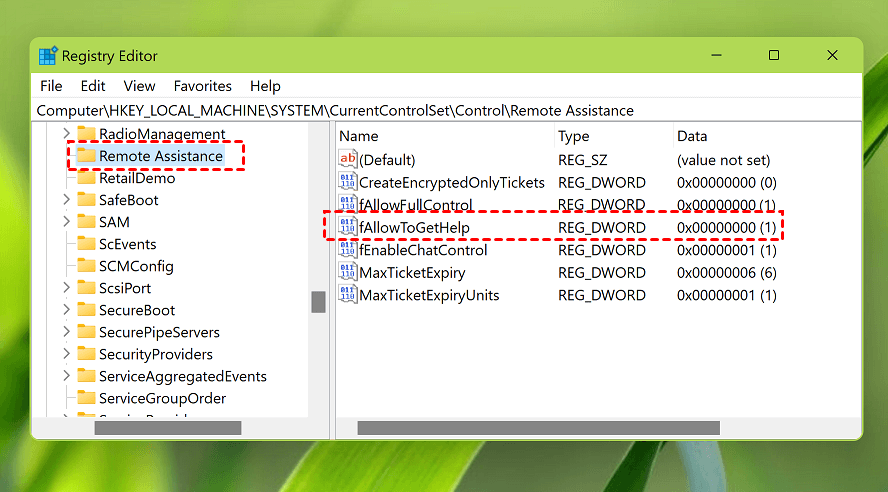
Step 3. Double-click on "fAllowToGetHelp" to edit its value.
Step 4. In the Edit DWORD Value window, change the Value Data to 1 to enable Remote Assistance. Click on the "OK" button to save the changes.
How to fix “Allow Remote Assistance connections to this computer” greyed out on Windows 10 & 11
When encountering the issue where the "Allow Remote Assistance Connections to this computer" is greyed out on Windows 11 and 10, preventing you from receiving assistance through Remote Assistance, it is often attributed to incorrect Group Policy settings or corrupted file systems. Fortunately, here are four possible solutions to fix this issue.
Method 1. Enable the Policy "Allow users to connect"
Step 1. Open the Local Group Policy Editor.
Step 2. Navigate to the following location within the Local Group Policy Editor:
Computer Configuration > Administrative Templates > Windows Components > Remote Desktop Services > Connections
Step 3. Double-click "Allow users to connect remotely by using Remote Desktop Services".

Step 4. Select the "Enabled" option. Click "OK" to save the changes.
Method 2. Configure Offer Remote Assistance
Step 1. Open the Local Group Policy Editor.
Step 2. Navigation:
Computer Configuration > Administrative Templates > System > Configure Offer Remote Assistance
Step 3. Double-click on the "Configure Offer Remote Assistance" option.
Step 4. Select the "Enabled" option. Click "OK" to save the changes.
Method 3. Change some registry settings
Step 1. Open the Registry Editor.
Step 2. Navigation:
Computer > HKEY_LOCAL_MACHINE > SOFTWARE > Policies > Microsoft > Windows NT > Current Version > Terminal Services
Step 3. In the right pane of the Terminal Services key, right-click and choose "New", then select "DWORD (32-bit) Value".
Step 4. Rename the newly created value as "fDenyTSConnections". Double-click on the "fDenyTSConnections" value and change its data field value to 0 to allow users to remotely connect by Terminal Services/Remote Desktop.
Note: Setting the "fDenyTSConnections" value to 0 allows users to remotely connect using Terminal Services/Remote Desktop, while setting it to 1 disallows remote connections.
Method 4. Run sfc/scannow and dism.exe
Step 1. Search for "cmd" in the search box. Right-click on the "Command Prompt" option and select "Run as administrator" from the context menu.
Step 2. In the Command Prompt window that opens, type the command "sfc /scannow" and press Enter. Allow the process to run, as it may take some time to complete. Do not interrupt the scanning process.
Step 3. In the Command Prompt window, enter the command "DISM /Online /Cleanup-Image /RestoreHealth" and press Enter. This will initiate the DISM scan and repair process.
Note: The scanning process, whether with sfc or DISM, checks the integrity of system files and repairs any issues found. It can also scan the registry for broken, empty, or invalid keys and clean them up.
Bonus tip: Best free Remote Assistance alternative for unattended remote support
If you are in need of an alternative to Remote Assistance, AnyViewer is highly recommended as it offers several advantages as a free remote support software. Here are some key advantages that AnyViewer has over Remote Assistance:
- Compatibility: Remote Assistance is limited to specific Windows systems. It is available on Windows Pro and Enterprise Editions but not available in Windows Home Edition. However, AnyViewer can be utilized on all editions of Windows, including Pro, Enterprise, and Home.
- Unattended remote support: Remote Assistance does not support unattended remote access. This means that you cannot provide remote support to a computer without the user's permission. In contrast, AnyViewer enables both attended and unattended remote access, allowing you to offer assistance even when the user is not present.
- Practical features: Remote Assistance lacks certain practical features that can enhance the remote support experience. For instance, Remote Assistance doesn’t support file transfer. AnyViewer, on the other hand, provides a comprehensive set of features including file transfer, multi-session support, remote restart and reconnect functionality, and more.
Step 1. On the host computer, click Log in on the left pane, and click Sign up (log in directly if you already have signed up).

Step 2. Complete the sign up information.

Step 3. When you successfully logged in to AnyViewer, your device will automatically be assigned to the account you’ve logged in to.

Step 4. Log in to the same AnyViewer account on the two devices, and click One-click control to achieve unattended remote support.

- ✍ Notes: You can upgrade your account to a Professional or Enterprise plan to enjoy more rights:
- Assign more devices to achieve unattended remote access to more devices.
- Connect to another computer in privacy mode, which means you can black the screen and block the mouse and keyboard of the remote computer.
- Faster file transfer speed. Transfer speed for a free account is 500 KB/s, and for a paid account is up to 10 MB/s.
The bottom line
This post explores the steps to enable the “Allow Remote Assistance connections to this computer” on Windows 11. Additionally, it discusses troubleshooting methods for resolving the issue of “Allow Remote Assistance connections to this computer” on Windows 10 and 11 greyed out. Furthermore, itintroducesAnyViewer as a reliable alternative for remote support, offering efficient remote assistance capabilities.
