
How to Disable Remote Assistance in Windows 10, 11
This post provides users with the detailed operating steps on how to disable Remote Assistance in Windows 10, 11.
By Ellie / Updated on December 13, 2024
Should I disable Remote Assistance in Windows 10, 11
In Windows 10 and 11, Remote Assistance is a feature used by technicians to provide technical support to others. With Remote Assistance, a technician can (or can be invited to) see what’s happening on the other screen and control the computer remotely.
However, some users wonder “Should I disable Remote Assistance in Windows 10” as it may be a security threat to sensitive information on their computers. For security considerations, we recommend you disable Remote Assistance in Windows 10 when you don’t need remote support from technicians to prevent your device from being more vulnerable to potential remote attacks (you could re-enable it once you need technical support).
How to disable Remote Assistance in Windows 10, 11
Then how to disable Remote Assistance in Windows 10, 11? Here we provide you with the detailed steps. By the way, in case you need it, the way to disable Remote Desktop in Windows 10 is quite similar to the way to disable Remote Assistance in Windows 10, 11.
Disable remote access to computer over Remote Assistance
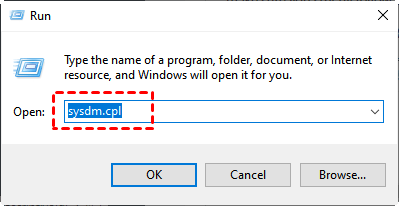
Step 1. Press WIN + R and then type in “sysdm.cpl” to open the System Property.
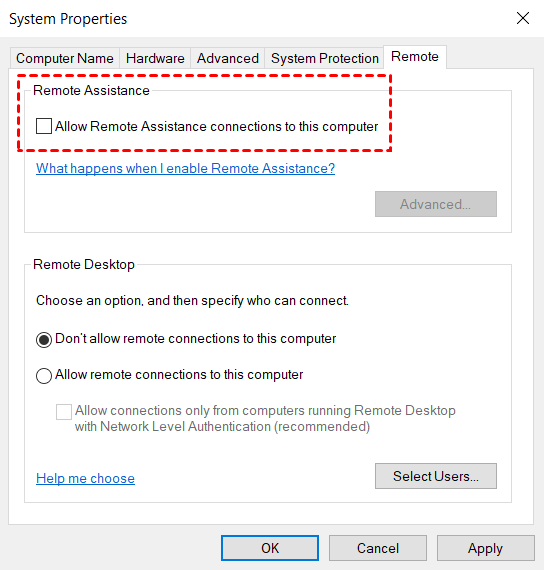
Step 2. Switch to the Remote tab. Under the Remote Assistance section, clear the Allow Remote Assistance connection to this computer option. Then click Apply and OK.
Disable Remote Assistance in Firewall
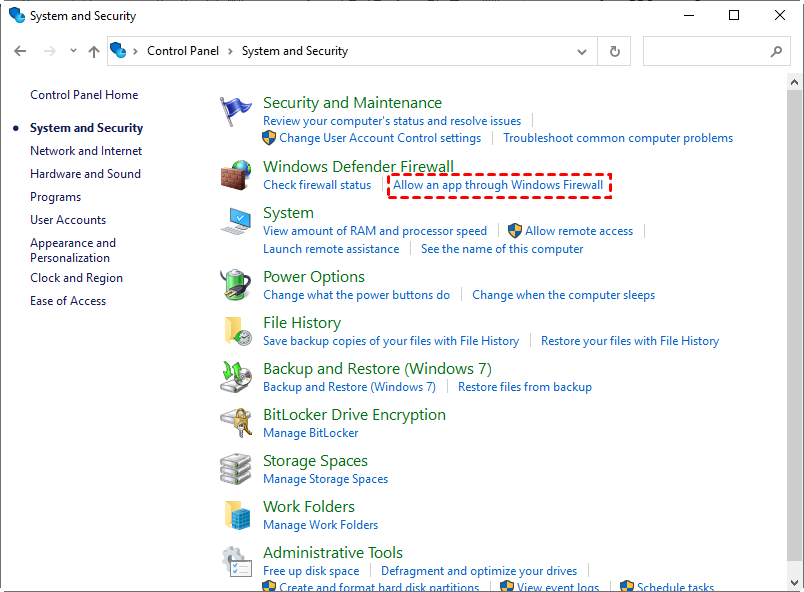
Step 1. Navigate here: Control Panel > System and Security > Windows Defender Firewall. Then click Allow an app through Windows Firewall.
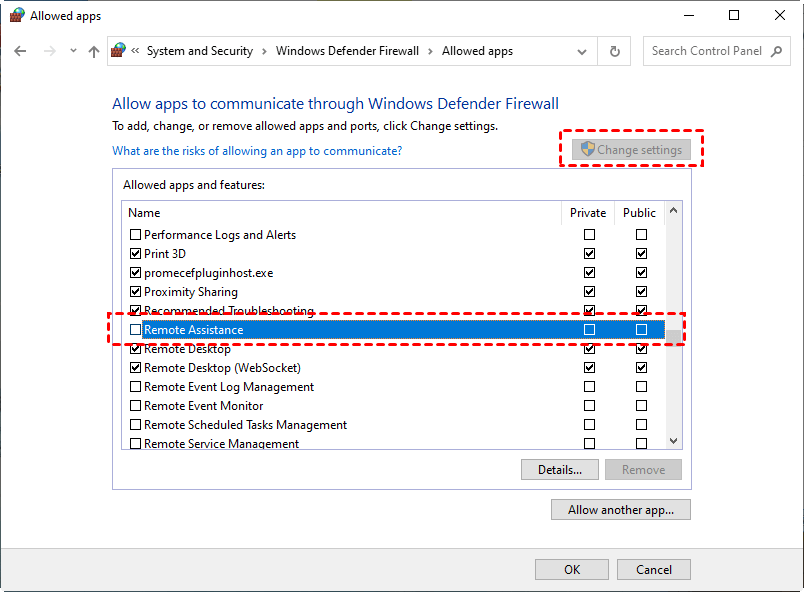
Step 2. Click the Change settings button. Then clear the Remote Assistance option. Click the OK button.
AnyViewer: A remote assist software easy to enable/disable
For safety considerations, some users want to disable remote access to their computers when they don’t need it. At this point, it is quite important to find remote access software that is easy to enable and disable. Here, we recommend AnyViewer to you.
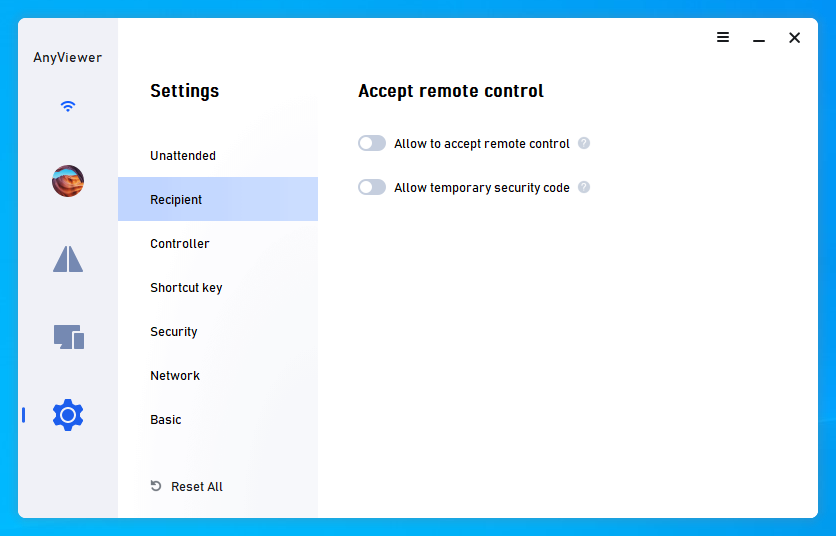
AnyViewer is a safe remote access software developed by a strong technical team and is secured by Elliptic Curve Cryptography (ECC) encryption. If you still feel it is not safe enough and need to disable it when you don’t want to use it, it is quite easy to disable and re-enable it. You just need to go to Settings > Recipient, and then untick the three options, your device is not enabled to be accessed anymore.
If you need remote access, just tick the options above, then AnyViewer is enabled to use again. Next, let’s learn how to achieve remote access with AnyViewer.
Step 1. Download, install, and launch AnyViewer on both computers.
Step 2. Go to Log in, and then click Sign up. (If you already have signed up on its official website, you can log in directly.)

Step 3. Fill in the signup information.

Step 4. Then you can see you successfully logged in to AnyViewer. Your device will automatically be assigned to the account you've logged in to.

Step 5. Log in to the same AnyViewer account on the two devices, then click One-click control to achieve unattended remote access.

- ✍ Notes: Free edition of AnyViewer allows you to remotely control two computers simultaneously. If you want to control more computers simultaneously, you can upgrade your account to a Professional or Enterprise plan. Then you'll have the following rights:
- Assign more devices to achieve unattended remote access to more devices.
- Connect to another computer in privacy mode, which means you can black the screen and block the mouse and keyboard of the remote computer.
- Faster file transfer speed. Transfer speed for a free account is 500 KB/s, and for a paid account is up to 10 MB/s.
In conclusion, this post provides users with detailed operating steps on how to disable Remote Assistance in Windows 10, 11. Besides, it also introduces a free remote desktop software AnyViewer to you. With it, you can easily enable and disable remote connections as you like.
