
How to Do Remote Assistance in Windows 10
How to use Remote Assistance on Windows 10? This tutorial shows instructions and recommends a better way to assist remotely.
By Ellie / Updated on February 27, 2025
Don’t know how to use Remote Assistance on Windows 10
"Hello, everyone. Please excuse my somewhat dumb question. I'm a new user of Remote Desktop. I had some problems with my computer (Win 10) and had to ask a professional to help me, but he told me I need to use Remote Assistance. But I don't know how to use it, is there anyone to help me?"
How to use Remote Assistance on Windows 10
We know that it’s unavailable to use Remote Desktop without locking the host computer. Thus, if you want to view what the helper does to your computer on the other end, you need to choose remote access solutions, like Remote Assistance or Quick Assist.
Firstly, have a brief understanding of Windows Remote Assistance. Remote Assistance means that the remote user receives an invitation file from the host computer and later gives assistance remotely. Before remotely assisting on Win 10, we need to enable Remote Assistance and then follow the steps to connect.
Before the connection: Enable the Remote Assistance
Here are two methods to enable Remote Assistance.
Method 1. Enable Remote Assistance in System Properties
Step 1. Right-click on This PC and then select Properties.

Step 2. Locate Remote settings on the left pane.
Step 3. Switch to the Remote tab, and then tick the option “Allow Remote Assistance to this computer”
Method 2. Enable Remote Assistance by using Registry Editor
Step 1. Press Win +R and then input “regedit”, and then hit OK to open Registry Editor.
Step 2. Navigation:
HKEY_LOCAL_MACHINE\SYSTEM\CurrentControlSet\Control\Remote Assistance
Step 3. Locate fAllowFullControl and fAllowToGetHelp.
Step 4. Double click on fAllowFullControl and change the value data to 1 and click on OK.
Step 5. Double click on fAllowToGetHelp and change the value data to 1, then click on OK.
Concrete Steps for Remote Assistance
Step 1. Press Win + R and then type in “msra” in the box, hit OK to open Remote Assistance.
Step 2. Choose “Invite someone you trust to help you” on the host PC and click “Save this invitation as a file”.
![]()
Step 3. Save this file on the desktop and a pop-up window that contains a password will appear. Send the file and password to the client PC.
Step 4. On the client PC, choose “help someone who has invited you”, and then double click on the file, enter the password and click OK.
Step 5. Then a pop-up request will display on the host computer, click on “Yes”. Then the screens on both sides are the same.
Step 6. On the client PC, click on “Request control” and then a window will be popped up on the host computer.
Step 7. Click on OK on the host PC, and then you can give assistance.
AnyViewer: A free and easy-operated software for remote assistance on Windows 10
Surely, Remote Assistance can help you to assist or get assistance from others, providing an easy way for the one who needs it. However, we can’t deny that we may come across various problems when connecting Remote Assistance, such as the option “Allowed Remote Assistance connection to this computer greyed out”, Remote Assistance not working on Windows 10, and so on. It must be frustrating for every user when they need to use it urgently.
At this time, AnyViewer, a free and efficient remote access software seems the best choice. Unlike the potential problems or complicated password access of Remote Assistance, AnyViewer can easily realize the Windows remote assistance with easy operation and fewer problems. And for unattended access, you can get remote assistance with one click. Now, let’s see how AnyViewer works.
Step 1. Install AnyViewer on 2 PCs. Sign up and fill in the information to create AnyViewer account. Once logged in, the PC will be assigned to the account automatically.

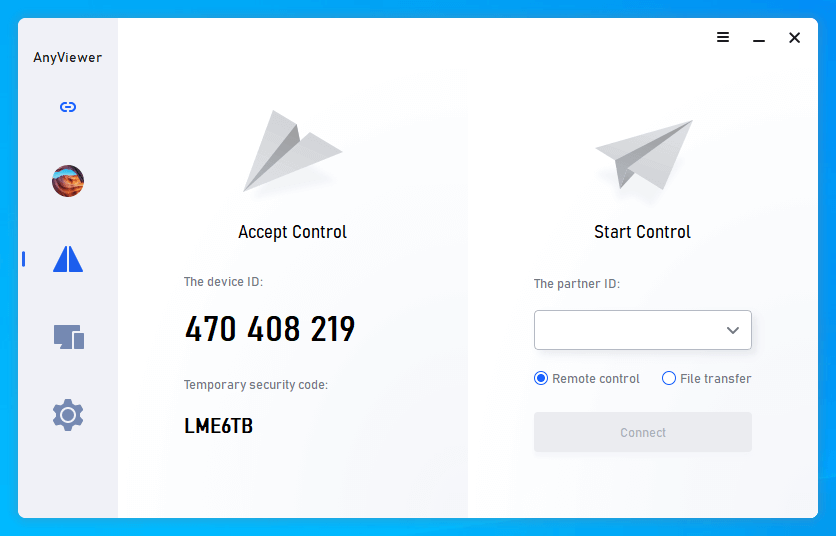
Step 2. After logging in, you can see your interface as the following picture.

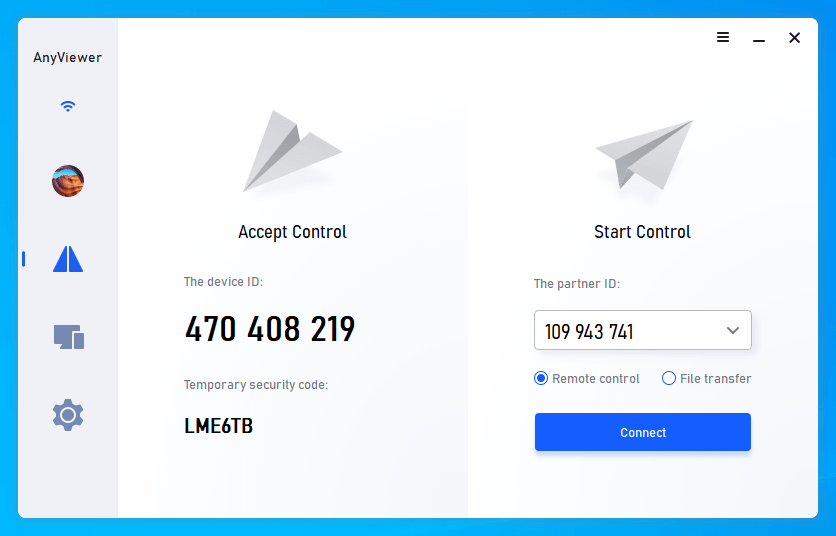
Step 3. Go to the “Connect” tab, and then you can see the device ID. Ask your friends or family member to tell you the device ID of the host PC.
Step 4. Enter the device ID of the remote PC and then click on “Connect”.
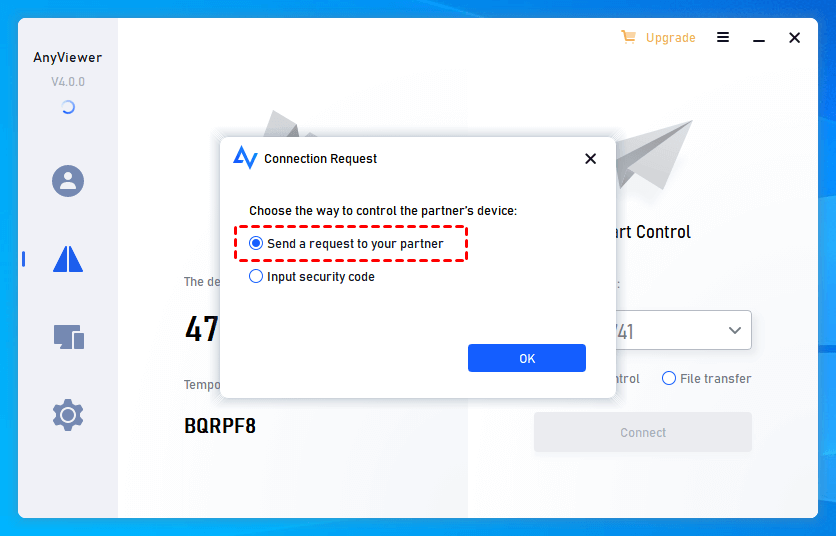
Step 5. For the 2 options, choose the first one “Send a control request to your partner”, and then click on “OK”.
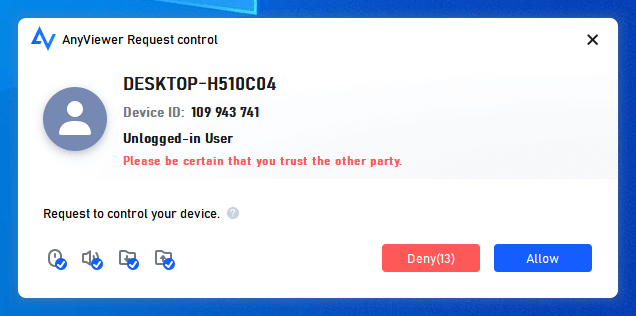
Step 6. There will be a pop-up window on the host PC. Click on “Allow” to receive remote support. And then the connection will be realized.
Note: Are you looking for how to offer Remote Assistance without permission? Actually, it’s kind of easy. Log into the AnyViewer account on the host PC, and then go to "Device" on the local PC, locate and click the PC that you need to control. And then click "One-click control" to achieve a remote connection with one click.

Conclusion
How to use Remote Assistance on Windows 10? You must gain clarity on the way to enable Remote Assistance and the concrete steps to operate. If you run into some issue when using Remote Assistance, AnyViewer can be the best solution to offer or get assistance efficiently.
