
Guide: How to Enable Remote Microphone on Remote Desktop [PC & Phone]
Interested in how to enable remote microphone on Remote Desktop? Look no further! This comprehensive guide provides step-by-step instructions for activating RDP's remote microphone functionality on both your personal computer and mobile device.
By Ellie / Updated on December 13, 2024
How do I enable microphone on Microsoft Remote Desktop?
I was providing remote support to my clients via Microsoft Remote Desktop. Sometimes I need to speak to them. How do I enable microphone on Microsoft Remote Desktop so they can hear me?”
- Question from Reddit
Microsoft Remote Desktop grants you the power to control any PC remotely while also syncing the audio from remote devices. However, there's a default setting in certain versions of Microsoft Remote Desktop that turns off access to your local microphone. In these cases, you'll have to do it yourself and manually enable the remote microphone access for your Remote Desktop.
How to enable remote microphone on Remote Desktop [PC & phone]
Let’s see how to enable remote microphone on Remote Desktop for Windows, macOS, and mobile devices.
How to enable remote microphone on Remote Desktop for Windows
If you have a Windows system, follow the steps below to learn how to enable remote microphone on Remote Desktop Windows 10, 11, etc.
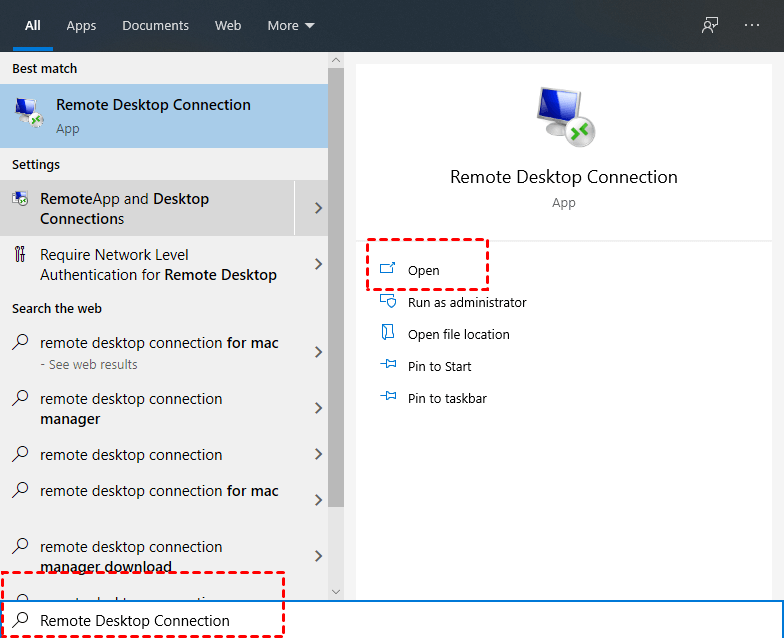
Step 1. Search for Remote Desktop Connection in the Search box. And then open it.
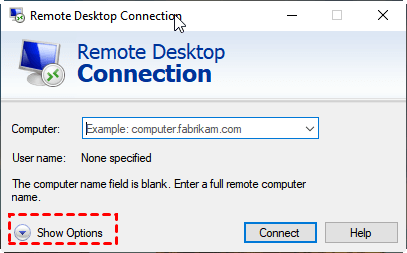
Step 2. In the Remote Desktop Connection dialog box, click Show Options.
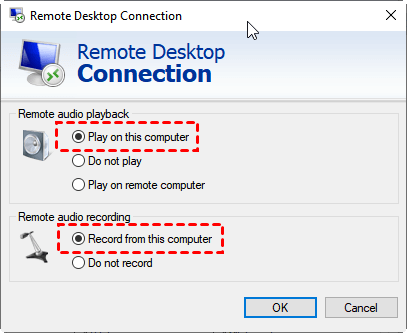
Step 3. Click the Local Resources tab, and then click Settings under Remote Audio.
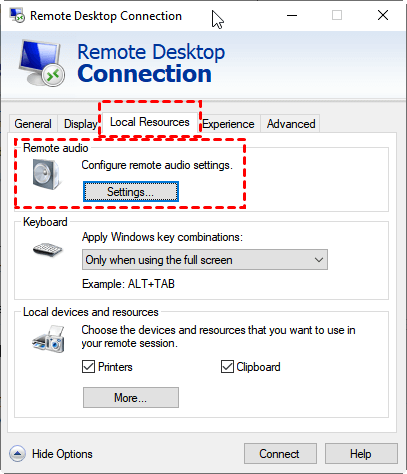
Step 4. For Remote audio playback, select Play on this computer (for remote audio to play on the local machine). For Remote audio recording, select Record from this computer (for the local mic to be used on the remote machine). Then click OK.
How to enable remote microphone on Remote Desktop for macOS
If you have macOS, follow the steps below to enable remote microphone on Remote Desktop for your Mac.
Step 1. Download the Microsoft Remote Desktop client from the Mac App Store.
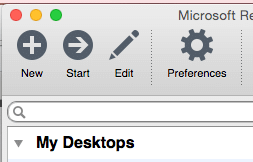
Step 2. Now open the Microsoft Remote Desktop application and click on PCs, next click on + New > Add PC. Fill in the computer information, including PC name, IP address, etc.
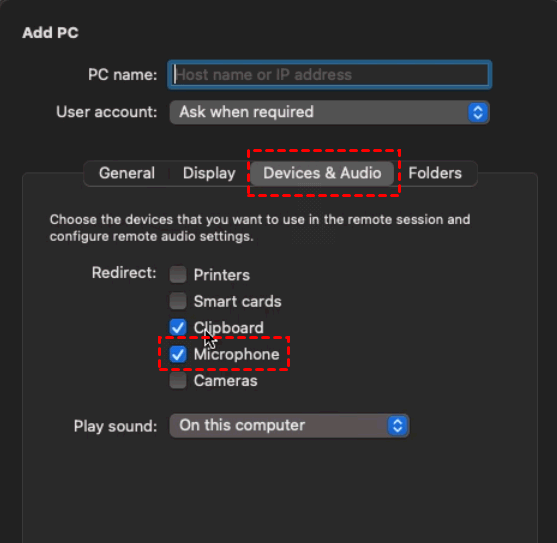
Step 3. Navigate to the Devices & Audio tab. Check the Microphone option and click on Add/Save.
How to enable remote microphone on Remote Desktop for mobile devices
If you’re using Microsoft Remote Desktop Android or iOS, you can follow the steps below to enable remote microphone. As the operating steps are pretty much the same, we’ll take Android as an example here.
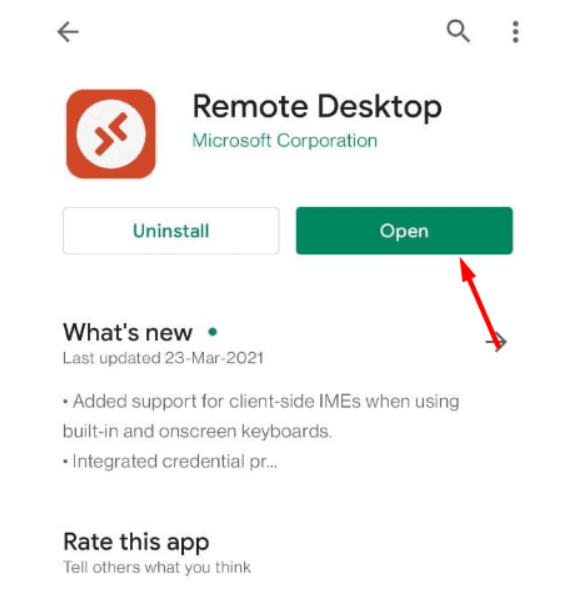
Step 1. Download Microsoft Remote Desktop from the Android app store.
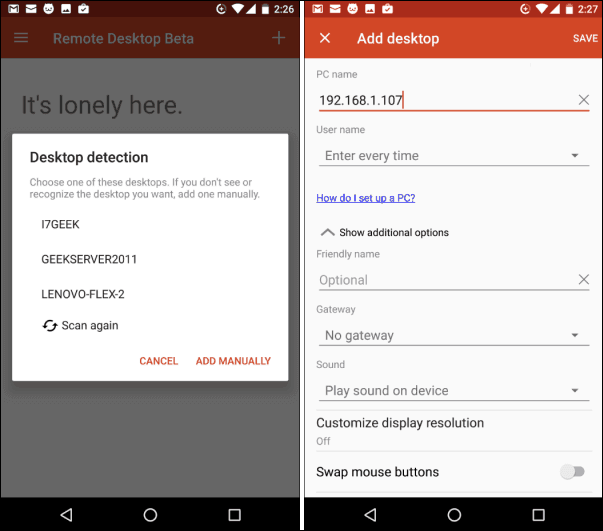
Step 2. Tap the “+” icon to select desktop, and then wait for the app to search your local network for connected PCs. You must manually add the one you want to connect to if it does not appear automatically.
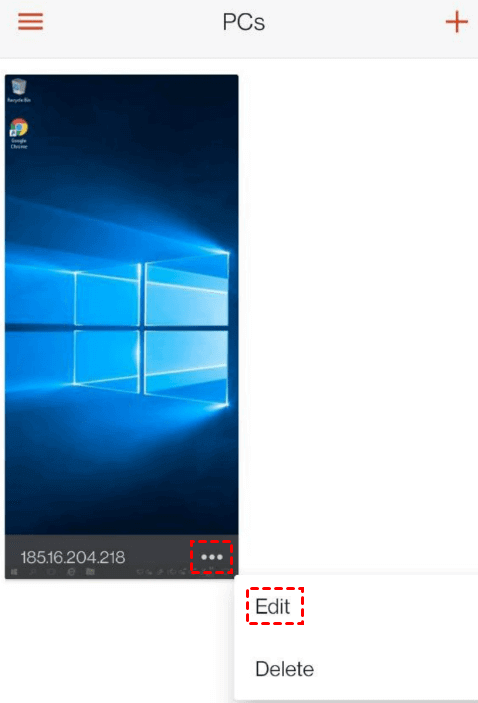
Step 3. After adding the desktop, click on ••• > Edit.
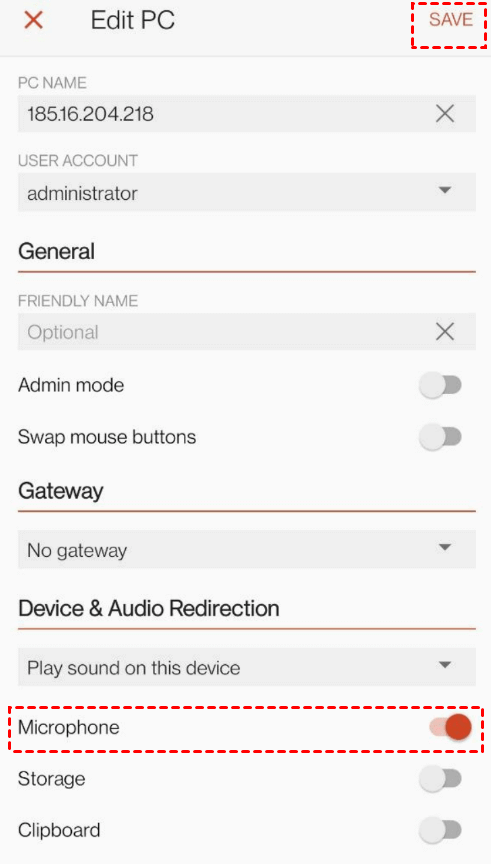
Step 4. Navigate to the Device & Audio Redirection and check the option Microphone. Click on Save to keep the changes.
Bonus tips: How to fix Remote Desktop remote microphone not working
If the Remote Desktop remote microphone not working even if you have enabled it, you can use the following three solutions to fix it on Windows.
Solution 1. Check Registry setting
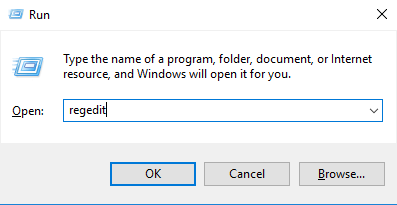
Step 1. Press Windows key + R to invoke the Run dialog box and then type in “regedit” and hit OK to open Registry Editor.
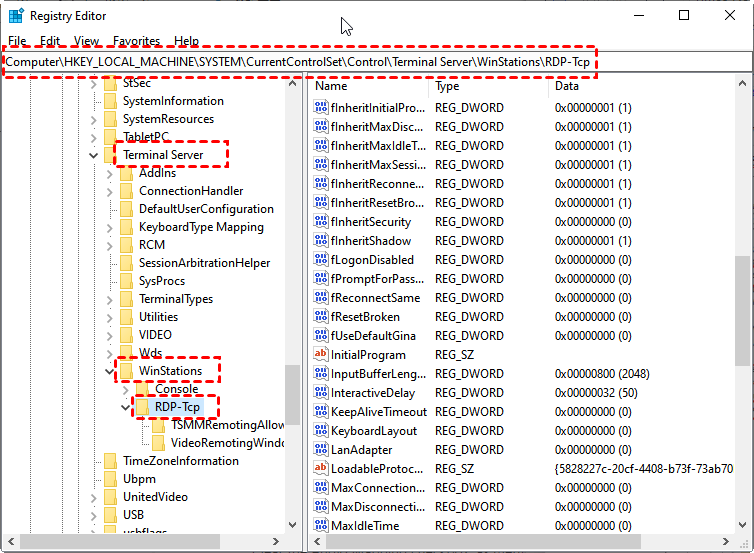
Step 2. Navigate here: Computer > HKEY_LOCAL_MACHINE > SYSTEM > CurrentControlSet > Control > Terminal Server > WinStations > RDP-Tcp
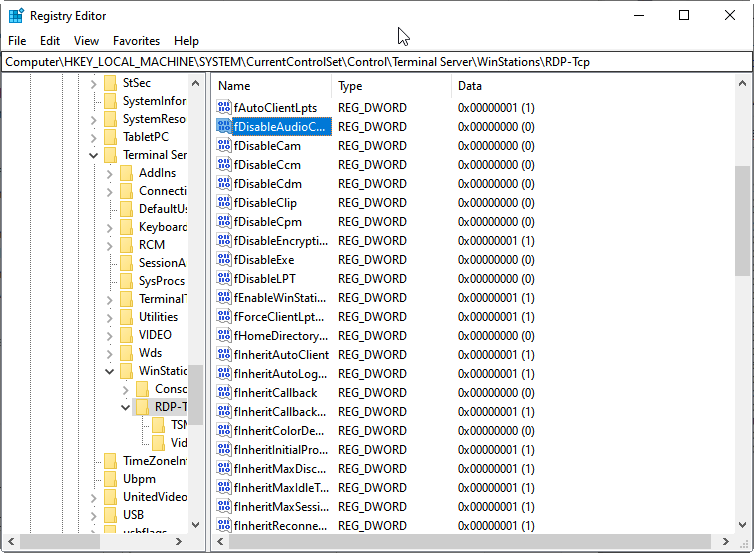
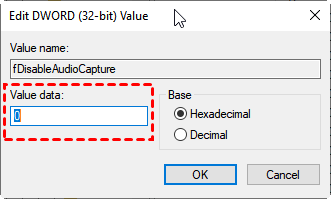
Step 3. On the right pane, click on fDisableAudioCapture to change its value data. You need to set the value to 0. Then click on OK.
Solution 2. Check Group Policy setting
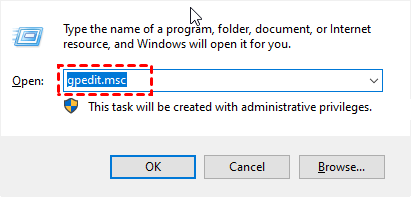
Step 1. Invoke the Run dialog box. Type in “gpedit.msc” and press OK. This will open up the Local Group Policy Editor window.
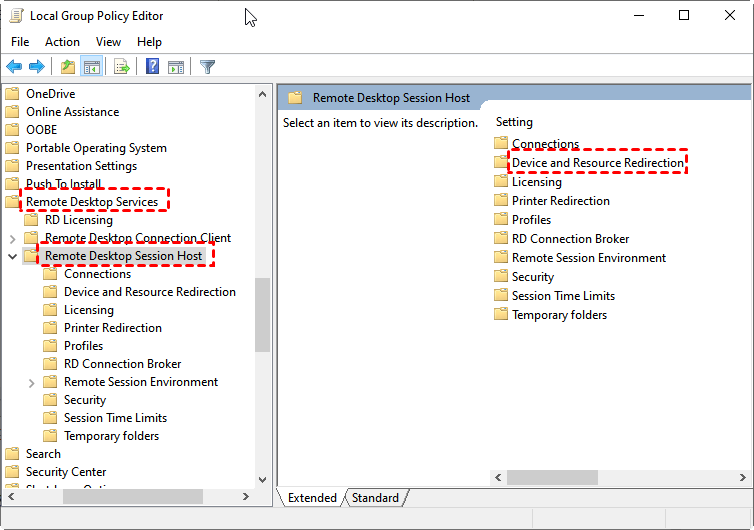
Step 2. Navigate here: Computer configuration > Administrative Templates > Windows Components > Remote Desktop Services > Remote Desktop Session Host > Device and Resource Redirection.
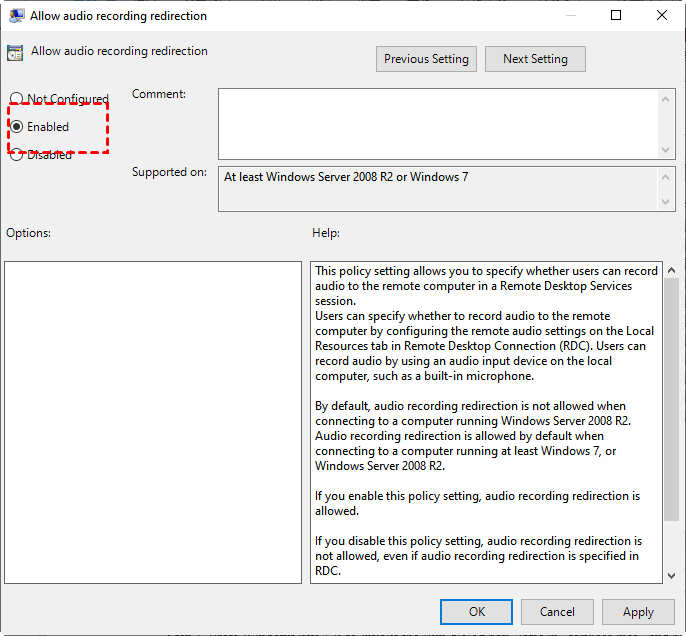
Step 3. On the right pane, double click Allow audio recording redirection and set it to Enable. Then click OK.
Solution 3. Check Services setting
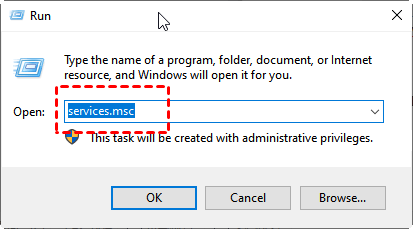
Step 1. Invoke the Run dialog box. Type in “services.msc” and hit OK.
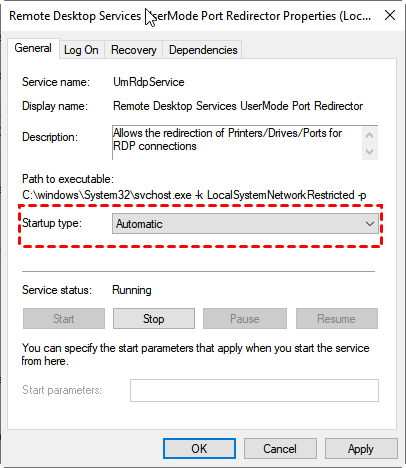
Step 2. In the Services window, double-click Remote Desktop Services User Mode Port Redirector to check its status.
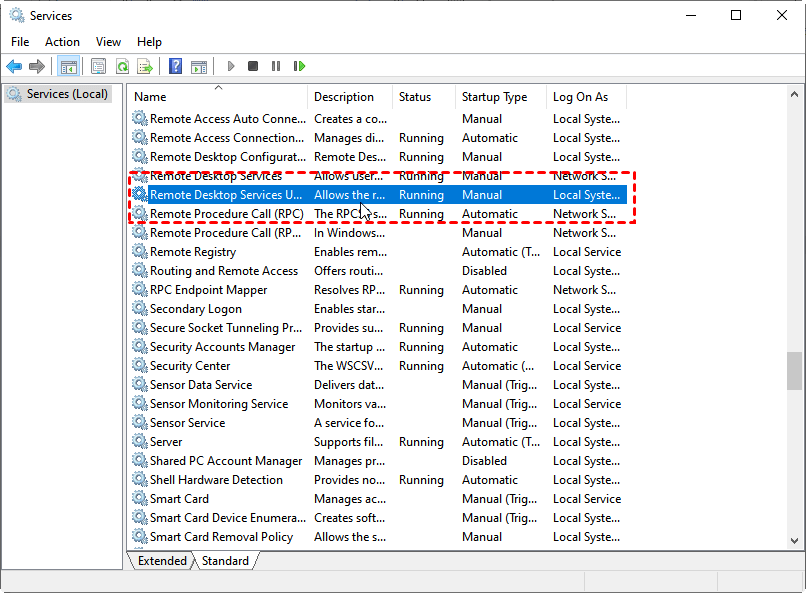
Step 3. Change the Startup type to Automatic.
AnyViewer: Best Remote Desktop alternative with audio support
If you want an easier way to sync remote sound during remote access, you're advised to use AnyViewer. It is the free remote desktop software for Windows, iOS, and Android devices. To enable remote sound during a remote session, you just need to click the sound button in the toolbar. No more complicated configuration process anymore.

Besides, AnyViewer also has many advantages that make it one of the best Remote Desktop alternatives:
- AnyViewer is easier to use. Remote Desktop requires a complicated configuration process, while AnyViewer allows you to connect to an unattended remote device with one click.
- AnyViewer has fewer restrictions. Remote Desktop requires that the two devices be on the same network, while AnyViewer doesn’t.
- AnyViewer is more compatible with Windows versions. Remote Desktop can’t be used to connect to Windows Home computers and Standard edition computers, while AnyViewer is fully compatible with both.
- AnyViewer supports more features. In contrast, Remote Desktop falls short, lacking functions like text chat and multi-session—features readily available in AnyViewer. If you upgrade to a Professional or Enterprise plan, you can unlock more incredible features.
If you’re interested, get it right now!
The bottom line
This post primarily introduces how to enable remote microphone on Remote Desktop across different operating systems, including Windows, macOS, and mobile devices. If you encounter issues with your remote microphone not working as expected, you can explore three solutions to address the problem.
For individuals seeking a simpler method to sync sound during remote access, consider opting for AnyViewer. AnyViewer is a user-friendly, free remote desktop software available for Windows, iOS, and Android devices. It offers a seamless audio experience during remote sessions, making it a reliable choice for remote access needs.
