
Three Easy Ways to Achieve PC Remote Control for Windows 8.1
This post introduces three software for PC remote control for Windows 8.1 to you, you can choose one to use after comparing their pros and cons.
By Ellie / Updated on December 26, 2025
Why do you need PC remote control for Windows 8.1?
My computer is running Windows 8.1 system because I am really not used to using Windows 10. I wonder how can I remotely control another computer using my computer? Is there any easy solution to achieve PC remote control for Windows 8.1?”
- Question from Spiceworks
Nowadays, as a large number of people are using Windows 10, it’s easy to find remote control solutions for Windows 10. But it is not fair for users who insist on using the old version of Windows 8.1. Therefore, this tutorial provides three software for remote control PC Windows 8.1.
How to remotely control PC on Windows 8.1?
In addition to the Windows built-in remote desktop program RDP, we also recommend two free third-party remote control software, Chrome Remote Desktop, and AnyViewer, for you, giving you wider choices to achieve PC remote control Windows 8.1.
Method 1. Windows built-in RDP
RDP is the Windows built-in remote desktop program that allows users to initiate a remote connection, or multiple remote connections to a Windows 8.1.
Preparation work:
- Connect both the client computer (the controller computer) and the host computer (the controlled computer) to the same network.
- The client computer is running Windows 8 Professional. The host computer Windows 8.1 Enterprise.
Part 1. Enable remote control on the host computer
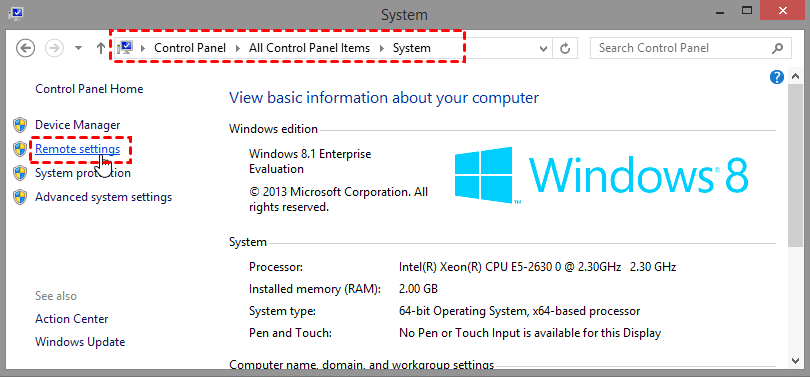
Step 1. Navigate here: Control Panel > All Control Panel Items > System > Remote settings.
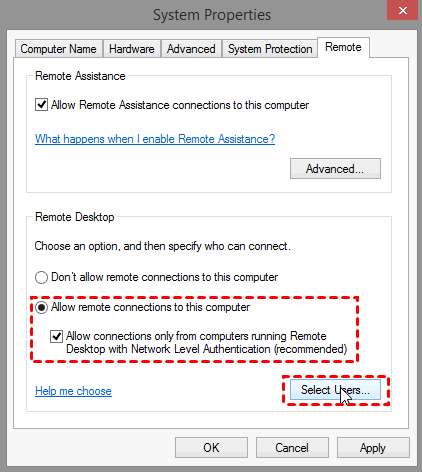
Step 2. On the Remote tab, click Add to add users who are allowed to access this computer (you need to add already existing users to realize remote desktop). Then click Select Users.
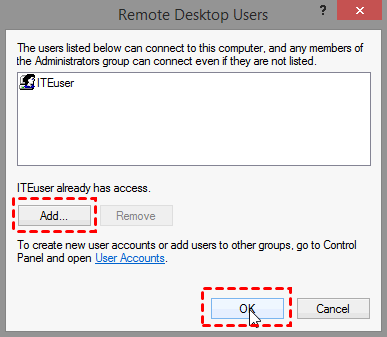
Step 3. Click Add in the pop-up window, and add users who you want to access this computer (you need to add an existing user to realize the remote desktop). And then click OK.
Part 2. Find the IP address and User name of the host computer
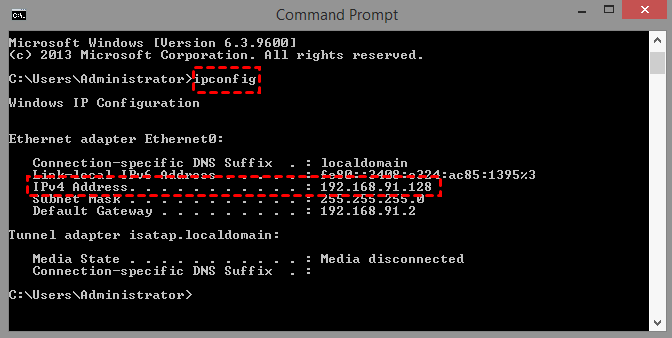
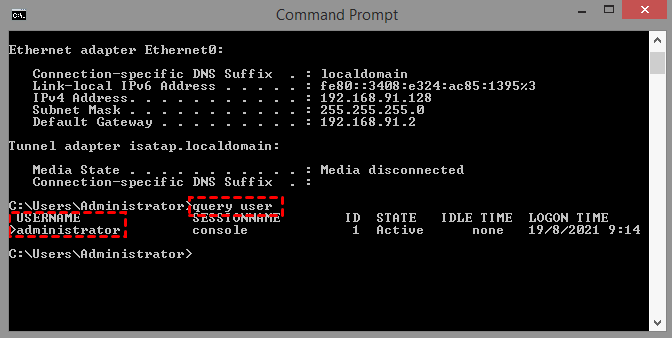
Step 1. Press Win + R to invoke the Run dialog box. Type in “cmd” and press OK. Then type “ipconfig” and press Enter. Now you can see a group of IP addresses, of which the IPv4 address is the one you need.
Step 2. Then type “query user” to see the PC name.
Part 3. Start remote control on the client computer
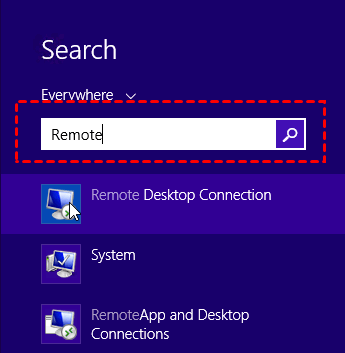
Step 1. Search for Remote Desktop Connection in the Search box. And then open it.
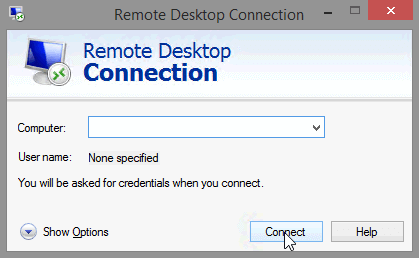
Step 2. Enter the IP address and user name in the Remote Desktop Connection interface to achieve connection.
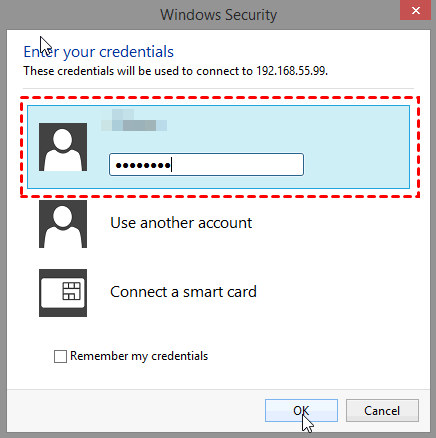
Step 3. In the pop-up Windows Security window, find the user name you just entered and enter the power-on password. If there is no power-on password, click OK.
Step 4. In the pop-up window, click Yes to successfully establish a remote connection.

Note:
- This is only applicable to computers that are on the same network. Otherwise, you need to forward the connection of the client computer to the designated port through port forwarding (RDP defaults port: 3389) before it can be used normally.
- In addition, you need to pay attention to the Windows system version of your computer. In addition to Windows 8/8.1 Home Edition, Windows 7 Starter Edition, Windows 7 Home Edition, and Windows 10 Home Edition also do not support RDP.
Method 2. Chrome Remote Desktop
Preparation work:
- Connect both the client computer (the controller computer) and the host computer (the controlled computer) to the networks (it doesn’t matter whether the two computers are connected to the same network).
- Download and install the Chrome browser on both computers in advance, and register and log in to the same Google account.
Part 1. Enable remote control on the host computer
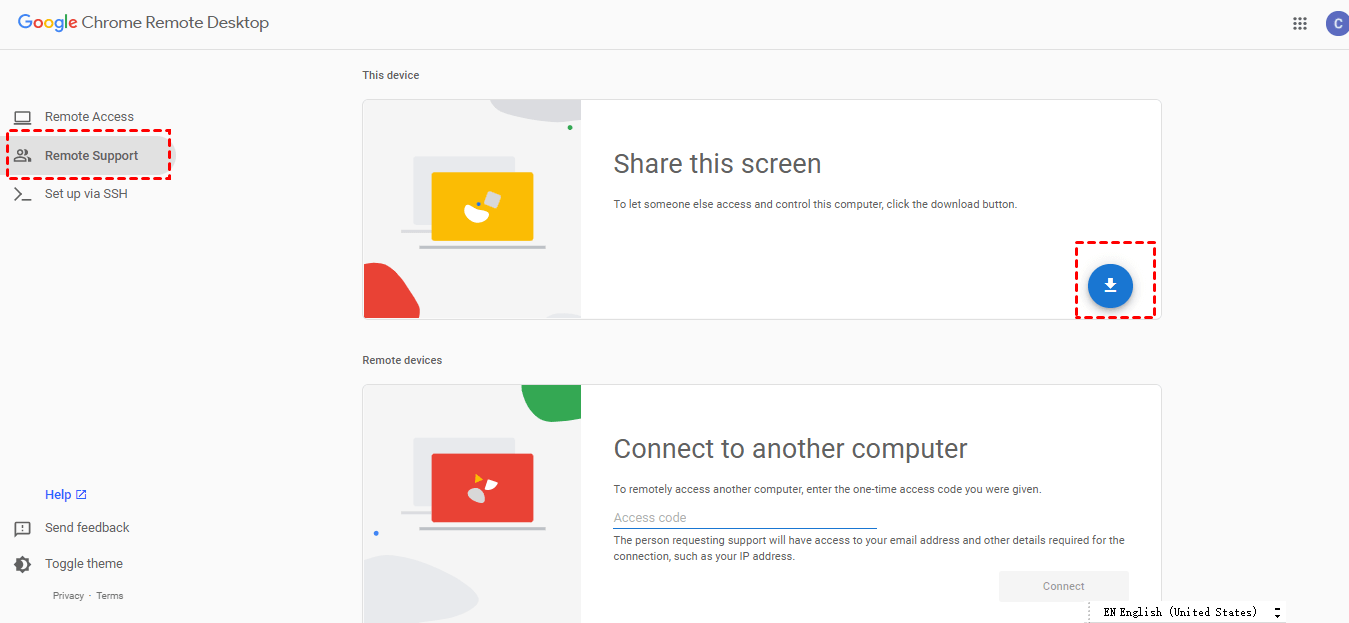
Step 1. On the host computer, open Chrome Remote Desktop download page. Click Remote Support first and then click the blue download button.
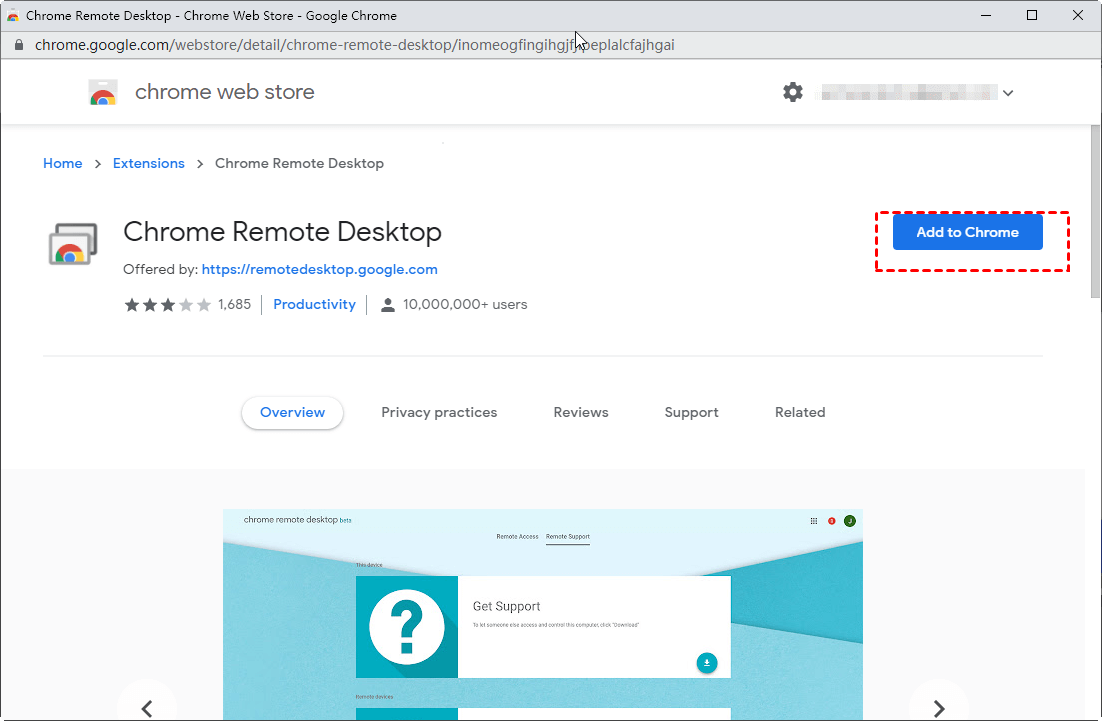
Step 2. After automatically jumping to the chrome web store, click Add to Chrome to download Chrome Remote Desktop.
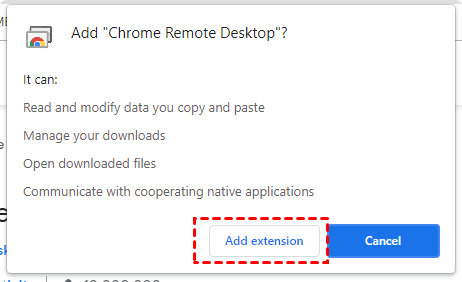
Step 3. Click Add extension to confirm the installation.
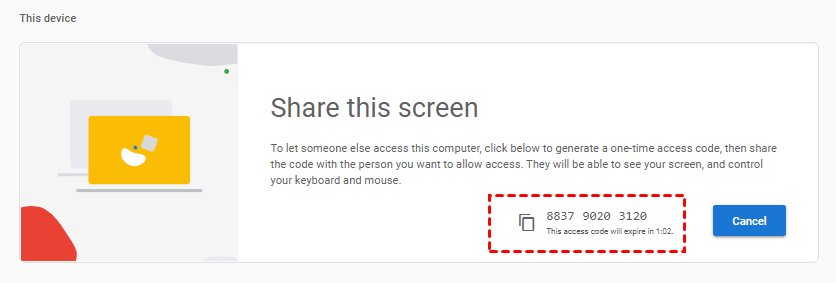
Step 4. Then turn back to the previous page, and then click Generate Code.
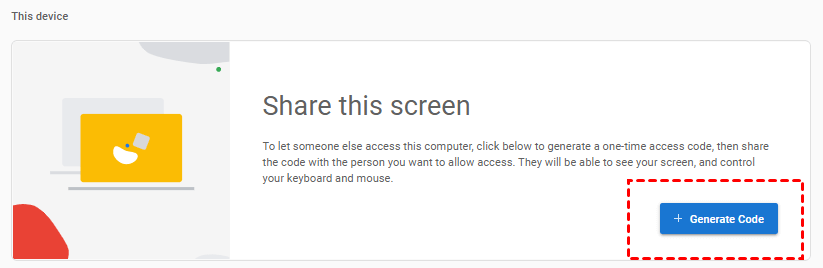
Step 5. Remember the automatically-generated code. Note: the code is only valid for 5 minutes.
Part 2. Start remote control on the client computer
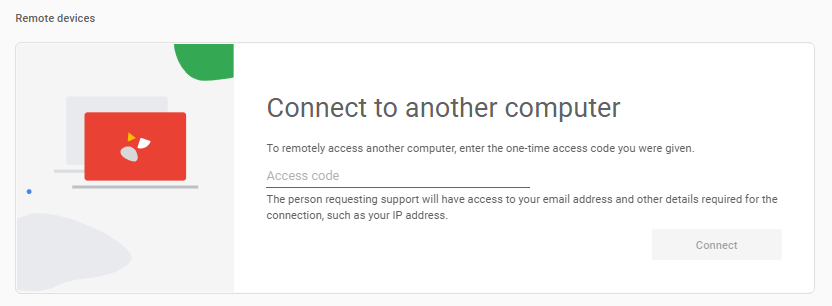
Step 1. On the client computer, find Connect to another computer on the Remote Support page. Input the automatically-generated code of the host computer. Then click Connect.
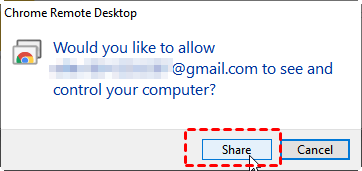
Step 2. On the host computer, there will be a pop-up window asking whether the host computer allows the control of the client computer. Click Share to establish the connection.
✍Pros
▪ Fully free.
▪Fully trans-platform, covering iOS, OS X, Chrome OS, Android, Windows, and Linux.
✍Cons
▪ Unstable connection.
▪ No chat box in the remote session.
▪ Need Google Chrome web browser.
▪ Consumes a lot of resources
Method 3. Free third-party software AnyViewer
AnyViewer is free, easy, yet professional remote desktop software for Windows. It supports multiple Windows versions, including Windows 11/10/8.1/8/7 and Windows Server 2022/2019/2016/2012 R2.
Preparation work:
- Connect the client computer (the controller computer) and the host computer (the controlled computer) to the Internet (it doesn’t matter whether the two computers are connected to the same network).
- Download and install AnyViewer on the client computer and the host computer respectively.
Step 1. Launch AnyViewer on both computers. Go to Log in, and then click Sign up. (If you already have signed up on its official website, you can log in directly.)

Step 2. Fill in the signup information.

Step 3. Then you can see you successfully logged in to AnyViewer. Your device will automatically be assigned to the account you've logged in to.

Step 4. Log in to the same AnyViewer account on the two devices, then you can achieve unattended remote access by clicking One-click control.

- Notes:✎...
- You can also upgrade your account to a Professional or Enterprise plan to enjoy more rights:
- Faster file transfer speed. Transfer speed for a free account is 500 KB/s, and for a paid account is up to 10 MB/s.
- Increasing number of files transferred in a single time.
- Larger size of a single file that can be transferred.
- More devices can be assigned to the same account for unattended remote access.
- More Currently connected devices are displayed for chekcing connection history.
- Connect in privacy mode to protect privacy.
- Initial more concurrent connections to one computer.
AnyViewer can also provide users with some practical functions for remote control after a successful connection. Such as lock, logout, restart, Command Prompt (CMD), etc.
Users can choose image quality according to the network connection speed. If the network connection speed is better, it can provide a higher image quality. The default wallpaper hiding function makes the remote connection smoother.
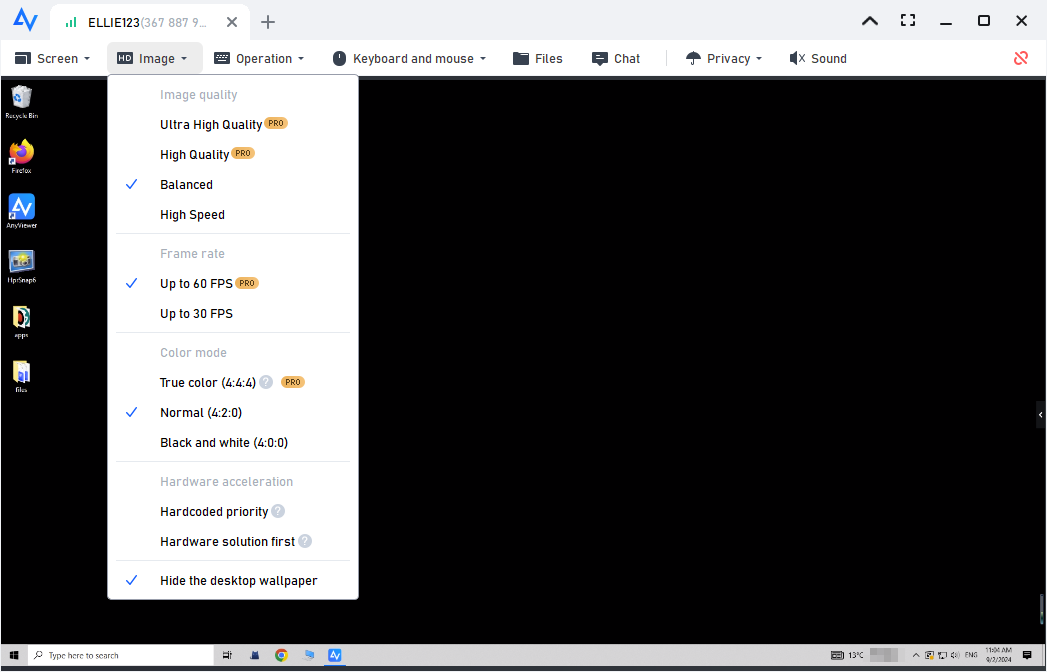
AnyViewer also provides users with different resolutions. Users can choose according to their preferences.
Conclusion
This post introduces three software to help users achieve PC remote control for Windows 8.1. According to the above contents, you can have a basical understanding of the pros and cons of the three remote desktop software.
Aside from the problems of RDP and Chrome Remote Desktop we mentioned above, users also reflected they have encountered problems like RDP shift key not working and Chrome Remote Desktop goes offline as well. Therefore, compared to RDP and Chrome Remote Desktop, AnyViewer is the easiest way to remotely control a PC.
