
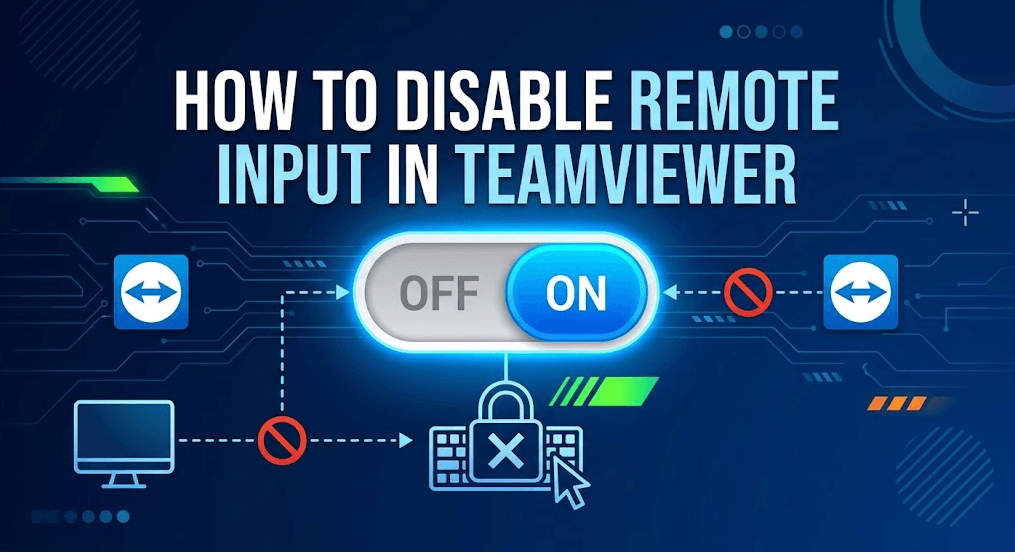
Stepwise Tutorial to Disable Remote Input in TeamViewer
This guide provides a step-by-step walkthrough on disabling remote input in TeamViewer, troubleshooting common issues like grayed-out options, and introducing AnyViewer as a powerful alternative for privacy-focused remote work.
By Ellie / Updated on April 3, 2026
In the world of remote desktop support and collaboration, TeamViewer stands as a titan. It allows IT professionals to leap across continents to fix computers remotely or teammates to collaborate on a single workstation from their respective homes. However, a common friction point in these sessions is the "input tug-of-war."
Imagine you are trying to perform a delicate registry edit or a precise design change, but the user on the other end keeps moving their mouse or typing into a chat box. To maintain efficiency and security, you need to know how to disable remote input.
This comprehensive guide will walk you through everything you need to know about the TeamViewer"Disable remote input" feature, why it matters, and how to troubleshoot it when things go sideways.
How to Disable Remote Input in TeamViewer (Step-by-Step)
TeamViewer makes this process relatively straightforward, provided you have the necessary permissions on the remote machine.
Step 1: Establish the Connection
Open your TeamViewer client and connect to the remote partner using their ID and password (or via your Computers & Contacts list).
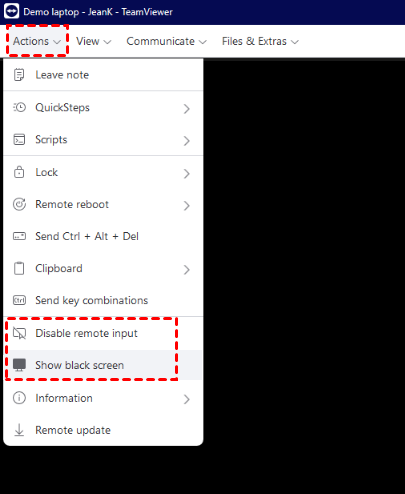
Step 2: Access the Actions Menu
Once the remote desktop window is open, look at the toolbar at the top of the window. Click on the Actions tab.
Step 3: Enable "Disable Remote Input"
In the dropdown menu under Actions, find the option labeled Disable remote input. Click it. A checkmark should appear next to the option.
Step 4: Combine with "Show Black Screen" (Optional but Recommended)
To maximize privacy and focus, most users choose to use TeamViewer "Disable remote input" and "Show black screen" simultaneously. Under the same Actions menu, select Show black screen.
The Disable Remote Input feature is no longer available in the free version of TeamViewer. It is now a paid-only feature, along with the "Show Black Screen" option. If you want full control over remote sessions without a high-cost subscription, you need a powerful TeamViewer free alternative.
Troubleshooting: "Disable Remote Input" Greyed Out
If the "Disable Remote Input" option is unavailable, it is usually due to version limitations, missing drivers, or licensing restrictions. Here is how to fix the common TeamViewer "Disable remote input"greyed out issue:
Cause 1. QuickSupport vs. Full Host Version
- The Issue: The "QuickSupport" module is designed for temporary, limited-access sessions. It lacks the administrative hooks required to disable local input.
- The Fix: You must install the full TeamViewer Host version on the remote device to unlock these advanced control features.
Cause 2. Missing Monitor Drivers
- The Issue: TeamViewer requires a specific virtual display driver to handle "Show Black Screen" and advanced input blocking, especially on Windows.
- The Fix: Navigate to Extras > Options > Advanced. Click Show advanced options and locate the Advanced network settings section. Click Install monitor driver.
Cause 3. Licensing Restrictions (The "Paywall" Factor)
- The Issue: TeamViewer has moved several core control features behind a paid commercial paywall. If you are using the free version, these options will appear grayed out regardless of your configuration.
- The Fix: Ensure you are signed in with a licensed, paid account on at least one side of the connection.
If you're tired of "greyed out" features and licensing paywalls, switch to AnyViewer. It bypasses these restrictions, offering a seamless Privacy Mode without complex driver setups or expensive commercial costs.
Bonus Tip: AnyViewer—The Best Value Alternative for Privacy Mode
If TeamViewer's rising costs and driver requirements are a hurdle, AnyViewer is the ideal, budget-friendly solution. It offers a streamlined Privacy Mode that provides professional-grade control at a fraction of the cost, with many features available for free.
With AnyViewer's Privacy Mode, you can accomplish two things with a single click:
- Instant Input Lock: The remote keyboard and mouse are automatically disabled.
- Screen Blackout: The remote monitor instantly turns black, preventing anyone sitting in front of the remote PC from seeing your actions.
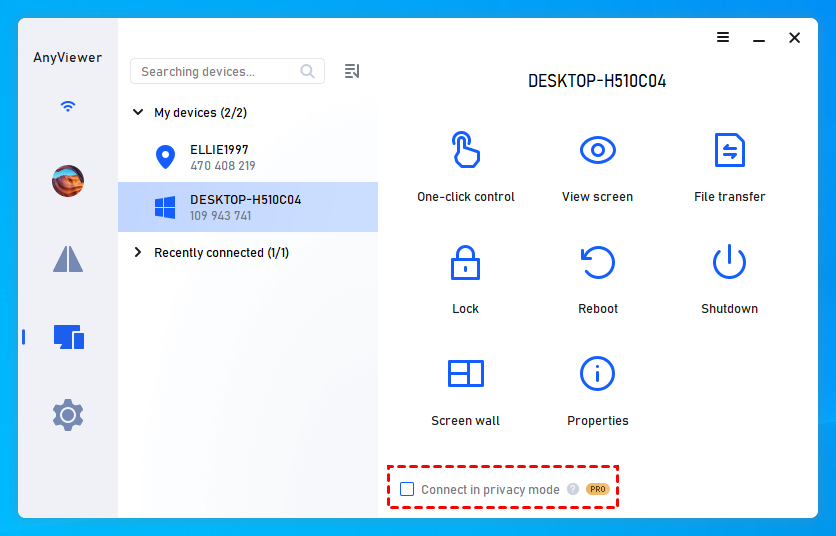
How to use it:
Step 1. Install AnyViewer on both computers and log in to the same account.
Step 2. Your devices will automatically appear in the "My devices" list.
Step 3. Select the remote computer under "Device," check Connect in privacy mode, and click One-click control.
Why You Need to Disable Remote Input
Disabling the remote user's keyboard and mouse isn't about being a control freak; it's about operational integrity.
- Preventing Interference: The most common reason. If both the local and remote users move the mouse simultaneously, the cursor becomes erratic, making it impossible to click small icons or menu items.
- Security and Privacy: During sensitive operations, such as entering administrative passwords or accessing private folders, you don't want the remote user to accidentally (or intentionally) click away or capture data.
- Speed and Focus: For IT support, time is money. Locking the remote input allows the technician to navigate the system without waiting for the user to "let go" of the mouse.
- Show and Tell: If you are using TeamViewer for a presentation or training, disabling input ensures the "audience" doesn't accidentally disrupt the flow of the demonstration.
Conclusion
Mastering the "Disable Remote Input" feature is essential for seamless remote support. While TeamViewer remains a powerful tool, its recent decision to move input locking and black screen features behind a high-cost commercial paywall has left many users searching for better value.
If you are tired of "greyed-out" features and complex driver setups, AnyViewer is the ideal TeamViewer free alternative. It offers a professional, one-click Privacy Mode that combines input locking and screen blackout—giving you full control and security without the expensive subscription.
