
RustDesk Not Ready? Fix “Please Check Your Connection”
Follow this complete troubleshooting path to identify why RustDesk shows “Not ready. Please check your connection,” fix public or self-hosted server issues, and choose a simpler alternative when needed.

By Ricardo / Updated on September 3, 2026


Why does RustDesk say “Not ready. Please check your connection”?
The status means the RustDesk client cannot register with its ID (rendezvous/signaling) server. It is different from a later Failed to connect to relay server message: “Not ready” appears before a remote session starts, while a relay error usually appears after direct peer-to-peer connection has failed.
The most common causes are an internet outage, a temporary public RustDesk service problem, proxy/VPN or DNS interference, firewall filtering, an incorrect self-hosted ID Server or public key, stopped hbbs/hbbr services, incomplete Docker mappings or port forwarding, NAT loopback, and incompatible or stale client/server builds.
Complete RustDesk “Not ready” troubleshooting path
Work through the checks in order. Stop when the status changes to Ready; changing several settings at once makes the actual cause harder to identify.
Step 1. Decide whether you use public or self-hosted servers
Open RustDesk’s Settings > Network (on many desktop builds, use the three-dot menu beside the ID and unlock Network settings). If ID Server and Key are blank, the client normally uses RustDesk’s public infrastructure. If a hostname/IP and key are present, follow the self-hosted checks below. Check both endpoints: one device using public servers and the other using a private server will not register in the same environment.
Step 2. Rule out a device or network problem
- Confirm ordinary websites load, then fully quit and reopen RustDesk. Restart the device and router if the problem began suddenly.
- Set the system date, time, and time zone automatically. A badly incorrect clock can break secure connections.
- Try a mobile hotspot. If RustDesk becomes Ready, the original router, ISP, corporate firewall, DNS, proxy, or VPN is the likely cause.
- Temporarily disable a VPN, proxy, DNS filter, or antivirus web shield for a controlled test. Re-enable protection afterward and create a narrow RustDesk allow rule instead of leaving security disabled.
If multiple devices on different networks fail only when using public servers, check RustDesk’s official channels and retry later. Do not add self-hosted port-forwarding rules to a normal client that uses the public service.
Step 3. Verify self-hosted client settings and the public key
On both clients, enter the hbbs hostname or IP in ID Server, for example hbbs.example.com or hbbs.example.com:21116. Enter the public key from the server’s id_ed25519.pub file. The Key is not a login password or a RustDesk Server Pro license key. A copied key with missing characters, a key left from an old server, or two clients pointed at different ID servers can all keep registration from working.
In a standard installation, Relay Server can usually remain blank because RustDesk derives hbbr from the ID server. Specify it only when hbbr uses another host or a nondefault port. API Server is for Server Pro account/web-console features; it is not required for an OSS-only deployment.
Step 4. Confirm hbbs and hbbr are running
On a systemd installation, check systemctl status rustdesk-hbbs rustdesk-hbbr. For Docker, use docker ps and inspect the hbbs/hbbr container logs. Restart a failed service, then read its log for address-in-use, permission, key, database, or license errors. If hbbs is unavailable, clients usually remain Not ready; if only hbbr is unavailable, registration may work but sessions that need relaying can fail.
Step 5. Test the correct ports end to end
From a client on another network, test the server name and ports instead of relying on ping (many servers deliberately block ICMP). On Windows, for example, run Test-NetConnection hbbs.example.com -Port 21116 and Test-NetConnection hbbs.example.com -Port 21117.
- Minimum core service: TCP 21115–21117 and UDP 21116.
- Full standard self-hosted range: TCP 21114–21119 plus UDP 21116, depending on the features used.
- Web client: TCP 21118 and 21119 are WebSocket ports. If exposed, place them behind a correctly configured reverse proxy; if the web client is unused, they do not need to be publicly exposed.
- Server Pro API: TCP 21114 without an SSL proxy, or normally HTTPS 443 through a reverse proxy.
Make the cloud security group, host firewall, Docker port mapping, and router port forwarding agree. Forward inbound ports to the fixed LAN address of the RustDesk server, not to either client. Port 8000 is not part of RustDesk’s documented core port set.
Step 6. Check DNS, IPv4/IPv6, NAT loopback, and CGNAT
Confirm the ID-server hostname resolves to the intended public address. Clear the local DNS cache or test a trusted resolver if the record recently changed. If an AAAA record exists but IPv6 is not routed to the server, correct or remove that record rather than masking the problem on every client.
If an external device works but a client on the same LAN does not, configure hairpin NAT/NAT loopback or split DNS so the public hostname resolves to the server’s private address internally. If no external client can reach a home-hosted server and the router’s WAN address differs from the public address, the connection may be behind carrier-grade NAT; request a public IP, use a VPS, or use a managed remote-access service.
Step 7. Align client and server versions
Update both endpoints from the same trusted release channel, then update the self-hosted server and restart its services. Avoid mixing a nightly client with an older production server while diagnosing. Back up configuration and keys before a server upgrade.
Version and edition differences:
- Current 1.4.x desktop clients: Network settings are generally under the menu beside the device ID; administrator privileges may be required to unlock them. RustDesk 1.4.0 and later can use the optional WebSocket mode, but it requires compatible server/reverse-proxy configuration and uses relay-only connections.
- Older 1.3.x clients: labels and menu placement can differ, and WebSocket-related options introduced in 1.4.x will not be present. Use the fields available for ID Server and Key rather than copying a newer screenshot literally.
- Android/iOS: use Settings > ID/Relay Server; normally enter the ID Server and Key and leave Relay/API blank unless the deployment requires them.
- Server OSS vs. Pro: OSS needs hbbs, hbbr, ID Server, and Key. Pro adds the API/web console and may use TCP 21114 or HTTPS 443. Being able to reach the Pro web console does not prove that hbbs/hbbr ports are reachable.
Step 8. Reset only the affected local configuration
Export or record the current settings first. Remove and re-enter the ID Server and Key, restart RustDesk, and retest. If one device still fails while an identically configured device works on the same network, reinstall the stable client or reset its configuration according to the official guide. Do not delete a self-hosted server’s id_ed25519 files during routine troubleshooting: regenerating them changes the public key and requires every client to be updated.
When AnyViewer is the easier alternative
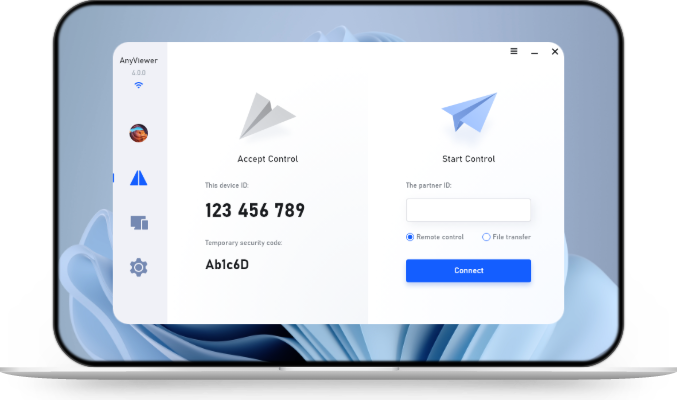
If you need remote access immediately and do not want to maintain hbbs/hbbr, firewall rules, keys, and server upgrades, AnyViewer is a managed alternative. This does not repair a RustDesk deployment; it replaces that connection path, so it is most useful for individuals and support teams that prioritize quick setup over self-hosting control.
Key AnyViewer capabilities include:
-
High Performance:
AnyViewer delivers ultra-low latency and 4:4:4 color mode for a smooth and clear remote desktop experience. Whether you’re streaming, troubleshooting, or transferring files, the connection remains fast and stable. -
Strong Security:
It uses ECC 256-bit end-to-end encryption and two-factor authentication to protect every remote session. Privacy mode can also be enabled to hide the local screen during sensitive operations. -
Cross-Platform Compatibility:
Works seamlessly across Windows, macOS, Android, and iOS, allowing flexible remote access between different devices. -
Unattended Access and File Transfer:
You can access unattended devices securely and transfer large files at high speed, which is especially useful for IT management or business collaboration. -
User-Friendly Interface:
The setup is simple, the layout is intuitive, and even beginners can start a remote session in minutes without any training. -
Free and Scalable:
The free version includes essential features with no time limit, while the Professional and Enterprise plans unlock additional tools such as multiple concurrent sessions, faster transfers, and priority support.
Choose AnyViewer when a managed connection service and account-based unattended access fit your needs. Continue repairing RustDesk when open-source software, self-hosting, or direct control over rendezvous and relay infrastructure is a requirement.
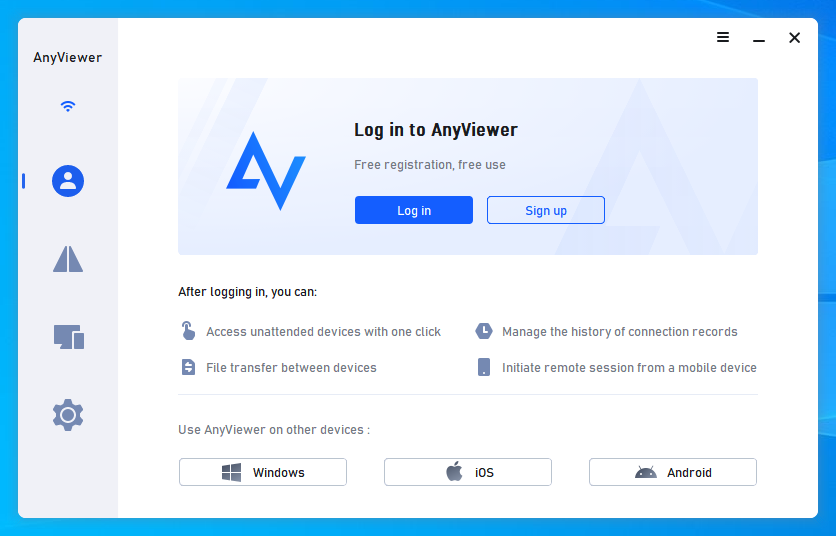
Step 1. Install and run AnyViewer on both your work and home computers. Navigate to Log in and then Sign up on the Controller computer (if you have already registered on the official website, you can log in directly).
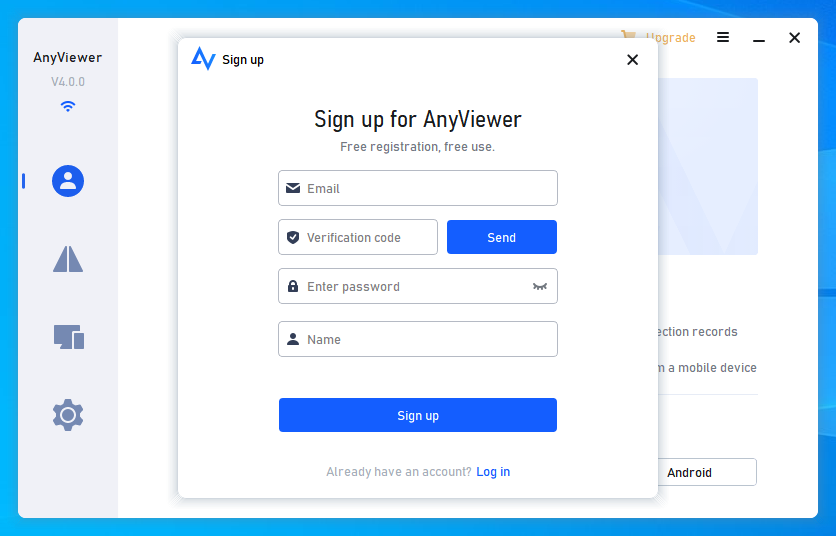
Step 2. Fill out the sign-up form.
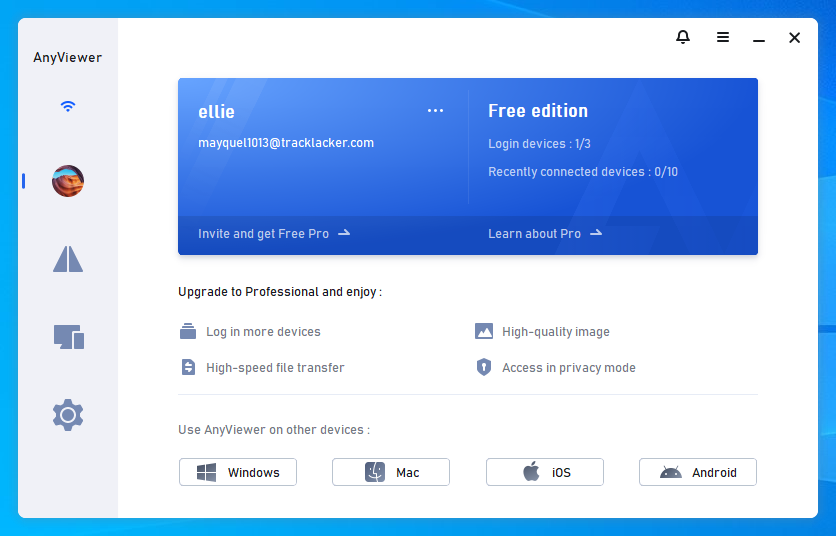
Step 3. You should now see that you have successfully logged into AnyViewer. Your device will be assigned to the account to which you have logged in automatically.
Step 4. On both devices, log in to the same AnyViewer account, then click One-click control for unattended remote support to establish a direct connection.
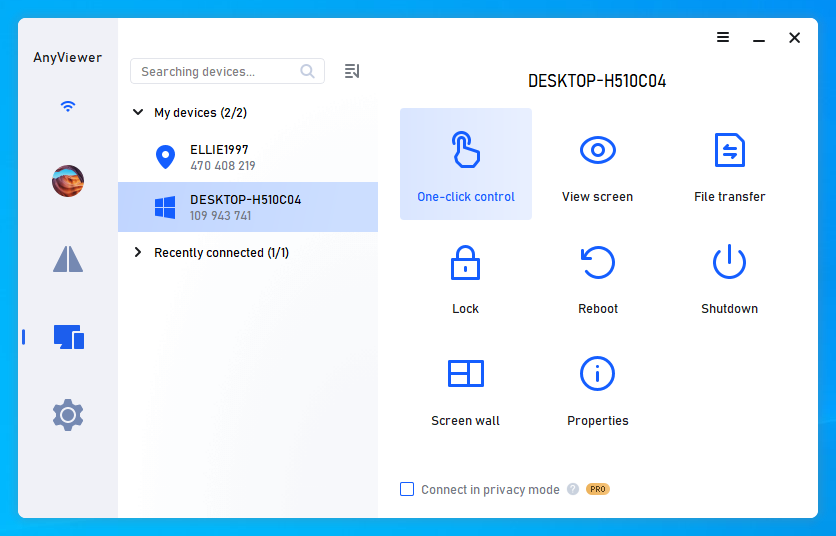
Step 5. After successfully connecting, you will see the remote desktop. Then you can control it completely and provide remote support as if you were sitting in front of it.
Note: AnyViewer has mobile versions, supporting iOS remote access and Android remote access. You must sign into the same account on all of your mobile devices before you can remotely access a PC from an iPhone, iPad, or Android device.
Conclusion
Start by identifying whether the client uses RustDesk public servers or a self-hosted server, then isolate the device, network, client configuration, service, and port layers in that order. For self-hosting, the ID Server and public key must match on both endpoints, hbbs/hbbr must be running, and every firewall and forwarding layer must expose only the ports required by the deployment. If maintaining that infrastructure is outside your needs, AnyViewer offers a managed alternative for attended and unattended remote access.



 as a preferred
source on Google
as a preferred
source on Google