
Top 5 Free NoMachine Alternatives [Pros & Cons Included]
NoMachine is one of the most popular remote desktop software. However, you may need a NoMachine alternative for various reasons. This post lists the top 5 free NoMachine alternatives. Choose according to your needs.
By Ellie / Updated on December 13, 2024
Why do I need a NoMachine alternative?
NoMachine is a remote access software that allows users to access and control a computer remotely from another device. It provides a secure and efficient way to connect to a remote desktop environment, allowing users to interact with their files, applications, and desktop as if they were sitting in front of the remote computer.
Why you may need a NoMachine alternative? Here are several potential reasons:
- Limited platform support. Although NoMachine supports various operating systems, including Windows, Mac, Linux, Android, and iOS, it may not be as comprehensive as some other remote desktop solutions. If you require remote access to less common or specialized platforms, NoMachine may not have the necessary support.
- Technical setup and configuration. Setting up NoMachine can involve some technical configuration, especially when dealing with firewalls, routers, or network settings. This may pose a challenge for users who are less experienced with networking concepts or who prefer a simpler setup process.
- Lack of advanced features. While NoMachine offers a range of features for remote desktop access, it may not have certain advanced capabilities that other software solutions provide. This could include features like remote wake-on-LAN, session recording with annotations, virtual desktop support, or specific customization options.
- User interface and user experience. The user interface and user experience of NoMachine may not suit everyone's preferences. Some users may find the interface less intuitive or may have specific usability expectations that are not fully met by NoMachine.
The best free NoMachine alternatives [5 options]
Here are the best alternatives to NoMachine, each with its unique features and advantages.
Option 1. AnyViewer
The first option is the highly recommended free yet professional remote access software AnyViewer. It is the best alternative to NoMachine. AnyViewer provides many impressive features, which meet the remote access requirements of most users.
Below are the advantages and disadvantages of AnyViewer:
Pros:
- Cross-platform compatibility. AnyViewer operates seamlessly on Windows, iOS, and Android.
- Cross-network connection. AnyViewer offers free services, regardless of whether you are using it over WiFi or a network.
- Unattended remote access. AnyViewer supports attended remote access and permit users to connect to an unattended computer without explicit permission.
- Easy to use. AnyViewerhas an intuitive user interface, making it accessible to both technical and non-technical users. Setting up remote connections is typically straightforward, and the software provides clear instructions and guides.
- Impressive features for the free version. AnyViewer provides various features, such as remote file transfer without logging in, concurrent remote sessions, clipboard sync, locking, restarting, or shutting down remote computers. All these features are free for personal or commercial use.
- High performance. AnyVieweradopts optimized connection algorithm, automatically connecting to the best server to enjoy a faster and smoother remote control experience.
- Reasonable prices of paid versions. AnyViewer also offers a professional and enterprise plan. The cost is much more reasonable than other remote desktop solutions.
Cons:
- Mac & Linux are not supported at present.
Step 1. Install and run AnyViewer on both of your computers. Navigate to Log in and then Sign up on the Controller computer (if you have already registered on the official website, you can log in directly).

Step 2. Fill out the sign-up form.

Step 3. You should now see that you have successfully logged into AnyViewer. Your device will be assigned to the account to which you have logged in automatically.

Step 4. Log in to the same AnyViewer account on the two devices, then you can click One-click control to achieve a direct connection, click View the screen to see another’s screen, or click File transfer to share files between computers.

- Notes:✎...
- Additionally, you can change your account's plan to a Professional or Enterprise one. What a business or professional plan can provide for you is:
- More devices will be allowed to assign to the same account for unattended remote access.
- More connection channels for more devices to be able to start remote connection at the same time.
- One device can connect to more devices simultaneously.
- Black the remote PC screen and disable the remote keyboard & mouse click to protect privacy.
- Transfer 1TB files at 10 MB/s.
Option 2. TeamViewer
TeamViewer is a popular remote desktop software that offers a comprehensive set of features. It provides cross-platform support, allowing remote access between multiple platforms. TeamViewer offers strong security measures, including end-to-end encryption and two-factor authentication. It is known for its user-friendly interface and robust performance, making it suitable for both personal and business use.
The followings are the pros and cons of the TeamViewer.
Pros:
- Cross-platform support. TeamViewer is available on various platforms, including Windows, Mac, Linux, Android, and iOS, allowing users to access and control remote devices regardless of the operating system.
- Feature-rich. TeamViewer offers a comprehensive set of features for remote access and collaboration. It includes functionalities such as file transfer, screen sharing, session recording, remote printing, remote wake-on-LAN, and more.
- High performance. TeamViewer is known for its fast and stable performance, providing smooth remote desktop access even over slower or less stable internet connections.
- Security measures. TeamViewer incorporates robust security measures, including end-to-end encryption, two-factor authentication, and device authentication. It also allows users to configure specific security settings to meet their requirements.
- Collaboration features. TeamViewer enables real-time collaboration and teamwork. Multiple users can connect to the same remote device simultaneously, making it convenient for remote meetings, presentations, or working on projects together.
Cons:
- Free license restrictions. TeamViewer'sfreelicense is only free for private use. Your connection will be blocked once it detects you’re using it for commercial users, for example, accessing a company computer for work-related activities.
- High prices. The cost for paid licenses may be far beyond the affordable of organizations or individuals who need commercial or business use, require advanced features, or have multiple concurrent sessions.
- Connection issues. Users may sometimes encounter connection issues when trying to establish a remote session, such as difficulty connecting through firewalls, routers, or corporate networks. Troubleshooting these issues may require additional configuration or technical expertise.
- Dependency on internet connection. As with any remote desktop software, TeamViewer relies on a stable and reliable internet connection. If the connection is slow, unstable, or experiences frequent disruptions, it may affect the overall performance and user experience.
Download and install TeamViewer on the client and host computers respectively. Launch it and then follow the step below.
Step 1. Select the purpose (commercial or personal) for downloading this software during installation. Here, take the free version of individual users as an example.

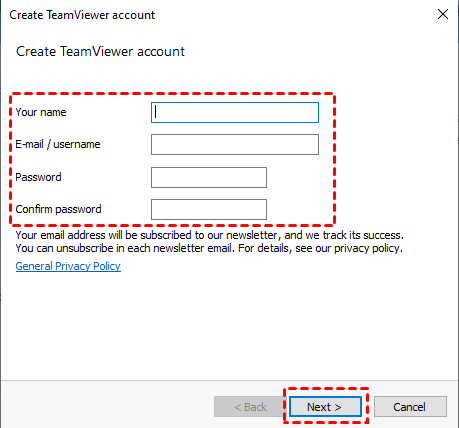
Step 2. Run TeamViewer on both computers. Select Login in the main interface. You need to create your own TeamViewer account for the first time. Click Next to complete account registration (you also need to verify the account before use).
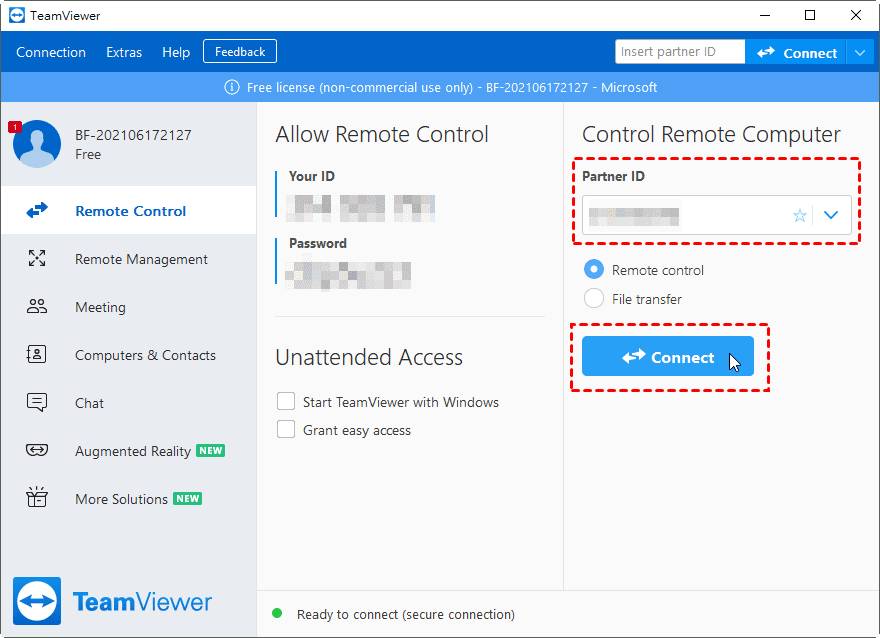
Step 3. Click Remote Control on the left side of the TeamViewer main interface on the client computer, enter the ID of the host computer under Partner ID, and click Connect.
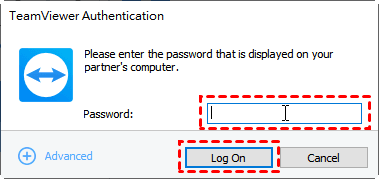
Step 4. Enter the password of the host computer in the TeamViewer Authentication window to realize the remote control.
Option 3. Splashtop
Splashtop is a remote desktop software that targets both individuals and businesses. It offers various plans tailored to different needs, including personal use, remote support, and remote access for IT teams. There is a Splashtop free version for personal use.
Pros:
- High performance. Splashtop offers fast and responsive remote desktop access, even over low-bandwidth connections. It utilizes advanced streaming technology to provide a smooth and real-time remote experience.
- Cross-platform support. Splashtop is available on various platforms, including Windows, Mac, Linux, Android, and iOS, allowing users to connect and control devices across different operating systems.
- Security measures. Splashtop prioritizes security and provides features such as TLS and SSL encryption, device authentication, and multiple levels of password protection to ensure secure remote access and protect sensitive data.
- Multi-monitor support. Splashtop supports remote access to multiple monitors, allowing users to view and control multiple screens of the remote device simultaneously. This can be beneficial for tasks that require multiple displays.
- Customization and branding options. Splashtop offers customization options, allowing businesses to brand the remote access experience with their logo, colors, and domain name. This can enhance the professional image and provide a consistent user experience.
Cons:
- Free version limitation. Splashtop Personal is free for individual users. But it is only available for free in your local home network. To connect from an outside network, a subscription is required.
- Cost considerations. Splashtop's pricing structure can be relatively higher compared to some other remote desktop software options. Depending on your needs and budget, the cost of a Splashtop subscription or license may be a deterrent, especially if you require advanced features or multiple concurrent connections.
- Advanced feature limitations. If you require specific advanced features such as session recording with annotations, virtual desktop support, or remote wake-on-LAN, you may find that Splashtop doesn't meet your requirements.
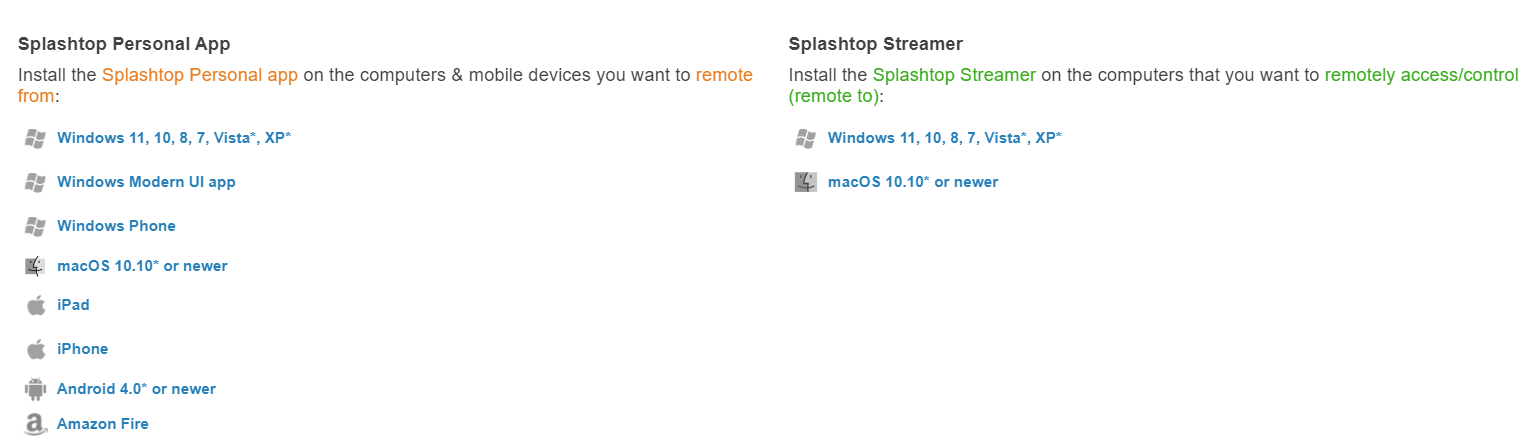
Step 1. Download Splashtop Personal App on the local computer and download Splashtop Streamer on the remote computer from its official site. Choose the correct version according to your computer OS.
Step 2. Follow the guidance to install Splashtop Personal on both computers.
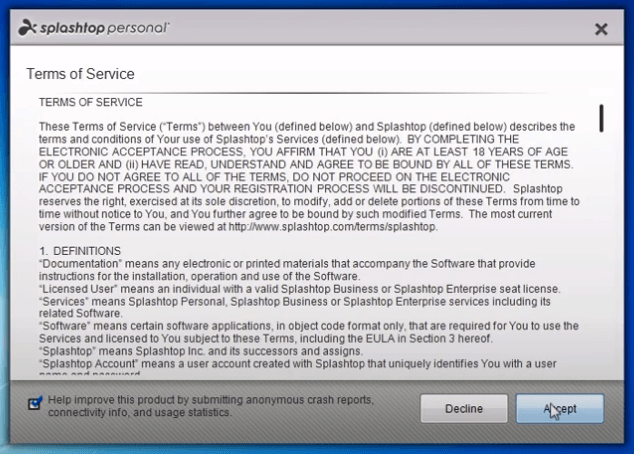
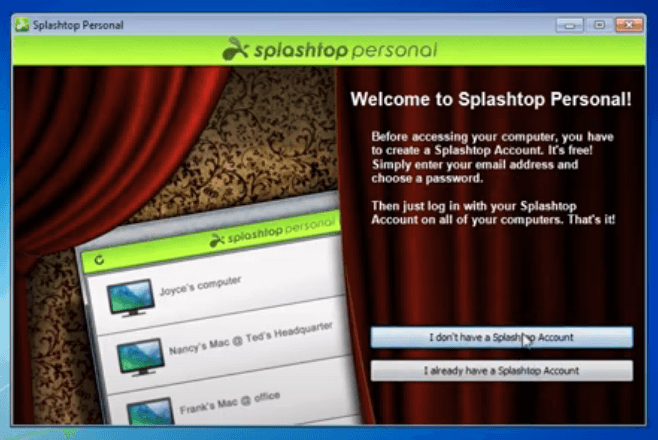
Step 3. Splashtop will ask you to log in to your account. If you already have an account, choose I already have a Splashtop account. If not, choose I don't have a Splashtop account.
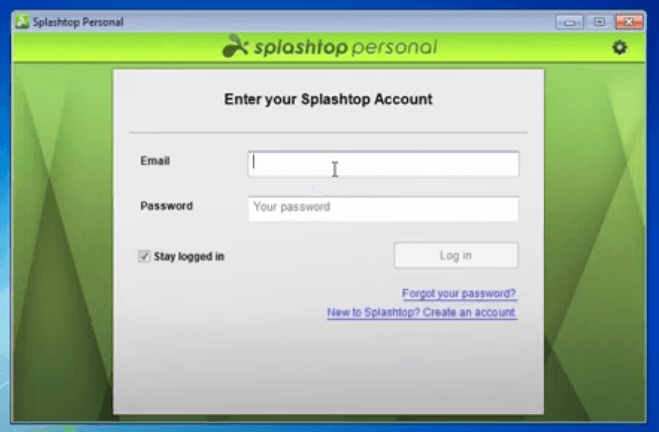
Step 4. Log in to your Splashtop account.
Note: If you can’t login successfully, it may be because your device needs to be authenticated. Check your email box, and you may receive an authentication email. Follow the link in the email to authenticate the device.
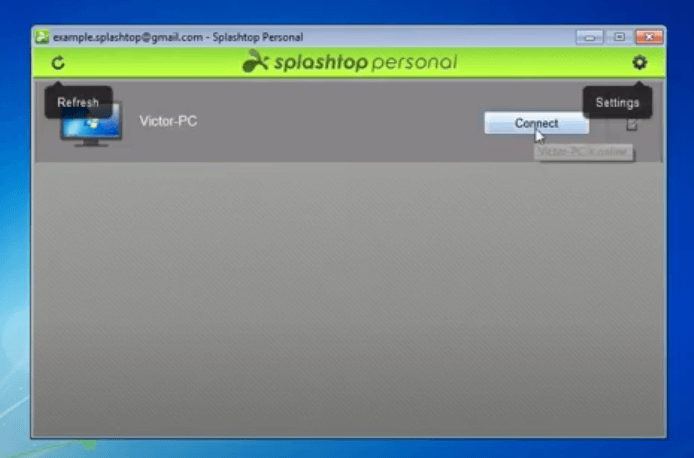
Step 5. After logging in successfully, you'll see the device that has installed Splashtop Streamer. Click Connect; you can successfully connect to the remote device on your home network.
Option 4. Chrome Remote Desktop
Chrome Remote Desktop is a completely free browser-based remote desktop solution provided by Google. It is easy to set up and use, as it only requires the Chrome browser and a Google account. It offers a simple interface and allows users to access their remote desktops from any device with the Chrome browser installed. It's a good option for casual users who need basic remote access functionality.
Pros:
- Platform compatibility. Chrome Remote Desktop is compatible with various operating systems, including Windows, Mac, Linux, Chrome OS, iOS, OS X, and Android. This allows users to connect and control devices across different platforms.
- Integration with Google ecosystem. Chrome Remote Desktop seamlessly integrates with other Google products and services, making it convenient for users already using Google accounts or the Chrome browser. It can be easily accessed through the Chrome web browser or Chrome Remote Desktop mobile app.
- Simple setup and ease of use. Chrome Remote Desktop has a straightforward setup process, and its user-friendly interface makes it accessible to both technical and non-technical users. It doesn't require extensive configuration or firewall adjustments.
- Free to use. Chrome Remote Desktop is available as a free service, which can be advantageous for personal use or small-scale remote access needs without incurring additional costs.
Cons:
- Limited features. Chrome Remote Desktop lacks some basic features like chat function in session, multiple sessions, reboot and reconnect, etc.
- Performance limitations. While Chrome Remote Desktop generally provides decent performance, it may not be as optimized for high-demand tasks or resource-intensive applications compared to some dedicated remote desktop software solutions. Users who require high-performance remote access for tasks like gaming or graphic-intensive applications may find Chrome Remote Desktop less suitable.
- Security considerations. While Chrome Remote Desktop employs security measures such as end-to-end encryption, users must ensure they have proper security measures in place, including strong Google account passwords and device security, to mitigate potential risks.
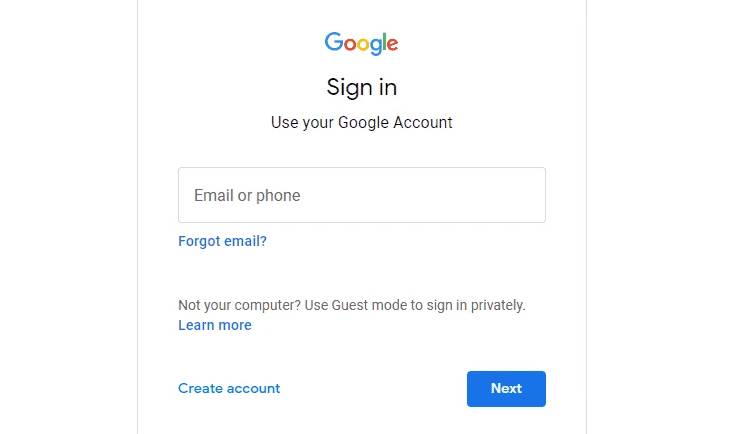
Step 1. On both computers, sign in to the same Google Account if you are not logged in. Then, open the Chrome Remote Desktop web page.
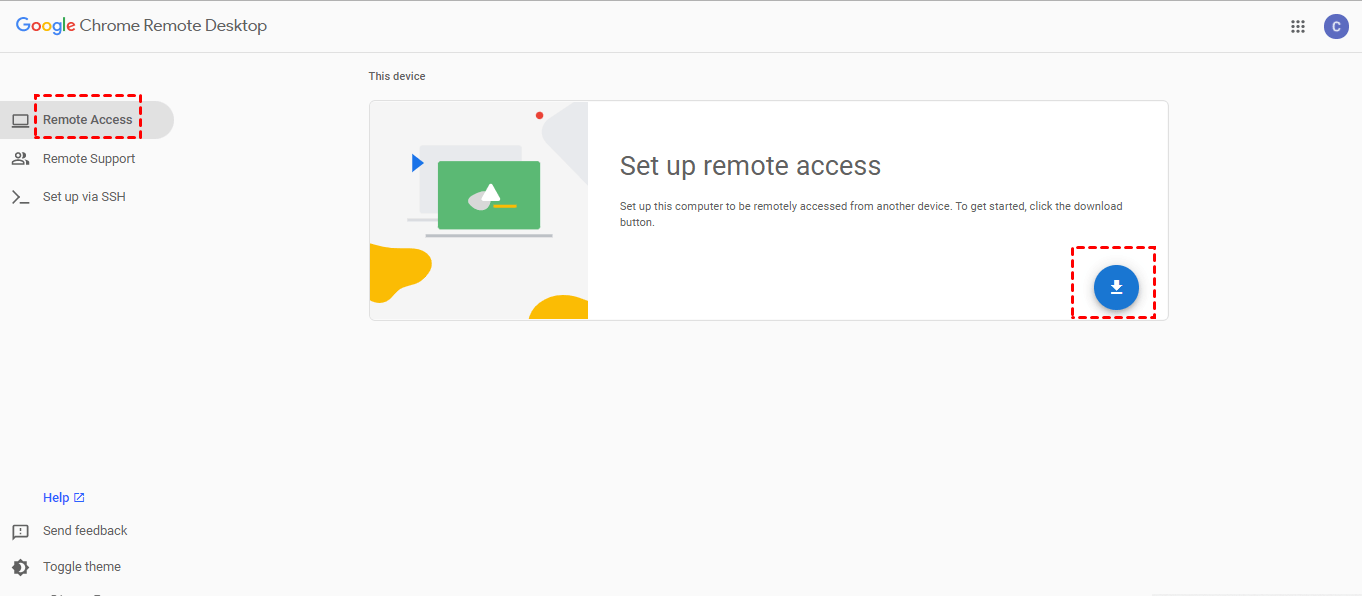
Step 2. Click Remote Access first and then click the blue download button.
Step 3. Click on Add to Chrome to add the Chrome Remote Desktop in your Chrome browser.
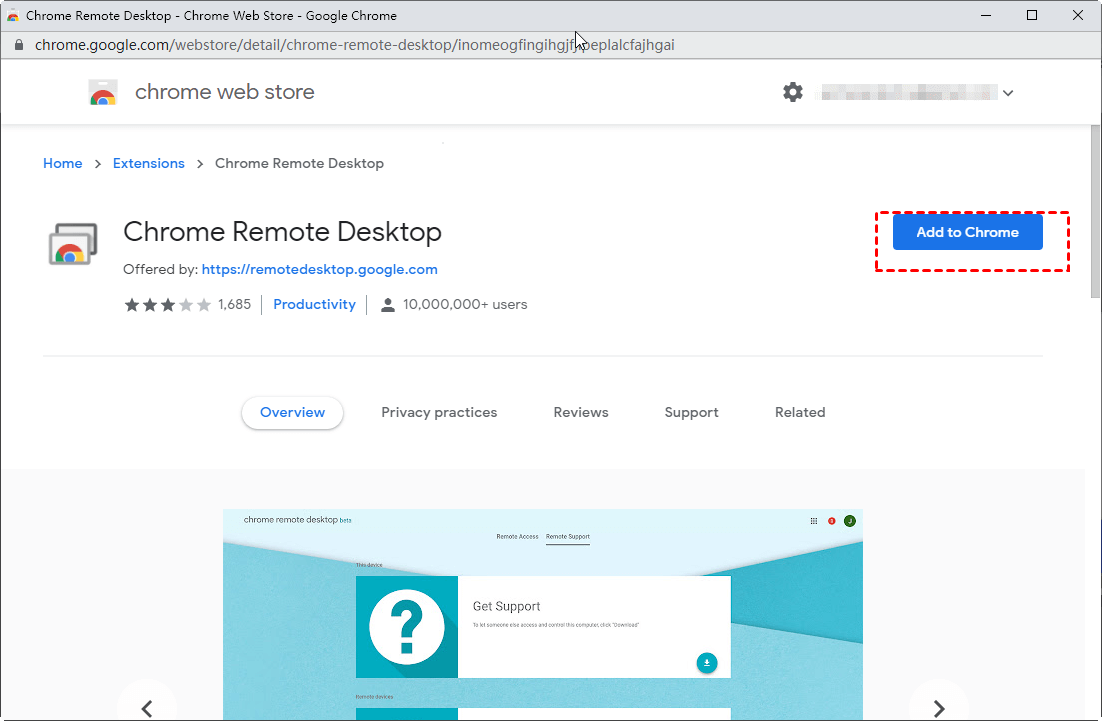
Step 4. Click Add extension to confirm the download.

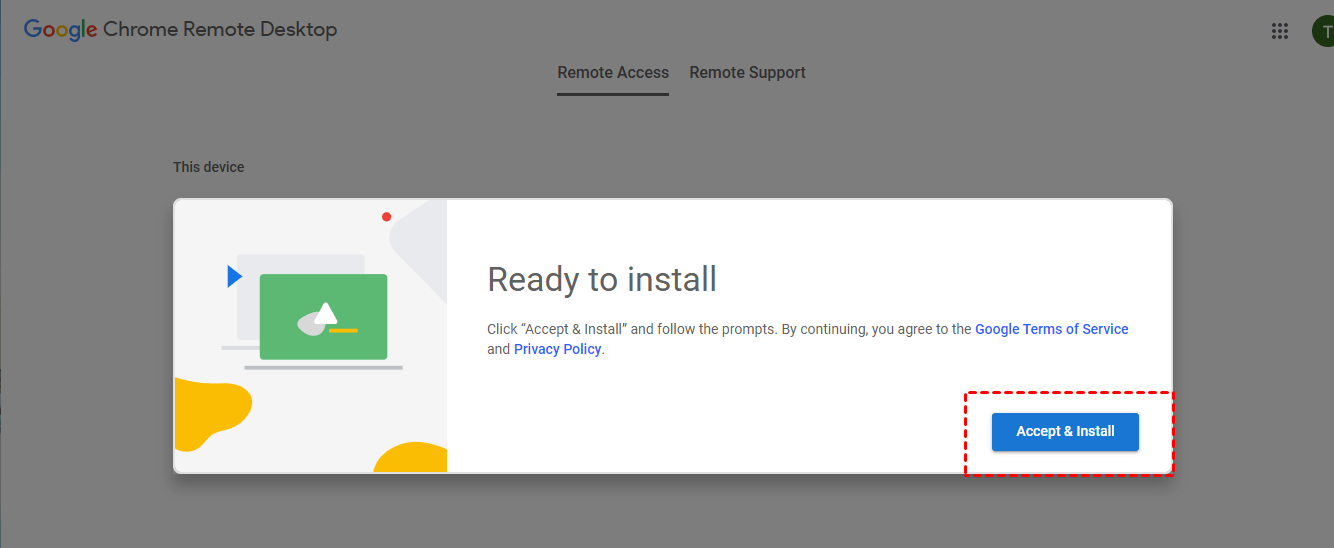
Step 5. Click Accept & Install.
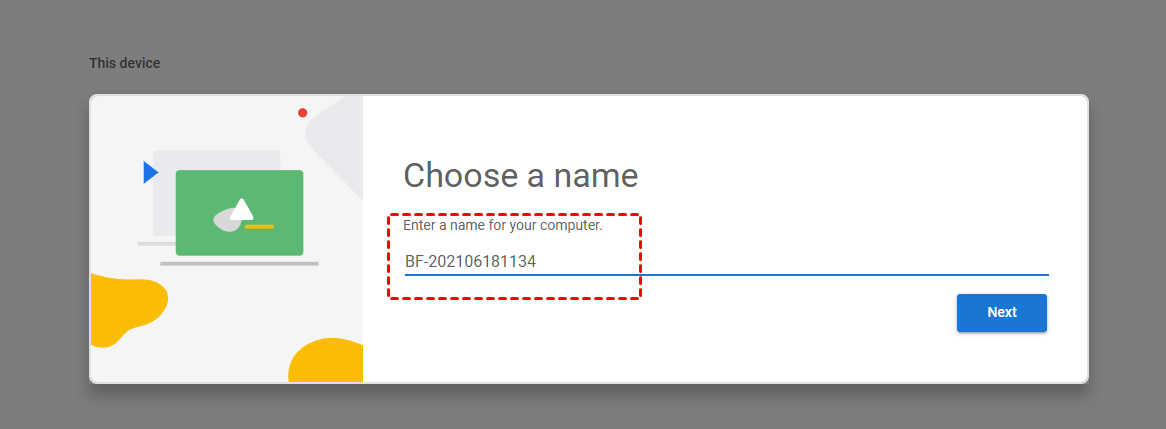
Step 6. Enter a name for your computer and then click Next.
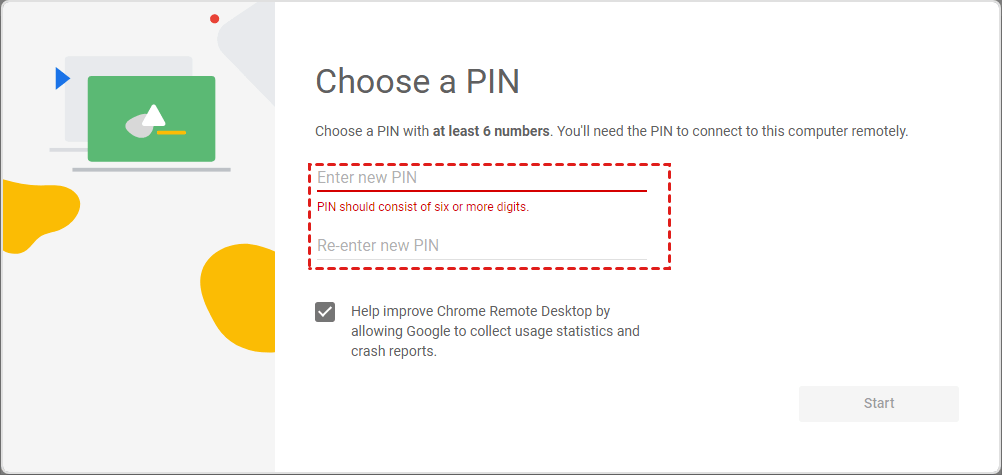
Step 7. Choose a PIN with at least 6 numbers, and then enter it twice to start the program.
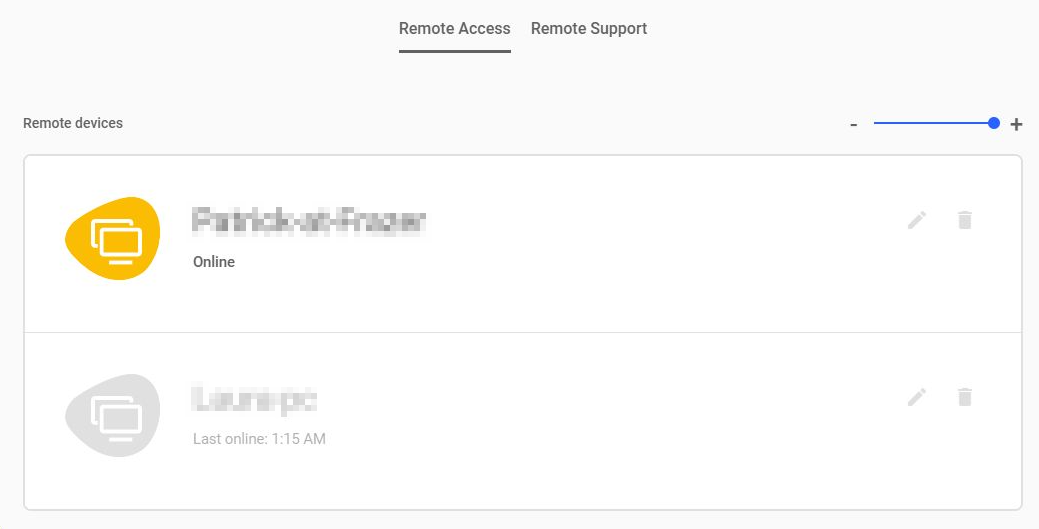
Step 8. After both computers have successfully created their PINs, you can see the available computers here on the client computer. Click the computer you want to connect to.
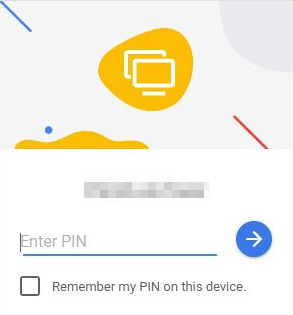
Step 9. Enter the PIN of the host computer, then click the blue arrow. Then you can start to control it.
Option 5. Remote Desktop Connection
Remote Desktop Connection is a built-in feature in Windows operating systems that allows users to connect to and control a remote computer over a network connection. It enables users to access their office or home computer from a remote location as if they were sitting in front of it.
Pros:
- Built-in feature. RDC is a built-in feature of Windows operating systems, so there is no additional cost or installation required. It comes pre-installed on Windows machines, making it easily accessible for users without the need to download or purchase separate software.
- Widely compatible. RDC is compatible with Windows-based computers, allowing remote access to a broad range of Windows operating systems. It provides seamless integration and compatibility with the Windows ecosystem.
- Integration with Windows features. RDC integrates well with other Windows features and functionalities, such as file sharing, printing, and multimedia streaming. It leverages the capabilities of the Windows operating system for a smooth remote desktop experience.
- Familiarity and support. Since RDC is a Microsoft product and has a built-in feature, it is widely known and has extensive documentation and support resources available. Users can easily find guides, tutorials, and troubleshooting assistance for using RDC.
Cons:
- Limited platform support. RDC is primarily designed for accessing Windows-based computers, which means it may not support remote access to non-Windows devices or platforms. If you need to connect to Mac, Linux, or other operating systems, you may require additional software or use alternative remote desktop solutions.
- Configuration and setup. While RDC is relatively straightforward to use, configuring remote access settings and network configurations may require some technical expertise. Setting up RDC to work across different networks or firewalls can be challenging for non-technical users.
- Security considerations. While RDC uses encryption and authentication mechanisms for secure connections, it may not offer the same level of advanced security features found in some paid remote desktop solutions.
- Performance limitations. RDC's performance can be affected by factors such as internet speed, network stability, and hardware capabilities. In some cases, dedicated remote desktop solutions may offer better performance optimization for resource-intensive tasks or graphic-intensive applications.
Part 1. Configure Remote Desktop connection on the host computer
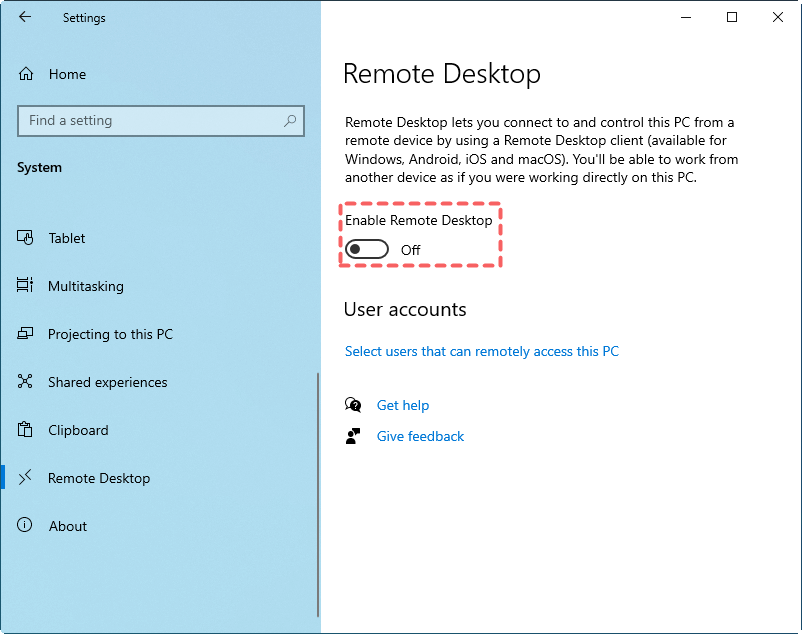
1. Enable Remote Desktop in Settings
Navigate to: Settings> System> Remote Desktop > Turn on the Enable Remote Desktop switch, and then click the Confirmbutton.
2. Allow remote connections to this computer in Control Panel
Step 1. Select Control Panel > System and Security > System, under the “System” section, click Remote Settings.
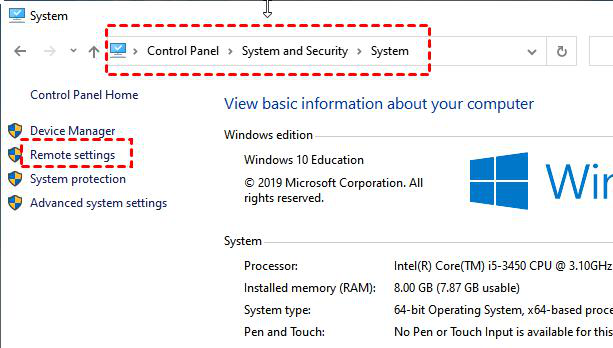
Step 2. Select the box next to "Allow remote connections to this computer" and then click OK.

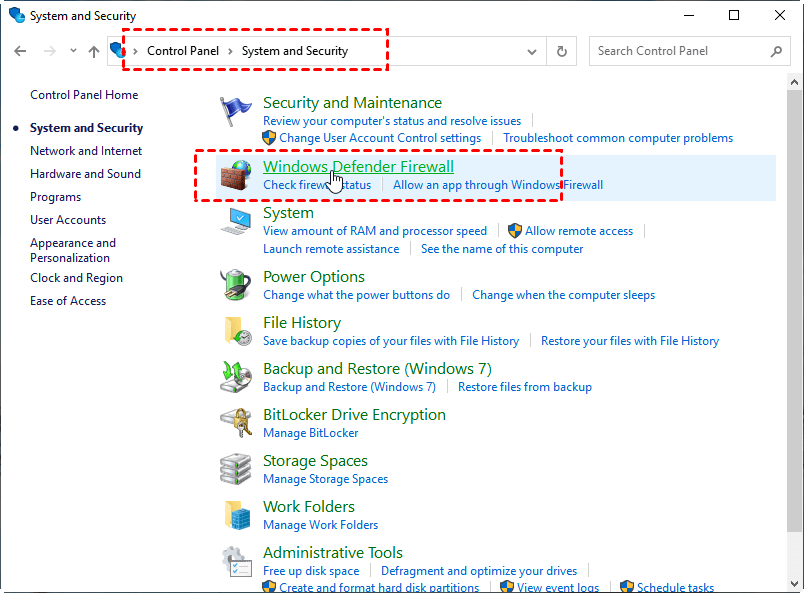
3. Change Windows Firewall settings
Step 1. On the host computer, select: Control Panel > System and Security > Windows Defender Firewall.
Step 2. Click “Allow an App or Feature Through Windows Defender Firewall” on the left navigation.
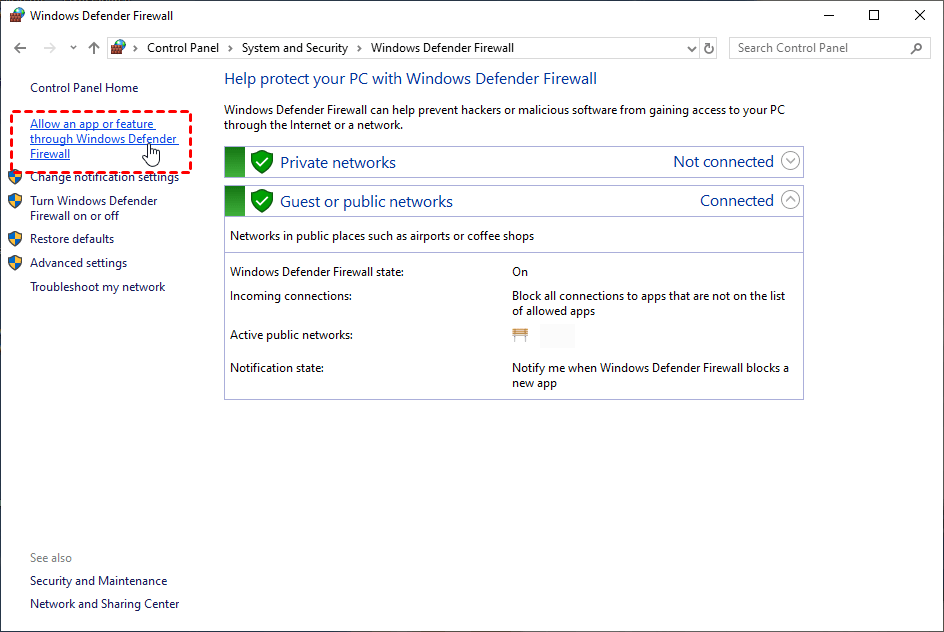
Step 3. Check “Remote Desktop” and hit OK.

4. Get the IP address and computer name
Step 1. Press Win + R on the host computer to open the Run dialog box. Enter "cmd" and then hit OK.

Step 2. To get the IP address for Remote Dekstop, enter the command "ipconfig" and note the IPv4 Address.

Step 3. To get the PC name for Remote Desktop, type in “query user”, and you can see your PC name.

Part 2. Connect to the host computer from the client computer via RDP
After all you have done before, follow the next steps to connect to another computer.
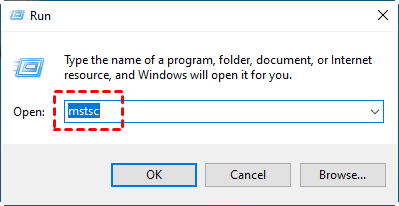
Step 1. On the client computer, press Win + R, and type “mstsc” in the Run Dialog box to open Remote Desktop connection.
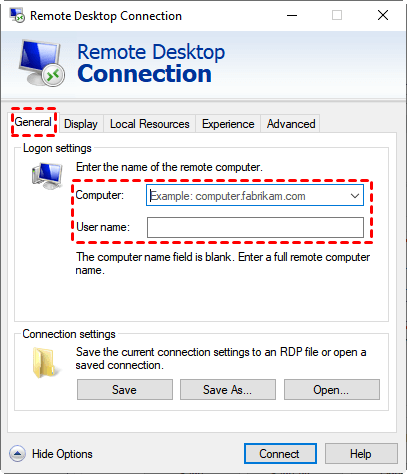
Step 2. Click Show Options, type in the IP address and name of the host computer, and then click Connect.
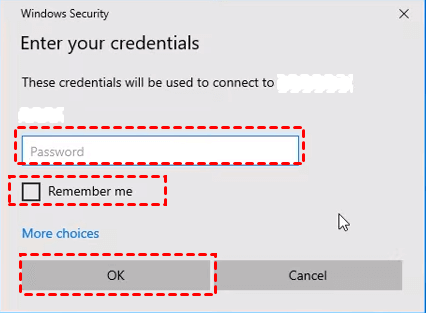
Step 3. Input the password of the client computer in the pop-up window, and press OK.
Once you complete the steps above, you can successfully use Remote Desktop Connection in the local network to connect to other computers.
The bottom line
This post primarily introduces the top 5 free NoMachine alternatives and their pros and cons. Based on their pros and cons, here are some considerations:
- If you require a free option and primarily use Windows, AnyViewer, Chrome Remote Desktop, and Remote Desktop Connection are worth considering.
- If you prioritize fast and responsive performance, AnyViewer and TeamViewer are known for their high-performance remote access.
- If cross-platform support is crucial, TeamViewer and Splashtop offer compatibility with multiple operating systems.
- If you are willing to pay for advanced features and comprehensive support, AnyViewer offers feature-rich solutions and is priced at the most reasonable prices.
Choosing the right remote desktop software depends on your specific needs and requirements. Consider your specific needs, budget, platform compatibility, desired features, and ease of use when making your decision. You may also want to try out the free versions or trial periods of these software options to see which one suits you best.
