
[4 Options] How to Transfer Files from Office Laptop
Do you know how to transfer files from office laptop to personal laptop wirelessly? Here in this post, we provide you with multiple methods to transfer files between two computers.
By Ellie / Updated on December 13, 2024
How do I transfer files from my company laptop to my personal laptop?
We are not allowed to bring our company laptops out of the company. But sometimes, I need to do some paperwork out of the company. How do I transfer files from my company laptop to my personal laptop wirelessly?”
- Question from Annie
How to transfer files from office laptop to personal laptop wirelessly
You have multiple options on how to transfer files from office laptop to personal laptop wirelessly depending on different situations. Choosing the right way that suits your own situation can save you a lot of time.
For example, if your office laptop and personal laptop are on the same network, you can redirect and map a drive in an RDP session to copy and paste files between two computers. But if the two computers are on different networks, you need to set up port forwarding or VPN to use RDP, which is complicated. Therefore, methods used to transfer files between computers on different networks are also introduced for your choice.
How to transfer files from office laptop to personal laptop on the same network
To copy files in an RDP session when the two computers are on the same network, you need first to configure Remote Desktop Connection to make your local drives available when you connect to a remote computer. Then you can access local drives from a command line in a remote session.
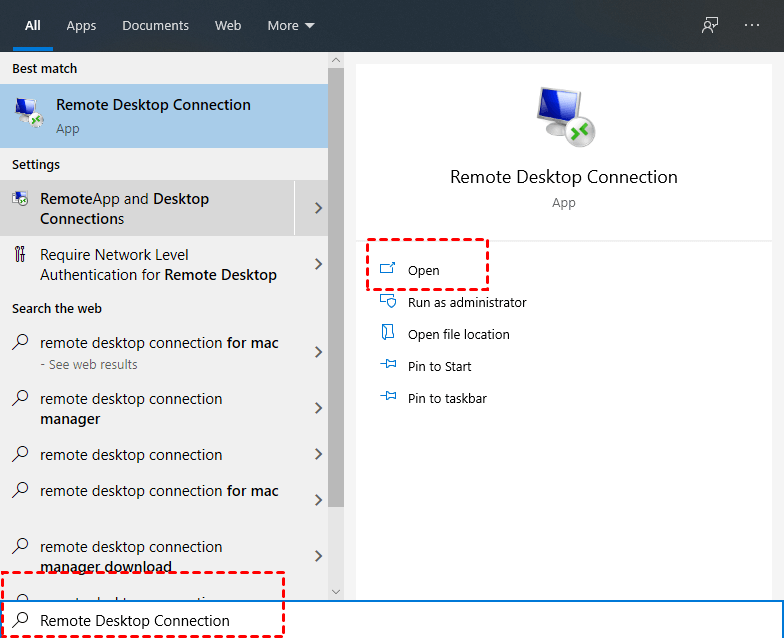
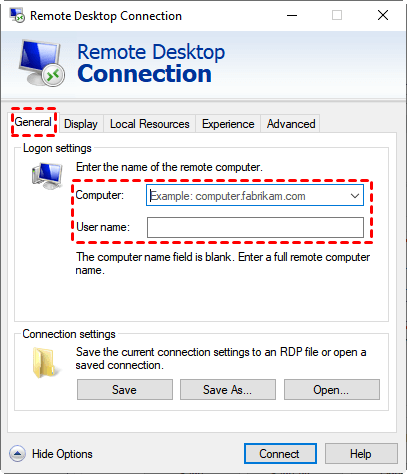
Step 1. On the office laptop, search for Remote Desktop Connection in the Search box. And then open it.
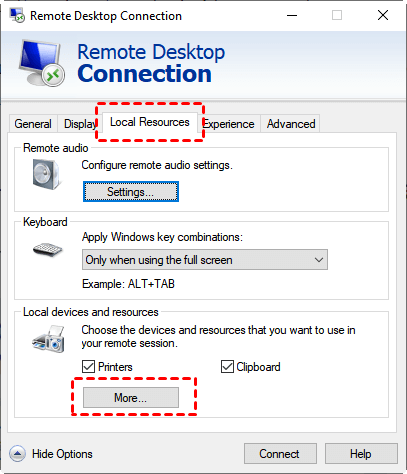
Step 2. On the main interface of Remote Desktop Connection, switch from the General tab to the Local Resources tab, and in the Local devices and resources column, click More.
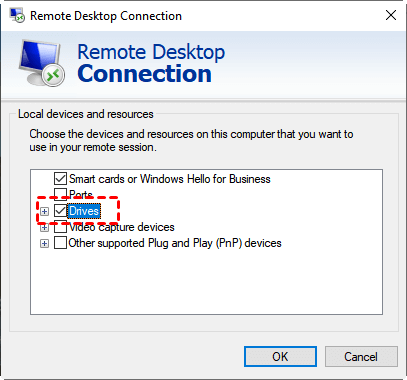
Step 3. On the Local Devices and Resources interface, check the Drives and click OK.
Step 4. Go back to the General tab. Enter the IP address and user name in the Remote Desktop Connection interface to achieve connection.
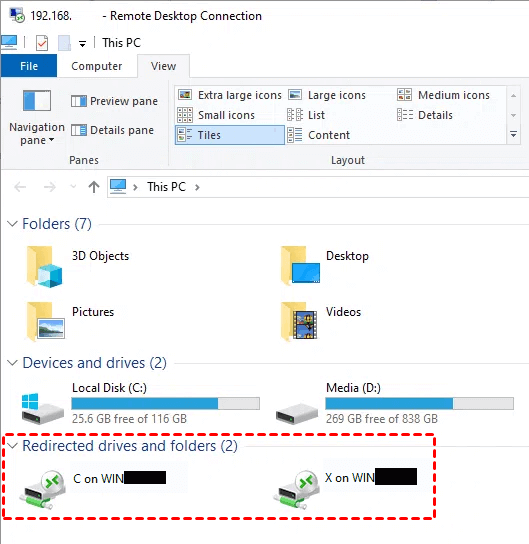
Step 5. Within the Remote Desktop Connection session, your local drives appear in Windows Explorer of the remote computer with the following designation:

Step 6. Run PowerShell inside of your RDP session, and run a simple net use command. You will see the redirected drives appear.
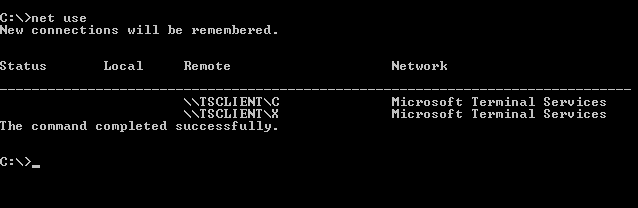
Step 7. Run a simple net use \tsclient to map these drives in a true sense to a network drive letter.

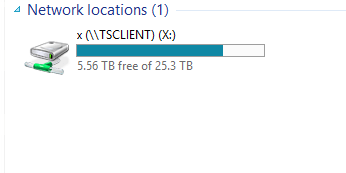
Step 8. Now if you look in Windows Explorer, you will see a true network drive mapped under your Network Locations section. If you copy files to the mapped drive on the remote computer, you can find the files in the same drive on your local computer.
How to remotely transfer files between computers on different networks
There are 3 options on how to transfer files from work laptop to personal laptop when they are on different networks.
Option 1. Transfer files between computers through email [limited]
Using email is an option on how to transfer files from office laptop to personal laptop wirelessly. However, there are some disadvantages to sending files via email. Aside from potential security troubles, the main drawback is that email file transfer has some restrictions when it comes to attachment size. Gmail, for example, allows messages to be up to 25 MB, including the message’s text and any files attached. Outlook.com allows only 10 MB.
Option 2. Transfer files between computers using cloud storage services [insecure]
Cloud storage is popular and has been adopted by many businesses to make file access and sharing easier and faster. However, the main disadvantage of cloud storage services is the risk of customer data exposure due to a security breach or incompetence on the part of the cloud service provider, making this method relatively insecure.
There are lots of cloud service providers at present. Here we’ll take Google Drive, a popular free cloud storage service, as an example. You can save various files to the cloud hard disk and access them from almost any device. Before you get started, you need to register a Google account first.
Step 1. Open the main interface of Google Drive, find and click My Drive in the left sidebar, click My Drive again, and select Upload files or Upload folder in the expanded menu.
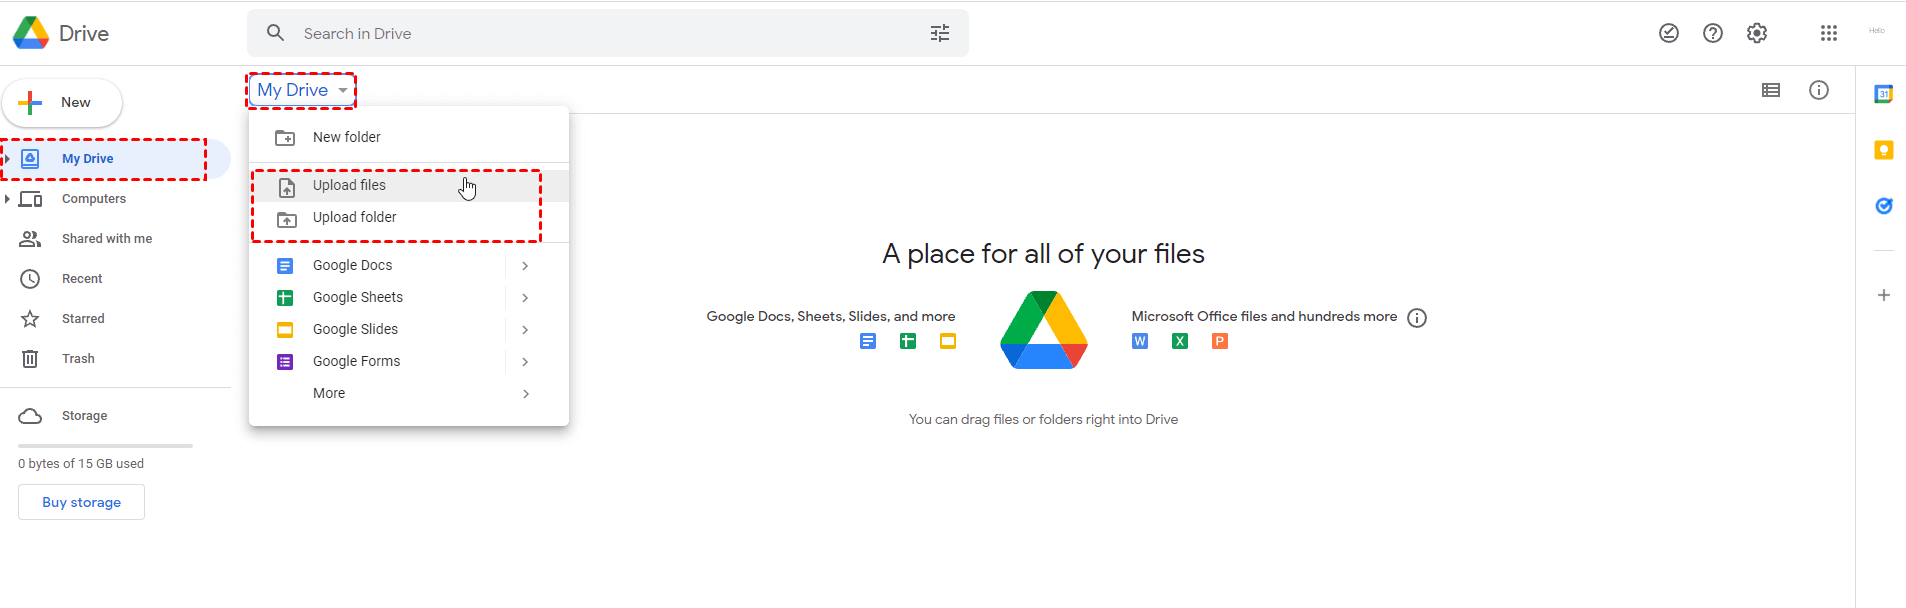
Step 2. For example, click Upload files, and a window will pop up automatically. Select the file you want to upload and click Open in the lower-right corner.

Step 3. You can see the file upload progress in the lower right corner. After the upload is completed, you can find the file in the main interface.
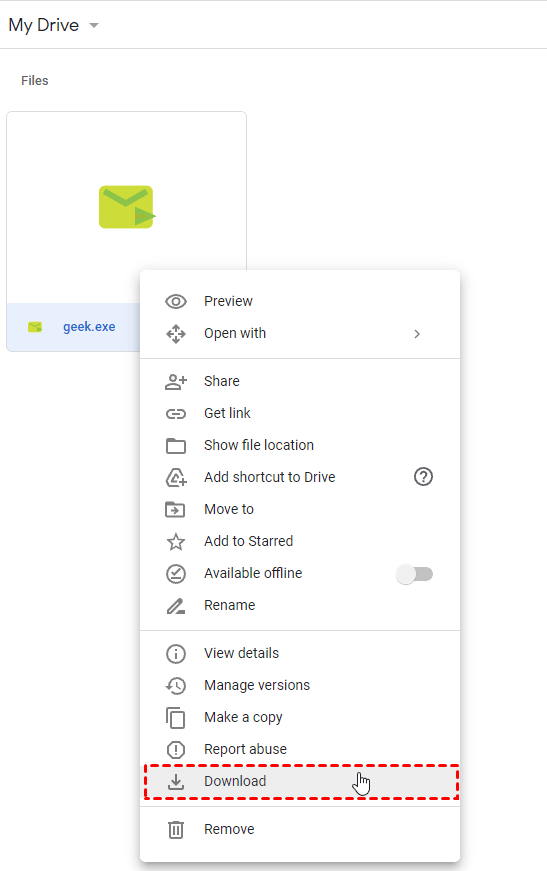
Step 4. Open Google Drive on the other computer and log in to the same Google account. Find the file you’ve transferred, right-click the file, and select Download in the expanded menu to realize remote file transfer between different computers.
Option 3. Transfer files between computers via remote file transfer tool [recommended]
The final option for you is to transfer files between Windows machines using AnyViewer, which is a file transfer tool, as well as remote desktop software. It has the following advantages:
- Fast speed. It allows you to transfer a batch of files at a really fast speed. For example, it only costs about 20 seconds to transfer a 2 GB zip file from the local to the remote computer.
- High security. The file transfer process is secured by Elliptic Curve Cryptography (ECC) encryption, protecting your data from leakage.
- Multiple features. As a remote desktop tool as well, it also allows you to easily control and manage office computer remotely.
Step 1. Download, install, and launch AnyViewer 3.0 on both Windows computers. If your version is lower, please upgrade first.
Step 2. On the Controller computer, go to Log in, and then click Sign up. (If you already have signed up on its official website, you can log in directly.)

Step 3. Fill in the signup information.

Step 4. Then you can see you successfully logged in to AnyViewer. Your device will automatically be assigned to the account you’ve logged in to.

Step 5. Choose your target computer, and then click File Transfer.


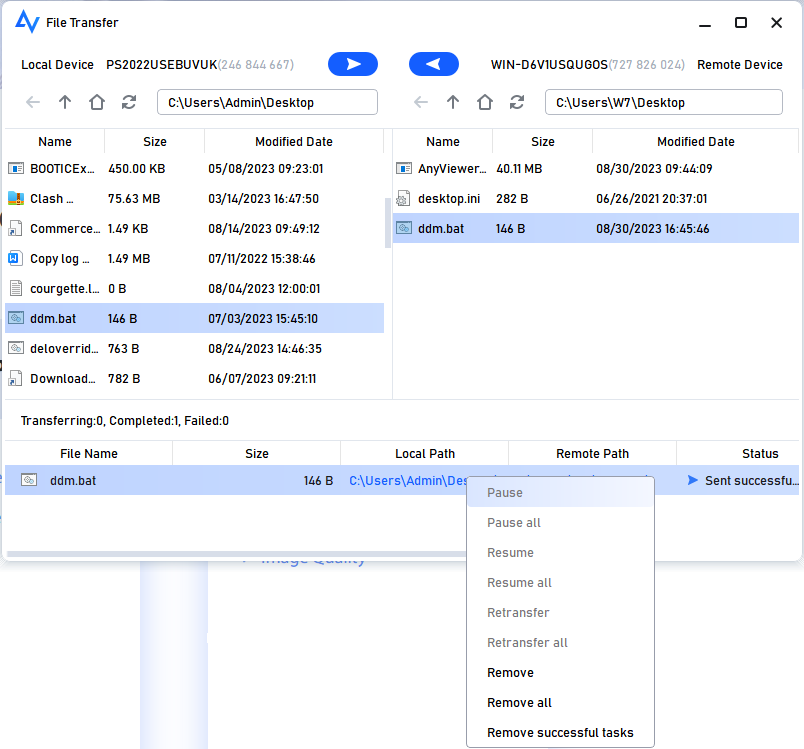
Step 6. Then a File Transfer dialog box will appear. The path of the Controller computer is shown on the left of the box, and the path of the Recipient computer is shown on the right. You’re able to transfer files between devices freely by clicking the arrows after choosing the target files.

Step 7. You can see the transfer status at the bottom of the File Transfer dialog box. Right-click to pause or remove the transfer task. The dialog can be closed when the transfer is complete.
- Notes:✎...
- You can also upgrade your account to a professional or enterprise plan. Here are what a professional or enterprise plan can bring to you:
- Faster transfer speed. Transfer speed for a free account is 500 KB/s, and for a paid account is up to 10 MB/s.
- Increasing number of files transferred in a single time. The maximum number of files that can be transferred per time for a free account is 100.
- Larger size of a single file that can be transferred. The maximum size of a single file that can be transferred for the free account is 100 MB.
- More devices can be assigned to the same account for unattended remote access.
- More Currently connected devices are displayed for management.
- Connect in privacy mode to protect privacy.
Conclusion
This post primarily explains how to transfer files from office laptop wirelessly, regardless of whether they are on the same network or on different networks. You can choose the most suitable one according to your own situation.
