
2026 Top 6 Free Zoom Alternative with Screen Sharing
Looking for free Zoom alternative with screen sharing? You come to the right place, this article will provide you with 6 free options and a stepwise tutorial on how to enable screen sharing. Keep reading if you need!
By AnyViewer / Updated on December 26, 2025
Is there something like Zoom but free?
Of course, there is. Zoom stands out as a versatile video conferencing platform, offering accessibility on both computers and mobile devices. It caters to various online needs, including video conferences, webinars, and real-time chat sessions. However, the free version offered by Zoom limits meetings to 40 minutes. If users want longer meetings they need to purchase a paid plan. And all users are worried about is Zoom remote control safe.
![]()
If you're using the free version of Zoom, get tired of its time limitations. If and are looking for the best free Zoom alternative with screen sharing, this article will bring you generous free Zoom alternatives. Keep reading if you’re interested.
Free Zoom alternative with screen sharing [6 options]
How to find the best free Zoom alternative with screen sharing? Don't worry, this article below will provide you with 6 options. Choose one that suits your needs most.
Option 1. AnyViewer
The most recommended for you is AnyViewer. It is an all-in-one, safe and free remote desktop software with screen sharing. AnyViewer is highly praised and loved by the majority of users because of its following features:
- Free. AnyViewer offers free plans for both personal use and commercial use, with enough features and permissions to meet user needs.
- No time limit. AnyViewer has no time limit on screen sharing and can synchronize the sound of remote devices in real time.
- High performance. AnyViewer provides a swift and responsive connection experience.
- Easy hand. The entire operation is user-friendly, and the connection is not confined to the same LAN, ensuring seamless connectivity.
- Additional features. Besides screen sharing, AnyViewer offers many other great features, including one-click control, file transfer, text chat, multi-monitor support, and more.
Using AnyViewer as the best free Zoom alternative with screen sharing will never disappoint you, so hurry up and download it to start trying it out.
Step 1. After downloading, installing and starting AnyViewer on both of your devices, go to “Log in” and click “Sign up”.

Step 2. Complete the registration form to create a new account and log in to the same account on your device.

Step 3. After a successful login, your device will be automatically assigned to the account you are logged into.

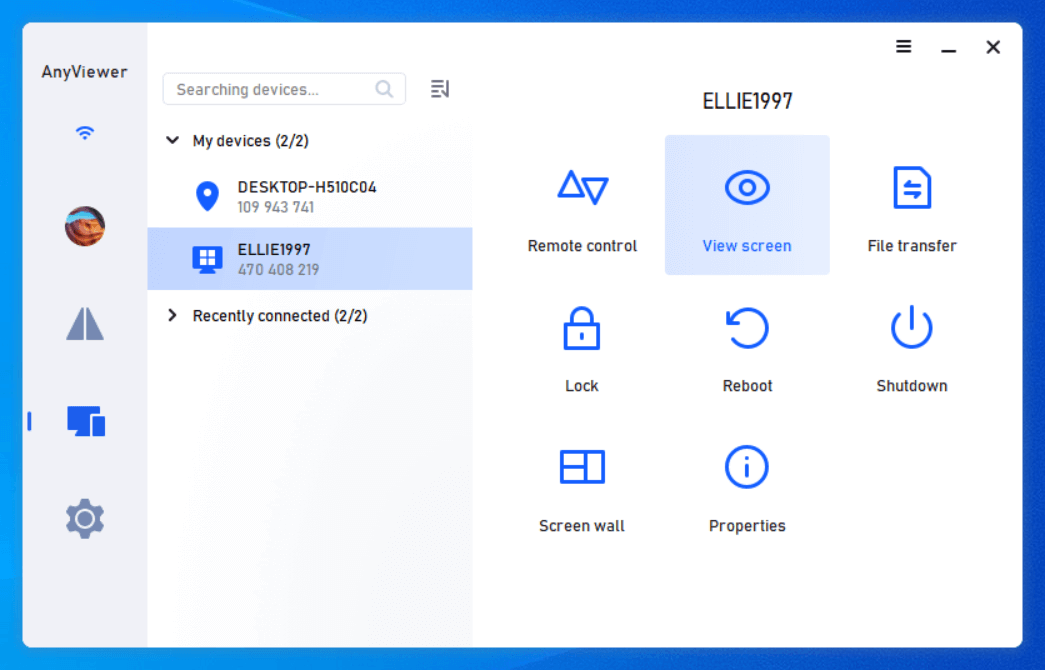
Step 4. On your local device, navigate to “Device” and choose the target device you want to view its screen, then click ”View screen” to share the screen without asking.
- ★Tips: You can upgrade your account to a professional or enterprise plan to get more rights:
- Allocate additional devices for screen sharing.
- Enjoy remote access in Privacy Mode.
- Enjoy faster file transfer speed.
- Enhance device management for organizations by creating groups to efficiently oversee a substantial number of devices.
- ...
Option 2. Chrome Remote Desktop
If you and another computer are both running Windows and have the Chrome browser pre-installed, Chrome Remote Desktop is an excellent option for screen sharing. This tool is compatible with Microsoft Windows, OS X, Linux, and ChromeOS.
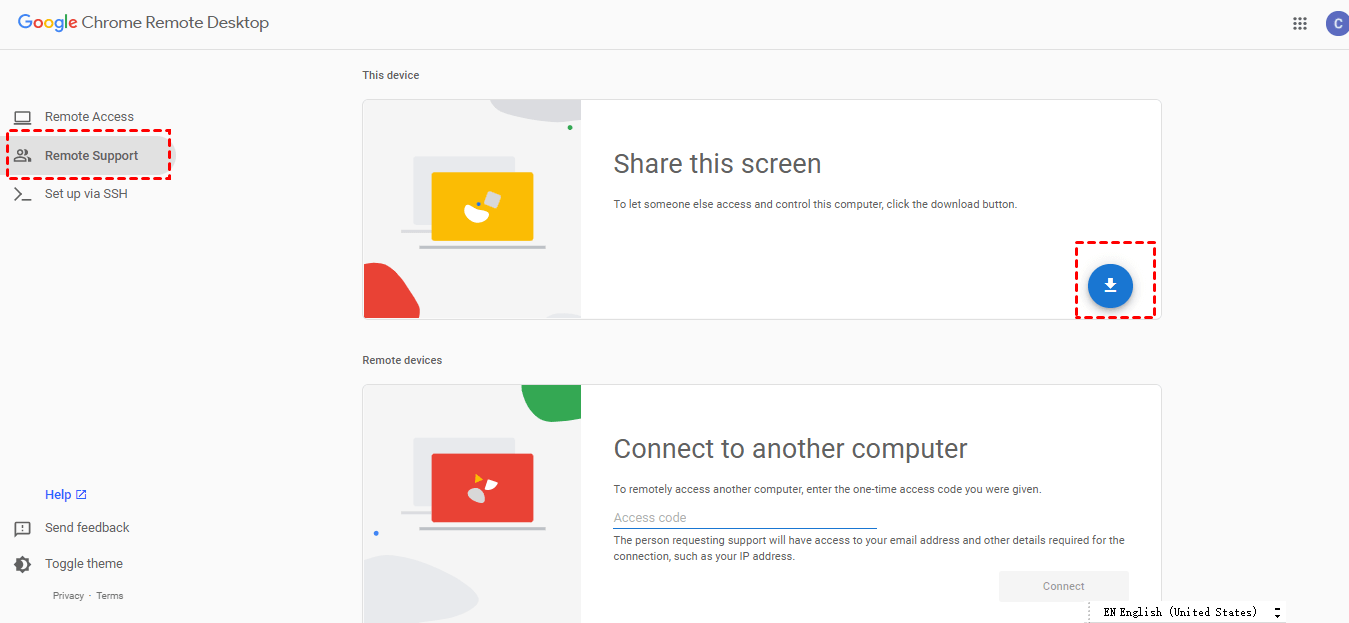
Step 1. To set up Chrome Remote Desktop, ensure you're signed in to the same Google Account on both devices. Next, visit the Chrome Remote Desktop download page. On your PC, select “Remote Support” from the left pane, and then click the “blue download” button.
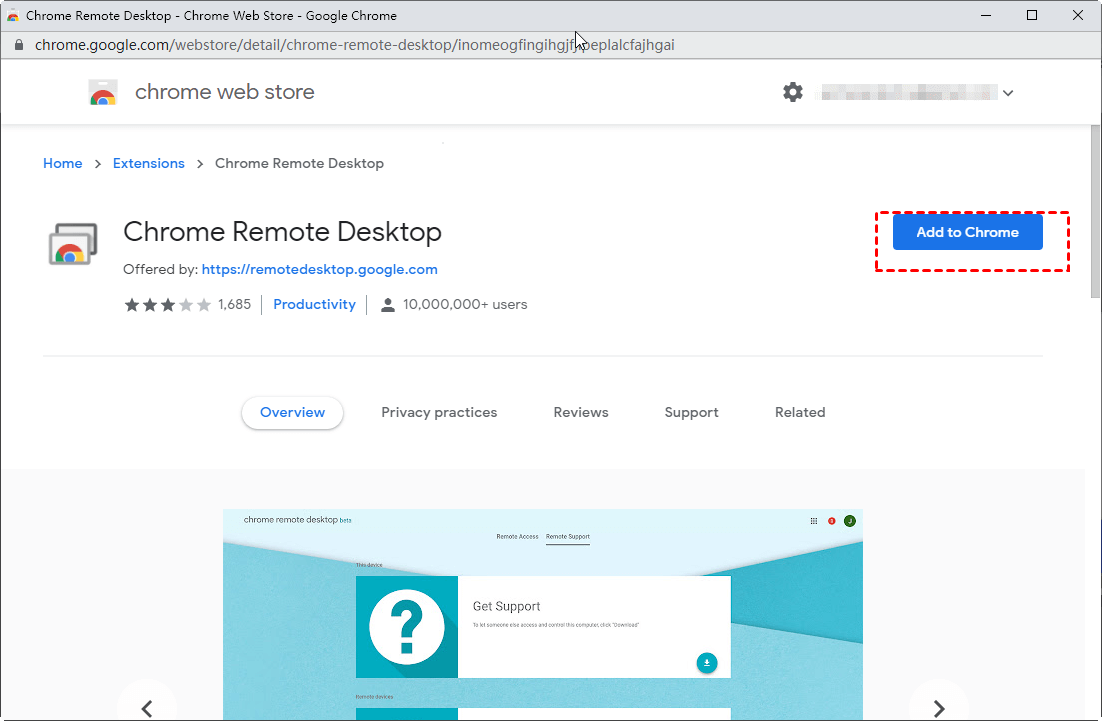
Step 2. Click “Add to Chrome” to install the Chrome Remote Desktop extension to your Chrome browser.
Step 3. Click “Add extension” in the pop-up window to confirm and complete the download.

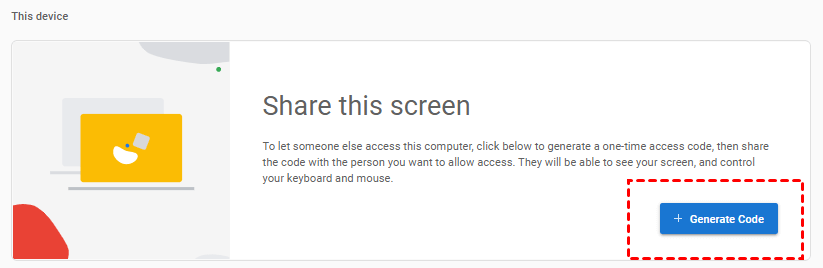
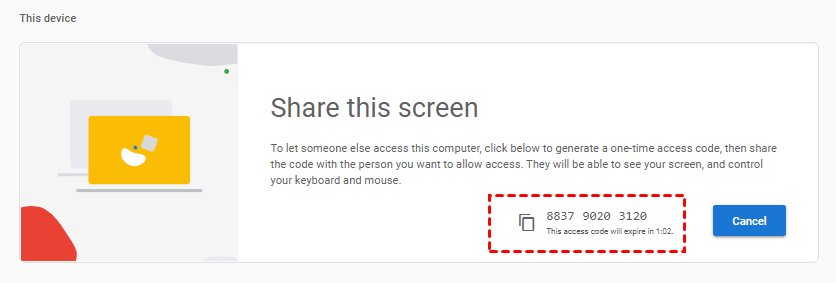
Step 4. Once the Chrome Remote Desktop extension is added, click on “+ Generate Code” under the “Share this screen” section.
Step 5. Share the generated code with the PC you intend to screen share with (please note that the code has a 5-minute expiration).
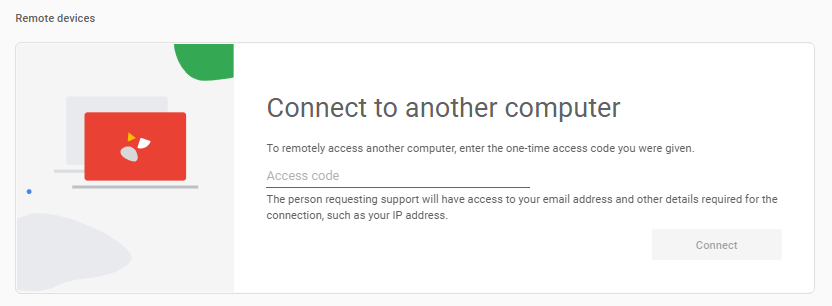
Step 6. On the remote computer, input the access code of the host PC, and then click “Connect”.
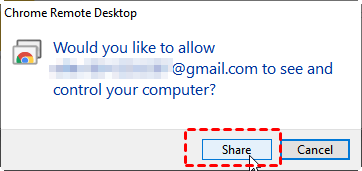
Step 7. A request will appear on your computer; click “Share” to initiate screen sharing.
Option 3. Quick Assist
Quick Assist, a built-in Windows feature, enables remote device sharing between individuals. It allows one person to establish a remote connection to another user's device and view its display. Quick Assist can be used for Windows Remote Desktop screen sharing. However, you need to keep in mind that the Quick Assistant is only available on Windows 10 or later.
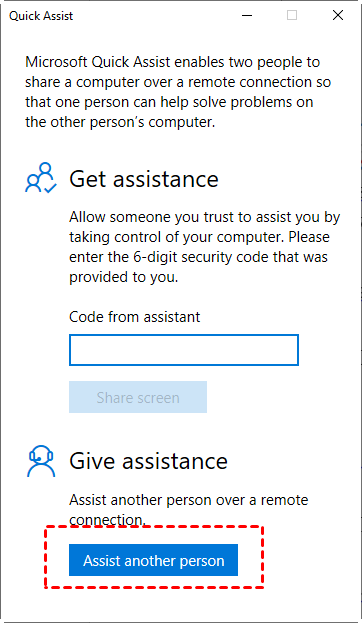
Step 1. On the computer where you wish to share your screen, search for “Quick Assist” in the search box and open the application. Subsequently, click “Assist another person” on the main interface.
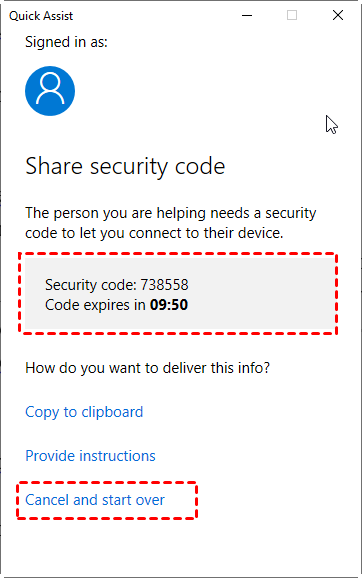
Step 2. Enter your Microsoft account, click “Next” to obtain the share security code, and proceed to enter your password. After clicking “Sign in”, a security code will be generated, but it's only valid for 10 minutes.
Step 3. On your own computer, launch Quick Assist, input the security code, and then select “Share screen”.

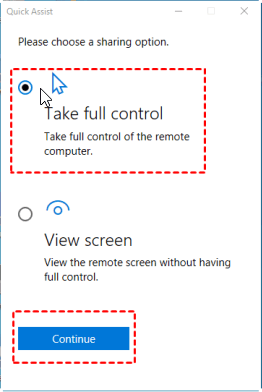
Step 4. Select either “Full Control” or “View Screen”, depending on your specific requirements, and then click “Continue”.
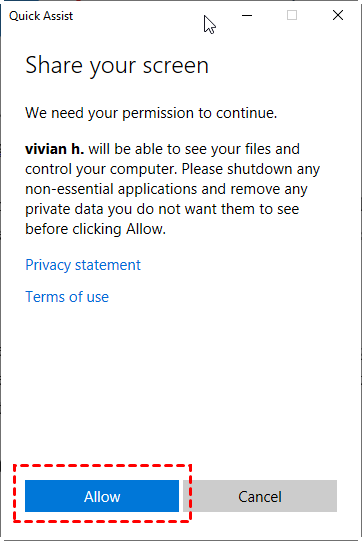
Step 5. Click “Allow” to grant permission to share your screen with the other computer.
Option 4. TeamViewer
TeamViewer is a well-known remote control application that provides a free version for personal use, as well as paid versions for business needs. However, it's important to be cautious with the free TeamViewer version, as there have been reports of users being falsely flagged for commercial usage, leading to blocked connections even when it's not the case. Therefore, if you're in need of a reliable remote screen sharing solution, TeamViewer may not be the most suitable option.
Step 1. Download and install TeamViewer on your devices. When installing, choose the intended purpose for downloading the software, whether it's for commercial or personal use. In this instance, we'll illustrate using the free version for individual users.

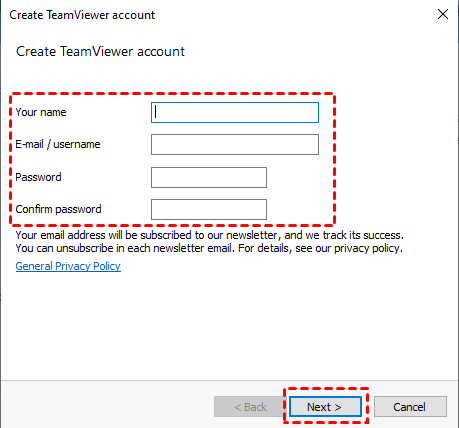
Step 2. Open TeamViewer on both computers and, in the main interface, choose “Login”, If you're using TeamViewer for the first time, you'll need to create your TeamViewer account. Click “Next” to complete the account registration process (be aware that account verification may be necessary before usage).
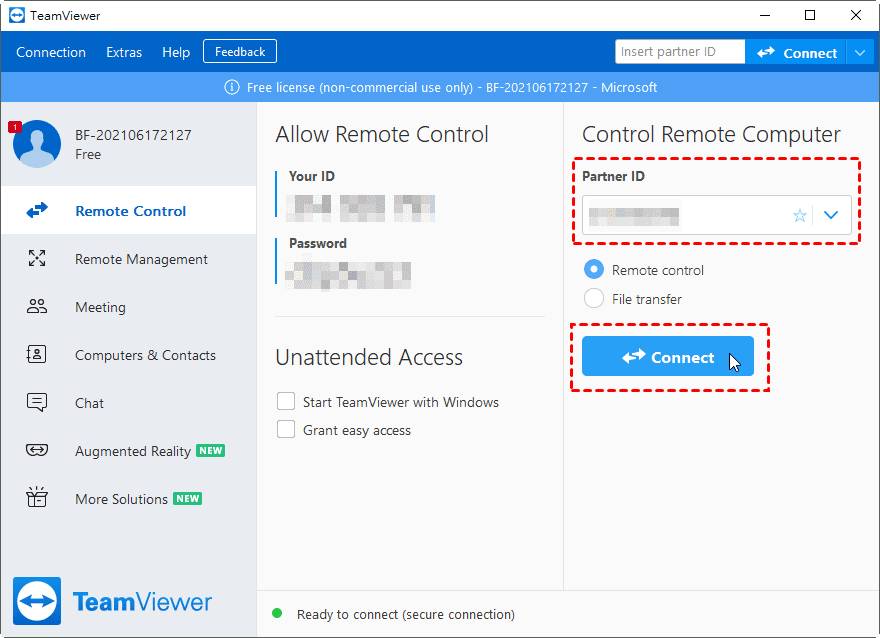
Step 3. On the client computer's TeamViewer main interface, go to "Remote Control" on the left side. Next, input the ID of the host computer in the “Partner ID” field and click “Connect”.
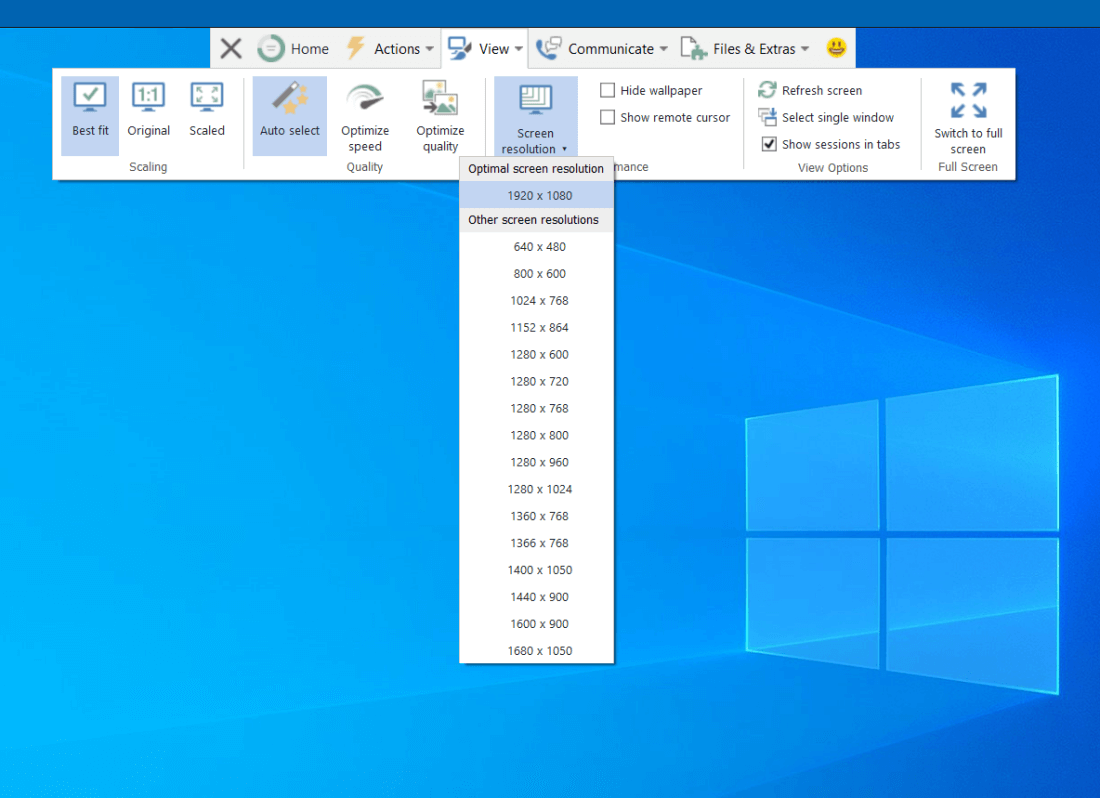
Step 4. After successful connection, you can choose to view the screen of the remote device and modify the screen resolution and other operations.
Option 5. Splashtop
Splashtop is a remote access and remote help software that delivers a smooth remote desktop connection experience. It boasts an extensive range of features and is available in various versions tailored to different requirements and functionalities, giving you the flexibility to purchase according to your specific needs. However, it's worth noting that Splashtop does not provide a free plan.
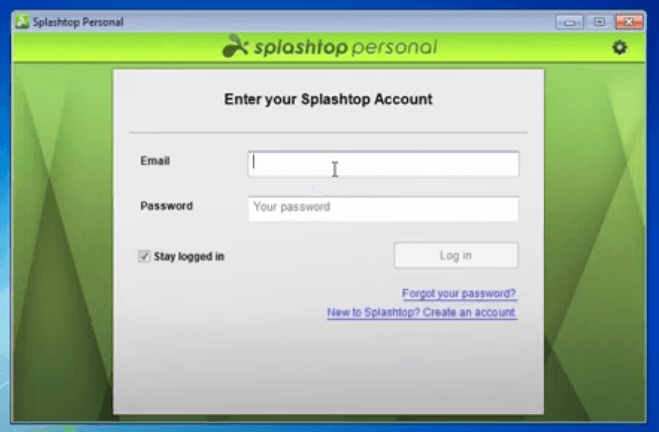
Step 1. Begin by downloading and installing Splashtop on your device, and then proceed to sign in.
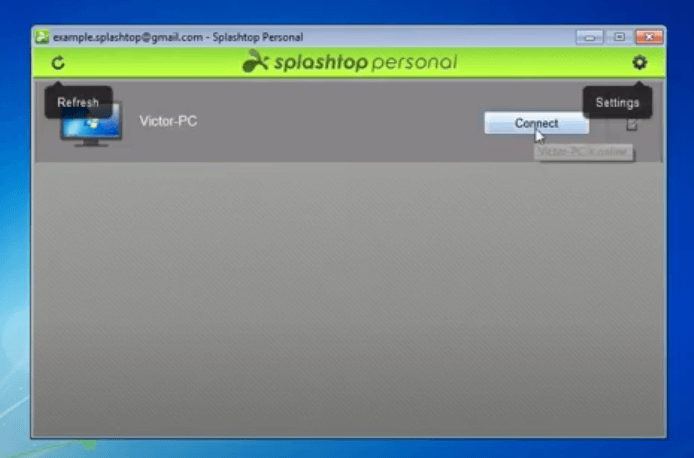
Step 2. Once you've successfully logged in, you'll notice other devices with Splashtop installed. Click “Connect” to establish a successful connection to a remote device within your home network.
Step 3. Once connected, click the Actions icon and then click “Share My Desktop”.

Option 6. VNC Viewer
VNC is a remote access and control software that empowers users to access and control another computer's desktop from a mobile device or another computer, regardless of their location on the Internet. For instance, you can utilize VNC to view your Windows office desktop from your Mac or Linux computer at home.
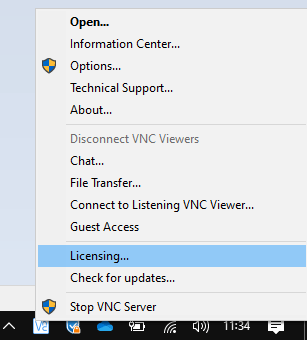
Step 1. Download VNC Server on your device and proceed with the installation. After the installation, you'll likely receive a prompt to license the VNC server program. If not, you can select “License” from the VNC server shortcut menu.
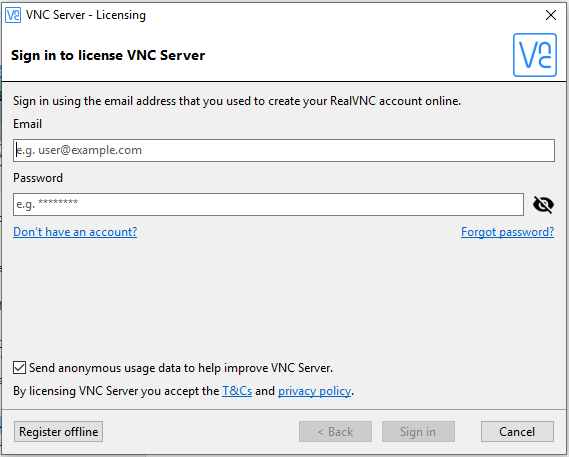
Step 2. Sign in using your RealVNC account credentials to apply your subscription to VNC Server.
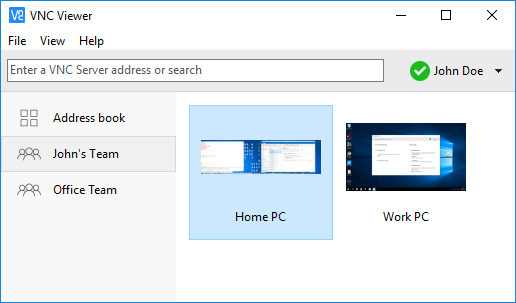
Step 3. Download VNC Viewer on the computer you want to control and log in using your RealVNC account credentials. The remote computer ought to show up in your team.
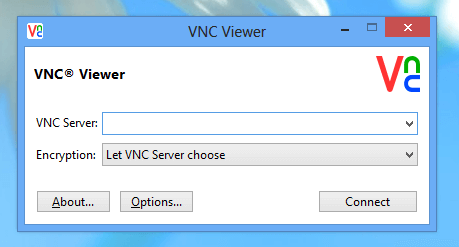
Step 4. Click to connect. You will be prompted to authenticate to the VNC server. Enter the PC name of the remote server and enter the password to achieve remote access.
Conclusion
This article provides a list of seventhe best free Zoom alternative with screen sharing, allowing you to select the one that suits your requirements. Nevertheless, AnyViewer distinctly stands out among its competitors. It not only provides free plans for both personal and commercial use but also offers an extensive range of features and permissions, meeting user needs without imposing excessive limitations. In summary, if you're seeking the top free Zoom alternative with screen sharing capabilities, AnyViewer emerges as the optimal choice.
