
Fixed: Disk Management Could Not Start Virtual Disk Service on Remote Computer
This post mainly introduces how to solve “Disk Management could not start Virtual Disk Service on remote computer”. If you happen to encounter this problem, read this post to troubleshoot.
By Ellie / Updated on December 13, 2024
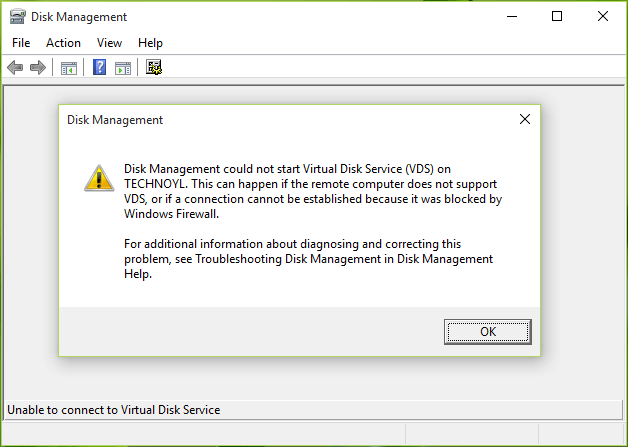
Disk Management could not start Virtual Disk Service on remote computer
Has anyone else experienced this problem with Windows 10 before? When I use RDP, I am unable to open Disk Management and receive the error ‘Disk Management could not start Virtual Disk Service (VDS) on XXX. Any assistance will be highly appreciated."
Five solutions to “Disk Management could not start Virtual Disk Service on remote computer”
Here in this part, we’ll introduce five solutions to fix “Disk Management could not start Virtual Disk Service on remote computer”. If you are unable to connect to Virtual Disk Service on remote computer, find the answers here.
Solution 1. Start Virtual Disk on both local and remote computers
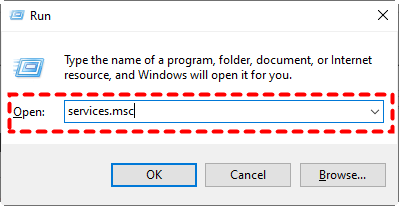
Step 1. Press Win + R and type “services.msc” in the Run dialog box, hit Enter key to open Services snap-in.
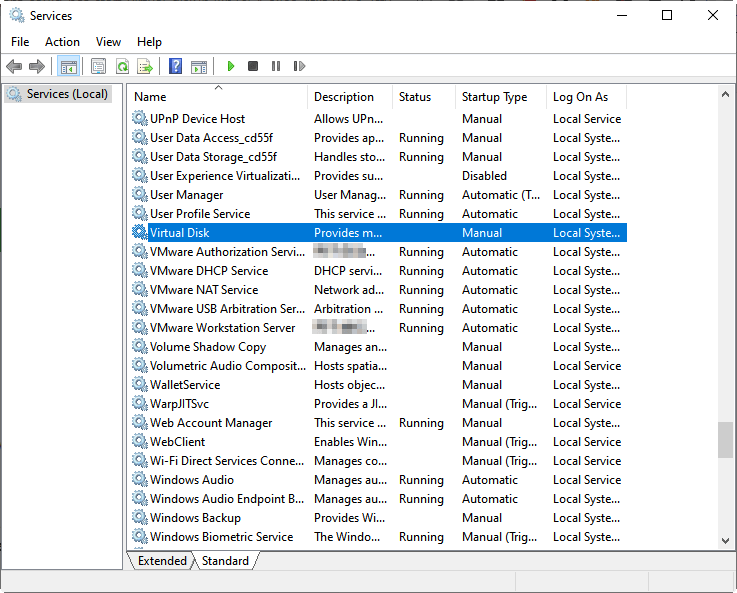
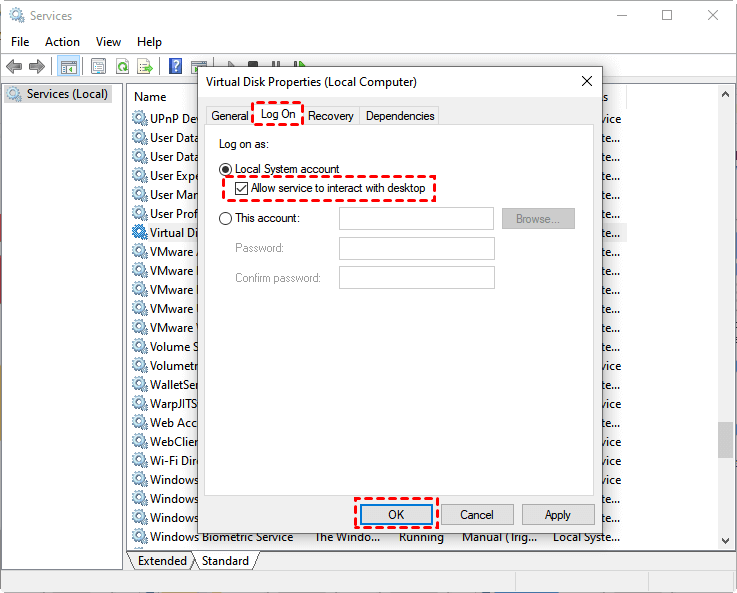
Step 2. In the Services window, find and double-click Virtual Disk.
Step 3. Set the Startup type to Manual or Automatic. Hit the Start button and then click OK.
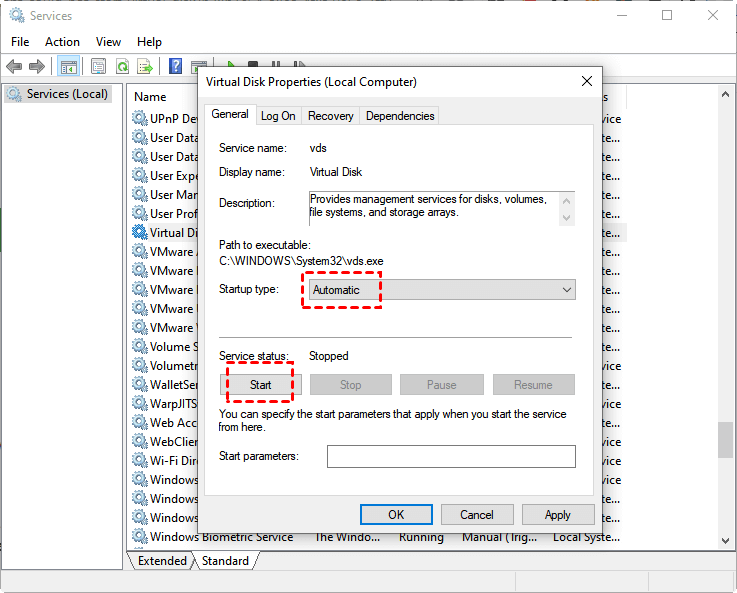
Step 4. Then click on the Log on tab and check Allow service to interact with desktop box. After this, click OK.
Solution 2. Enable Remote Volume Management through Windows Firewall on both local and remote computers
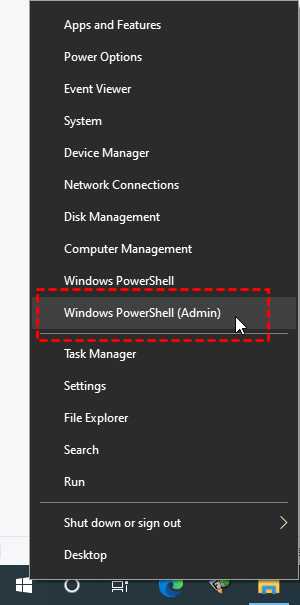
Step 1. Right-click Start and choose Windows PowerShell (Admin).
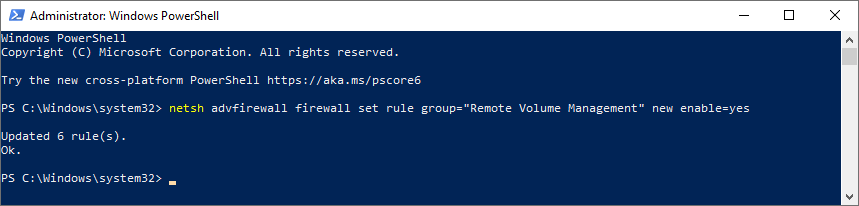
Step 2. Run the following command on both the local and remote system to enable Remote Volume Management:
netsh advfirewall firewall set rule group="Remote Volume Management" new enable=yes
Solution 3. Disable or configure Windows Defender
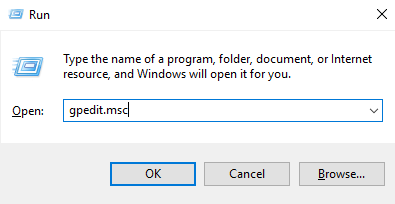
Step 1. Press Win + R and type “gpedit.msc” in the Run dialog box, hit Enter key to open Local Group Policy Editor.
Step 2. Navigate to Computer Configuration > Administrative Templates > Windows Components > Windows Defender Antivirus > Turn off Windows Defender Antivirus. Double-click it.
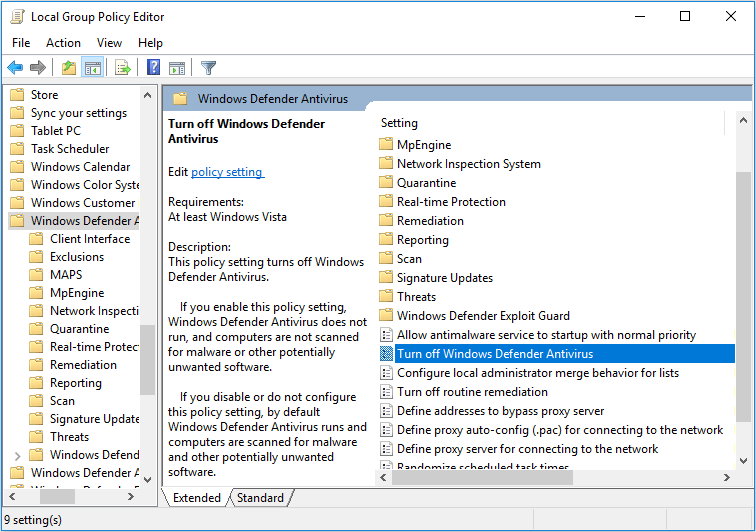
Step 3. Check Enabled and then click Apply and OK to save changes.

Solution 4. Run the SFC scan
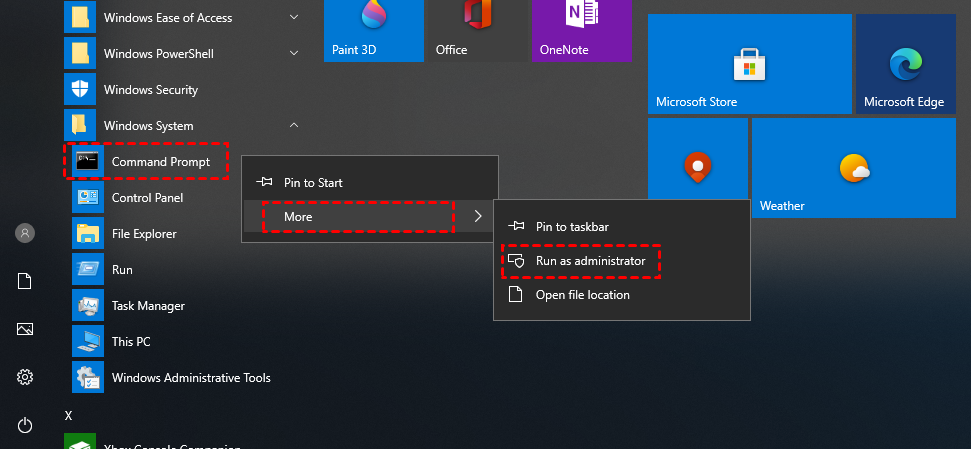
Step 1. Click Start, find Windows System, and expand it. Right-click Command Prompt, select More, and click Run as administrator.
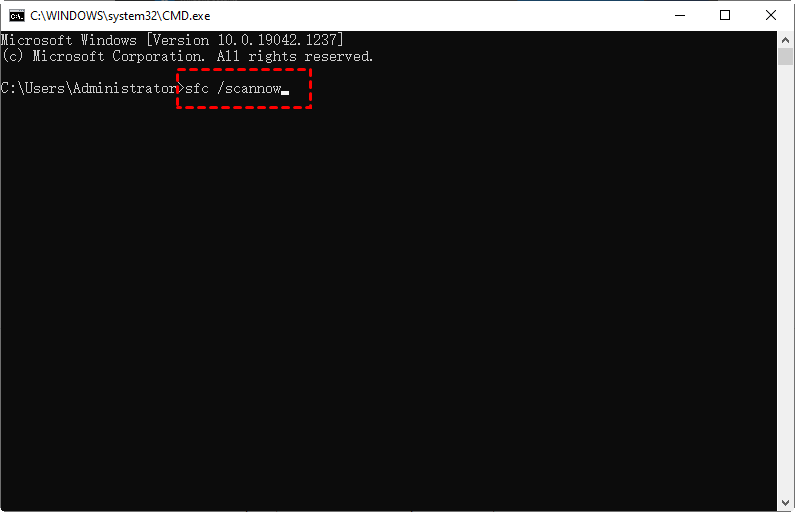
Step 2. In the Command Prompt window, enter “sfc /scannow” and then press Enter to execute the command.
Solution 5. Run DISM
Step 1. Run Command Prompt as administrator. Then type the following command:
DISM /Online /Cleanup-image /Scanhealth
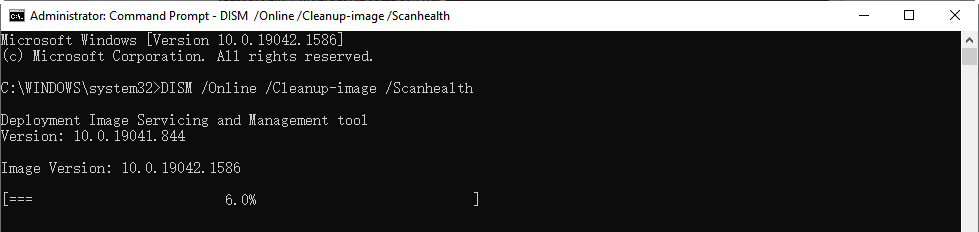
Step 2. Wait for the operation completed successfully, then type the following command afterward:
DISM /Online /Cleanup-image /Restorehealth

Try an easy way to remotely manage a disk!
If you’re tired of “Disk Management could not start Virtual Disk Service (VDS) on remote computer”, you can also try another easy way to remotely manage disk. You can use AnyViewer, the free and easy remote desktop software to remotely access another computer, and then use the professional disk management tool AOMEI Partition Assistant to manage your disk. Both tools are free to use and easy to operate.
Part 1. Remotely access another computer via AnyViewer
Step 1. Download, install, and launch AnyViewer on both computers.
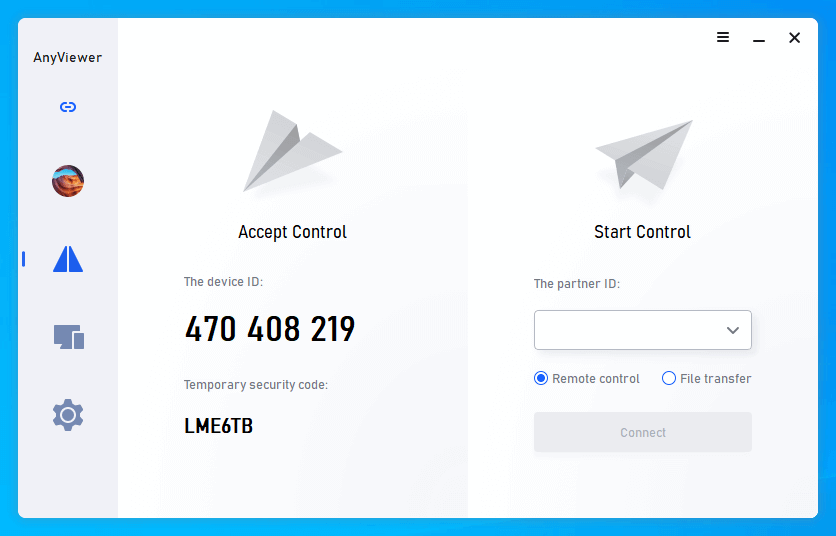
Step 2. Go to Log in, and then click Sign up. (If you already have signed up on its official website, you can log in directly.)

Step 3. Fill in the signup information.

Step 4. Then you can see you successfully logged in to AnyViewer. Your device will automatically be assigned to the account you've logged in to.

Step 5. Log in to the same AnyViewer account on the two devices, then click One-click control to achieve unattended remote access.

- Notes:✎ You can upgrade your account to a Professional or Enterprise plan. Then you'll have the following rights:
- Assign more devices to achieve unattended remote access to more devices.
- Connect to another computer in privacy mode, which means you can black the screen and block the mouse and keyboard of the remote computer.
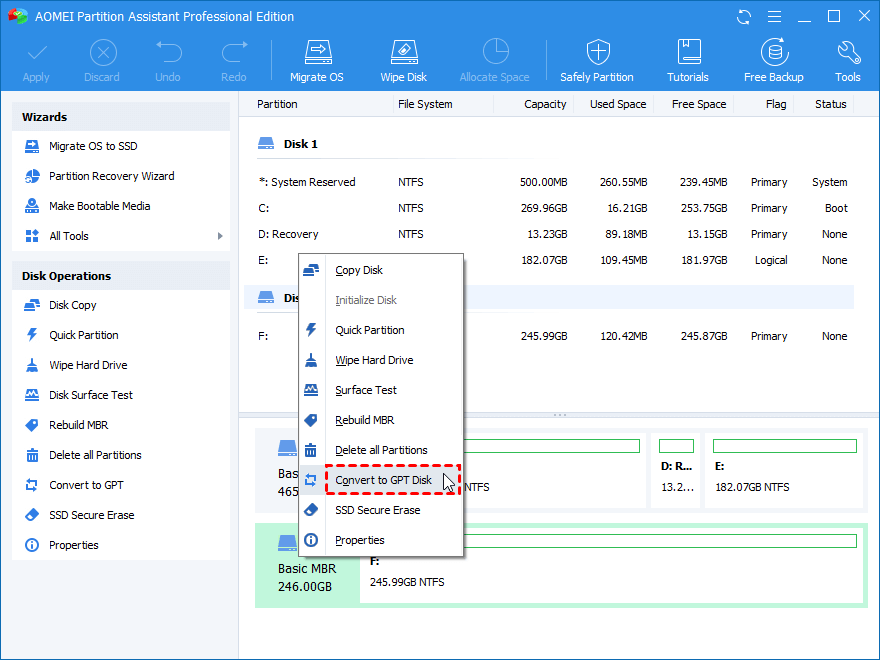
Part 2. Remotely manage disk via AOMEI Partition Assistant
Then you can start to manage the disk on the remote computer. For example, let’s see how to convert MBR to GPT using AOMEI Partition Assistant.
Step 1. Download, install and launch the software, right-click the MBR disk you want to change, and then choose Convert to GPT Disk.
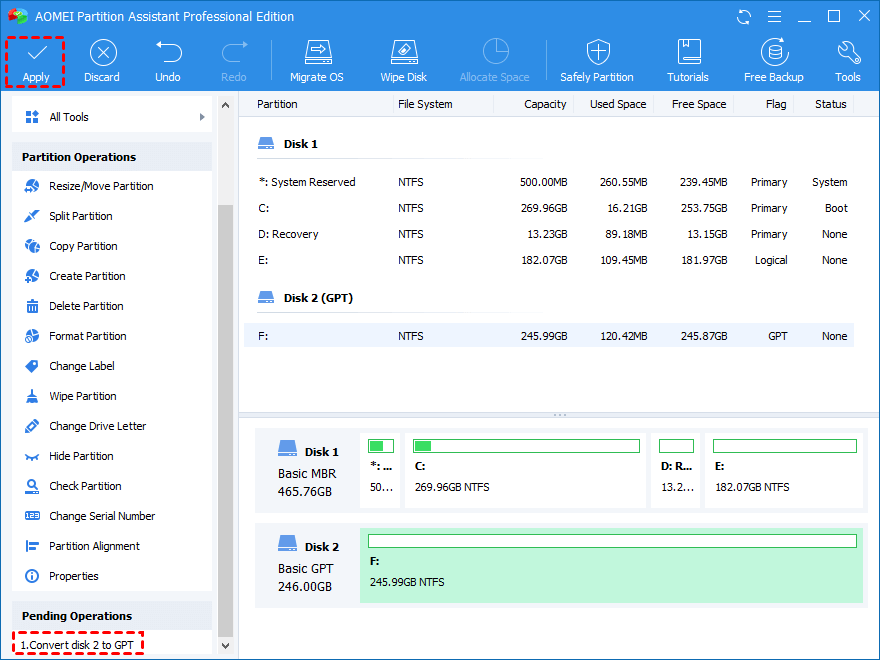
Step 2. In the pop-up windows, click OK to continue.

Step 3. Click Apply to operate and then your disk will be changed into GPT disk style.
Conclusion
This post mainly introduces five solutions to fix the “Disk Management could not start Virtual Disk Service on remote computer”. Besides, we also introduce another way, which is to use the free remote desktop software AnyViewer to remotely access another computer and then use the professional disk management tool AOMEI Partition Assistant to do disk management.
