
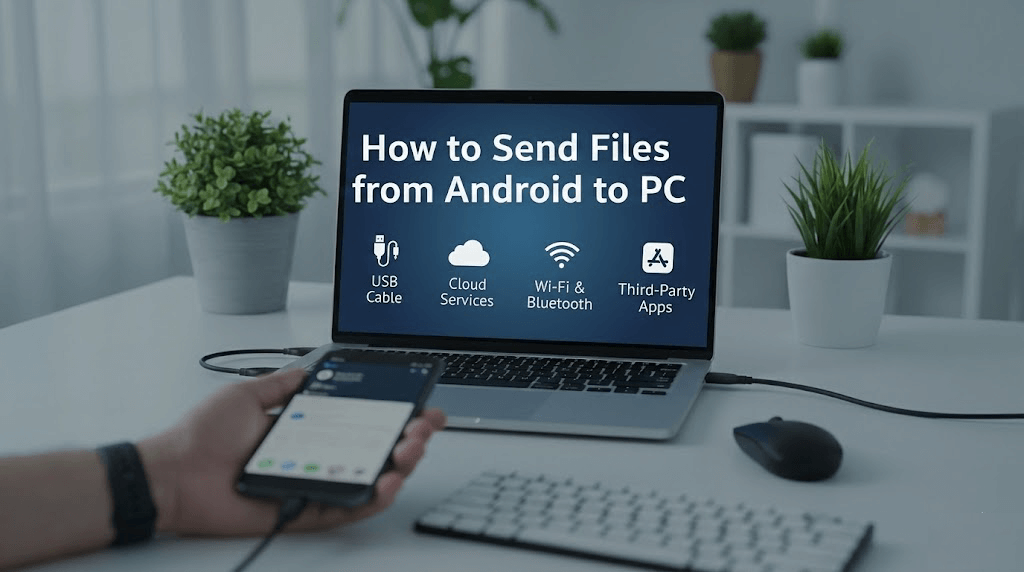
6 Proven Ways to Send Files from Android to PC
This guide compares 6 reliable methods to transfer files from Android to PC, highlighting AnyViewer for remote productivity, USB/SD cards for large files, and Cloud/Email for quick wireless sharing.
By Ellie / Updated on January 13, 2026
How do I send files from Android to PC?
In today's digital age, we constantly move between our mobile devices and computers. Whether it's a high-resolution photo, an important document, or a large video file, knowing how to send files from Android to PC quickly and securely is essential.
While there are dozens of tools available, some are faster and more reliable than others. This guide covers the 6 best methods to transfer your data, ranging from professional remote software to classic hardware solutions.
How to send files from Android to PC [6 ways]
Whether you need to move a single photo or a massive video library, here are the most effective methods to bridge the gap between your Android device and your computer.
Way 1. Transfer files remotely via AnyViewer [Best for productivity]
If you are looking for the most efficient, professional, and versatile file transfer tool to send files from Android to PC wireless, AnyViewer is the top recommendation. Unlike traditional methods, AnyViewer allows you to manage file transfers remotely, making it perfect for users who aren't sitting right next to their PC.
Why AnyViewer Outperforms Other Methods:
- High-Speed Remote Transfer: Faster than Bluetooth and more stable than most browser-based uploads. It uses optimized protocols to ensure your data moves at peak speeds.
- No Cable Required: Forget digging through drawers for a USB cable. It works seamlessly over Wi-Fi, 4G, or 5G.
- Bank-Level Security: Your data is protected by Elliptic Curve Cryptography (ECC) 256-bit encryption, ensuring that your private files remain private during the entire transfer process.
- Remote Management: Beyond simple file sharing, you can remotely control your PC, check system status, or even restart your computer from your phone.
Step-by-Step Guide to Send Files from Android to PC Remotely via AnyViewer:
Step 1. Install AnyViewer: Download and install AnyViewer on your Windows PC. Simultaneously, install the AnyViewer mobile app on your Android device from the Google Play Store.
Step 2. Create an Account: Launch AnyViewer on your PC, go to Log in, and click Sign up to create a free account. Log in to this same account on your Android app.
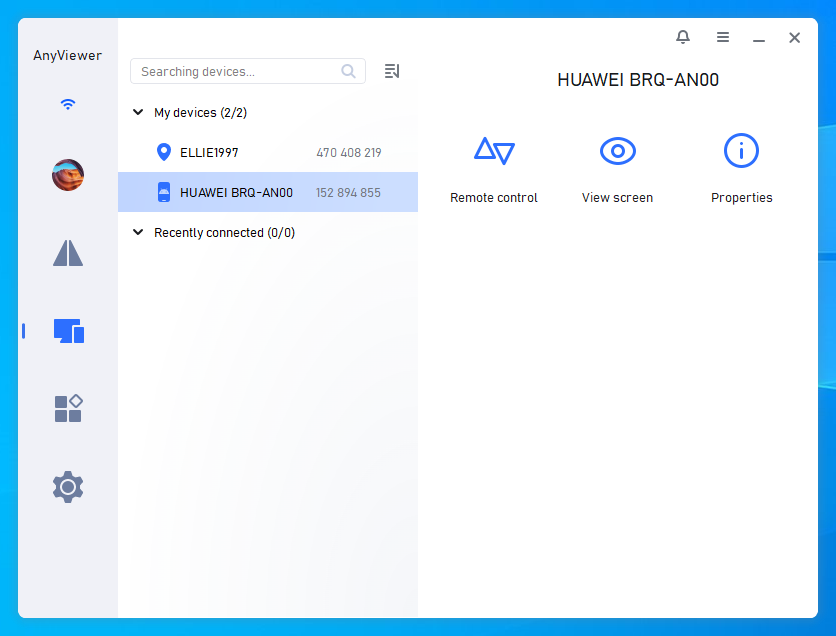
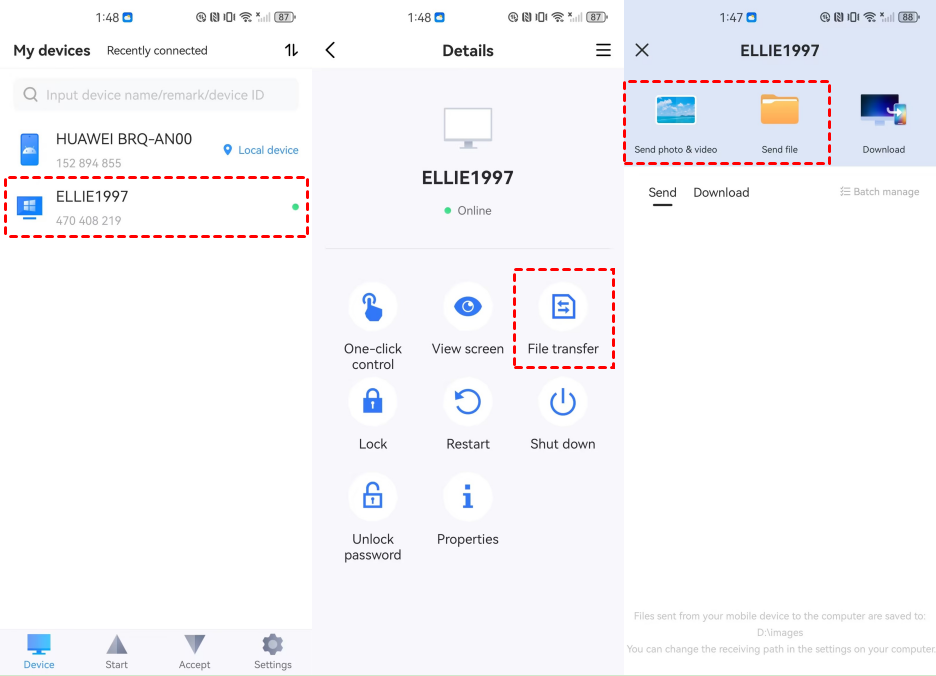
Step 3. Assign Devices: Once logged in, your PC will automatically be assigned to your account. You can view your PC name in the Device list on your Android phone.
Step 4. Initiate File Transfer: On your Android app, tap your PC name from the list. Select the File Transfer option.
Step 5. Move Files: Navigate to the files you want to send on the Android side, select them, and send them to your PC.
Way 2. Move files via USB cable [The reliable classic]
The USB cable is the "old reliable" of data transfer. It is a preferred way to send files from Android to PC when you have massive data volumes like 4K videos, as it is immune to Wi-Fi drops.
Step-by-Step Implementation:
Step 1. Physical Link: Connect your phone to a USB port on your PC. For best speeds, use a USB 3.0 or USB-C port.
Step 2. Toggle USB Preferences: Most phones default to "Charging only" for security. Swipe down your notification shade, tap "USB for charging," and switch to "File Transfer" or "MTP."

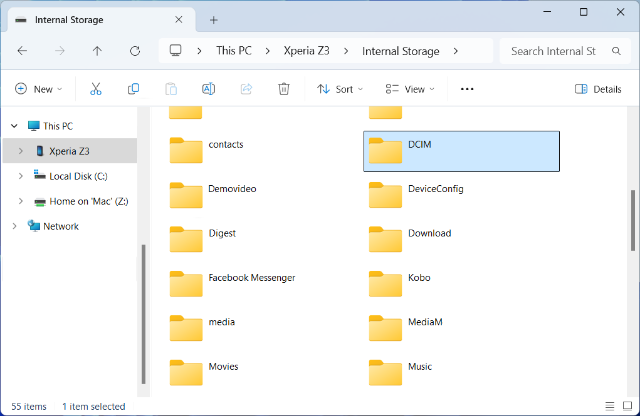
Step 3. Manage on PC: Open File Explorer (Win + E). Your phone will appear as a drive under "This PC." You can now copy, move, or delete files just like you would on a flash drive.
Pros & Cons of USB Transfer
| Pros | Cons |
| Maximum Speed: The fastest way to move GBs of data. | Tethered by a physical wire; no mobility. |
| Offline: No data plan or Wi-Fi required. | Faulty cables or dirty ports can cause connection drops. |
| Privacy: Data never touches the cloud or third-party servers. | Requires manual navigation of Android's complex folder tree. |
Way 3. Transfer files via Bluetooth [Best for small, quick tasks]
Bluetooth is the go-to method when you have no cables and no internet. While it is the slowest method on this list, its universal availability makes it a vital tool for sending a single contact card or a low-res image.
How to pair and send files from Android to PC via Bluetooth:
Step 1. PC Prep: Go to Settings > Bluetooth & devices and ensure Bluetooth is "On." Click "Receive a File" via the "Send or receive files via Bluetooth" link.

Step 2. Phone Share: Select your file in the Android Gallery or File Manager, hit Share, and tap Bluetooth.
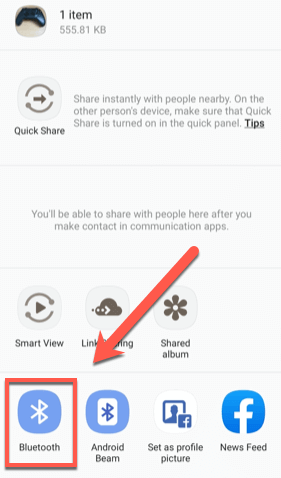
Step 3. Accept: Click "Finish" on your PC once the progress bar completes.
Pros & Cons of Bluetooth
| Pros | Cons |
| Completely wireless and requires zero internet. | Extremely slow (unsuitable for files over 5MB). |
| Pre-installed on almost all modern laptops. | Pairing process can be finicky and "time out." |
Way 4. Use an SD card [Best for massive backups]
If your Android device supports expandable storage, the SD card is a "mighty" tool. It allows you to move an entire library of photos or movies in one physical move.
Efficiency Tips: Ensure your SD card is formatted to exFAT if you plan to move files larger than 4GB.
Step-by-Step Guide:
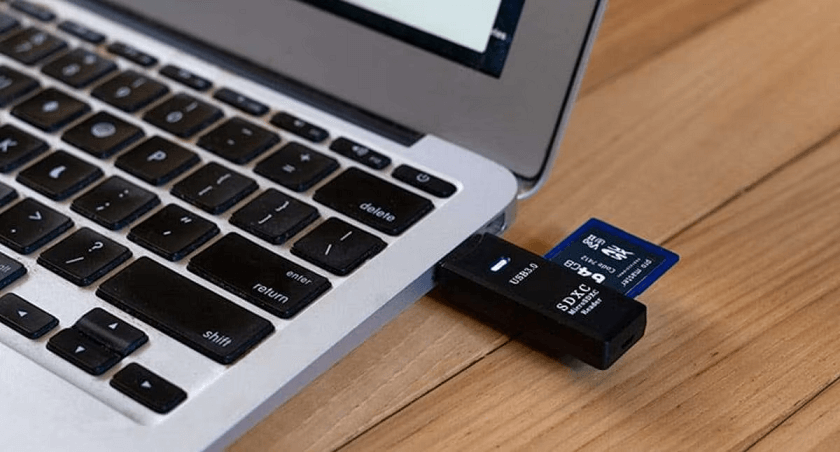
Step 1. If your files are stored on your phone, start by inserting a microSD card. Move the files you want to transfer onto the card.
Step 2. Once the transfer is complete, remove the microSD card from your phone and insert it into a card reader.
Step 3. Plug the card reader into your computer’s memory card slot or USB port.
Step 4. Open the card on your PC or Mac and simply copy and paste the files to your computer. It’s a quick and straightforward process.
Pros & Cons of SD Cards
| Pros | Cons |
| Zero Bandwidth: Move 1TB of data without using a single KB of data. | Risk of losing or damaging the tiny card during transfer. |
| Batch Transfer: Move thousands of files simultaneously. | Not all modern phones (like the Pixel or S-series) have SD slots. |
Way 5. Cloud-based providers [Best for seamless syncing]
Cloud storage and file sharing services like Google Drive, OneDrive, and Dropbox offer a "set it and forget it" experience. This is the most modern way to ensure your phone photos are already waiting for you on your PC when you get home.
Comparison of Popular Services:
- Google Drive: Best for Android users (integrated into the OS).
- OneDrive: Best for Windows users (pre-installed on PC).
- Dropbox: Best for third-party app integrations.
Step-by-Step Guide (Using Google Drive):
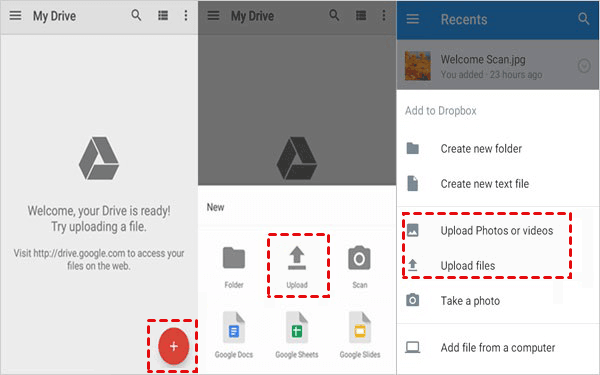
Step 1. Upload from Android:
- Open the Google Drive app on your Android phone.
- Tap the "+" (Plus) icon at the bottom right and select "Upload".
- Browse your folders and tap the files (photos, videos, or docs) you want to transfer.
- Wait for the "Uploading..." notification to finish.
Step 2. Access on PC:
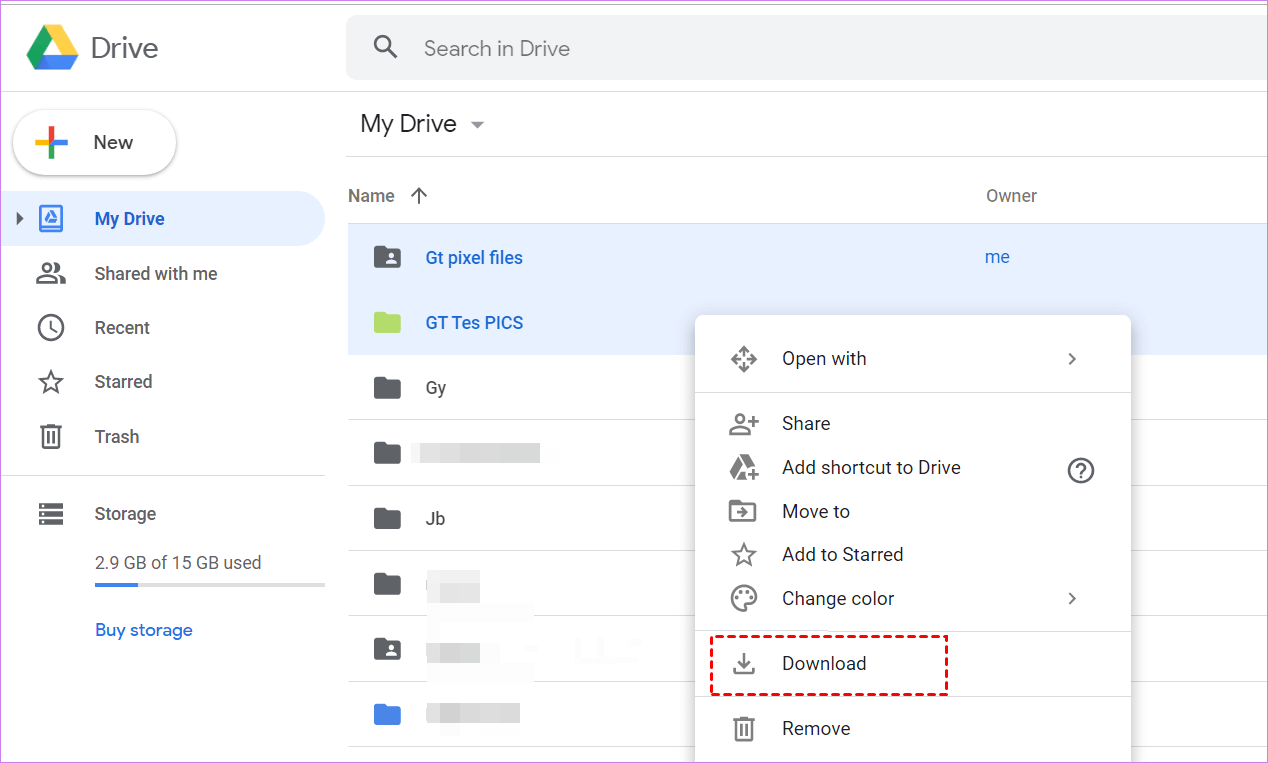
- Via Web Browser: Go to drive.google.com on your computer and sign in with the same Google account. Your uploaded files will appear in the "Recent" tab or "My Drive".
- Via Desktop App: If you have "Google Drive for Desktop" installed, the files will automatically sync to a virtual drive (usually labeled as Drive G:) in your File Explorer.
Step 3. Download to PC: Right-click the file on the Google Drive website and select "Download" to save it to your local hard drive.
Pros & Cons of Cloud Sharing
| Pros | Cons |
| Automatic Sync: Files upload in the background while you sleep. | Relies heavily on upload speeds (slow on weak Wi-Fi). |
| Universal Access: Access files from any device with a browser. | Limited free storage (15GB for Google, 5GB for OneDrive). |
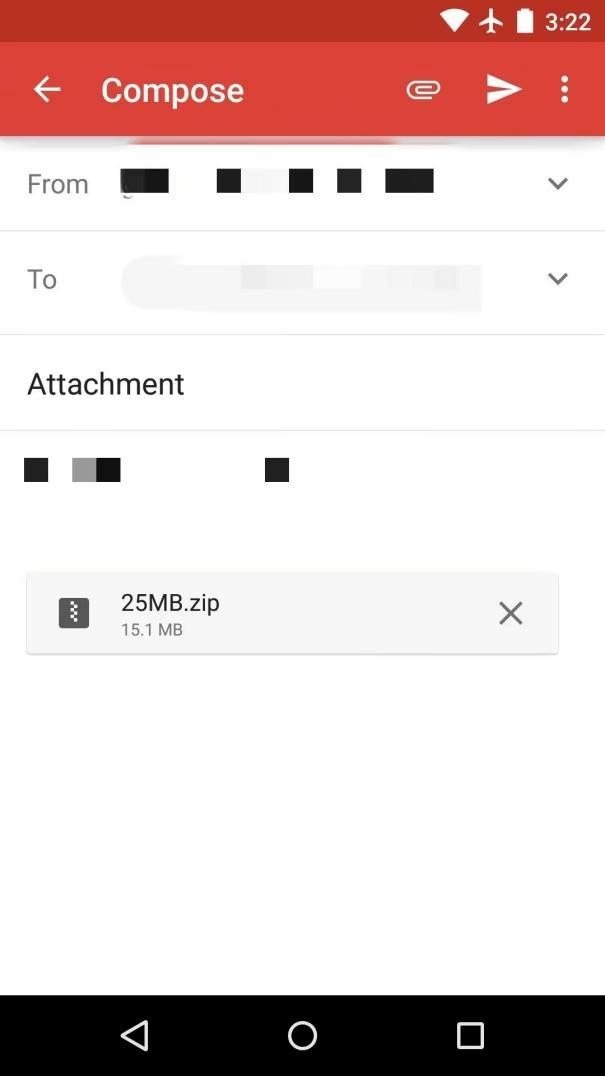
Way 6. Send small files via email [The "quick fix"]
We’ve all done it—emailing ourselves a PDF or a screenshot. It’s effective because it requires no configuration and provides a permanent "timestamped" record of the file in your inbox.
Detailed Step-by-Step Instructions:
Step 1. Select Your File: Open the Files app, Gallery, or Photos app on your Android device.
Step 2. Use the Share Menu: Long-press the file you wish to send (or select multiple) and tap the Share icon.
Step 3. Choose Your Email App: Select your preferred email client (e.g., Gmail, Outlook, or Yahoo Mail) from the list of apps.
Step 4. Address the Email: In the "To" field, type your own email address. You are essentially sending the message to yourself.
Pros & Cons of Email
| Pros | Cons |
| No Setup: Everyone already has an email account. | Size Limit: Most providers cap attachments at 20-25MB. |
| Multi-Purpose: You can add notes or context to the file in the body. | Clutters your inbox and uses up your email storage quota. |
Conclusion
In summary, the best way to send files from Android to PC depends on your file size and location. For massive data, a USB cable or SD card is fastest. For small, occasional files, Bluetooth or Email works in a pinch. However, for the best balance of speed, security, and the flexibility to transfer files from anywhere, AnyViewer is the ultimate professional solution. Choose the method that fits your workflow and start transferring with ease!
