
How to Set Up PC to PC Screen Mirroring (2 Easy Ways)
A step-by-step guide explaining how to set up PC to PC screen mirroring using Windows built-in features and AnyViewer for easy collaboration and display sharing.
By Ellie / Updated on June 16, 2026
Need to share your display with a colleague across the office, or want to turn an old laptop into a temporary second monitor? Mastering PC to PCscreen mirroring can instantly boost your productivity without requiring you to buy expensive new hardware.
Whether you need to collaborate on a project, troubleshoot a technical issue for a friend, or simply extend your digital workspace, learning how to mirror computer screen to another computer is a highly valuable skill.
This comprehensive guide will walk you through the absolute best ways to achieve this, covering both built-in Windows features and powerful third-party alternatives.
Step-by-Step Guide: How to Set Up PC to PC Screen Mirroring
Depending on your network setup and workspace needs, choose one of the two straightforward methods below to connect your screens.
Method 1: The Best Third-Party Solution – AnyViewer (Recommended)
While Windows has built-in tools, they often come with strict limitations, such as requiring both devices to be on the same Wi-Fi network or running specific Windows Pro editions.
If you want a hassle-free experience that works across different networks with zero lag, AnyViewer is the ultimate solution. AnyViewer is a professional remote desktop and screen-sharing software designed for speed, security, and simplicity. With its newly added "Mirror screen" feature, it allows you to effortlessly mirror Windows PC to another PC even if the computers are miles apart.
Why Choose AnyViewer?
- Added "Mirror screen" Feature: Mirror your current screen to another device in real time for easier presentations, screen sharing, online collaboration, and media viewing.
- High Performance: Offers 60 FPS rendering for smooth screen mirroring without stuttering.
- Over-the-Internet Mirroring: Unlike built-in Windows tools, AnyViewer works across different Wi-Fi networks and locations.
- End-to-End Encryption: Secured by Elliptic Curve Cryptography (ECC) encryption to keep your data safe.
- Built-in Extras: Includes high-speed file transfer, text chat, and multi-monitor support.
Step-by-Step: How to Mirror PC to PC with AnyViewer
Step 1. Download and Install: Download AnyViewer on both the source PC (the one you want to mirror) and the target PC. Install and launch the application.
Step 2. Create an Account: Sign up for a free account and log in to the same account on both computers. This automatically assigns the devices to your account for quick access.

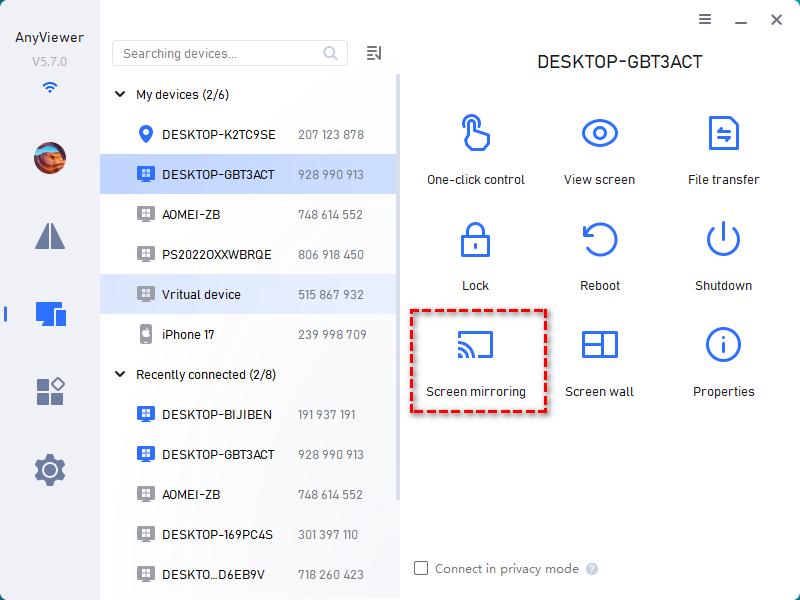
Step 3. Initiate the Screen Share: On the source PC, go to the Device menu, select the target PC, and click Screen Mirroring.
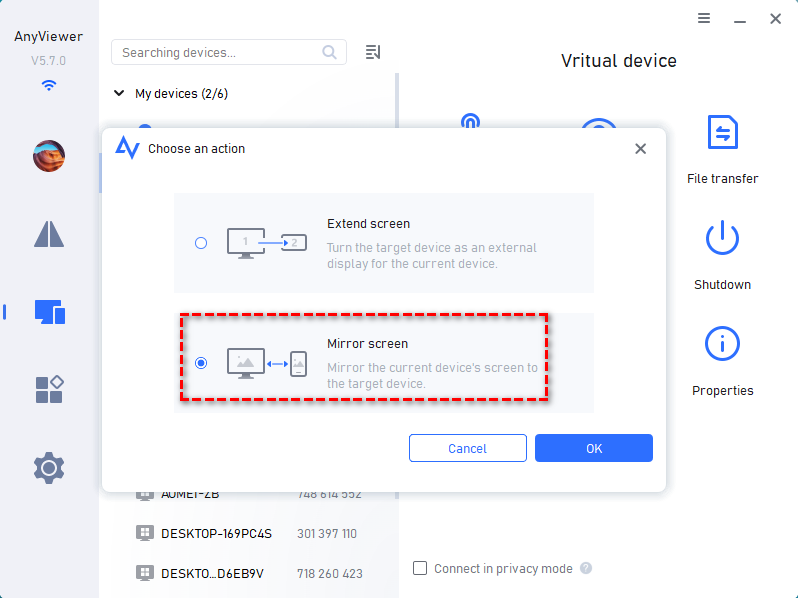
Step 4. Accept the Connection: Choose the Mirror Screen option and confirm. The screen will instantly mirror onto the target PC. You can choose to view only or take control if needed.
Method 2: How to Mirror PC to PC on Windows Built-in (Wireless Display)
If you are on a tight local network and prefer not to install third-party software, Windows 10 and 11 feature a built-in tool called "Projecting to this PC." This relies on Miracast technology to how to mirror PC to PC wirelessly.
Phase 1: Prepare the Receiving PC (The screen you want to project to)
Before you can cast, you must enable the Wireless Display feature on the computer that will act as the monitor:
Step 1. Open Settings (Press "Win + I").
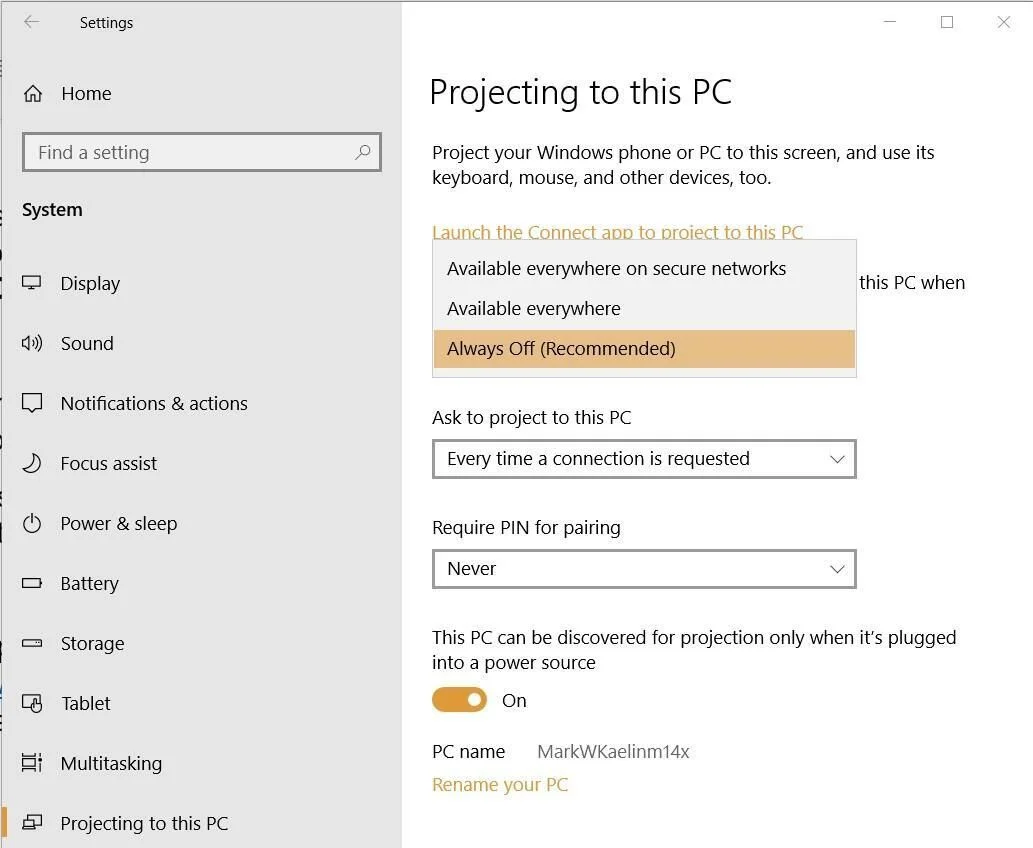
Step 2. Navigate to System > Projecting to this PC.
Step 3. If the options are greyed out, click Optional features and search for Wireless Display. Click Install.
Step 4. Once installed, go back to the Projecting to this PC menu.
Step 5. Change the first dropdown to Available everywhere on secure networks.
Phase 2: Connect the Source PC (The screen you want to share)
Now that the receiver is ready, follow these steps on your primary computer to launch the how to mirror windows pc to another pc process:
Step 1. On your main PC, press the Win + K shortcut keys to open the Cast menu.
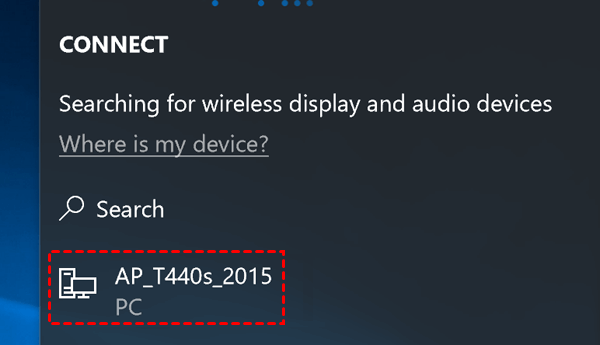
Step 2. Windows will automatically scan for available wireless displays.
Step 3. Select the name of your receiving PC from the list.
Step 4. A prompt will appear on the receiving PC. Click Allow.
Step 5. Check the box that says "Allow input from a keyboard or mouse connected to this device" if you want to control the source PC from the receiving screen.
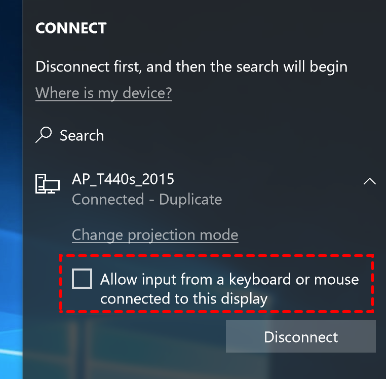
To stop mirroring, simply press Win + K again on the source PC and click Disconnect.
The Core Benefits of PC to PC Screen Sharing
Why should you bother learning how to mirror PC to PC? The practical applications span both professional and personal use cases:
- Cost-Effective Dual Monitor Setup: Don't waste money buying a second monitor. If you have a spare laptop lying around, you can use it to extend your desktop workspace.
- Seamless Collaboration: Instead of crowding around a single laptop during a meeting, you can screen share PC to PC so everyone can view the data clearly on their own devices.
- Remote Technical Support: Help family members or colleagues fix software glitches by viewing their screens in real-time.
- Improved Presentation Flexibility: Presenters can mirror their main workstation to a secondary PC connected to a projector or large boardroom display without dealing with messy HDMI cables.
Conclusion
Mastering PC to PC screen mirroring is an excellent, cost-effective way to boost your productivity and maximize your hardware. Whether you rely on Windows' built-in tools for quick local connections or choose a powerful solution like AnyViewer to safely mirror your display to another computer across different networks, setting up a screen share PC to PC has never been easier. Pick the method that best fits your workflow and upgrade your workspace today.
