
How to Use Whiteboard During Remote Support
To learn how to use whiteboard during remote support, start an authorized session, open the annotation tools, mark the relevant screen area, and explain the next action. This guide helps IT technicians, small business teams, and anyone assisting a less technical user turn confusing instructions into visible steps. AnyViewer is one option for combining remote computer access with whiteboard annotations and session chat.

By Ellie / Updated on September 8, 2026


What Does a Whiteboard Do During Remote Support?
A remote support whiteboard lets you draw attention to something on a shared desktop: a setting, an error message, or the button someone needs to click. Instead of saying “look near the bottom,” you can mark the exact area and explain what happens next.
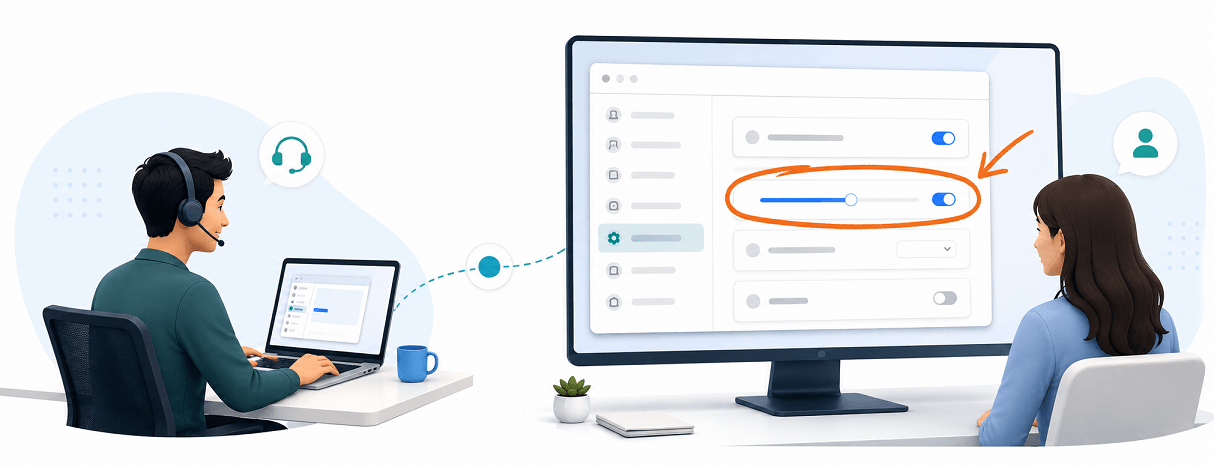
The word “whiteboard” can describe two different tools. A screen annotation overlay sits over the desktop you are discussing. A separate whiteboard canvas gives participants a space for diagrams and notes. For fixing software problems, an overlay usually keeps the instructions closer to the task.
|
Your task |
Suitable visual tool |
Practical advantage |
|
Identify a button or setting |
Screen annotation |
Keeps guidance beside the actual control |
|
Explain a connection or process |
Separate whiteboard canvas |
Provides space for a simple diagram |
|
Demonstrate a software fix |
Annotation plus remote control |
Connects an explanation to the action |
|
Leave repeatable instructions |
Written steps and an approved image |
Gives the user something to revisit |
How to Use Whiteboard During Remote Support: Step by Step
The workflow below applies broadly to remote support software. Tool names and permissions vary, so check your application's current instructions before the session.
1. Prepare the User and the Desktop
Confirm what the user needs help with and whether they want you to demonstrate the fix or guide them through it. Close unrelated windows and notifications, then bring the affected application into view.
Only access devices, accounts, and files that you own or are explicitly authorized to use. Explain that drawing on the screen and controlling the computer are separate activities, even when the same application provides both.
2. Establish the Remote Session
Connect through your approved remote support tool and have the user accept the request when using attended support. Confirm that you are both discussing the same application and monitor before annotating.
Ask the user to identify one visible item, such as the window title. This quick check can catch a wrong-monitor selection before you spend time explaining a screen they cannot see.
3. Open the Whiteboard or Annotation Tools
Find the whiteboard or annotation command in the active session's controls. Select a drawing tool available in your application and place a small test mark in an unused area.
Ask whether the user can see it. Do not assume that a mark visible in your own viewing window is also visible to the person receiving support. Confirm the behavior before giving instructions that depend on it.
4. Mark One Target and Explain One Action
Circle the relevant control or draw a short line beside it. Keep labels and error codes readable. Say the control's name aloud or type it in chat so the instruction does not depend entirely on color or shape.
For example: “Open the menu beside the circled printer name.” That gives the user both a visual reference and a specific action. Avoid covering the whole screen with marks for steps you have not reached yet.
5. Return to Interaction Mode
Switch out of drawing mode before attempting to click or type, where your application requires it. Otherwise, a mouse movement intended to operate the computer may simply create another annotation.
Agree on who will act next. If the user is learning a routine task, let them perform the step. If you need to demonstrate, explain what you are about to change before taking control.
6. Clear, Verify, and Repeat
Remove outdated marks when the page scrolls, a dialog opens, or the task moves to another monitor. Screen annotations should not be assumed to track the underlying button as the layout changes.
Check the result after each action. At the end, ask the user to repeat the key step without a mark. Provide brief written instructions, save any permitted reference material, and disconnect.
Why Use AnyViewer for Visual Remote Assistance?
Switching between a support session, a messaging application, and a separate drawing tool can interrupt an explanation. AnyViewer is worth considering when you need to troubleshoot an authorized computer and show the user what you mean within the remote support workflow.
Its remote desktop collaboration features include whiteboard annotations, session chat, and screenshots. These address different parts of the same conversation:
- Whiteboard annotations draw attention to the part of the remote desktop under discussion.
- Text chat provides a place for exact setting names and short instructions.
- Screenshots can provide a reference for follow-up, subject to permission and a check of what the capture includes.
For this use case, the combination is more relevant than a long list of unrelated remote access features. Review the available tools for your intended devices before choosing your setup.
Start an Attended Support Session
For the documented PC-to-PC request workflow:
- Install and open AnyViewer on both computers.
- On the recipient computer, check that accepting remote control is enabled under Settings > Recipient.
- On the technician's computer, open Connect, enter the remote device ID, and select Connect.
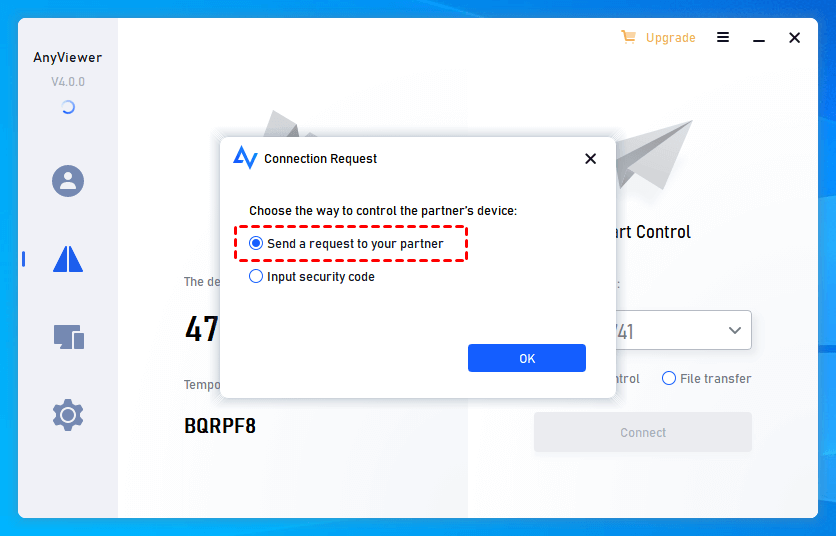
- Choose “Send a control request to your partner” and confirm. The recipient selects Allow to start the session.
Once connected, locate the whiteboard control available in your session and follow the mark–explain–act–verify process above. Confirm annotation visibility with the recipient before relying on it.
The official feature overview confirms whiteboard support but does not specify every platform combination, toolbar path, or export behavior. Verify these details in your installed version. A feature listed for the product should not be treated as a promise of identical behavior across desktop and mobile clients.
If you regularly guide customers or coworkers through computer problems, explore AnyViewer's remote desktop solution and test this workflow on an authorized device before your next support appointment.
Example: Explain a Printer Setting Without Taking Over
Imagine a colleague has two similar printer entries and keeps selecting the wrong one. This is an illustrative support scenario, not a measured product test.
Open the relevant print dialog together. Mark the printer selection field and ask the colleague to read the selected name. Remove the mark before they open the list, then identify the intended printer by its full name. Once selected, ask them to confirm the destination before printing a test page.
The useful sequence is:
- Identify the current selection.
- Explain how to recognize the intended printer.
- Let the colleague change it.
- Verify the output and leave a short reminder.
The annotation makes the setting easier to find; the explanation teaches the decision. Avoid changing unrelated printer settings simply because remote control is available.
Troubleshoot Common Whiteboard Problems
Start with the session view and tool mode before changing computer settings. Many confusing symptoms involve what is being displayed or which input mode is active.
|
Problem |
What to check |
Next action |
|
No whiteboard control |
Client, platform, session type, permissions |
Confirm support for the exact device combination |
|
User cannot see marks |
Selected monitor and annotation visibility |
Make a test mark and ask where it appears |
|
Clicking draws lines |
Drawing mode is still active |
Exit annotation mode before interacting |
|
Marks point to old positions |
Scrolling, resizing, or monitor changes |
Clear the marks and annotate the current view |
|
Text is difficult to read |
Viewing scale and image quality |
Enlarge the view; keep labels unobstructed |
For a delayed connection, pause between marking and speaking, wait for confirmation, and avoid unnecessary screen movement. If annotations remain unavailable, use exact control names in chat and guide one step at a time.
Make the Next Support Session Easier to Follow
Use whiteboard annotations to identify one target, explain one action, and verify one result. Clear the screen as the task changes and let the user practice before you finish.
To put this into practice, review AnyViewer's collaboration tools, start an authorized session, and test one visible annotation together. Build the rest of the explanation around what the user actually needs to do.



 as a preferred
source on Google
as a preferred
source on Google