
How to Add a Virtual Monitor to a Remote Device
Need more screen space? This guide shows you how to add virtual monitors remotely using software drivers, no hardware dummy plugs required.
By Ellie / Updated on March 17, 2026
In the modern era of hybrid work and remote IT management, the limitations of a single physical screen can be a major bottleneck for productivity. Whether you are a software developer needing extra screen real estate for debugging, a graphic designer multitasking across applications, or an IT professional managing a headless server, the ability to add a virtual monitor to a remote device is a game-changer.
This guide explores why virtual displays are essential, the technical mechanics behind them, and a detailed breakdown of the top 5 software solutions to expand your remote workspace.

Top 5 Software Solutions for Adding Virtual Displays
While many remote desktop tools exist, only a select few provide the specialized drivers necessary to simulate a secondary or tertiary monitor. Here are the best tools for the job.
1. AnyViewer: Easy Virtual Multi-Screen Setup
AnyViewer has quickly gained popularity among both individuals and businesses as a reliable remote desktop software, thanks to its fast connection speeds and clean, user-friendly interface. One of its standout capabilities is the Virtual Screen feature, which allows users to simulate additional monitors without complicated setup or extra hardware.
Key Features
- No Extra Hardware Needed: Generate multiple virtual displays without using physical dummy plugs or adapters.
- Independent Workspaces: Open and run different applications on each virtual monitor, making multitasking more efficient.
- Separate Screen Windows: Display multiple remote screens in individual windows and easily rearrange them by dragging tabs in or out.
- Smooth Performance: Optimized frame rates ensure that virtual monitors operate smoothly, delivering a responsive experience similar to using a real display.
How to Create a Virtual Screen in AnyViewer
Step 1. Open AnyViewer and connect to the target computer to start a remote control session.

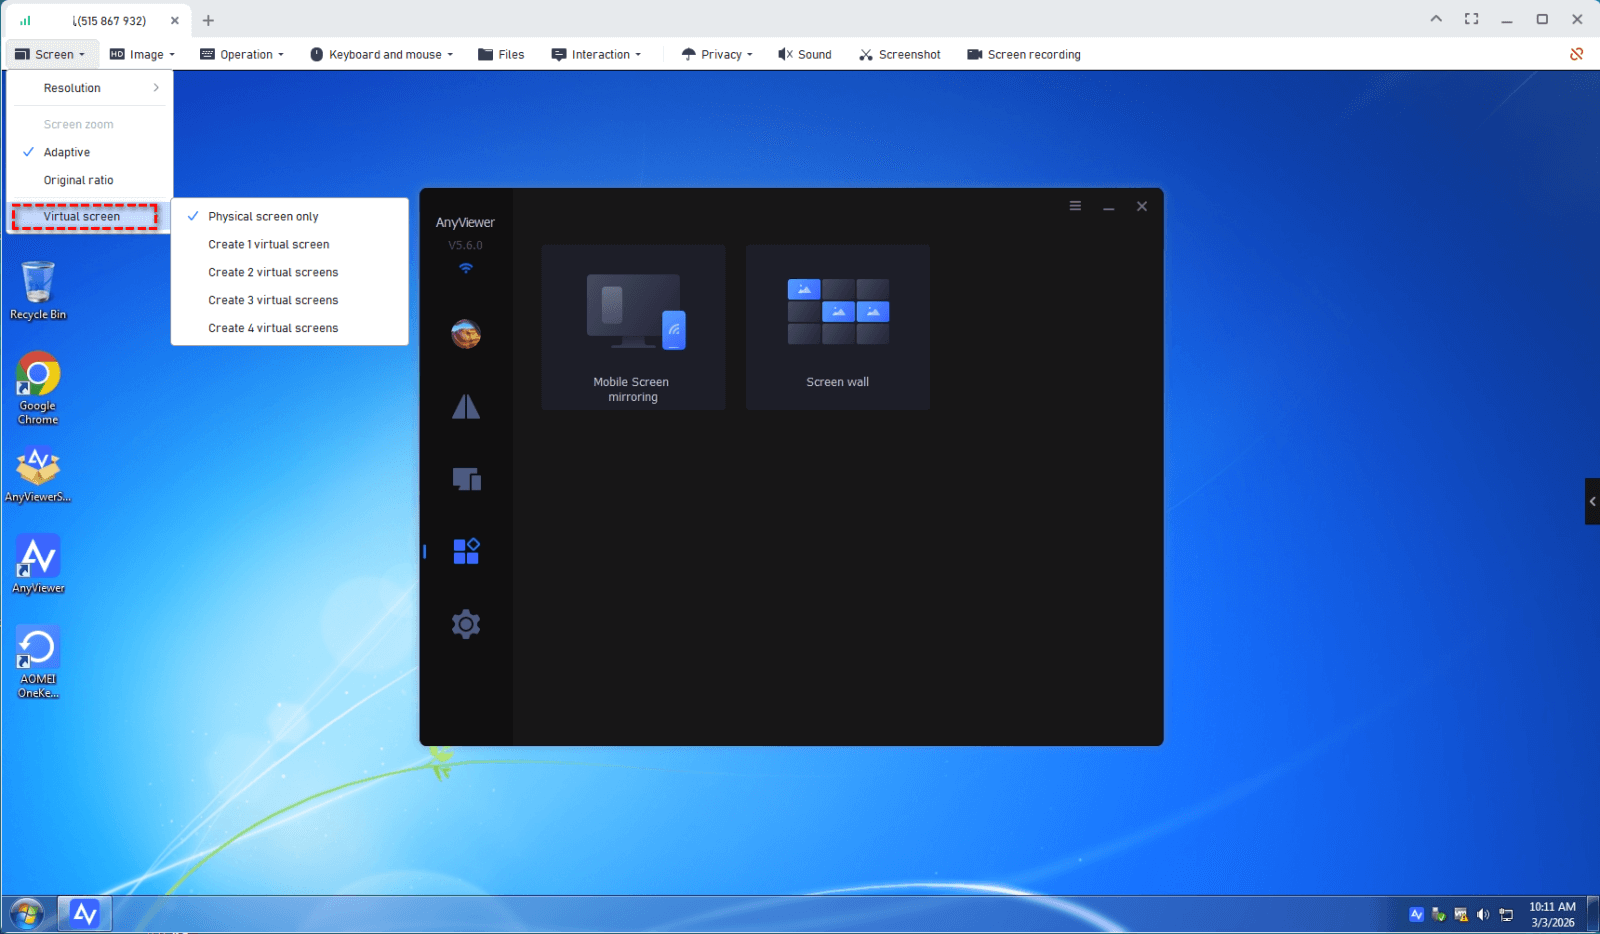
Step 2. Once connected, locate the toolbar at the top of the remote session window and click the Screen tab.
Step 3. From the dropdown options, select Virtual Screen.
Step 4. Choose how many virtual monitors you want to add, such as two or three displays.
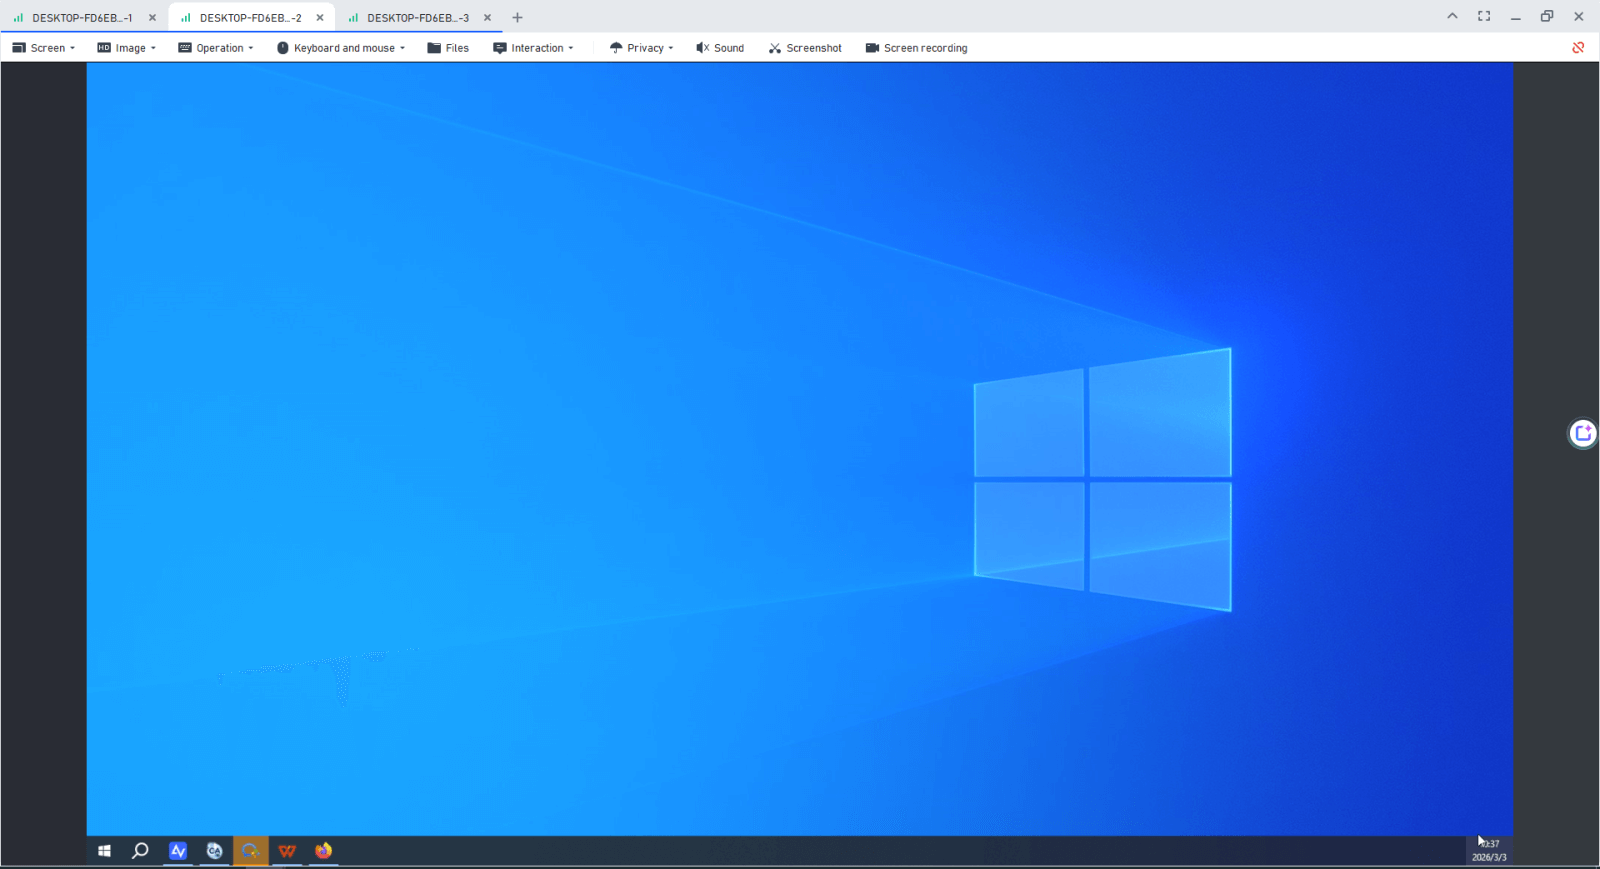
Step 5. The virtual screens will be created instantly. Switch between them using the toolbar, or move application windows across the invisible boundary to place them on another virtual display.
2. TeamViewer: Enterprise-Level Virtual Display Support
TeamViewer is widely recognized as a leading solution for remote connectivity, especially in professional and enterprise environments. Its virtual monitor capability is particularly useful for Windows-to-Windows remote sessions, making it an effective option for IT teams responsible for managing servers, unattended systems, or kiosk devices.
Key Features
- Smooth Integration: Virtual displays are integrated directly into the standard View menu, appearing alongside any connected physical monitors.
- Multi-Monitor Grid Mode: All displays—both physical and virtual—can be viewed simultaneously in a grid layout, providing a clear overview of every screen.
- Optimized for Unattended Access: Works seamlessly with TeamViewer Host, allowing administrators to manage headless systems with reliable 24/7 connectivity.
How to Create a Virtual Screen in TeamViewer
Step 1. Begin a remote control session with the target device that has Easy Access enabled.
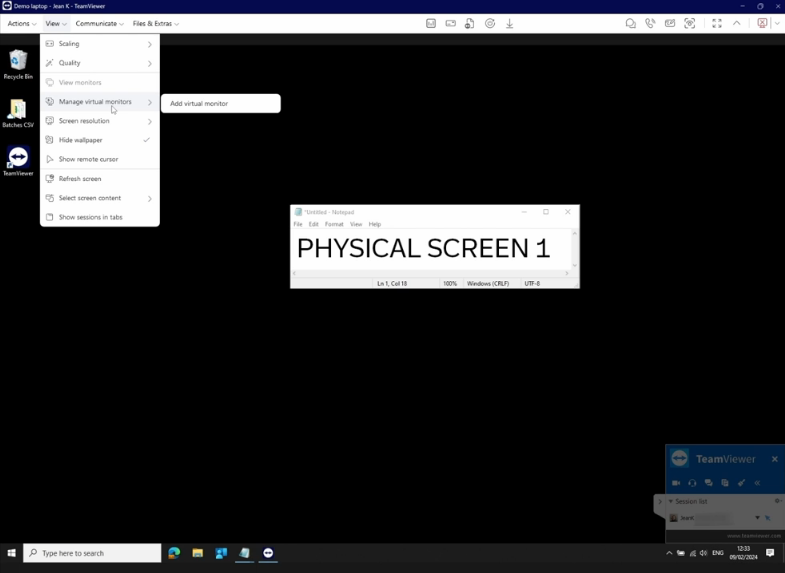
Step 2. In the remote session window, open the toolbar and select the View menu.
Step 3. Click Manage virtual monitors, then choose Add virtual monitor.
Step 4. If this is the first time using the feature, you may be asked to install the TeamViewer virtual display driver. Complete the installation when prompted.
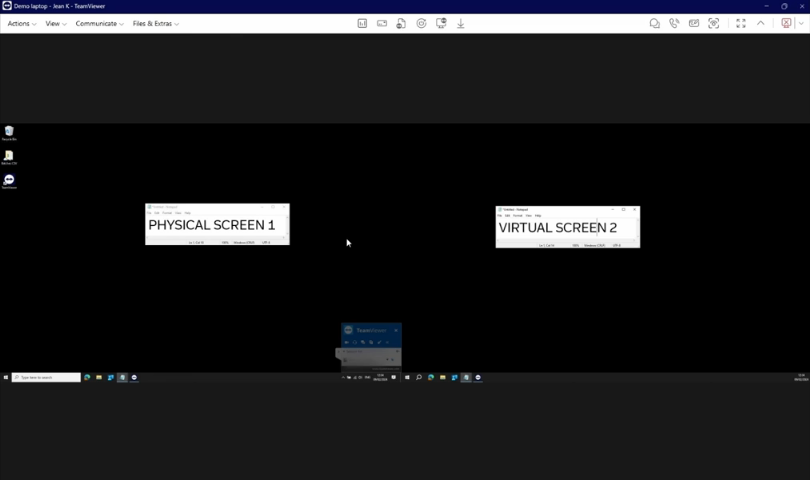
Step 5. After the virtual monitor is created, use the Monitor Switch button in the toolbar to move between the physical display and the newly added virtual screens.
3. Zoho Assist: A Reliable Tool for Remote Troubleshooting
Zoho Assist is designed primarily for remote support and unattended remote access scenarios. Its virtual monitor capability is particularly valuable for technicians who frequently connect to servers or laptops running with the lid closed—situations where the remote session may otherwise display a blank or black screen.
Key Features
- Automatic Driver Configuration: The ZAVirtualDisplayDriver is installed and configured automatically to ensure proper screen rendering during remote sessions.
- Black Screen Solution: Helps resolve situations where laptops stop sending a display signal after the lid is closed.
- Optimized for Headless Systems: Ideal for managing servers and industrial computers that operate without a connected monitor.
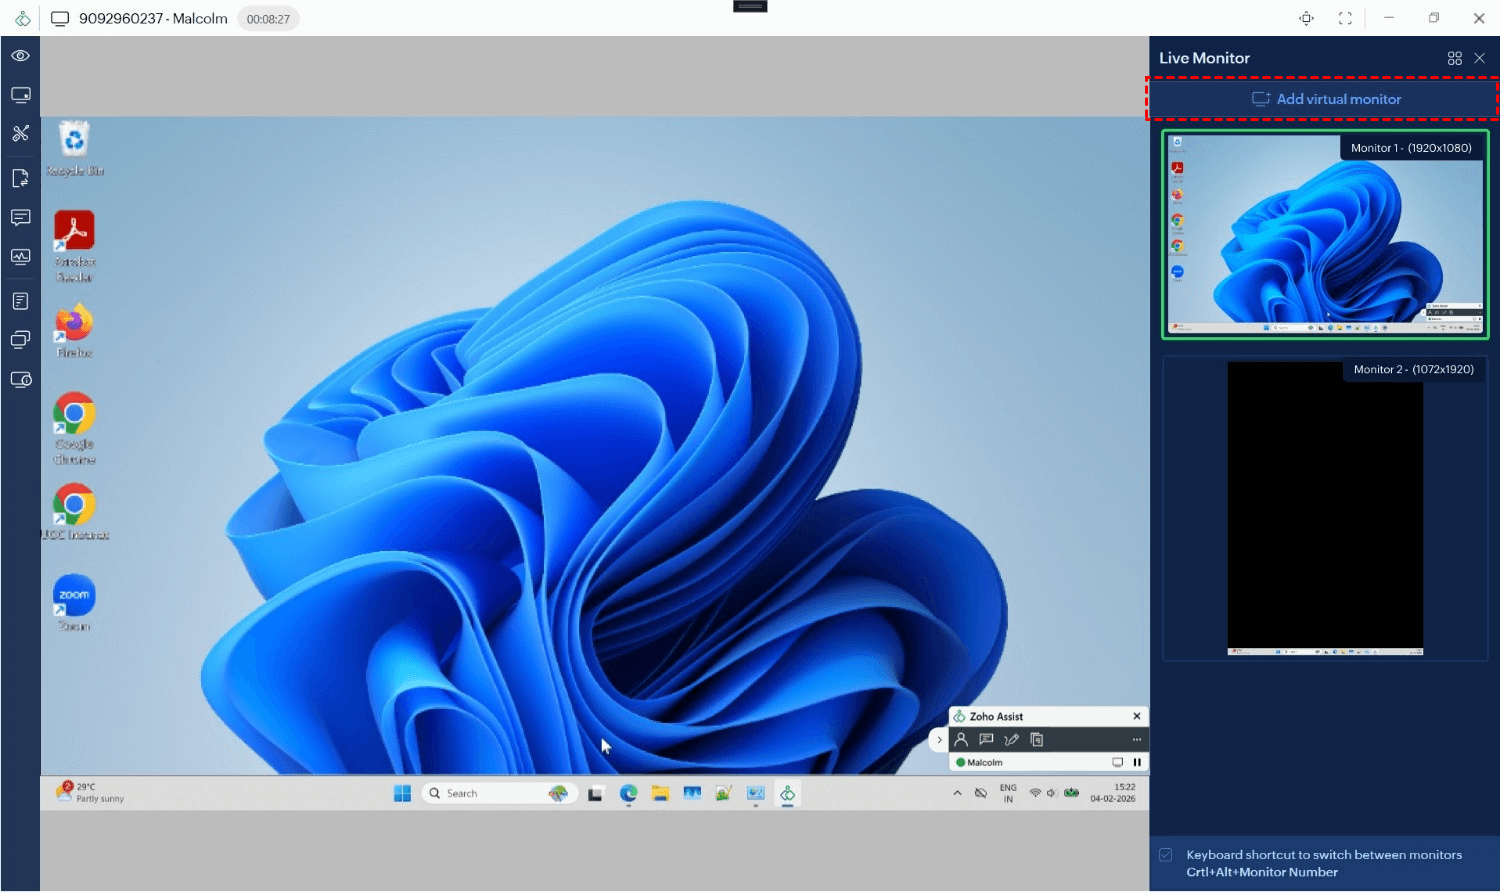
How to Create a Virtual Screen in Zoho Assist
Step 1. Start by connecting to the remote device configured for unattended access (Windows 10 or later).
Step 2. In the remote session interface, open the Session tab at the top or access the Monitors panel on the right side.
Step 3. Click Add Virtual Monitor.
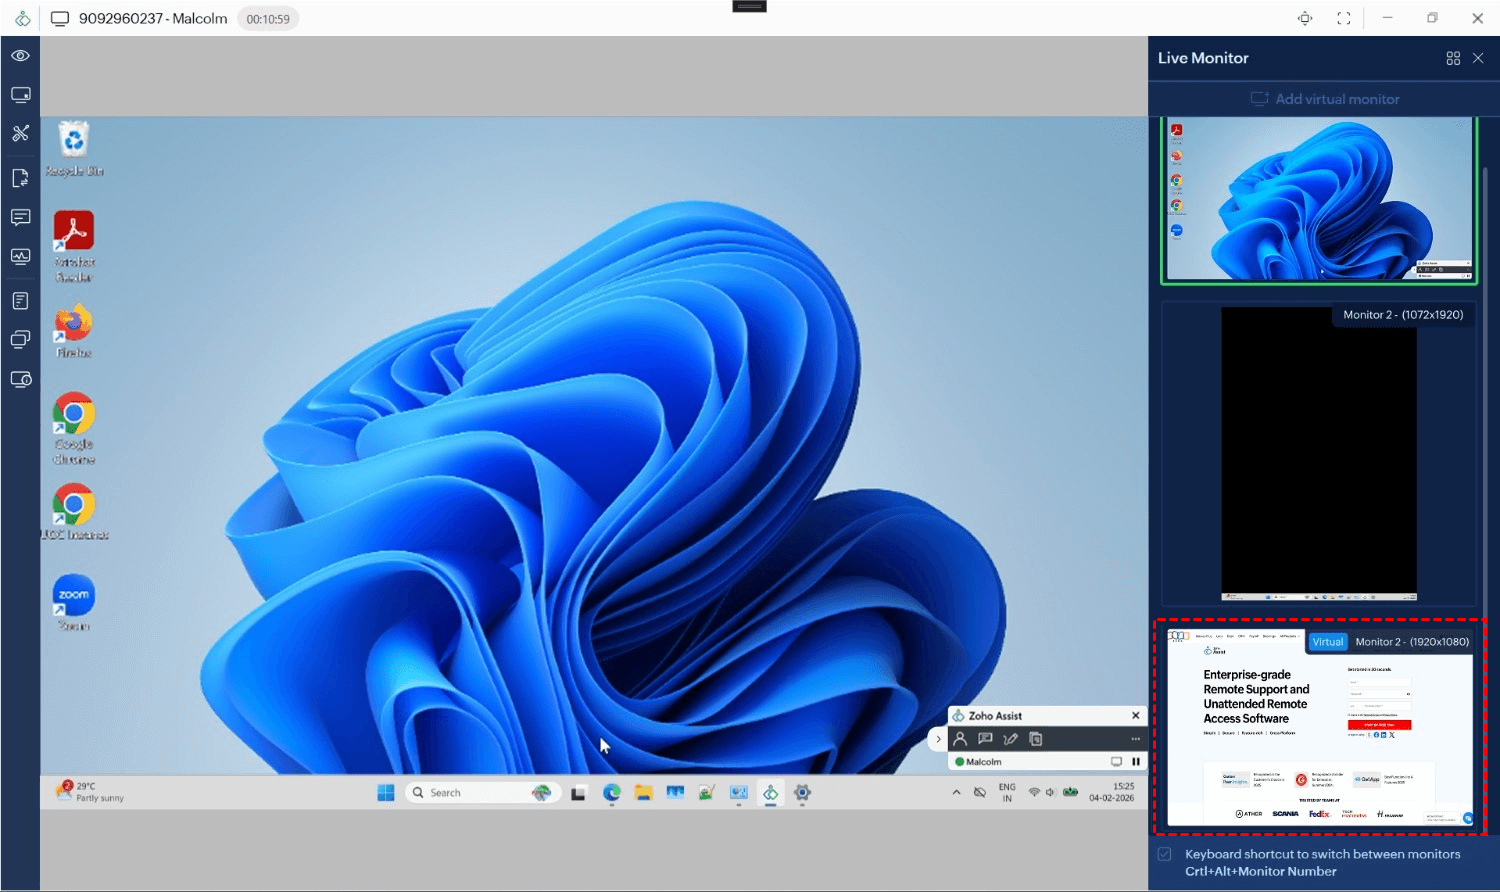
Step 4. A prompt will appear on the remote computer asking to install the display driver. This installation can also be pre-approved for silent deployment.
Step 5. After the driver is installed and activated, the new virtual monitor will appear in your display layout. You can switch to it or move application windows to this additional workspace.
4. Splashtop: High-Performance Multi-Monitor Support
Splashtop is widely recognized for its low-latency streaming, making it a top choice for creative professionals. For those needing to add a virtual screen to a remote device, Splashtop provides a sophisticated driver-based solution that lets users remote into a computer and use multiple monitors, even when the remote computer has only one.
Key Features:
- Multi-to-Multi Monitor: Map multiple remote monitors to multiple local monitors 1:1.
- Virtual Display Driver: Users can inject a virtual display driver to create additional screens on the fly.
- 4K Streaming: Supports high-resolution virtual displays for detailed work.
Steps to Create a Virtual Screen in Splashtop:
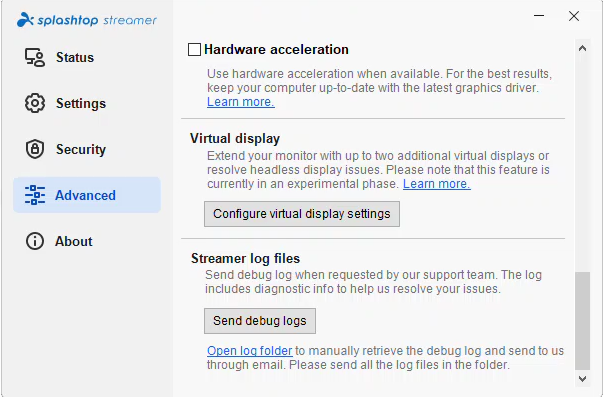
Step 1. On the remote computer, open the Splashtop Streamer agent and navigate to the Advanced tab.
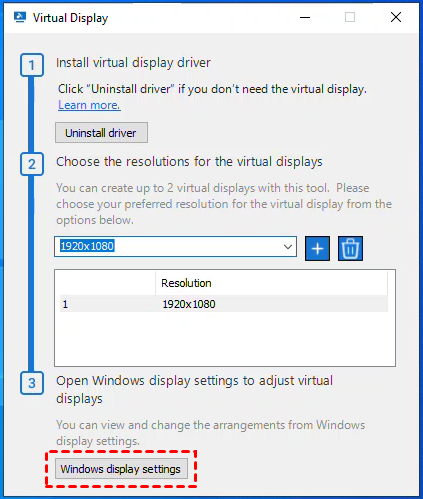
Step 2. Scroll down to the Virtual display section and click on Configure virtual display settings.
Step 3. In the configuration window that appears, click Install driver. This may require administrative privileges.
Step 4. Once the driver is active, select your desired resolution for the virtual displays from the list, then click Add.
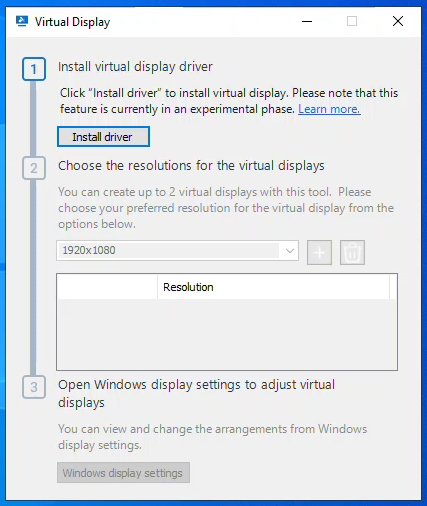
Step 5. If you need to change the positioning of these screens, click Windows display settings within the same window to drag and arrange the monitors.
5. RealVNC: Flexible Virtual Desktops
RealVNC (specifically VNC Connect) utilizes a different approach, often leveraging the underlying operating system's ability to create virtual desktops. While more technical to set up than AnyViewer, it offers unparalleled flexibility for Linux and Windows power users.
Key Features:
- Virtual Mode: Create a virtual desktop that exists only in the system's RAM, independent of the physical console.
- Custom Resolutions: Define exact pixel dimensions for your virtual screens.
- Cross-Platform: Strong support for adding virtual screens on Linux distributions.
Steps to Create a Virtual Screen in RealVNC:
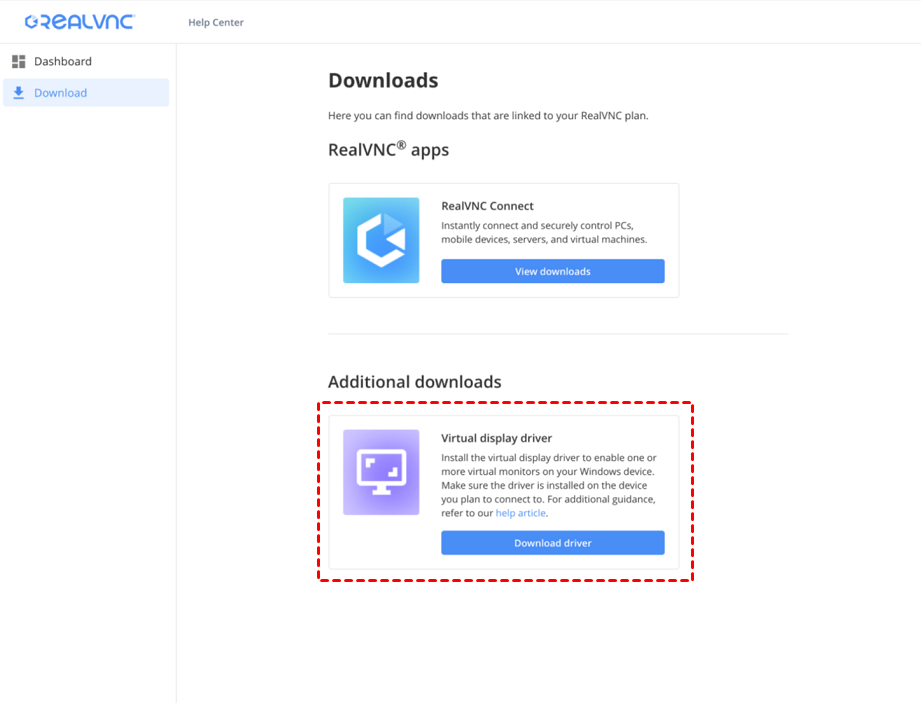
Step 1. Log in to the RealVNC Connect Portal and navigate to the Downloads section to find the Virtual Display Driver.
Step 2. Transfer and run the MSI installer on the remote computer where you want to add the virtual displays.
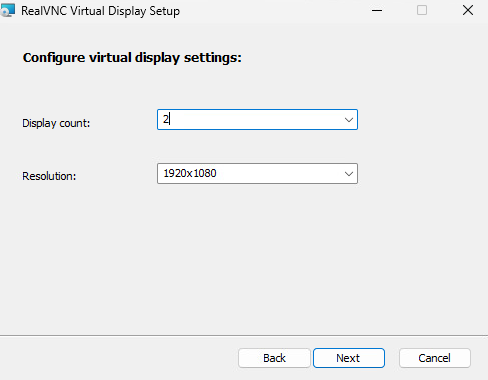
Step 3. During the installation process, you will be prompted to select:
- Number of Displays: Choose up to 3 virtual monitors.
- Resolution: Select your preferred resolution (e.g., 1920x1080 or 2560x1440).
Step 4. For multiple devices, use an endpoint management solution to deploy the MSI with specific parameters, such as COUNT=2 RESOLUTION=1920x1080.
Step 5. Once installed, start your remote session. The new virtual displays will function exactly like physical monitors. You can manage their arrangement by right-clicking the remote desktop and selecting Windows Display Settings.
Why Add a Virtual Monitor to Your Remote Device?
When you connect to a remote PC, you are typically limited by the hardware connected to that machine. If the remote computer has only one monitor, or worse, no monitor at all (a "headless" system), your remote session will be cramped or even fail to display a desktop.
By adding a virtual screen to a remote device, you unlock several benefits:
- Enhanced Productivity: Run multiple apps side-by-side without constantly minimizing windows.
- Headless System Management: Access servers or PCs that don't have a physical monitor attached.
- Cost Efficiency: Eliminate the need for physical "dummy HDMI plugs" or additional hardware.
- Seamless Organization: Dedicated screens for email, coding, and communication tools.
Conclusion
The ability to add a virtual monitor to a remote device is no longer a luxury, it is a necessity for efficient remote work. Tools like AnyViewer offer the most straightforward, hardware-free path for users who need a quick expansion, while TeamViewer and Zoho Assist provide the heavy-duty features required for enterprise and support environments.
By moving beyond the limitations of physical hardware, you can create a customized, high-productivity workspace that follows you wherever you go.
