
Which Port Is Used by Remote Assistance and Remote Desktop? [Answered]
Do you know which port is used by Remote Assistance and Remote Desktop? If you don’t know, don’t worry, find the answer in this post. Besides, this post also introduces how to use Remote Assistance and Remote Desktop and what their differences are.
By Ellie / Updated on December 13, 2024
Which port is used by Remote Assistance and Remote Desktop?
Many of you may wonder which port is used by Remote Assistance and Remote Desktop. Actually, the answer is quite easy. As we all know, Remote Assistance and Remote Desktop are both Microsoft programs about connecting to remote machines via Remote Desktop Protocol (their differences will be specified later). Remote Desktop Protocol (RDP) is a Microsoft proprietary protocol that enables remote connections to other computers, typically over TCP port 3389.

Therefore, we can conclude that both Remote Assistance and Remote Desktop use TCP port 3389 to achieve remote access.
What are the differences between Remote Assistance and Remote Desktop?
Although both Remote Assistance and Remote Desktop are used to remotely access another computer, they still have predominant differences. Here in this part, we’ll introduce their differences.
Remote Assistance is commonly used for tech support purposes. With Remote Assistance, you let some trusted helpers, for example, technicians, access your PC to fix whatever problems you may have. During the whole remote assistance, you’ll remain in control of your system and will be able to interfere if something goes wrong.
Remote Desktop is commonly used to remotely control another computer. Technically, the controller has full control of the host computer. Once connected successfully, the screen of the host computer will turn black, and people on the host side can’t see what’s happening on the host computer. Therefore, Remote Desktop is normally used to access your own remote computers.
How to use Remote Assistance and Remote Desktop
Next, we’ll get to know how to set up Remote Assistance and Remote Desktop respectively.
How to use Remote Assistance
Here we’ll take Windows 10 and Windows 7 as an example. The steps to offer Remote Assistance from Windows 10 to Windows 7 can be divided into the following three parts:
- Enable remote assistance on Windows 7
- Invite helper on Windows 7
- Accept invitation on Windows 10
Part 1. Enable remote assistance on Windows 7
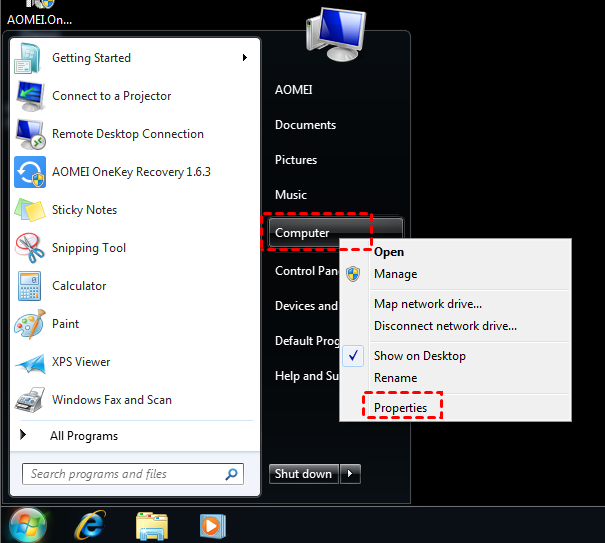
Step 1. Click Start and then find Computer. Right-click Computer, then click Properties.
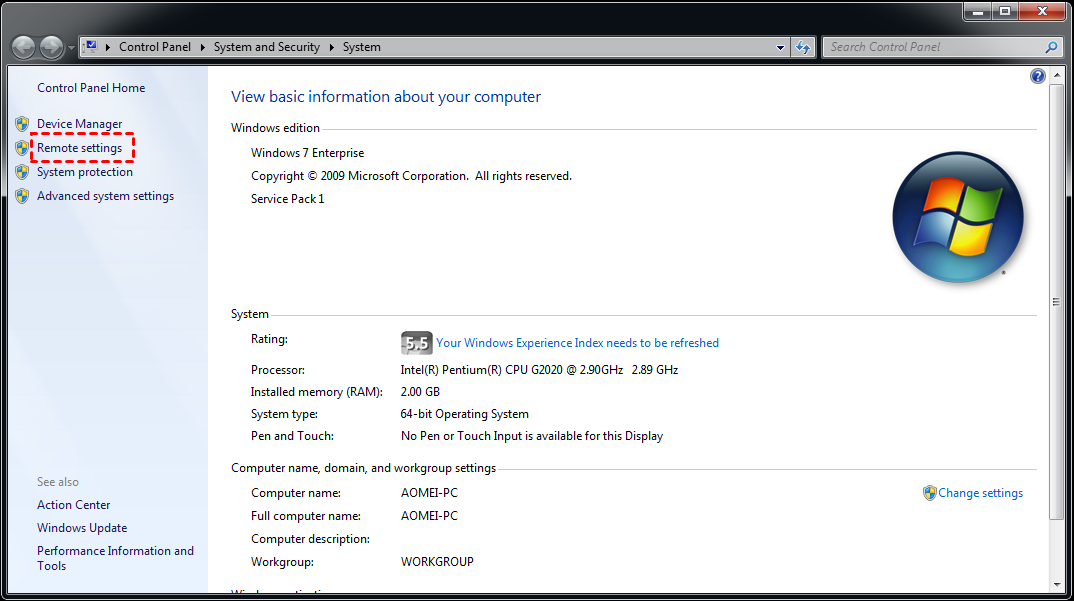
Step 2. Locate and then click Remote settings.
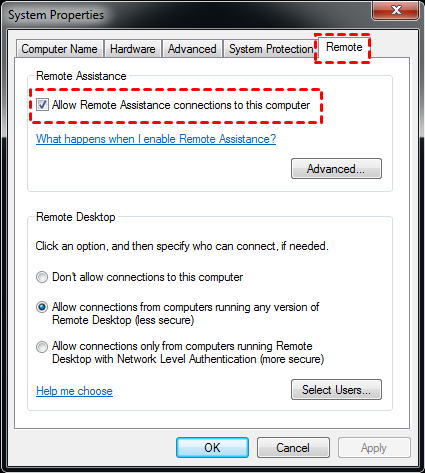
Step 3. On the Remote tab, tick Allow Remote Assistance connections to this computer. Then click Apply and OK.
Part 2. Invite helper on Windows 7
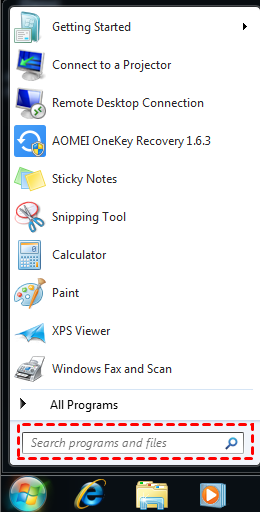
Step 1. On Windows 7, search for “Remote Assistance” in the search box, and then open it.
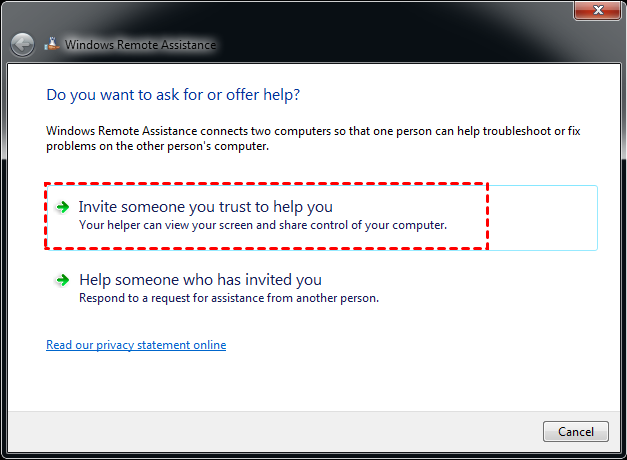
Step 2. Click Invite someone you trust to help you.
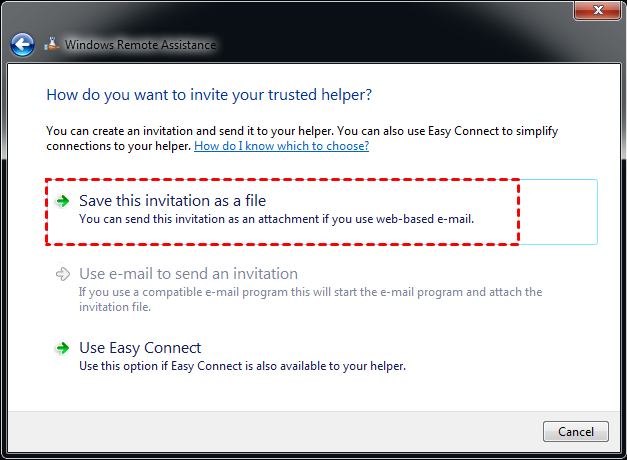
Step 3. Click Save this invitation as a file. You can save the invitation on your desktop.
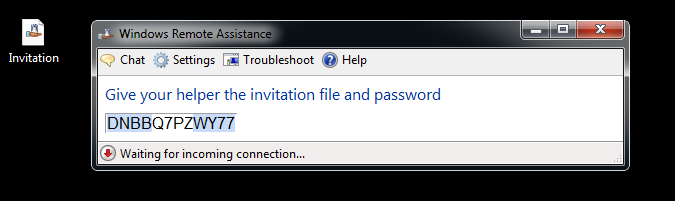
Step 4. Sent the invitation on your desktop and the password on the window to Windows 10.
Part 3. Accept invitation on Windows 10
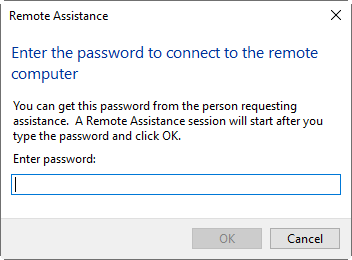
Step 1. On Windows 10, double-click the Remote Assistance invitation and then you’ll be asked to enter the password. Click OK after inputting the password.
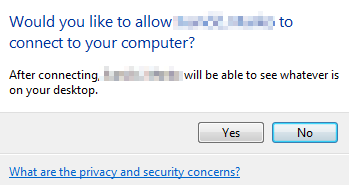
Step 2. On Windows 7, there will be a pop-up window asking whether to allow Windows 10 to connect to this computer, click Yes.
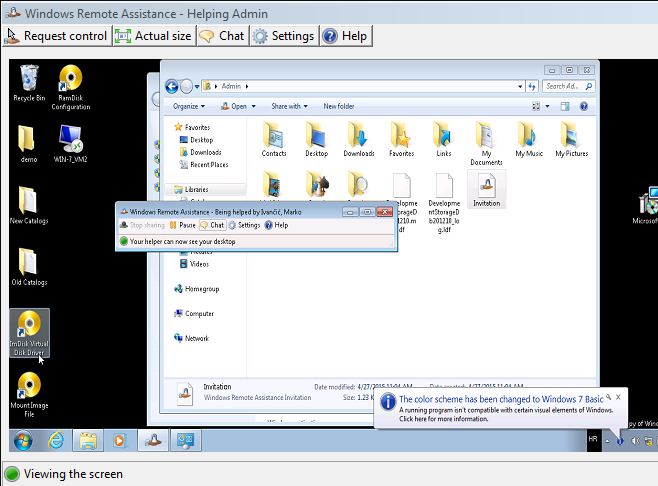
Step 3. Then you can offer remote assistance from Windows 10 to Windows 7.
How to use Remote Desktop
The steps to set up Remote Desktop can also be divided into three parts:
- Set up Remote Desktop on the host computer
- Find out the IP address and user name of the host computer
- Start remote control on the client computer
Part 1. Set up Remote Desktop on the host computer
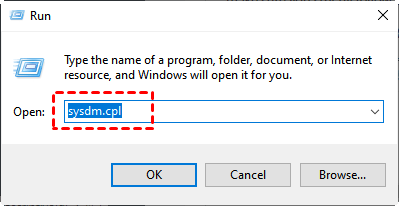
Step 1. Press Win + R to open Run box. Type “sysdm.cpl” in the entry bar and press Enter to open System Properties.
Step 2. In the System Properties window, go to Remote tab, and check “Allow remote connection to this computer”.

Part 2. Find out the IP address and user name of the host computer
Step 1. Press Win + R to invoke the Run dialog box. Type in “cmd” and press OK.

Step 2. Then type in “ipconfig” and press Enter. Now you can see a group of IP addresses, of which the IPv4 address is the one you need.

Step 3. Then type "query user" to see the username.

Part 3. Start remote control on the client computer
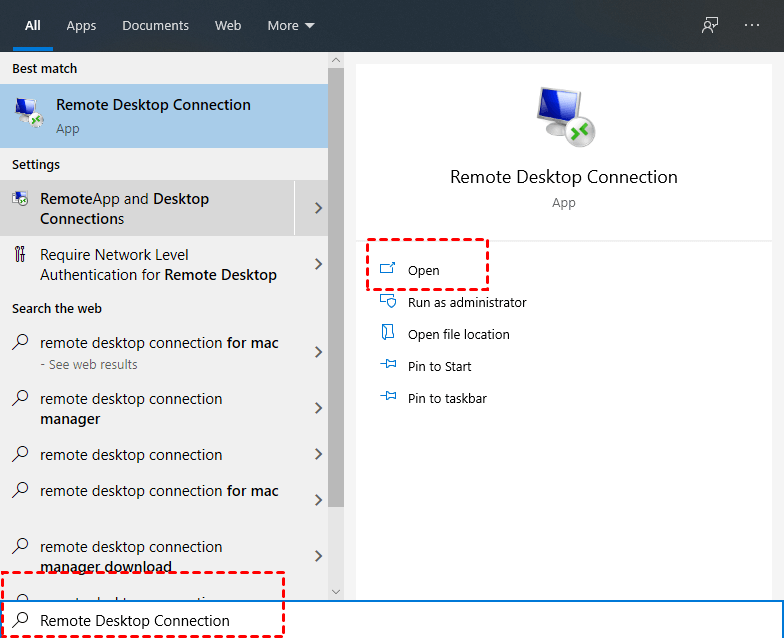
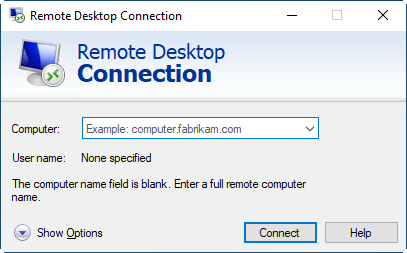
Step 1. The client computer doesn’t need any configuration. Just search for Remote Desktop Connection in the Search box. And then open it.
Step 2. Enter the IP address and user name in the Remote Desktop Connection interface to achieve connection.
AnyViewer: Free third-party remote desktop software for Windows
In the end, we would like to introduce another free and easy remote desktop software to you, which is AnyViewer. It can be regarded as the best alternative to Remote Assistance and Remote Desktop for the following reasons:
- Remote Assistance and Remote Desktop can’t provide unattended remote access, while AnyViewer can.
- Remote Desktop requires an IP address and user name to achieve remote access, while AnyViewer doesn’t.
- Remote Assistance and Remote Desktop are not available on Windows 10 Home Edition, while AnyViewer supports Windows 10 Home Edition.
After comparing AnyViewer with Remote Assistance and Remote Desktop, you may now want to try it yourself. But please note that AnyViewer uses UDP/TCP intelligent switching modes; its UPD port is 30196 and TCP ports are 30192, 30193. Make sure the supported ports are allowed through Firewall.
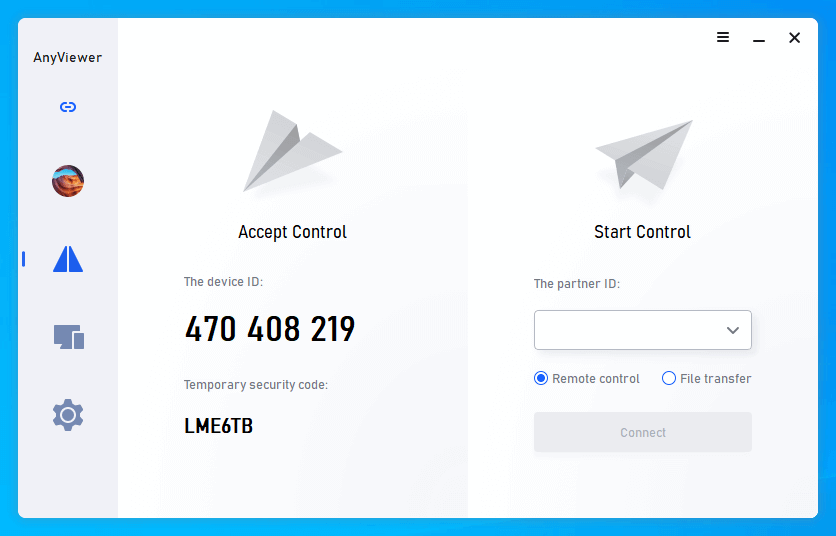
Step 1. Download, install, and launch AnyViewer on both computers.
Step 2. Go to Log in, and then click Sign up. (If you already have signed up on its official website, you can log in directly.)

Step 3. Fill in the signup information.

Step 4. Then you can see you successfully logged in to AnyViewer. Your device will automatically be assigned to the account you've logged in to.

Step 5. Log in to the same AnyViewer account on the two devices, then click One-click control to achieve unattended remote access.

Conclusion
This post mainly introduces which port is used by Remote Assistance and Remote Desktop. Besides, the differences between Remote Assistance and Remote Desktop and how to use them are introduced as well. If you are also interested in a Remote Assistance and Remote Desktop alternative, you can try AnyViewer.
