
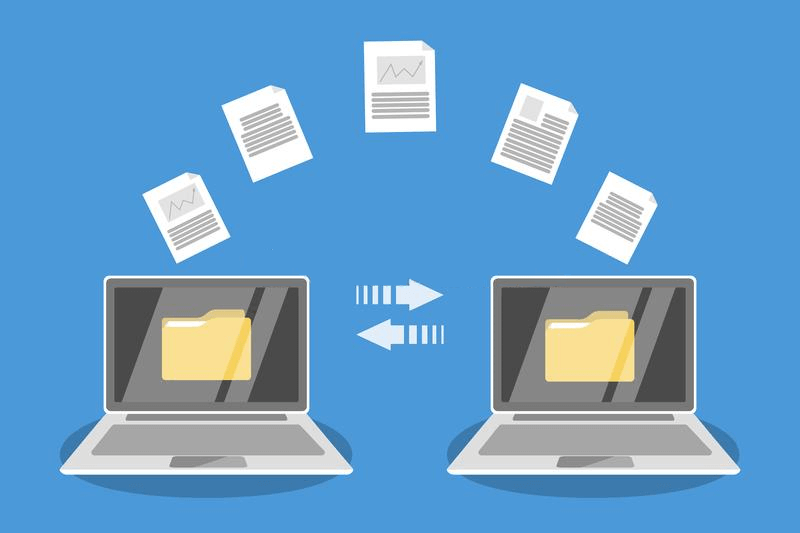
6 Easy Ways to Transfer Files from Laptop to Laptop on Windows 10/11
What is the best way to transfer files from laptop to laptop on Windows 10 and 11? This post provides six ways to transfer files. Whether you need to transfer files wirelessly or not, you can find the stepwise tutorial here.
By Ellie / Updated on December 13, 2024
What is the best way to transfer files from laptop to laptop?
I bought a new laptop, and I want to transfer most of my existing files from the old one to the new one. I wonder can I transfer files from laptop to laptop wirelessly?”
- Question from Quora
How to transfer files from laptop to laptop on Windows 10, 11 [6 ways]
In this part, we will demonstrate how to transfer files from laptop to laptop wirelessly. At the same time, we’ll also introduce how to transfer files between laptops using external devices, like a LAN cable or USB device.
Part 1. Transfer files from laptop to laptop wirelessly [4 ways]
No matter whether your two laptops are at a distance or near each other, you are able to transfer files between them wirelessly.
Way 1. Remotely transfer files from laptop to laptop via free file transfer software
The easiest and fastest way to transfer files from laptop to laptop is to use the free remote file transfer software AnyViewer.
- ★Benefits:
- Wide compatibility. It works with several Windows versions, including the newest Windows 11 and Windows 7.
- High efficiency. You don’t even need to appear in front of the laptop which contains the files you want to achieve file transfer with AnyViewer.
- Fast speed. It transfers files at a really fast speed, even if transferring large files over the internet. But if the two laptops are on LAN or WiFi, the transfer speed will be faster. For example, it only costs about 20 seconds to transfer a 2 GB zip file.
- Improved security. The file transfer process is secured by Elliptic Curve Cryptography (ECC) encryption, protecting your data from leakage.
- Multiple features. As a remote desktop tool as well, it also allows you to easily control and manage another computer remotely. Besides, it is also a screen share tool.
Step 1. Download, install, and launch AnyViewer 3.0 or above on both Windows laptops. If your version is lower, please upgrade first.
Step 2. On one laptop, go to Log in, and then click Sign up. (If you already have signed up on its official website, you can log in directly.)

Step 3. Fill in the signup information.

Step 4. Then you can see you successfully logged in to AnyViewer. Your device will automatically be assigned to the account you’ve logged in to. After this, log in to the same account on the other laptop.

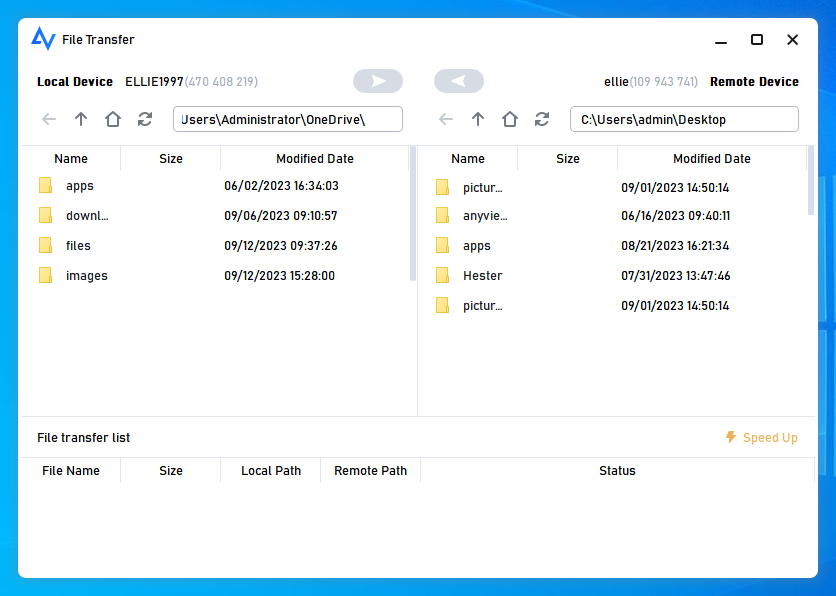
Step 5. Choose your target laptop, and then click File Transfer.


Step 6. Then a File Transfer dialog box will appear. You’re able to transfer files between devices freely by clicking the arrows after choosing the target files. You can also double-click the target file to achieve transfer.
- Notes:✎...
- To transfer files freely, it is highly recommended to upgrade your account to a professional or enterprise plan. Here are what a professional or enterprise plan can bring to you:
- Faster file transfer speed. Transfer speed for a free account is 500 KB/s, and for a paid account is up to 10 MB/s.
- Increasing numbers of files are being transferred at once. For a free account, 100 files can be transferred at a time; for a paid account, this number is unlimited.
- Larger size of a single file that can be transferred. The maximum size of a single file that can be transferred for the free account is 100 MB, and for a paid account is 1 TB.
Way 2. Share files between laptop and laptop wirelessly via Nearby Sharing
The second way is to transfer files from laptop to laptop using WiFi, specifically, the built-in Windows feature Nearby Sharing will be used. You should be informed before you begin that:
- ✍This method only works with Windows 10 and Windows 11.
- ✍Both laptops need to be linked to the same network.
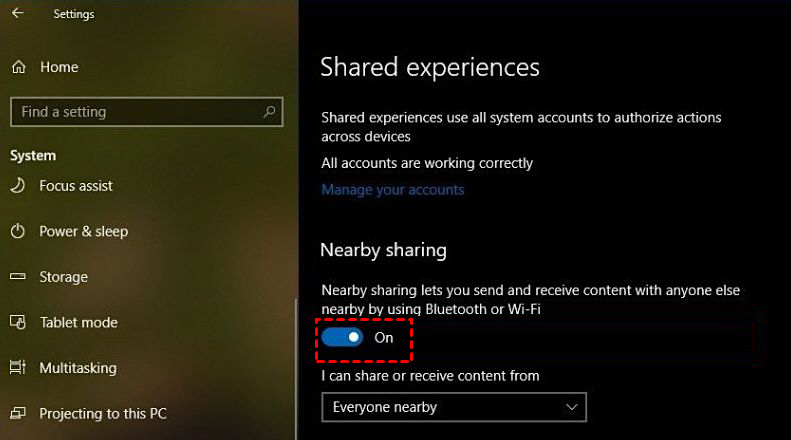
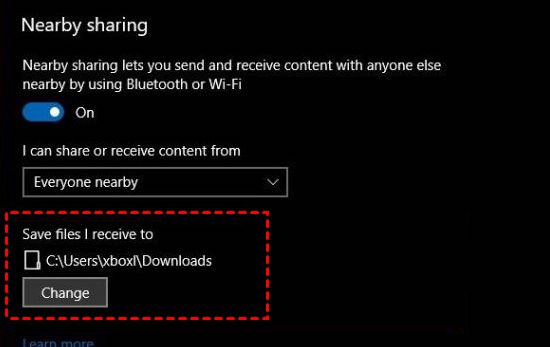
Step 1. Navigate to: Settings> System> Shared Experiences, and then turn on the Nearby sharing button.
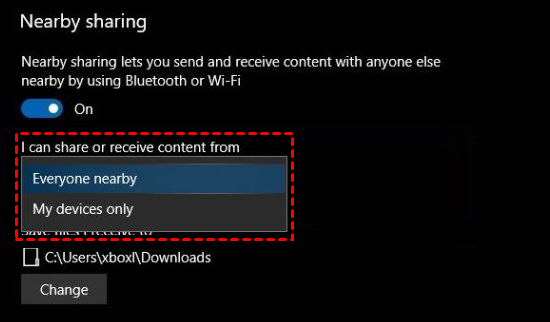
Step 2. Select the sharing pattern based on your own need from the drop-down menu.
Tips:
- Everyone nearby means your PC will share or receive content from all nearby devices.
- My devices only means your PC will share or receive content only with devices using the same Microsoft account.
Step 3. You can click Change to choose the folder location where you prefer to store the files being transferred to your laptop.
Step 4. Go to the file explorer, right-click the desired file you want to transfer, and then select Share in the context menu.

Step 5. Select the laptop you want to transfer files to from the pop-up window.

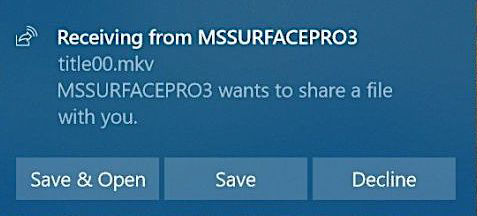
Step 6. Then the laptop receiving files will receive a notification. Click Save & Open to start the file transfer.
Way 3. Laptop to Laptop file transfer via cloud storage services
The third method for wirelessly transferring files from laptop to laptop is to use cloud storage services. It functions by allowing you to upload files to the cloud and then share those files with others. We'll use Google Drive as an example here.
Step 1. Open the main interface of Google Drive, find and click My Drive in the left sidebar, click My Drive again, and select Upload files or Upload folder in the expanded menu.
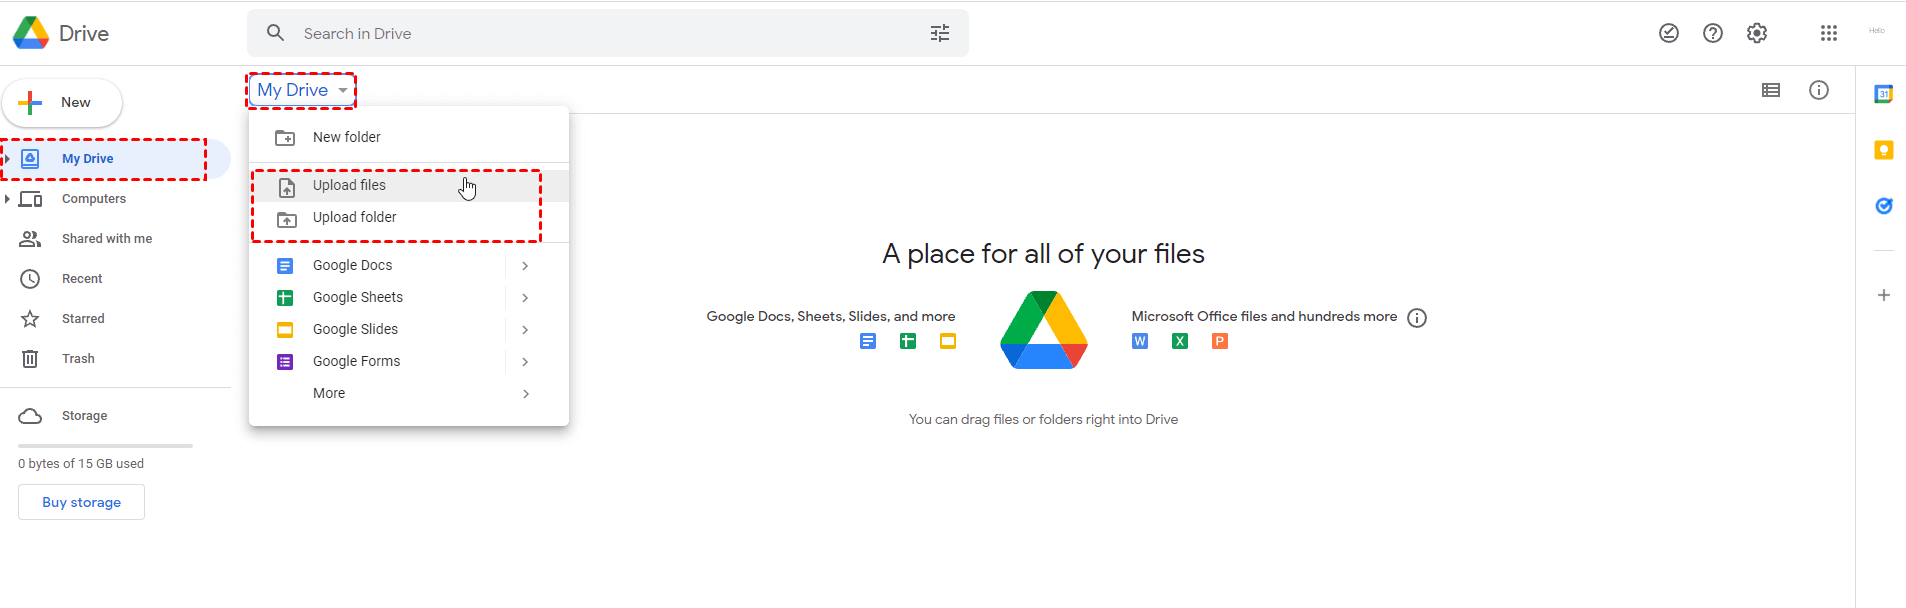
Step 2. For example, click Upload files, and a window will pop up automatically. Select the files you want to upload and click Open in the lower-right corner.

Step 3. You can see the file upload progress in the lower right corner. After the upload is completed, you can find the file in the main interface.

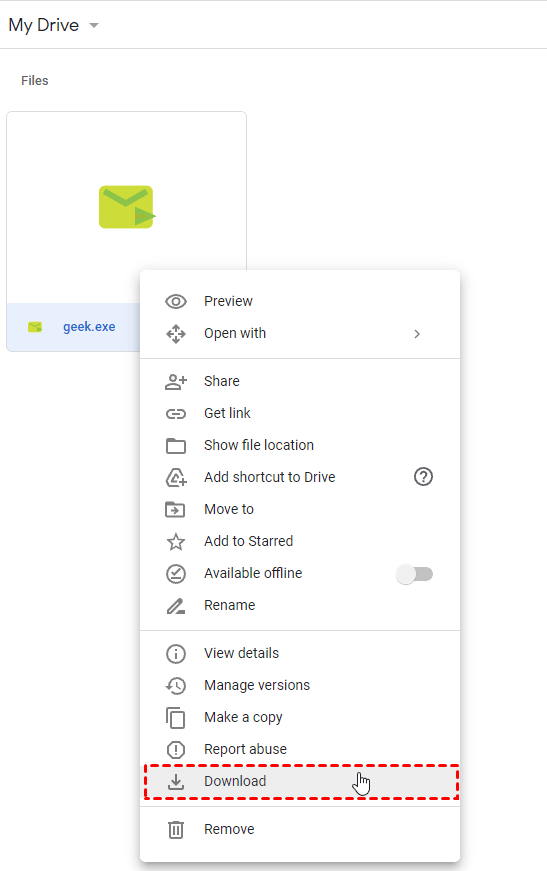
Step 4. Open Google Drive on the other computer and log in to the same Google account. Find the file you’ve transferred, right-click the file, and select Download in the expanded menu to realize remote picture transfer between different computers.
Way 4. Send files from laptop to laptop using email
The final way to transfer files from laptop to laptop wirelessly is to use email. But you should note that the size of a file that can be attached and sent via e-mail is limited. Gmail, for example, allows messages of up to 25 MB in size. Here we’ll take Gmail as an example.
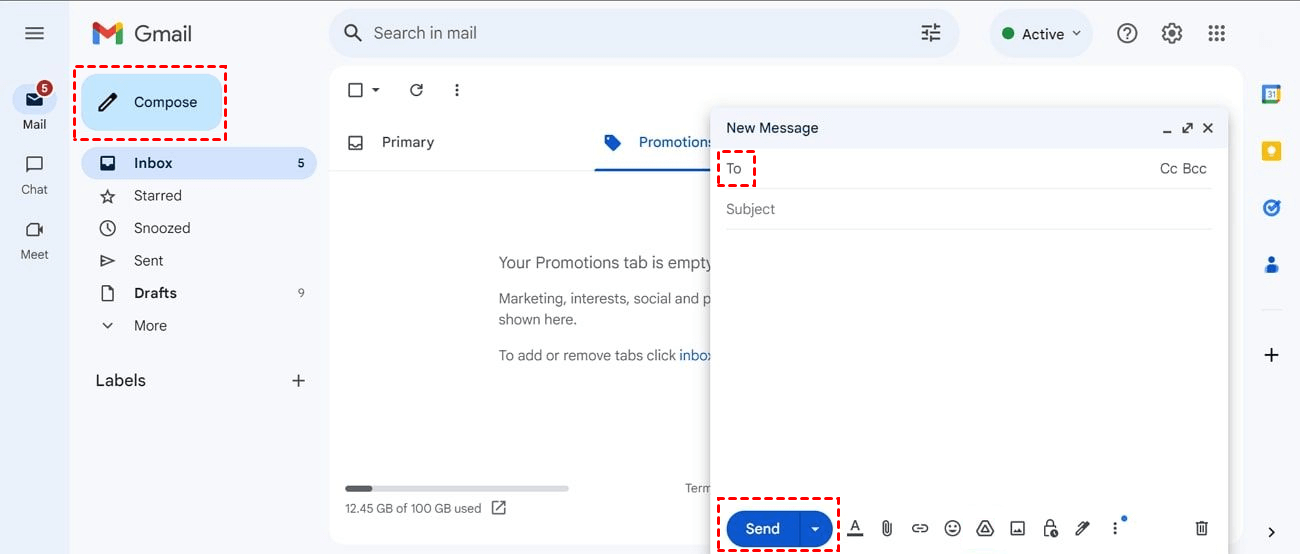
Step 1. Open Gmail official site on the laptop having files you need to transfer and create and sign in to your email account. On the main page, click Compose.
Step 2. Then type in the email addresses that have been logged in to the other laptop behind To. Click the attachment icon below to choose the files you want to transfer. Click Send to start sending picture files to the laptop.
Step 3. On the laptop receiving files, open and sign in to your email application to check and download the files.
Part 2. Transfer files from laptop to laptop using external devices [2 ways]
You are also able to transfer files from laptop to laptop using LAN cable or USB drives if you happen to have external devices.
Way 1. Transfer files from laptop to laptop using a LAN cable
Step 1. Connect the two laptops with a LAN cable.
Step 2. Go to Control Panel> Network and Internet > Network and Sharing Center > Change advanced sharing settings. Click on the drop-down icon next to All Networks.
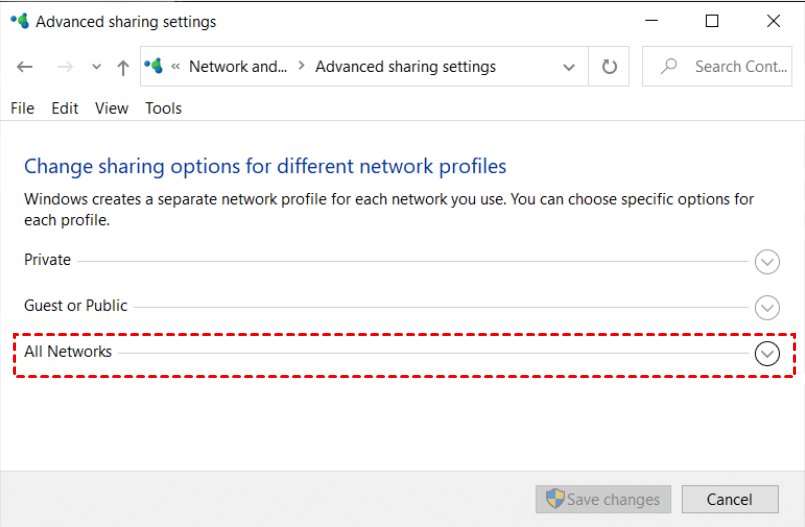
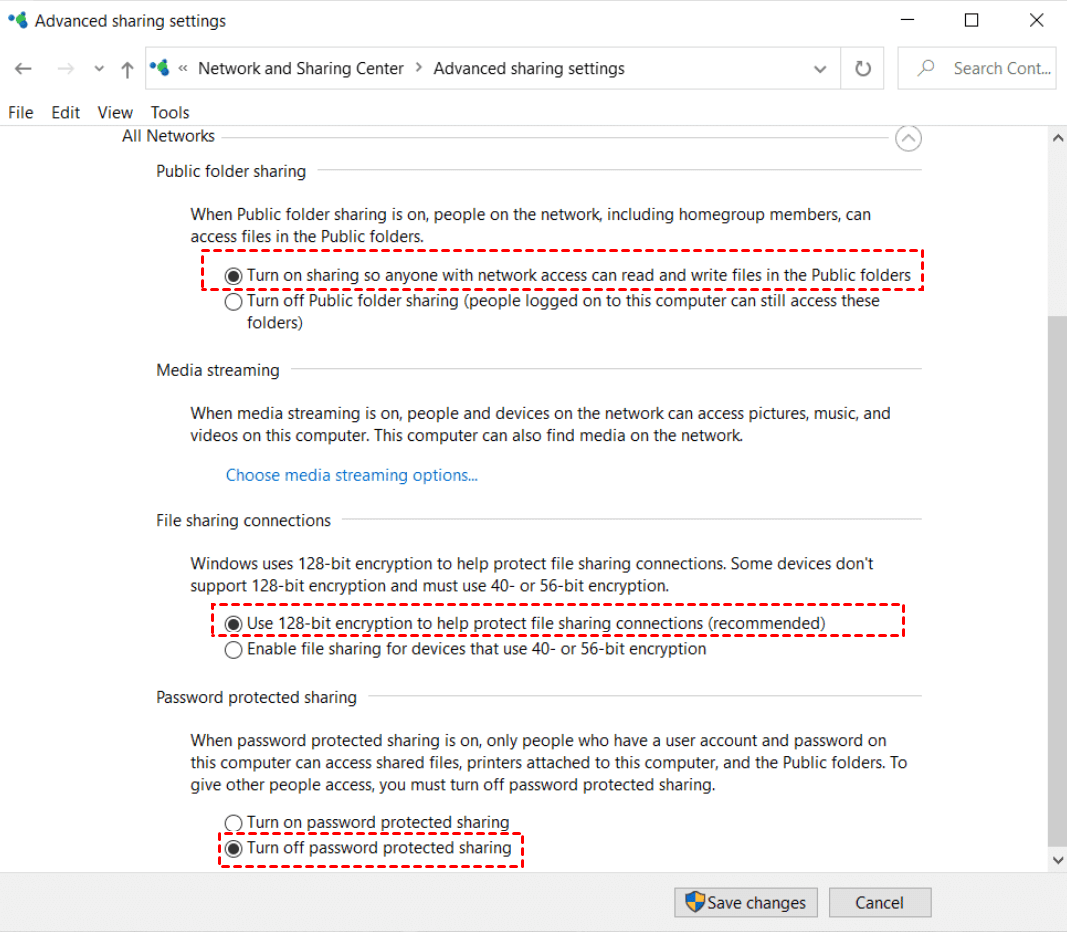
Step 3. Check the following settings and then click Save changes.
- Turn on sharing so anyone with network access can read and write files in the Public folders
- Use 128-bit encryption to help protect file sharing connections (recommended)
- Turn off password protected sharing
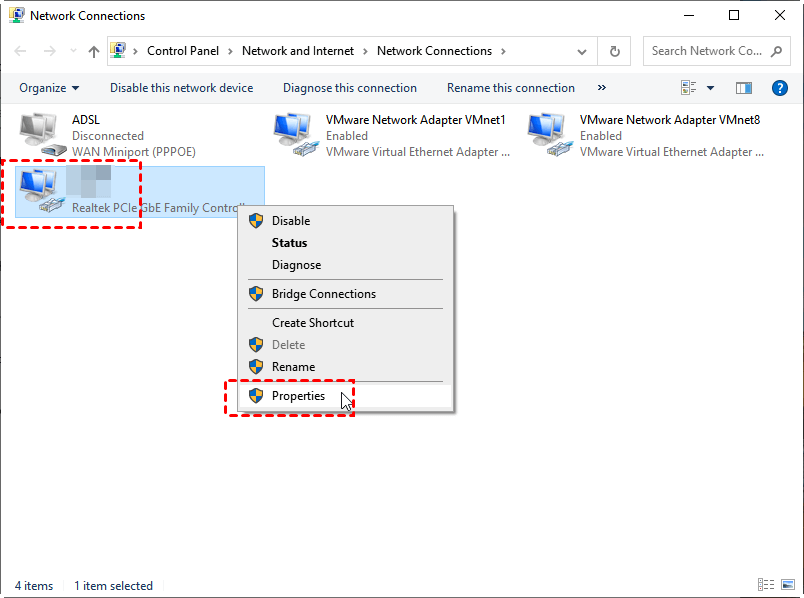
Step 4. Then go to Control Panel > Network and Internet > Change adapter settings. You can see a list of Network connections, right-click on the Ethernet network, and select Properties in the context menu.
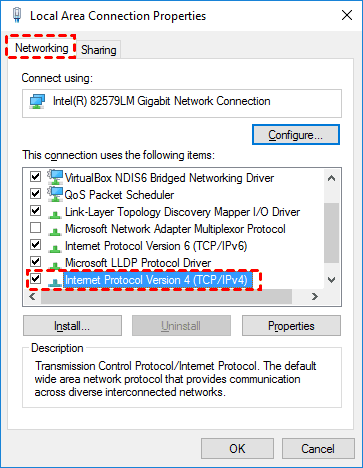
Step 5. In the pop-up window, select Internet Protocol Version 4 (TCP/IPv4), and then click Properties at the bottom.
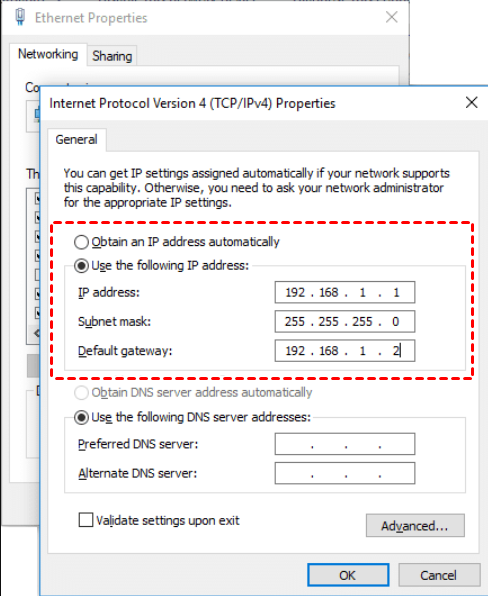
Step 6. On one laptop, check Use the following IP address and type in the following IP address.
IP address: 192.168.1.1
Subnet mask: 225.225.225.0
Default Gateway: 192.168.1.2
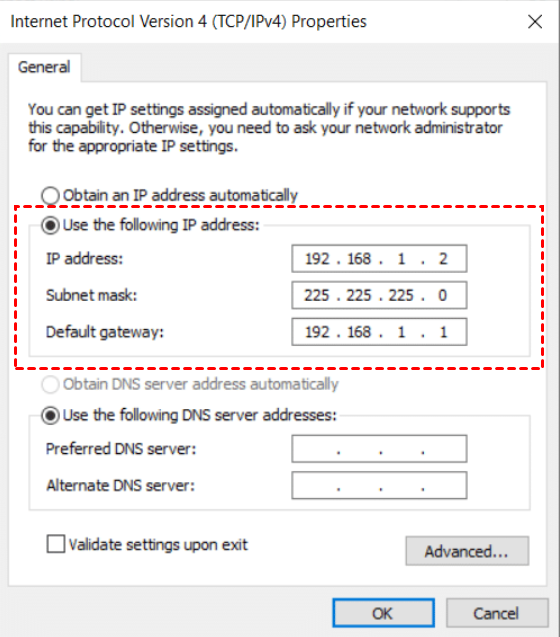
Step 7. Do the similar steps above on the other laptop and type in the following IP address.
IP address: 192.168.1.2
Subnet mask: 225.225.225.0
Default Gateway: 192.168.1.1
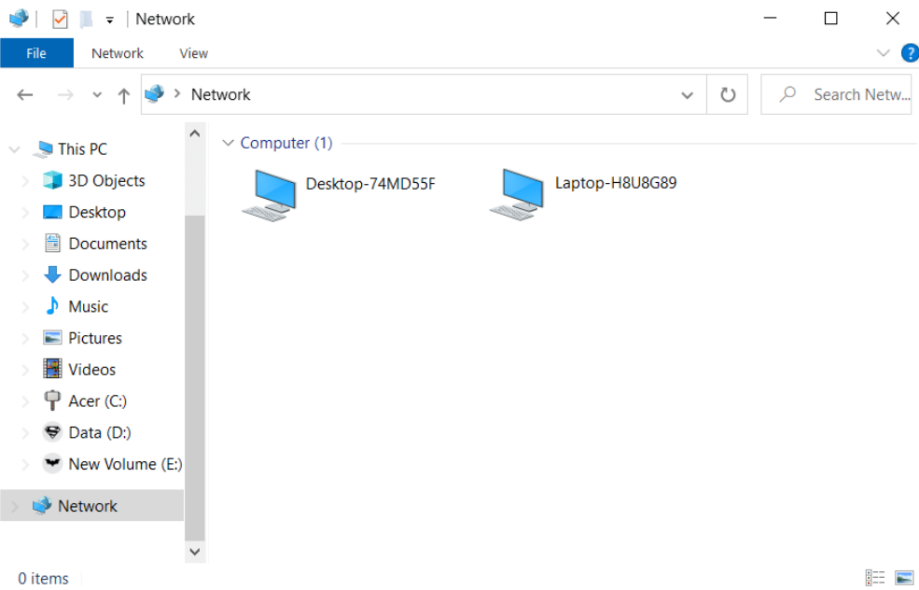
Step 8. If everything is configured correctly, you can see two computer names under the Network menu on the laptop sharing files.
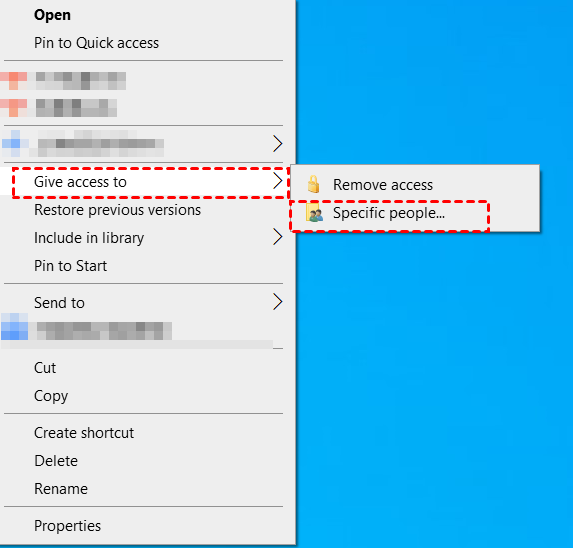
Step 9. Right-click on the folder you want to transfer, hover on Give access to and then select Specific people.
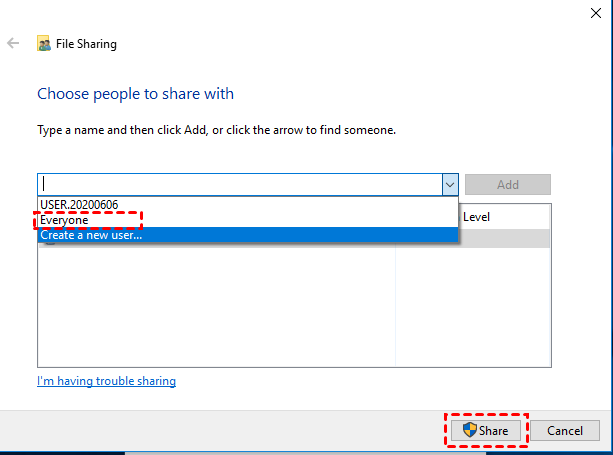
Step 10. In the sharing window, choose Everyone from the drop-down window and click Add button, and finally click Share.
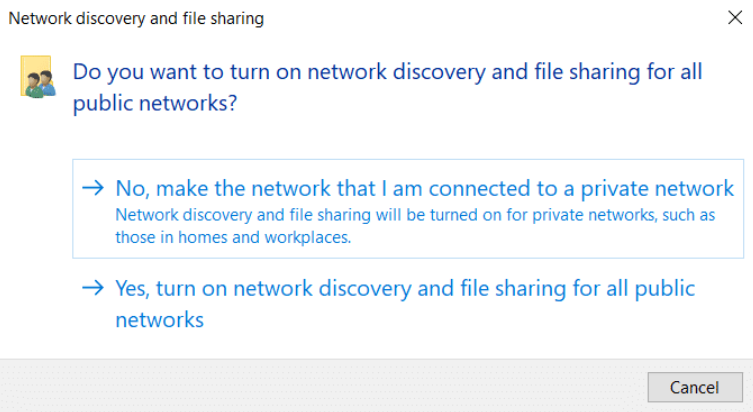
Step 11. The next time you will be asked if you want to enable file sharing for public networks. Depending on your requirements, select No to transfer files for a private network or Yes to send files for all public networks.
Step 12. Once you shared the folder successfully, you can see its network location of it.
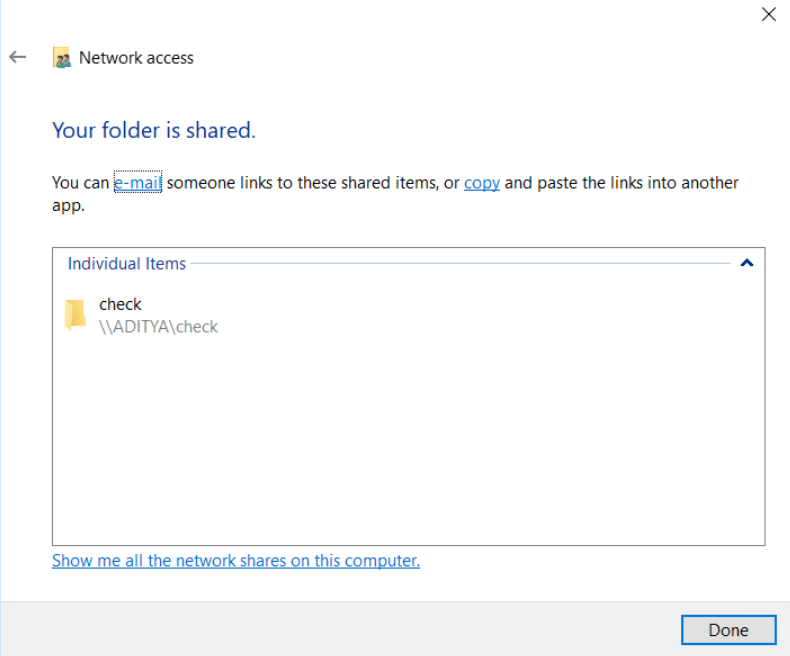
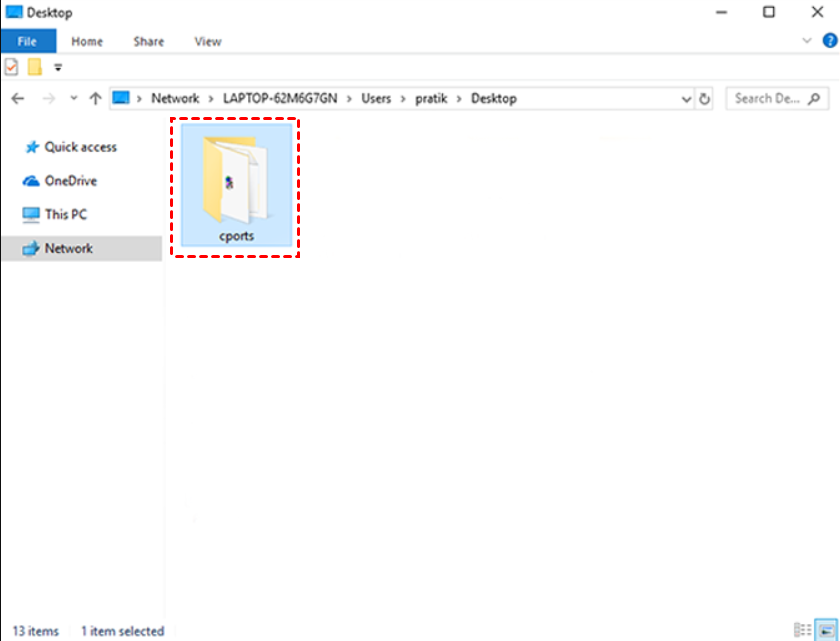
Step 13. Now go back to the laptop receiving files. Open the Network panel and double-click the computer name to check the target folder. Then you can transfer the files by simply copying and pasting.
Way 2. Share files between laptops using a USB drive
Step 1. Locate a storage device that is compatible and connect it to the laptop that is sharing files. After that, include the files you wish to share in it.
Step 2. The USB drive should be removed from the laptop that is sharing files and inserted into the laptop that is receiving files. Drag and drop the files to the laptop from the USB drive.
Quick summary: Comparison of 6 laptop-to-laptop file transfer methods
Provided below is a concise comparison of the six outlined methods for transferring files between laptops. This snapshot will assist you in swiftly determining the most fitting approach for your needs.
| Methods | Advantages | Disadvantages |
| Specialist file transfer software AnyViewer |
|
|
| Transfer wirelessly via Nearby Sharing |
|
|
| Transfer via cloud storage services |
|
|
| Email file transfer |
|
|
| Transfer locally over LAN cable |
|
|
| Manual transfer with an external USB drive |
|
|
Closing words
Getting a new laptop is an exciting thing, but transferring files between laptops can be a tough problem sometimes. To ease your transition of files, 6 ways to transfer files from laptop to laptop on Windows 10, 11 are introduced here. You can choose according to your own judgment.
Out of the available six approaches, our strong recommendation leans towards the utilization of AnyViewer—a remarkably adept file transfer application that comes at zero cost. This software offers an uncomplicated, straightforward, and fortified avenue to enable seamless file transfers between laptops, irrespective of their geographical dispositions.
