
Remote Desktop Port Forwarding [Explained with Full Guide]
This post introduces what is Remote Desktop port forwarding and how to configure it. If you want to establish Remote Desktop connection via the Internet, this post is necessary for you to read through.
By AnyViewer / Updated on December 13, 2024
Do I have to use port forwarding for Remote Desktop?
Hi, I have two Windows 10 computers located in my home and my office respectively. Now I want to set up RDP to perform remote control between these two PCs. Is it necessary to configure Remote Desktop port forwarding? How can I do that?”
- Question from Windows Forum

What is Remote Desktop port forwarding?
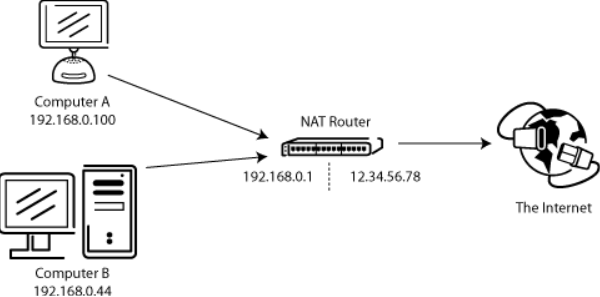
Let's figure out what is it before getting an answer to the question "do you need to port forwarding for RDP". RDP port forwarding routes the port on your public IP address (the router's IP) to the port and IP address of the computer you want to connect to. By using port forwarding, you can access your PC remotely from a different network over RDP and perform whatever actions you would normally do on it. If you access a computer within the same LAN, you don't need to configure port forwarding.
Many users may wonder whether port forwarding is safe. Yes, it is safe to port forward RDP as long as you are using a secure tunnel. Provided your computer or network has a security firewall or a VPN connection, the entire operation of port forwarding is safe enough.
How to: configure port forwarding for Remote Desktop step-by-step
Now, let's see how to set up port forwarding for RDP in Windows 11/10/8.1/8/7. The precise steps for enabling the port might be a little bit different because of different routers and the general steps remain the same.
Part 1. Change the default RDP port on Windows
First, we advise you to change the default RDP port 3389 to an alternative port number. This is because of the extremely high risk of Remote Desktop Protocol attacks. By altering the ports, you can slow down and limit the risks from random, port scanning bots that search for open RDP ports on your router.
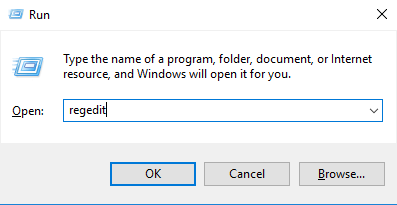
Step 1. Press Win + R, input "regedit", and then press Enter.
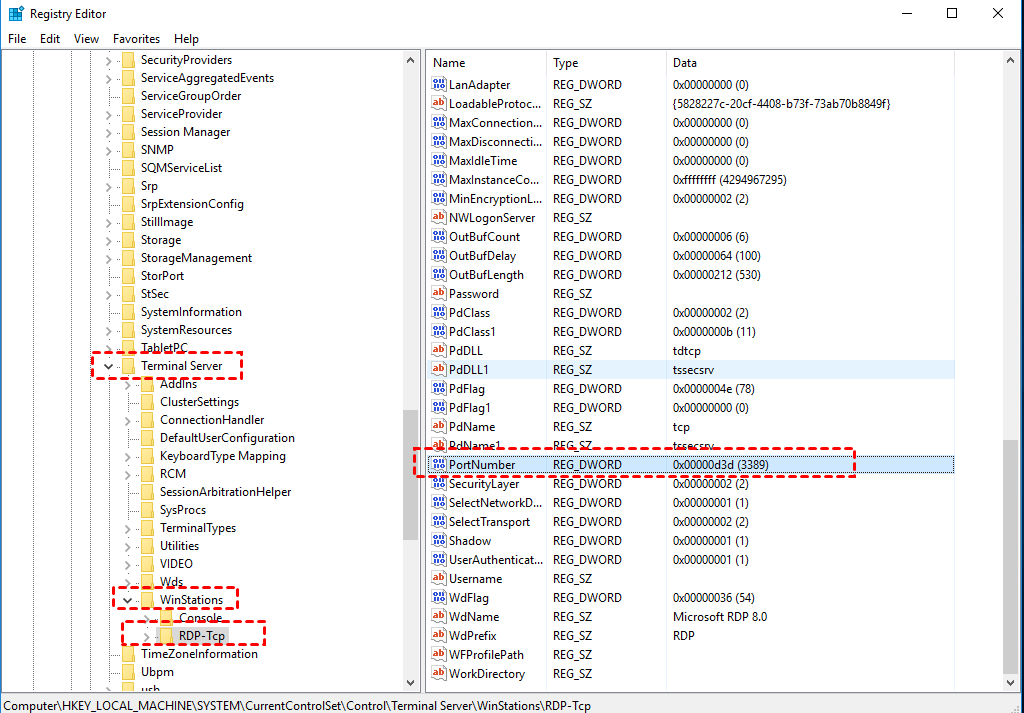
Step 2. On the left pane, locate to HKEY_LOCAL_MACHINE\System\CurrentControlSet\Control\Terminal Server\WinStations\RDP-Tcp. Double-click PortNumber key on the right.
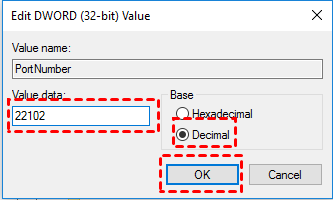
Step 3. In the edit window, set a new port value in the Value data box (between 1025 and 65535). Tick Decimal from the Base category, and click OK to take effect.
Once you’ve changed the RDP port number, you will need to restart your computer. Any RDP connections you make to your PC will need to be configured using the port number you selected.
Part 2. Configure RDP port forwarding
You can now begin to configure Remote Desktop port forwarding with the following steps.
✱ Figure out the IP address of the computer
Step 1. Press Win + R, type in “cmd” and click OK.

Step 2. Type “ipconfig” and press Enter. Look for IPv4 address and note down this number.

✱Log into your home Internet router
Routers offer web-based control panels that can be accessed by opening a web browser and entering the router's IP address. If you don't know the login details, go to check your router's user manual.
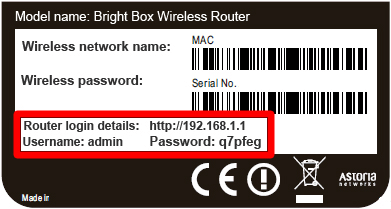
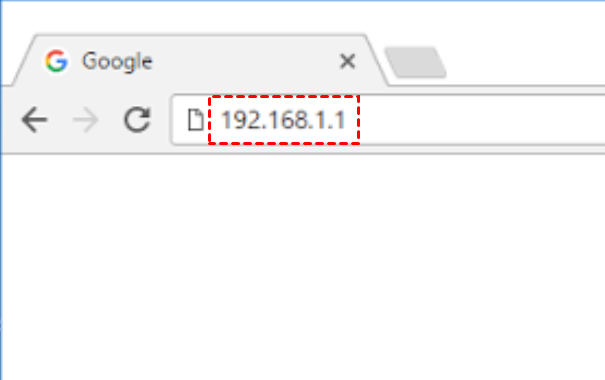
Step 1. Open your web browser, type in the router address, and press Enter.
Step 2. Type in the username and password, then click Login.

✱Change the router settings
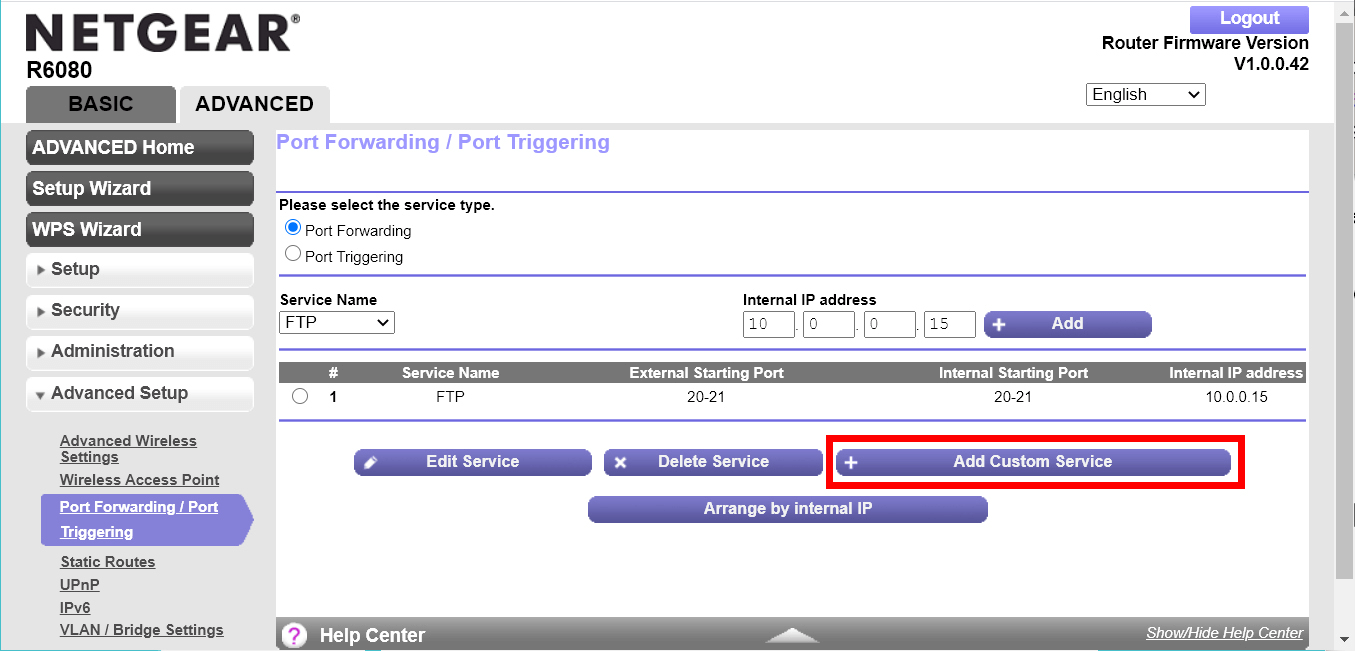
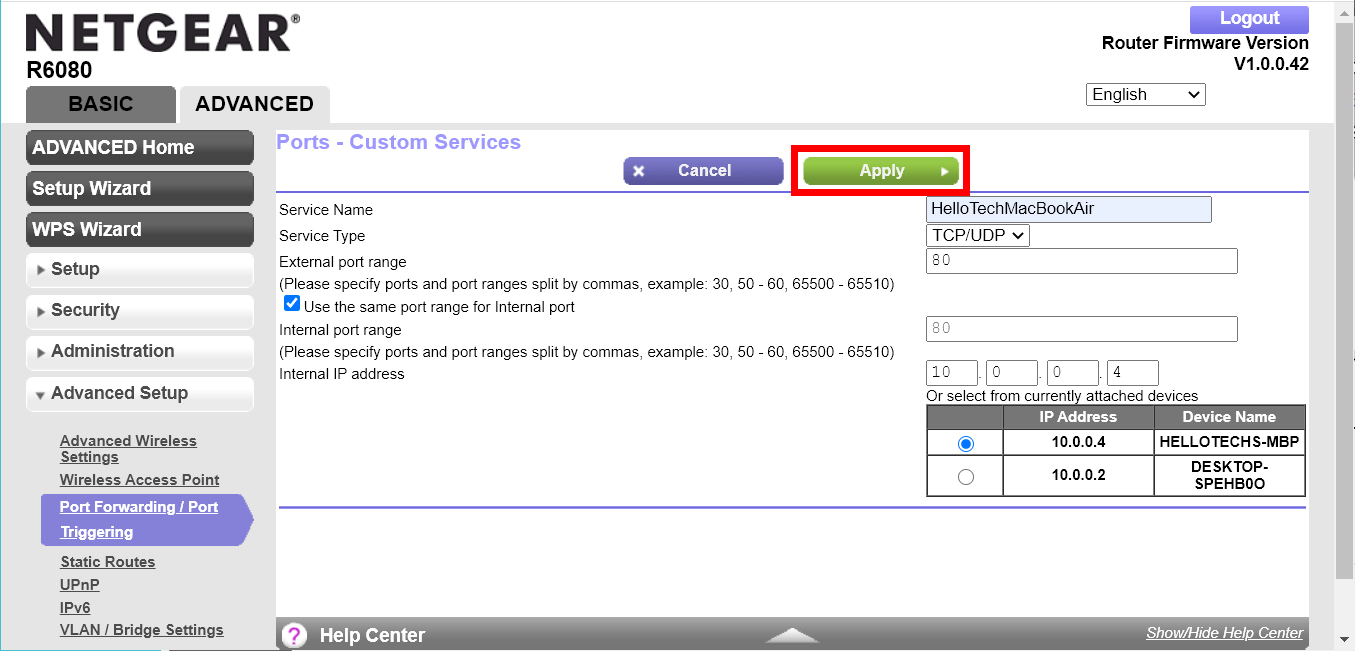
Step 1. Once you’ve logged into your router, click Port Forwarding/Port Triggering on the left pane, then click Add > Add Custom Service to create a new service.
Step 2. Then enter a name for your section, select "TCP/UDP" or "Both" under Service Type, type in the port number you set before, and enter the IP address of the device.
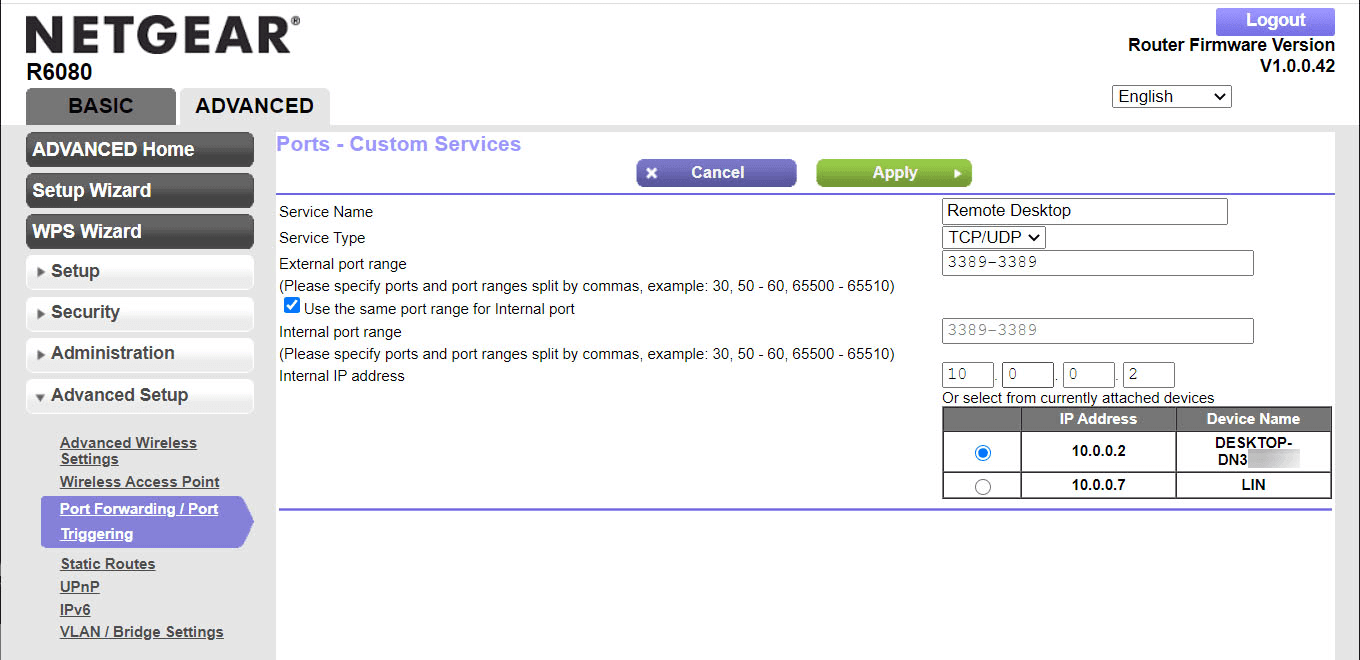
Step 3. When all is done, click Apply to save the settings and, if necessary, restart the router.
You can now access your PC from the outside network using the Remote Desktop port forwarding protocol.
Bonus tip: Remote access without port forwarding over the internet
The steps above allow you to establish Remote Desktop connections with port forwarding over the Internet. However, if you are confused about the cumbersome process, or you are not satisfied with the connection quality, there are several Remote Desktop alternatives you can switch to.
For instance, apps like AnyViewer will enable you to remotely manage your PC in different network conditions without port forwarding or setting up VPN. Besides, you can also use AnyViewer to perform direct file transfer, multiple sessions, screen sharing, remote lock/restart/shut down, etc.
Free download AnyViewer on your devices and keep reading to see how to use it.
Step 1. Install and run AnyViewer on both PCs. Click Sign up to register a new AnyViewer account and log into it on both PCs. Once logged into the account, the device will be assigned to the account automatically.

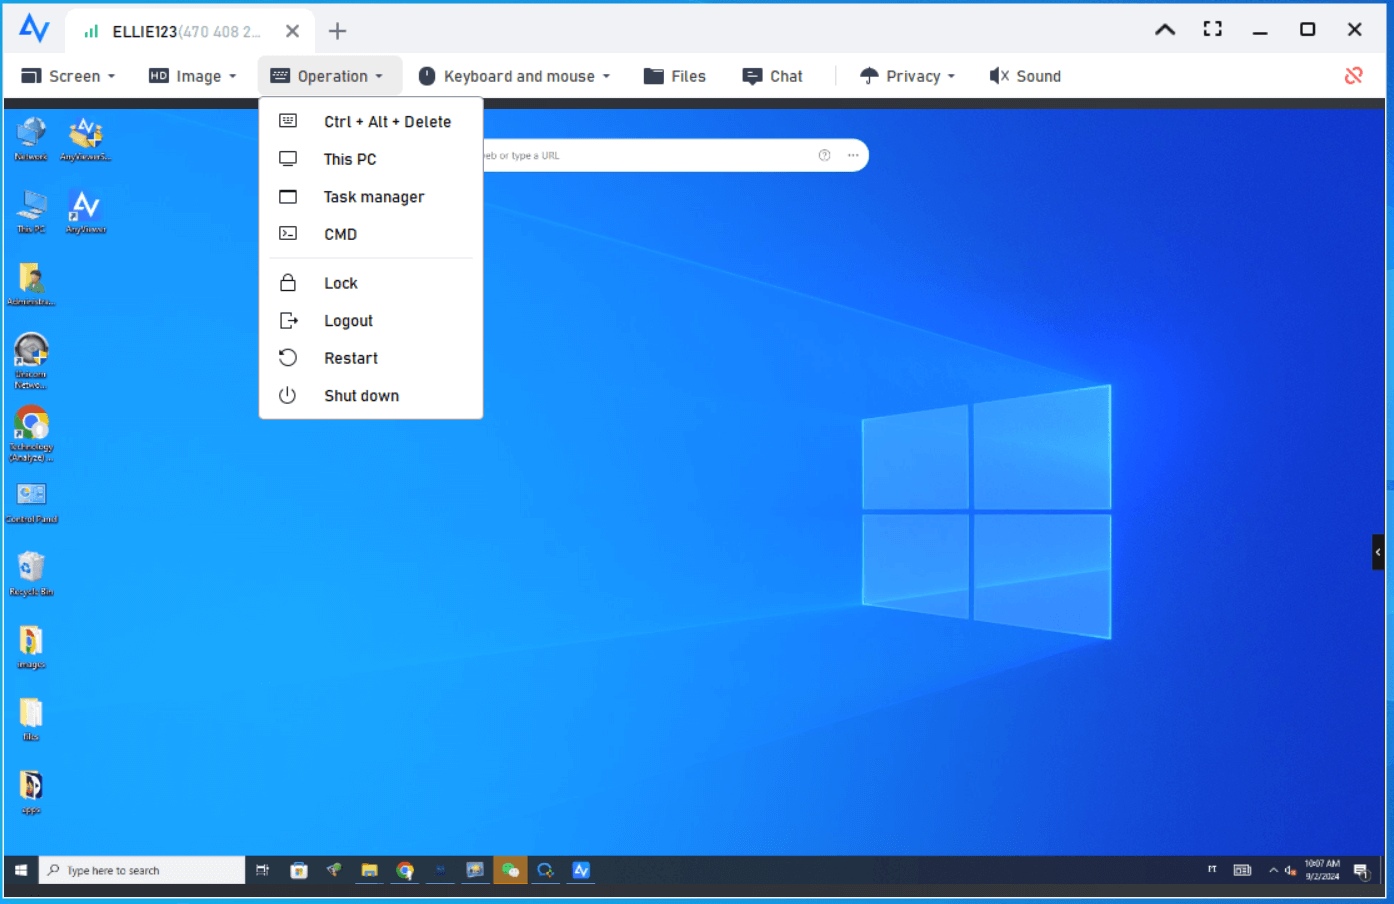
Step 2. On the local device, go to Device, click the remote computer, and click One-click control.

Quickly, you can use the remote PC as you want. The app also offers several built-in options in the remote control window, you can use them conveniently by clicking the toolbar.
✍ Notes:
► One-click access is only available between assigned devices. A Free account can assign up to 3 devices. To assign more devices, it's recommended to upgrade to advanced plans. After that, you can also enjoy features, including privacy mode access to assigned computers, high-quality, etc.
► AnyViewwer supports attended remote access as well. If you need to offer one-time remote support, you can choose Send remote control request and wait for approval from the remote computer.
Conclusion
This post introduces what is Remote Desktop port forwarding and how to configure it. With the RDP port forwarding protocol, you can establish Remote Desktop connections from anywhere outside the network. However, there is an easier way to achieve the same goal without port forwarding, using professional remote desktop software, for example, AnyViewer.
