
Fixed: Remote Desktop Not Working After Windows 10 Upgrade
Stuck in Remote Desktop not working after Windows 10 upgrade/update? Refer to the post for possible reasons and effective solutions.
By Ricardo / Updated on June 26, 2025
Remote Desktop stops working after installing Windows 10 20H2
I have been using Remote Desktop on my Windows 10 Professional for several months. It suddenly stopped working after installing Windows 10 20H2 with the following message:
'Remote Desktop can’t connect to the remote computer for one of these reasons:
1) Remote access to the server is not enabled
2) The remote computer is turned off
3) The remote computer is not available on the network
Make sure the remote computer is turned on and connected to the network, and the remote access is enabled.'
What causes RDP to stop working? How can I fix the Remote Desktop not working after Windows 10 upgrade issue? Any help would be much appreciated!"
- Question from John

Why is Remote Desktop not working after Windows 10 upgrade/update?
Windows Remote Desktop, known as RDP or RDS, allows you to connect to a Windows computer over the internet. Sometimes, you can meet RDP errors like" can't connect to the remote computer", "Your Remote Desktop Services session has ended", etc., after a Windows 10 update. There are different possible causes of why Remote Desktop stops working, and the most common types are listed below to help you solve the issue.
- Remote Desktop hasn't been enabled on the host computer (the computer you need to access).
- RDP hasn't been allowed through the Firewall.
- The network of the host computer or the client computer (the computer where you start remote access) is poor.
- The host's IP address has changed, and the DNS resolver cache stores the wrong IP address.
8 tested ways to troubleshoot Remote Desktop not working (after Windows 10 upgrade/update)
8 tested ways to fix RDP not working Windows 11/10/8.1/8/7 (after upgrade/update) are listed below. You can try one or more based on your specific situation.
Solution 1. Enable Remote Desktop on the host computer
First of all, you should enable Remote Desktop on the host computer that is running Windows 11/10/8.1/8/7. Check out the steps below:
Step 1. On Windows 11/10/8.1/8/7 host computer, press Windows + R, input sysdm.cpl, and click Enter to open the System Properties window.
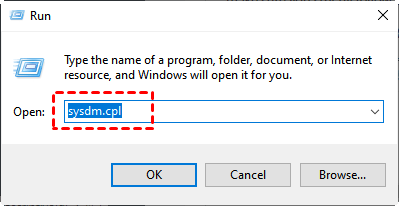
Step 2. Switch to the Remote tab and choose Allow connections to this computer. Then, click OK to enable Remote Desktop.

Solution 2. Allow Remote Desktop in Firewall settings
Then, make sure that Remote Desktop is allowed through the Firewall on both computers. Here are the detailed steps.
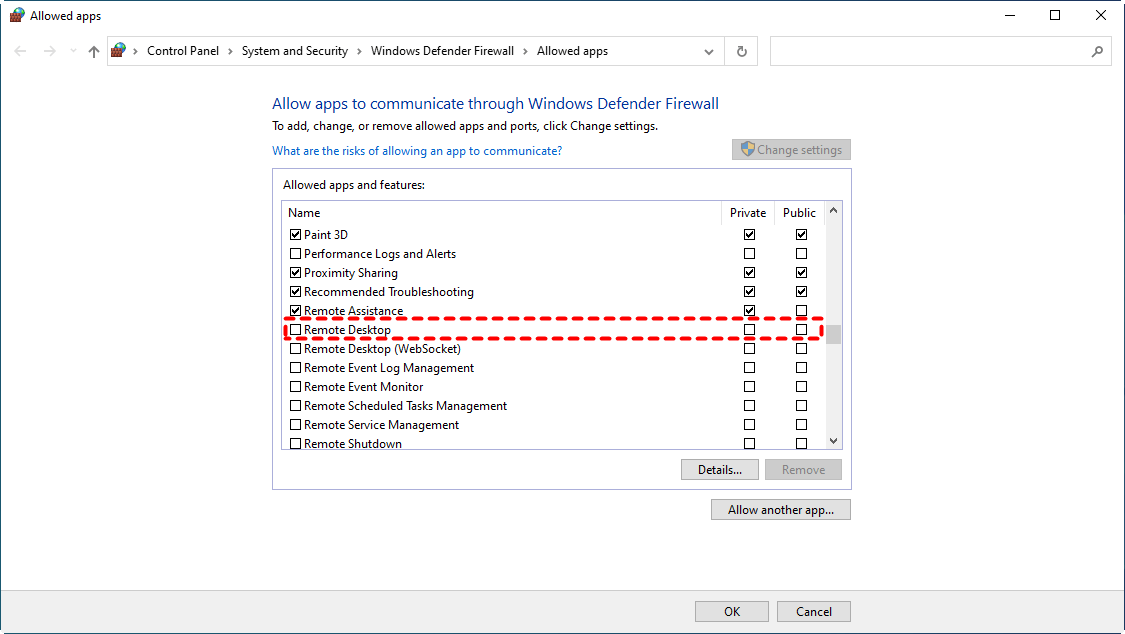
Step 1. In the Search box, type in firewall and open Windows Defender Firewall.
Step 2. Click Allow an app or feature through Windows Firewall and click Change settings.
Step 3. Now, you can locate Remote Desktop and check Private and Public. Then, click the OK button to save changes.
Solution 3. Flush DNS cache using CMD
If RDP fails after the host computer's IP changes, you can clear the DNS cache on your local computer.
Step 1. In the Search box, type in Command Prompt, right-click it, and choose Run as administrator.
Step 2. In the Command Prompt interface, input ipconfig / flushdns and press the Enter key.

Solution 4. Disable WDDM in Group Policy Editor and reboot your PC
If Remote Desktop not working isn't related to the network and firewall settings, you can fix the RDP error by disabling WDWM and rebooting the computer. Do the following steps:
Step 1. Press Windows +R at the same time, input gpedit.msc, and press Enter to open Group Policy Editor.
Step 2. In the Group Policy Editor interface, go to Local Computer Policy > Computer Configuration > Administrative Templates > Windows Components> Remote Desktop Service > Remote Desktop Session Host > Remote Session Environment.
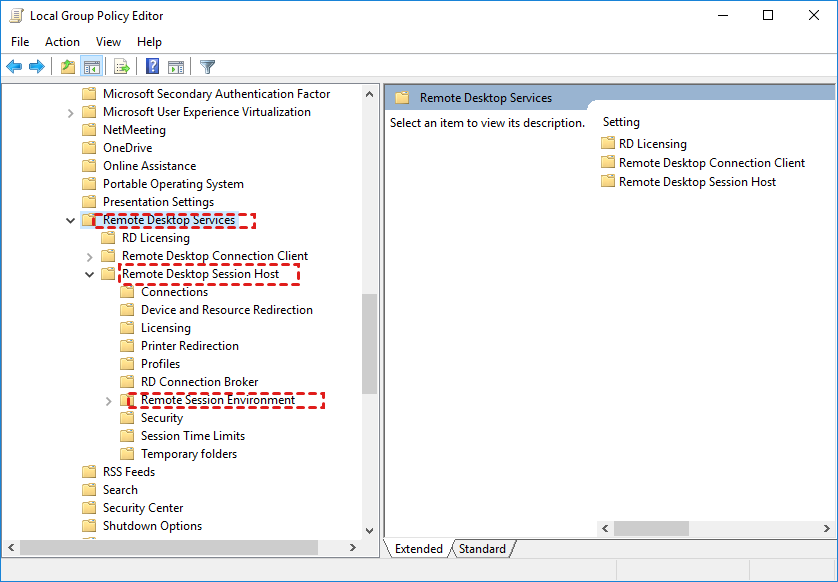
Step 3. Go to Use WDDM graphics display driver for Remote Desktop Connections, double-click it, and choose Disabled.
Step 4. Click OK and reboot your PC, and see if the RDP not working after the Windows 10 upgrade/update issue has been resolved.
Solution 5. Check the status of RDP Services in Services
If Remote Desktop Services is not started, you can encounter RDP not working problems as well. To check the status of RDP Services, follow the steps below:
Step 1. Press Windows + R simultaneously, input services.msc, and hit Enter.
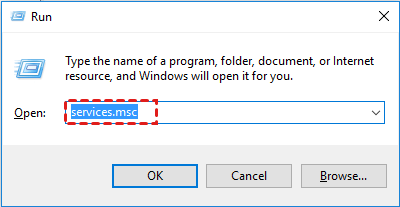
Step 2. Find Remote Desktop Services in the listed items, right-click it, and choose Properties.
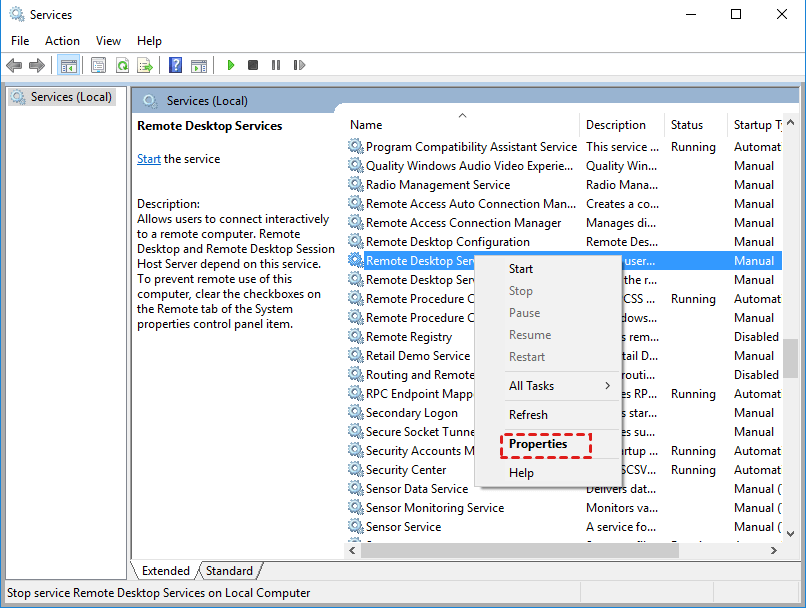
Step 3. In this window, you can check the status of Remote Desktop Services.
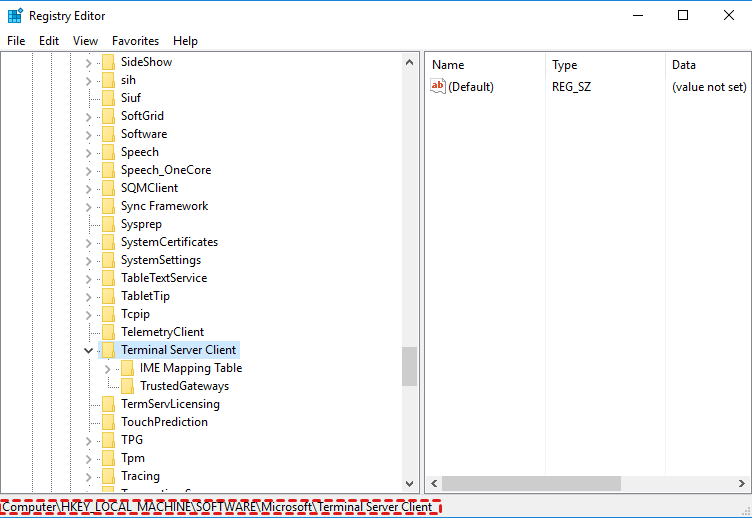
Solution 6. Add a new key in Registry Editor
If Remote Desktop still isn't working, you can adjust the settings for Remote Desktop in Registry Editor.
Note: Since Windows Registry holds all the configuration of your Windows PC, it’s advised to back up the registry value before adjusting.
Step 1. Press Windows + R at the same time, input regedit, hit Enter, and click OK to open Registry Editor.
Step 2. Go to the following path:
HKEY_CURRENT_USER\Software\Microsoft\Terminal Server Client.
Step 3. Right-click the blank place on the right side and go to New> DWORD (32-bit) Value. Then, name the value DGClientTransport.

Step 4. Double-click the new key, choose Properties, and set the value data to 1. Then, click OK and exit from the window.
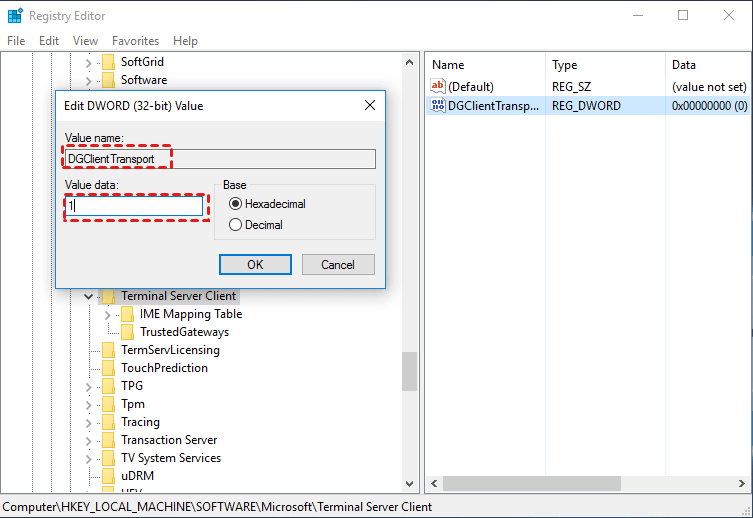
Step 5. Reboot your computer to make the change into effect.
Solution 7. Revert Windows to the previous version
If the solutions mentioned above are invalid for the Remote Desktops not working after the Windows upgrade, you can revert Windows to a previous version where the application works normally.
Step 1. In the Search box, type System Restore and choose it from the result list.
Step 2. Click Next, choose a restore point, and click Next.
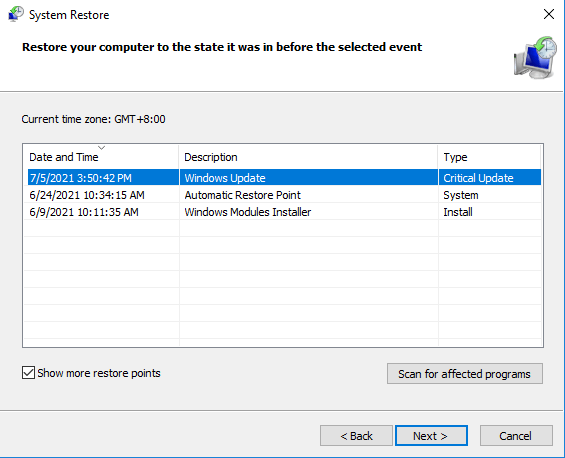
Step 3. Confirm the restore point and click Finish to revert your PC to its previous status, where Remote Desktop can work normally.
Solution 8. Switch to a third-party remote access program
Don't you think it's a bother to try various methods for fixing Remote Desktop not working (after Windows 10 update or upgrade)? Here, AnyViewer is recommended as the best RDP alternative because of its quick installation, easy setup, stable connection, and fast speed. What's more, it allows large file transfer, resolution adjustment, etc., during the remote session.
- Remote Control: Easily access and control Windows devices from anywhere, ideal for remote work and technical support.
- Screen Sharing & Mirroring: Share or mirror your screen in real time to facilitate presentations, collaboration, or training.
- File Transfer: Secure and fast two-way file transfer between local and remote devices to boost productivity.
- One-Click Connection: Quickly connect to remote devices using one-click control codes or by binding devices.
- User & Permission Management: Role-based access control to manage multiple users and define permission levels, perfect for team collaboration.
- Real-Time Chat: Built-in text chat during remote sessions to improve communication and coordination.
- Unattended Access: Set up unattended access to remote devices for 24/7 availability without manual confirmation.
It can also work with Windows 11/8.1/8/7 and Windows Server 2022/2019/2016/2012 R2. Free download and see how it works. To access a Windows computer from an iOS or an Android device, you need to download the AnyViewer mobile apps.
Step 1. On the PC that you want to control, install and run AnyViewer. Sign up for an AnyViewer account and sign in to the same account on the two computers.

☞ Note: The PC will be automatically assigned to the account after login. Among assigned computers, you can start secure unattended remote access with one click.
Step 2. Go to "Device", find out the remote PC that you want to access, click it, and then choose One-click control.

☞ Note: To access the remote computer with its physical screen blacked, you can upgrade your free account to the Professional or Enterprise Plan to enable Access in Privacy Mode.
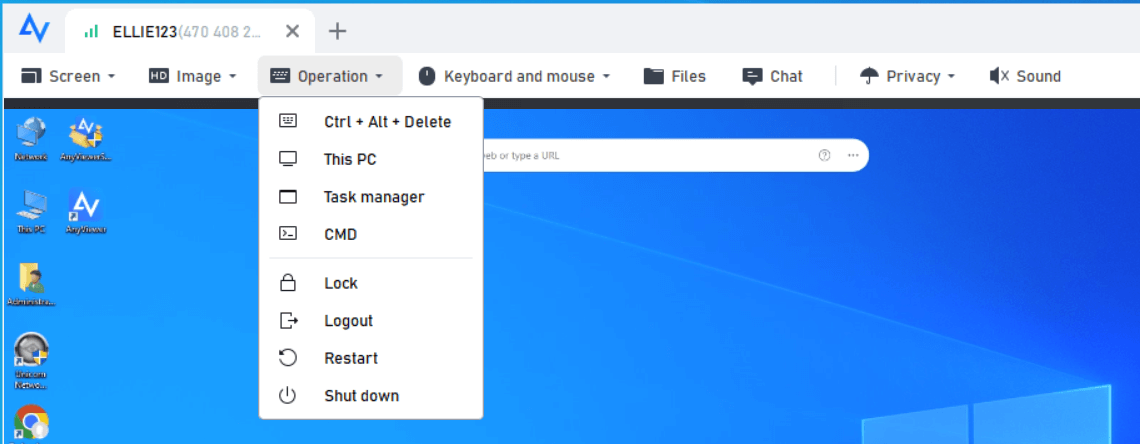
Then you can see the desktop of the remote computer and perform remote desktop control operations on it.
Conclusion
That's all the solutions about how to fix Remote Desktop not working after Windows 10 upgrade or update. These methods are also workable to fix RDP errors in Windows 11/8.1/8 and 7. What's more, the easiest and most recommended way may be to switch to a reliable and professional third-party remote access software like AnyViewer. Because you can quickly achieve remote control without any complicated steps/
