
How to Fix Remote Access to the Server Is Not Enabled
How to fix Remote access to the server is not enabled? Here we provide you with 8 solutions to ensure that your computer can remotely access another computer smoothly.
By Ellie / Updated on December 13, 2024
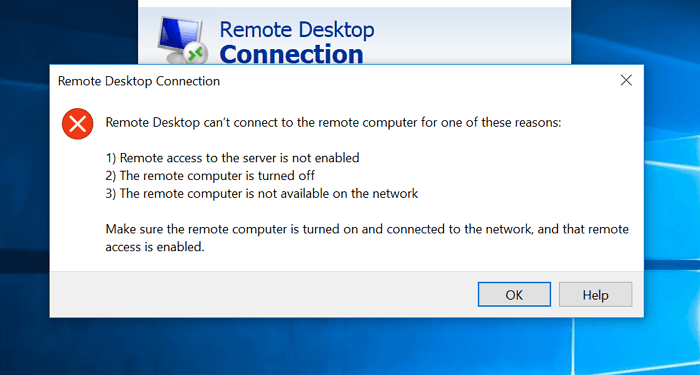
RDP error: Remote access to the server is not enabled
I’ve been using Remote Desktop on Windows 11 for a while now; However, when I tried to use it on my new laptop last week, I received the following message: Remote access to the server is not enabled. I tried rebooting both the machine and Remote Desktop Services, but the problem persisted. Who can assist in its resolution?”
- Question from Reddit
What caused “Remote access to the server is not enabled”?
Remote access to Server is not enabled is a common RDP error in Windows 11/10/8.1/8/7 when you access a remote computer. Generally speaking, there are seven reasons that can cause the issue
- Error caused by Windows update. As we all know, each update of the Windows version will fix some errors, but at the same time, also bring some new problems. Perhaps this is the reason why “Remote access to the server is not enabled”.
- Firewall setting error or impact of anti-virus software. Windows built-in firewall and third-party anti-virus software, in some cases, may cause the problem.
- Network configuration error. The connection of Microsoft Remote Desktop depends on the network. If your computer network configuration is wrong, it is likely to cause this problem.
- Remote Desktop setting error. If you reconfigure a new computer, you may need to check its settings to see whether Remote Desktop has been enabled.
- Group Policy setting error. Group Policy setting error. According to the feedback of some users, improper Group Policy settings may be the cause of this problem.
- Display setting error. If the screen size of your remote computer is too large, this problem may also occur. The culprit is custom scaling.
- Port conflict. If the port used by other applications on your PC conflicts with port 3389, it may also cause this problem.
8 solutions to “RDP Remote access to the server is not enabled”
Based on the causes of the RDP remote access to the server is not enabled error, we sort out 8 solutions.
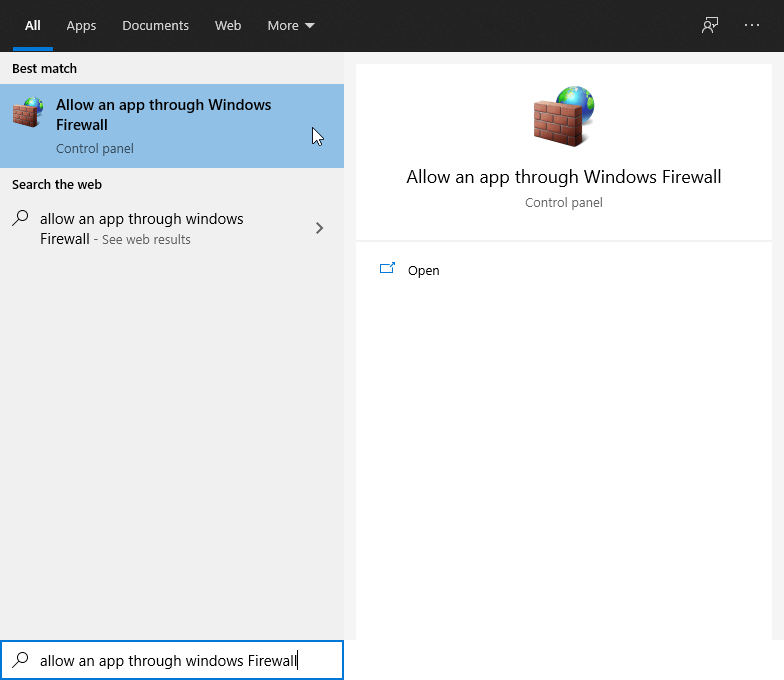
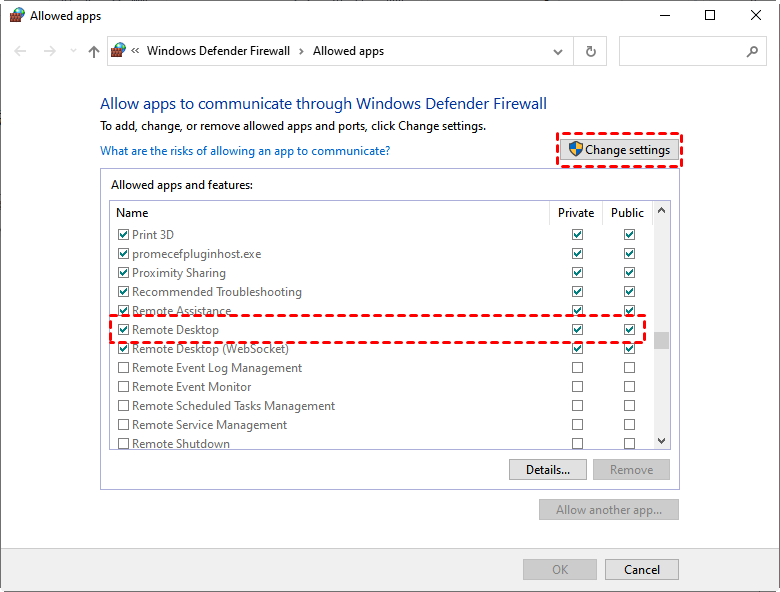
Solution 1. Modify Windows Firewall settings
Step 1. Press WIN + S and then type in “Allow an app through Windows Firewall”. Click Open.
Step 2. Click Change settings and then check Remote Desktop.
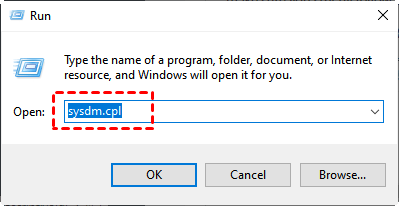
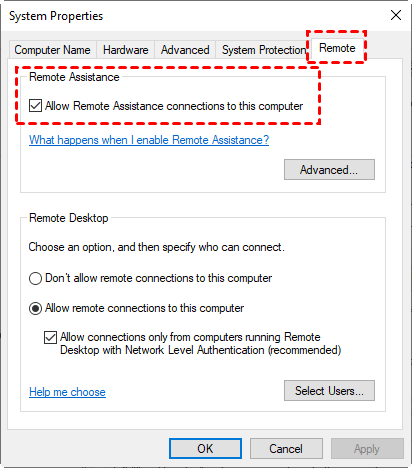
Solution 2. Check Allow Remote Desktop connections
Step 1. Press Win + R to invoke the Run dialog box. Then type in “sysdm.cpl” and hit OK to open System Properties.
Step 2. Switch to the Remote tab and then check Allow Remote Assistance connections to this computer.
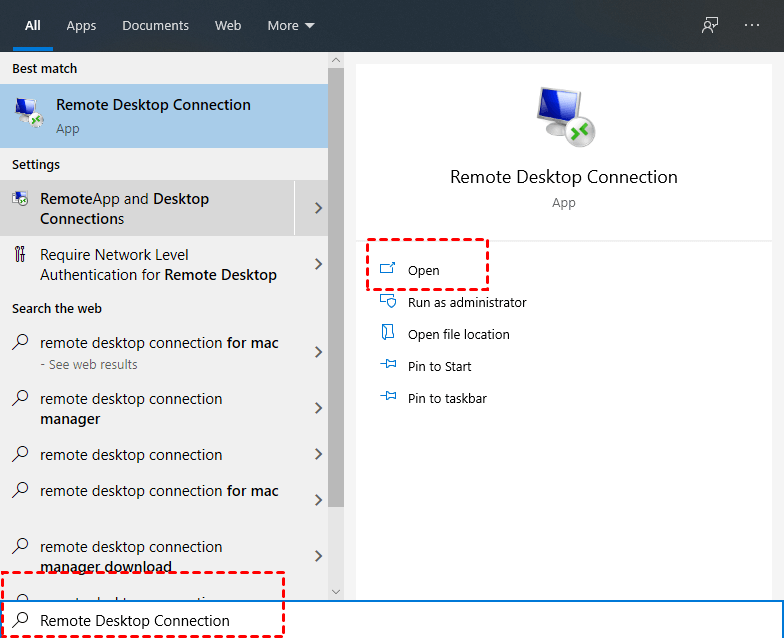
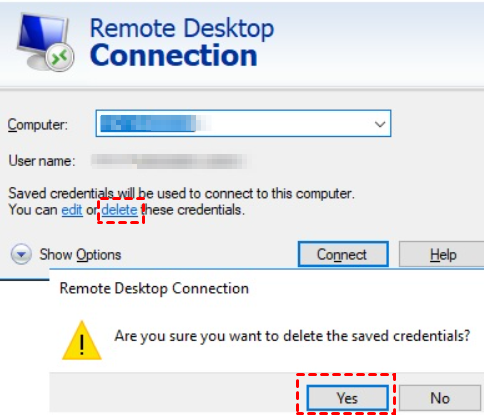
Solution 3. Reset the Remote Desktop credentials
Step 1. Press WIN + S and then type in “Remote Desktop Connection”. Click Open.
Step 2. Click Delete, and then click Yes to delete the saved credentials.
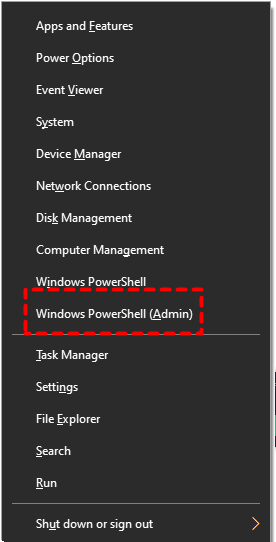
Solution 4. Add the IP address of the remote computer to the host’s file
Step 1. Press Win + X, and then select Windows PowerShell (Admin).
Step 2. Type in the following commands and press Enter respectively:
cd C:/Windows/System32/Drivers/etc
notepad/hosts
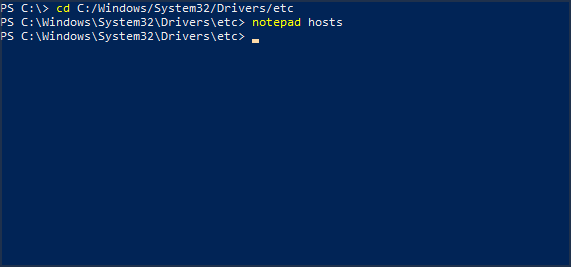
Step 3. Add the IP address of the remote computer. Click Close and then Save to save all changes.
Solution 5. Add RDGClientTransport key in the registry
Step 1. Press WIN + R and then type in “regedit” to open the Registry Editor.

Step 2. Navigate here: HKEY_CURRENT_USER > SOFTWARE > Microsoft > Terminal Server Client. On the right pane, click on the blank space and then choose New > DWORD (32-bit) Value.
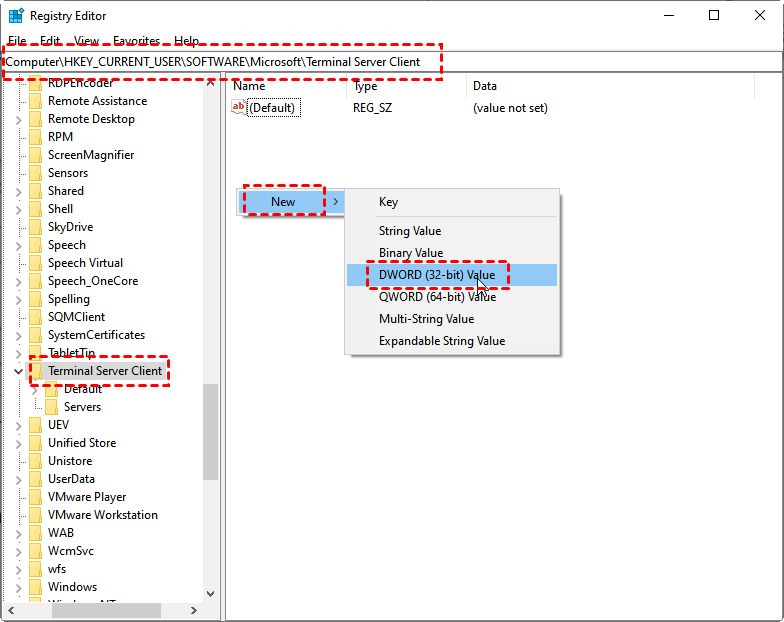
Step 3. Change the name of the new DWORD into “RDGClientTransport”.
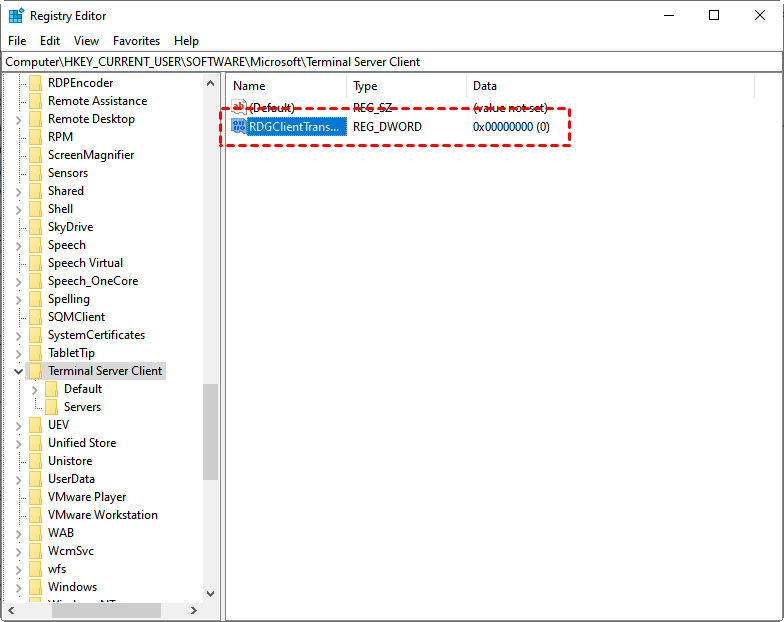
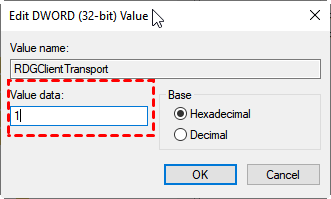
Step 4. Set the value data to 1.
Solution 6. Change network properties
Step 1. Press Win + I and then click Network & Internet.
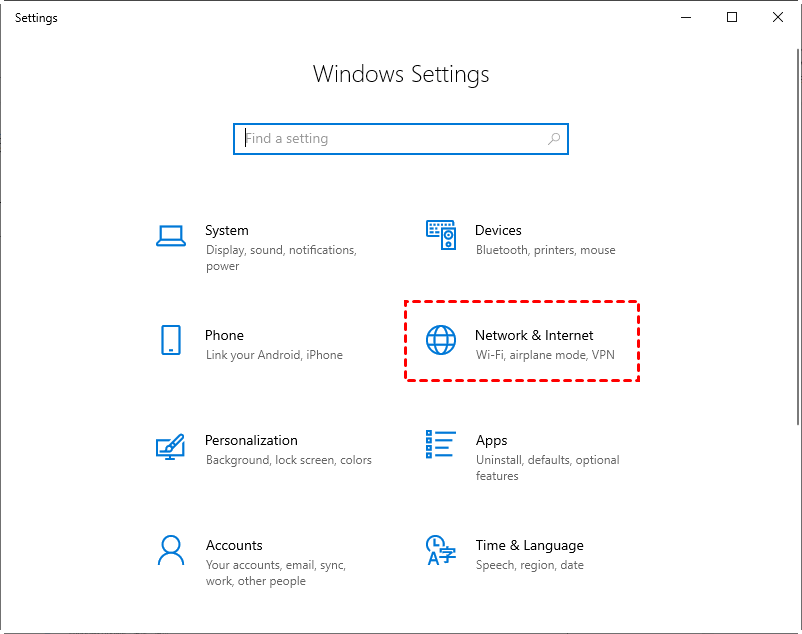
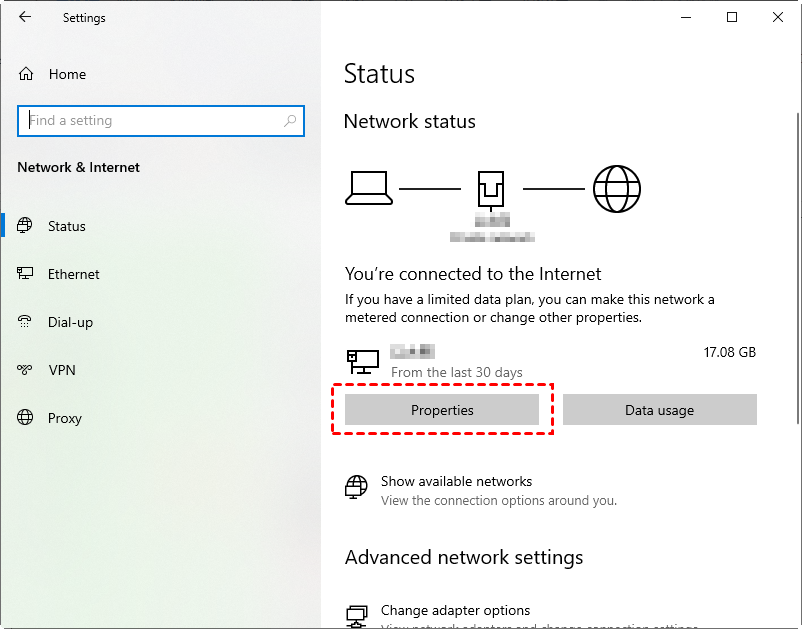
Step 2. Click Properties.
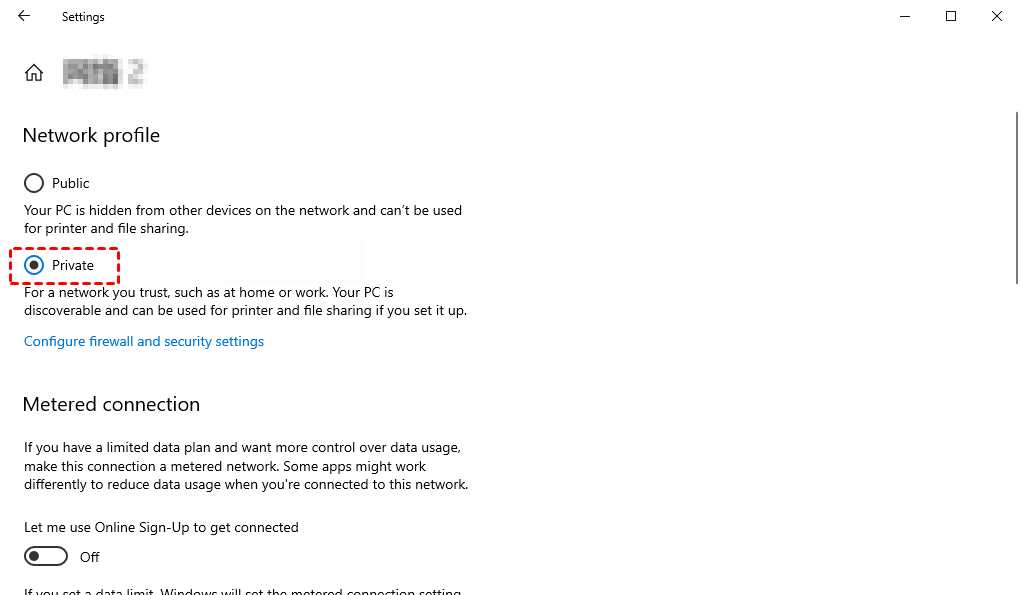
Step 3. Change the Network profile from Public to Private.
Solution 7. Check the Group Policy setting
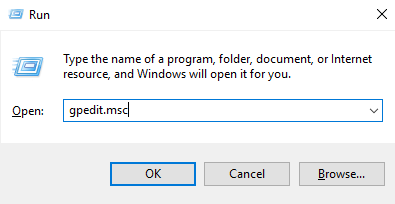
Step 1. Press Win + R and then type in “gpedit.msc” to open Local Group Policy Editor.
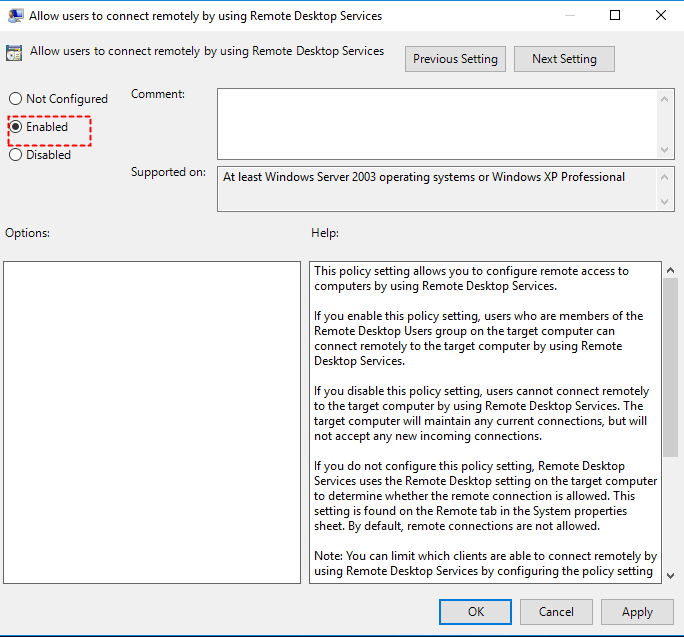
Step 2. Navigate here: Computer Configuration > Administrative Templates > Windows Components > Remote Desktop Services > Remote Desktop Session Host > Connection. On the right pane, find and click Allow users to connect remotely by using Remote Desktop Services.
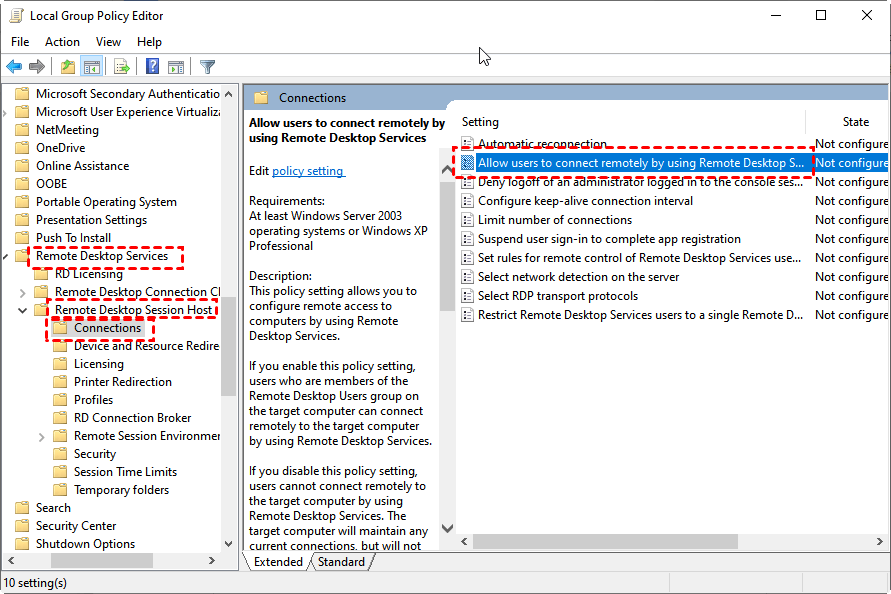
Step 3. Set it to Enabled.
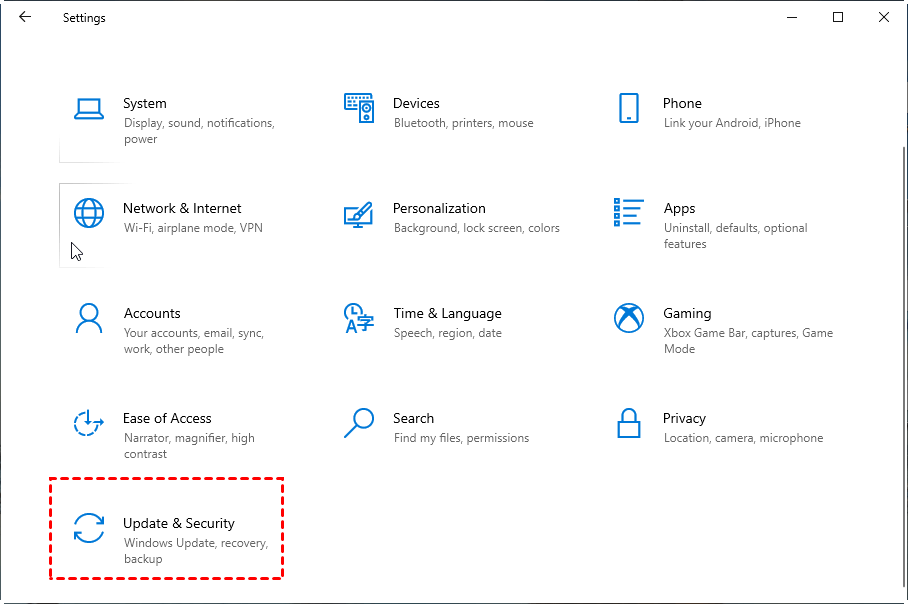
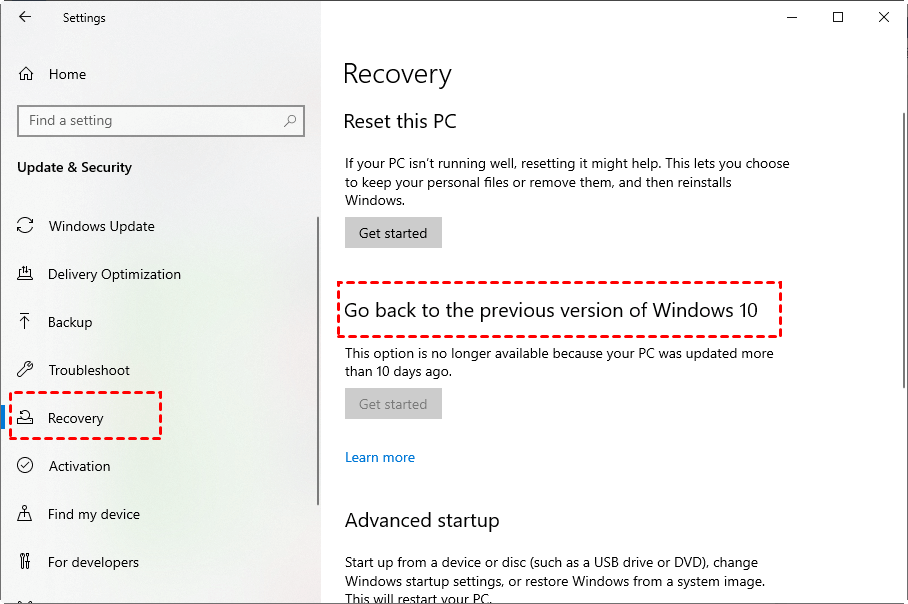
Solution 8. Update or recover the system version
Step 1. Open the Control Panel, locate, and click Update & Security.
Step 2. In the Update & Security interface, check whether a new version is available. If yes, download and install it (remember to back up your data first).
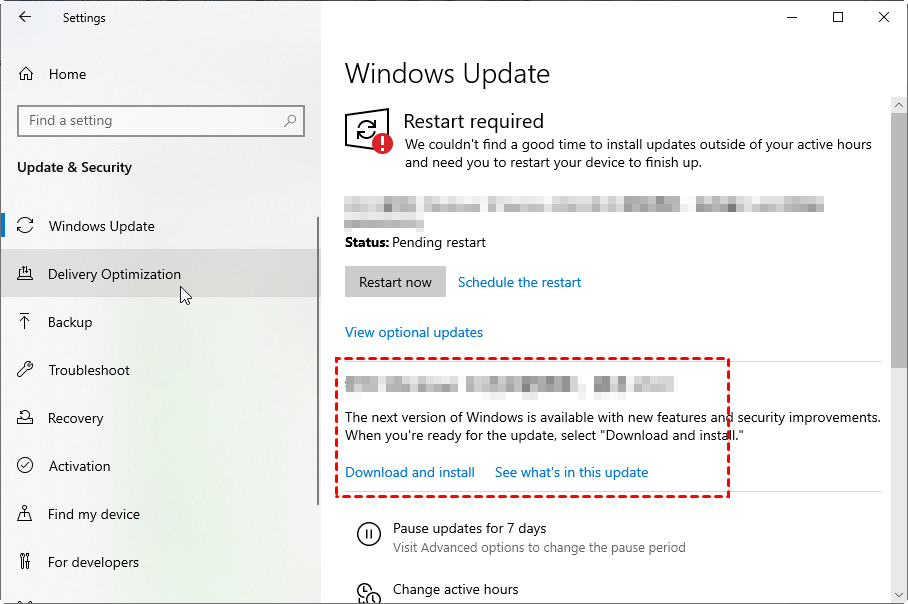
Step 3. If your computer system is already the latest version, you can consider to Go back to the previous version of Windows 10 in Recovery (choose carefully).
The best alternative to RDP [quick setup and easy operation]
Sick of changing Windows settings for using RDP? Try a free third-party remote access software, AnyViewer. It doesn't requires you to configure firewall settings and router even when accessing a computer from a different network. It supports unattended remote access, attended remote access, and file transfer between PCS. To offer remote support more effectively, it enables you to chat with the one on the other end in a remote session.
System requirements:
- The PC to be accessed - All versions of Windows 11/10/8.1/8/7 and Windows Server 2022/2019/2016/2012 R2.
- The device that you start remote access - All versions of Windows 11/10/8.1/8/7 and Windows Server 2022/2019/2016/2012 R2, iSO 10.0 and later versions, or Android 6.0 and later versions.
Step 1. Click the button to download AnyViewer, install, and run AnyViewer on both devices.
Step 2. Go to Log in, and then click Sign up to create an AnyViewer account. (If you already have signed up on its official website, you can log in directly.)

Step 3. Log in to the same account on other devices. All the logged-in devices will be assignedto the account and listed on My devices list.

Step 4. Go to Device to select the target device you want to connect to, and then click One-click controlto achieve unattended remote access.

✍ Note: AnyViewer offers advanced plans. Upgrade your account and enjoy advanced features, like connecting in privacy mode, and assigning more computers for one-click unattended remote access & power remote management (Lock, Reboot, Shutdown)
Conclusion
If you run into the problem “Remote access to the server is not enabled”, try one of the eight remedies listed in this post. If none of the methods work, you may want to consider using third-party remote connection software to avoid the issue. AnyViewer, a completely free third-party remote control software, is an excellent example.
