
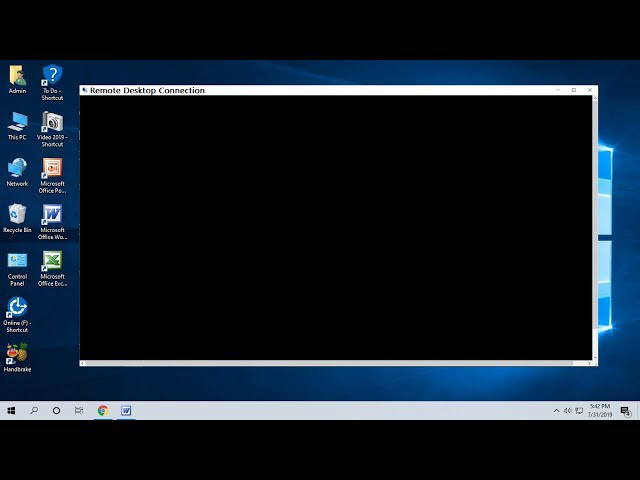
11 Ways to Fix Black Screen on Remote Desktop in Windows 10/11
This tutorial offers users 11 solutions to address the issue of black screen on Remote Desktop in Windows 10 and 11, ensuring smooth operation of the Remote Desktop functionality on the Windows 10 platform.
By Ellie / Updated on December 26, 2025
Why is my remote desktop screen black Windows 11?
I use the 1809 version of Windows 10 Remote Desktop to connect to my domain computer, everything was fine until I upgraded my computer system to Windows 11. I’ve been bothered by the black screen on Remote Desktop Windows 11 for nearly a month. Who can tell me what to do?”
- Question from Reddit
What causes Remote Desktop black screen?
To fully resolve the issue of the RDP black screen during remote control of another computer, it's essential to first understand the underlying causes of the problem.
- Windows updates: Although these updates are necessary for improvements, they can sometimes introduce compatibility issues that may cause a black screen during remote desktop sessions.
- RDP settings: Changes in your remote desktop settings could potentially trigger a black screen problem. Ensure your settings are configured correctly for smooth remote connections.
- GPU drivers: Adjustments made to your GPU driver settings can directly affect your remote desktop experience. Misconfigured GPU settings might result in an RDP black screen on Windows 10/11.
- Network issues: Slow or unstable network connections can also contribute to black screen problems. Ensure a stable and fast internet connection to minimize this risk.
- Firewall & antivirus software: Strict firewall or antivirus software settings could block remote desktop connections or interfere with the display, leading to a black screen.
- Logged-in user: If another user is already logged into the remote computer, it might cause a black screen during your remote desktop session. Coordinate with other users accordingly to avoid conflicts.
How to fix black screen on Remote Desktop in Windows 10/11 [11 methods]
Here, we outline 11 solutions for addressing the black screen on Remote Desktop in Windows 10 and 11. Keep reading if you're encountering the same problem.
Method 1. Recover the system version
As previously mentioned, a Windows update can occasionally introduce compatibility issues that result in a black screen during remote desktop sessions. The initial solution is to revert the system version to determine if this resolves the issue.
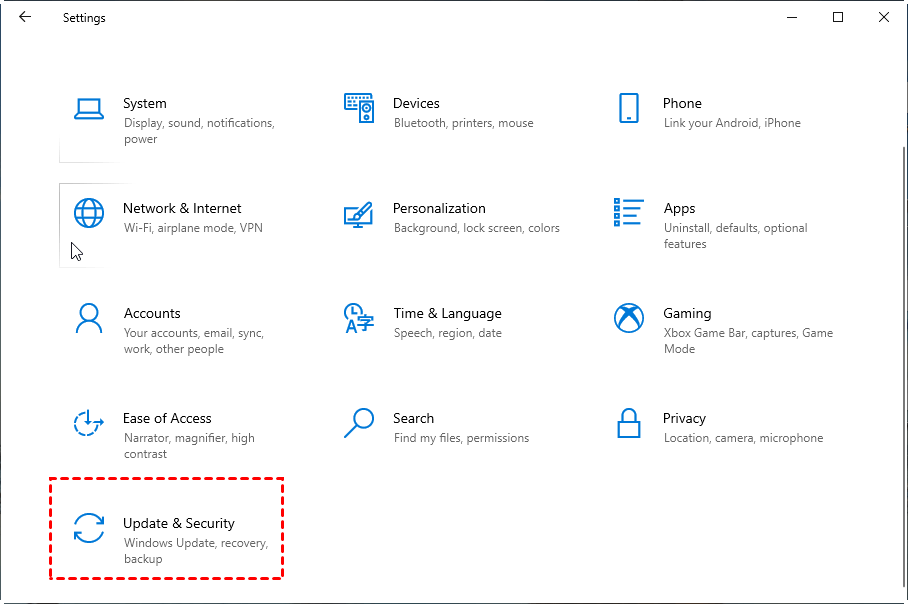
Step 1. Open the Control Panel, locate, and click Update & Security.
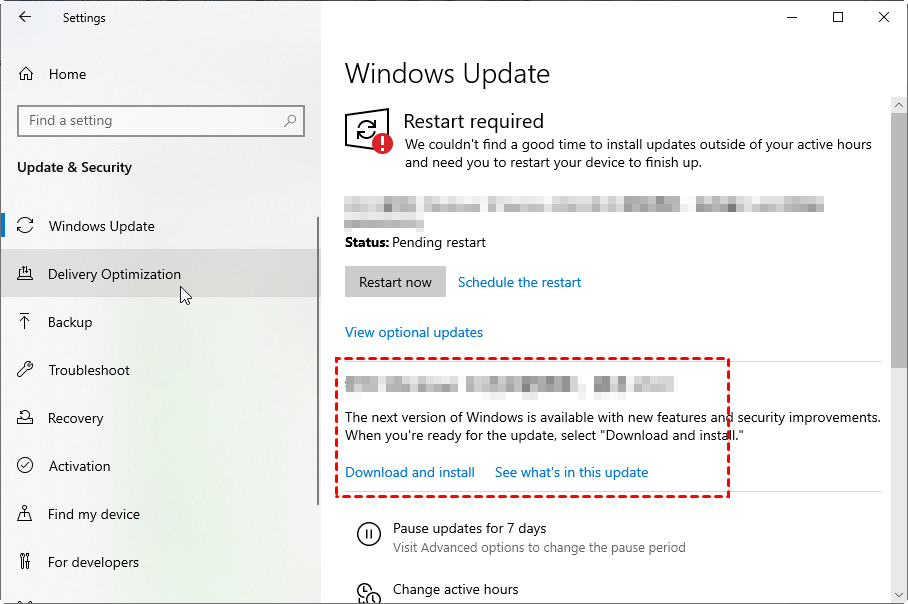
Step 2. In the Update & Security interface, check whether a new version is available. If yes, download and install it (remember to back up your data first).
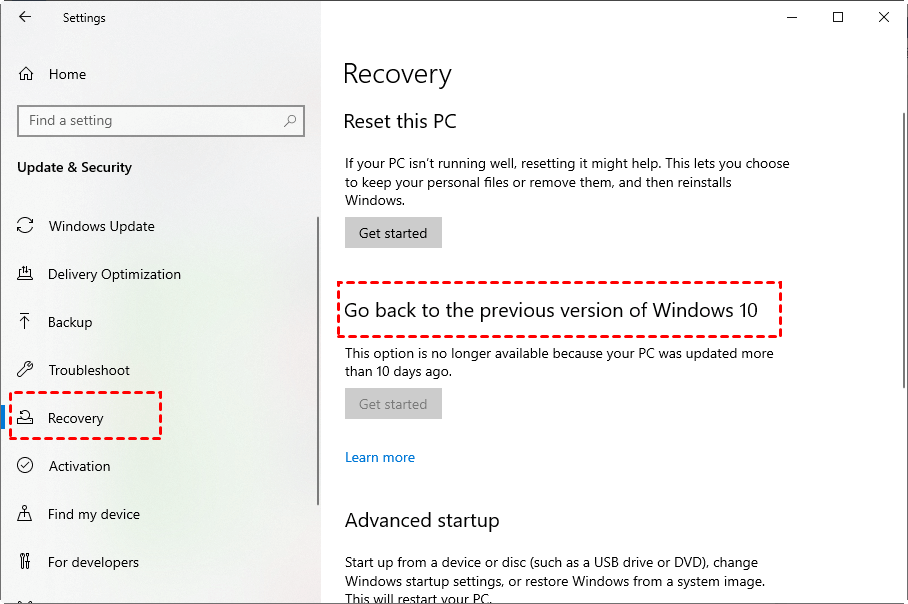
Step 3. If your computer system is already the latest version, you can consider clicking Go back to the previous version of Windows 10 in Recovery (choose carefully) to restore the system to a previous version.
Method 2. Open Task Manager
Now, let's delve into how opening the Task Manager can be beneficial in resolving RDP black screen issues on Windows. Task Manager enables you to observe background activities on your computer, aiding in identifying any problematic processes or applications causing the black screen.
Step 1. Press Ctrl + Shift + Esc to invoke the Task Manager window.
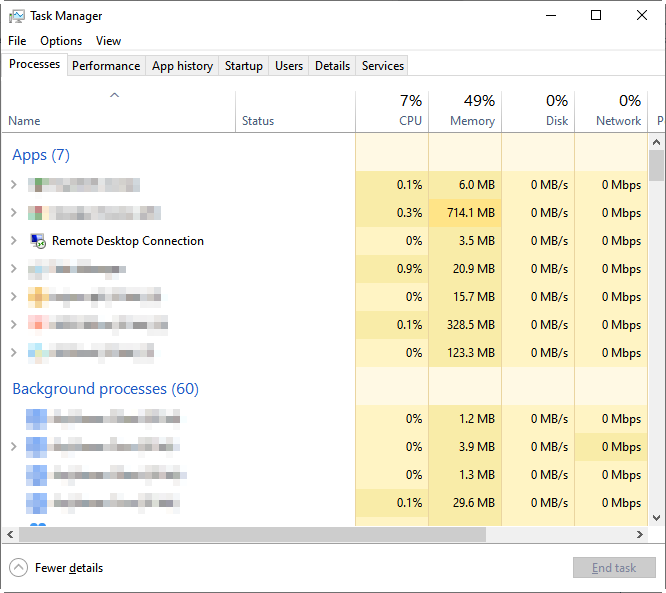
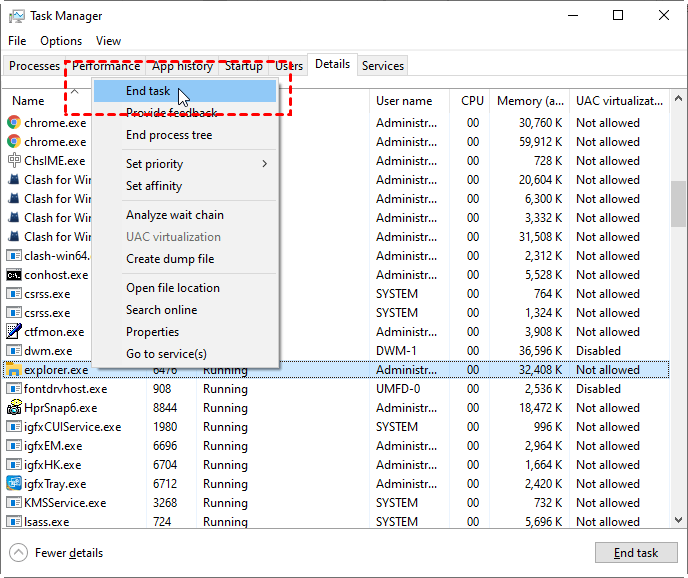
Step 2. Go to the Details tab. Find explorer.exe, right-click it, and then choose End task.
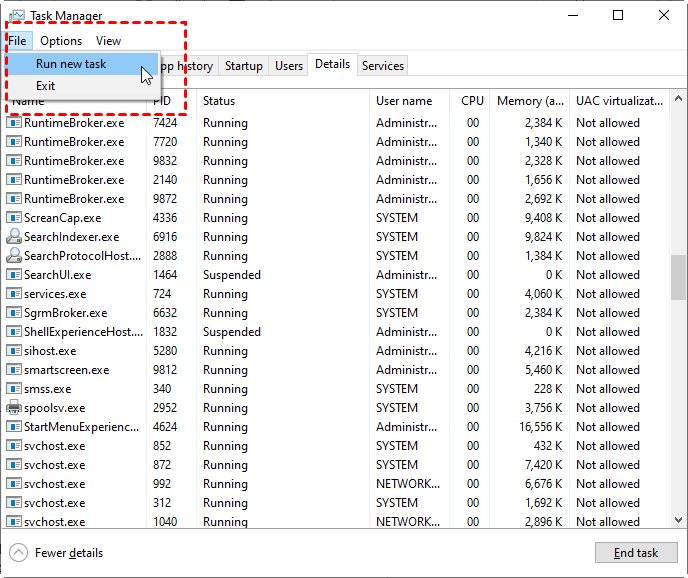
Step 3. Click File and then choose Run new task.
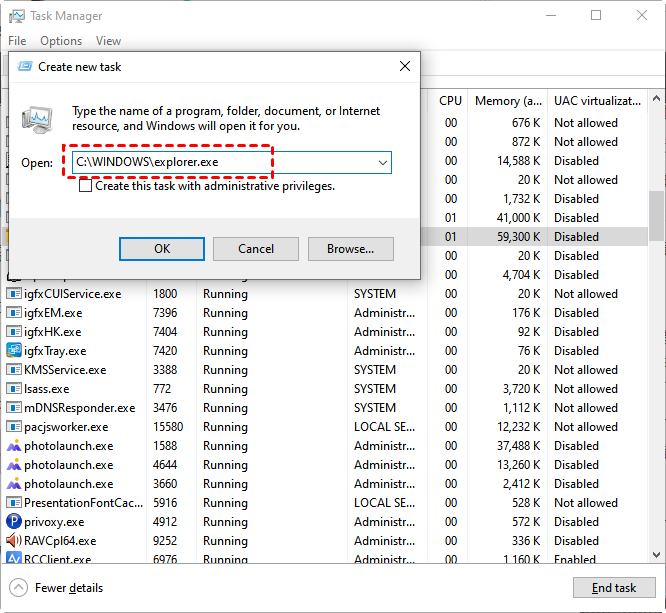
Step 4. Enter "C:\WINDOWS\explorer.exe" and click OK.
Method 3. Change the screen resolution
Verifying and adjusting your display settings to resolve the remote desktop black screen issue in Windows 10 and 11 is a positive step forward. This action can help ensure that your display configurations are compatible and correctly set up for effective remote connections.
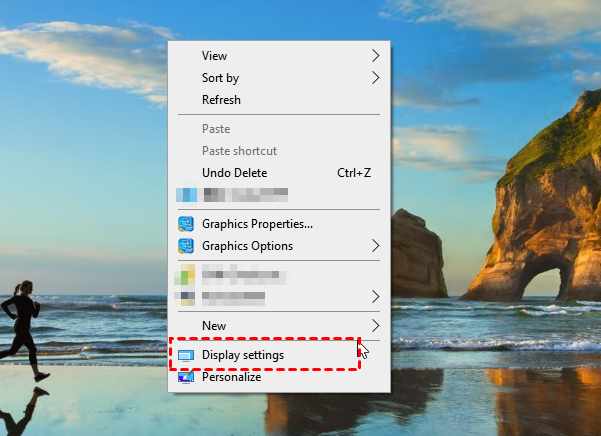
Step 1. On the local computer, right-click anywhere on the desktop and select Display settings in the expanded menu bar.
Step 2. Find Display resolution, then you can change the resolution.
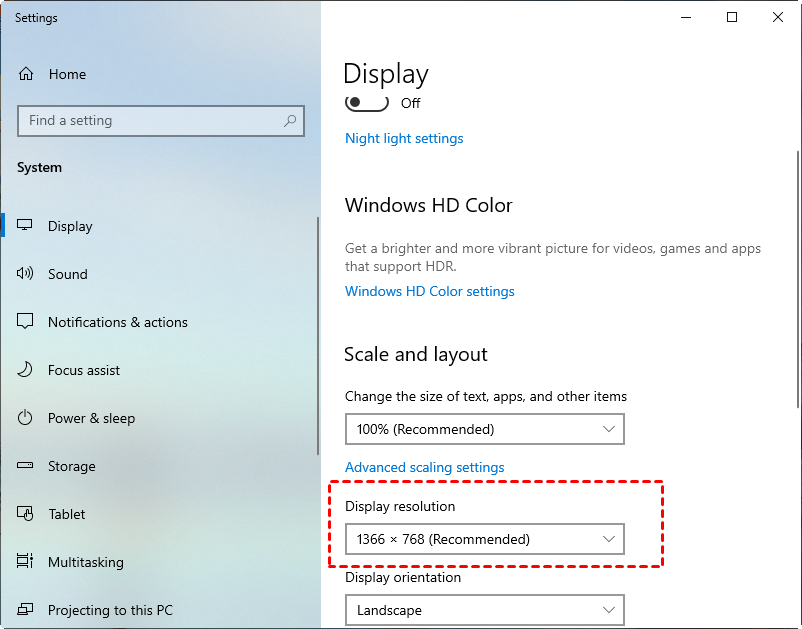
After changing the screen resolution, try the remote connection again to see if the problem of the black screen on Remote Desktop on Windows 10 has been solved.
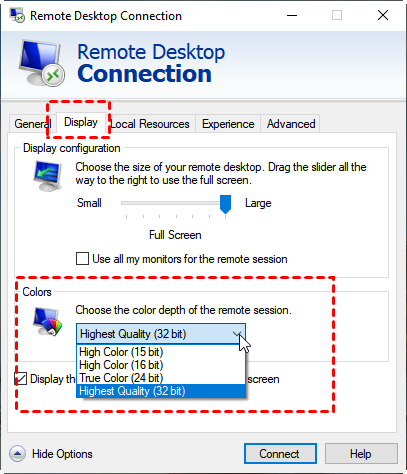
Method 4. Change the color depth of the remote session
Next, let's proceed to the following method for resolving the remote desktop black screen problem. This method entails adjusting the color depth settings of your remote session, which can greatly influence the display quality.
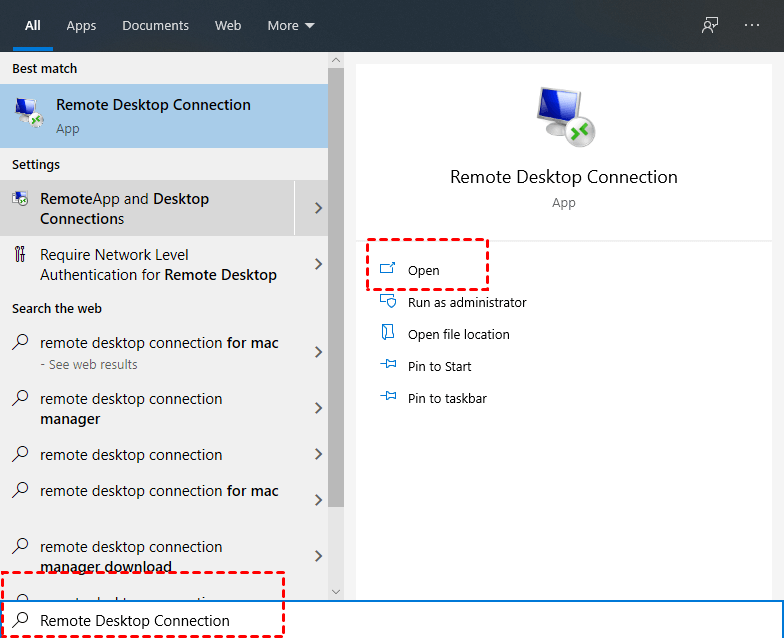
Step 1. Search for Remote Desktop Connection in the Search box. And then open it.
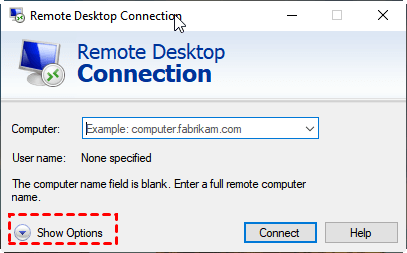
Step 2. In the Remote Desktop Connection dialog box, click Show Options.
Step 3. Switch to the Display tab, switch the Highest Quality (32-bit) to True Color (24 bit) in the Colors column, and then click Connect.
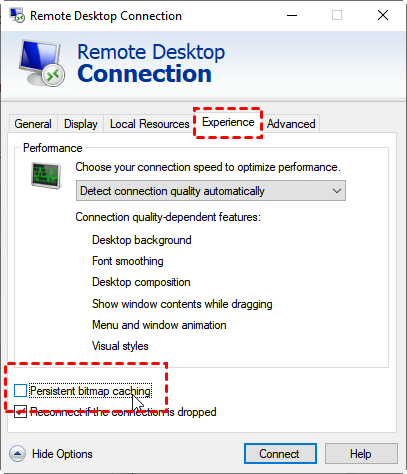
Method 5. Disable Persistent bitmap caching
After creating images and other resources, the computer will generate cache files and then store these files locally in the Remote Desktop Client. This process is called Persistent bitmap caching. Enabling Persistent bitmap caching has certain effects on the running speed of the computer. In some cases, it may lead to the problem of a black screen on Remote Desktop on Windows 10.
Open Remote Desktop Connection. In the dialog box, click Show Options. Switch to the Experience tab, then uncheck the Persistent bitmap caching option.
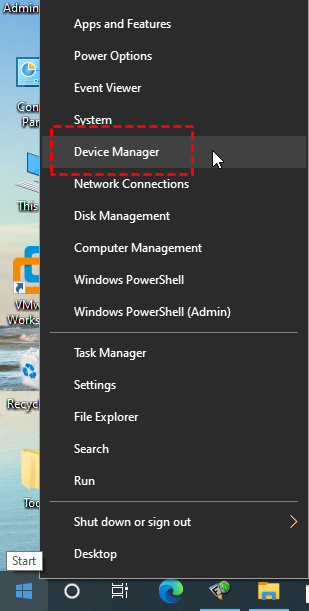
Method 6. Update GPU Driver process
The next approach involves updating your graphics drivers. While this method requires effort, it can notably enhance your computer's performance and address issues associated with the remote desktop black screen.
Step 1. Right-click the Start button and select Device Manager from the expanded menu.
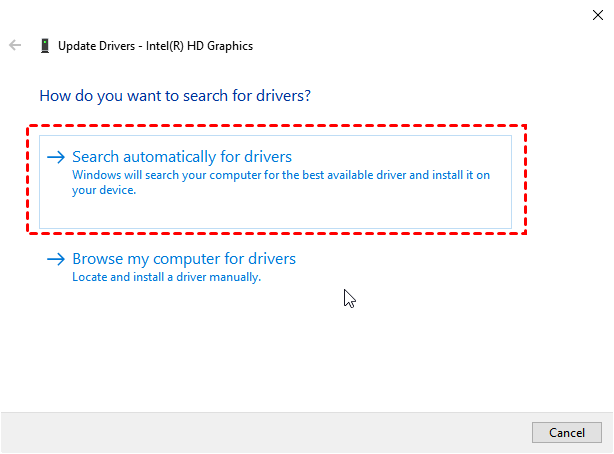
Step 2. Find Display adapters and click it. Right-click Intel(R) HD Graphics and then click Update driver.
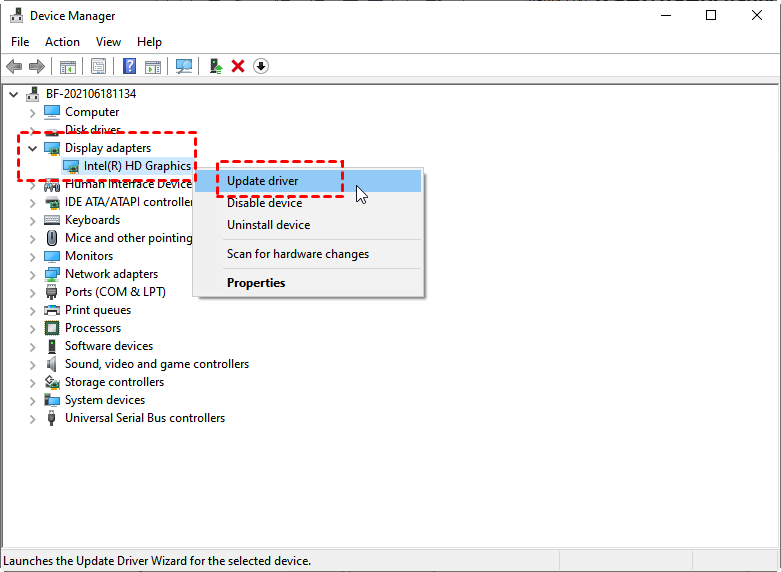
Step 3. On the update window, click Search automatically for drivers and then wait for the update.
Method 7. Disable fast startup
Fast startup is a Windows function that can quickly wake up your Windows notebook or desktop when they are in hibernation. Disabling the function may help solve the problem of a black screen on Remote Desktop on Windows 10 and 11.
Step 1. Click Control Panel on your desktop. Click Large icons on the right-upper corner and then find Power Options.

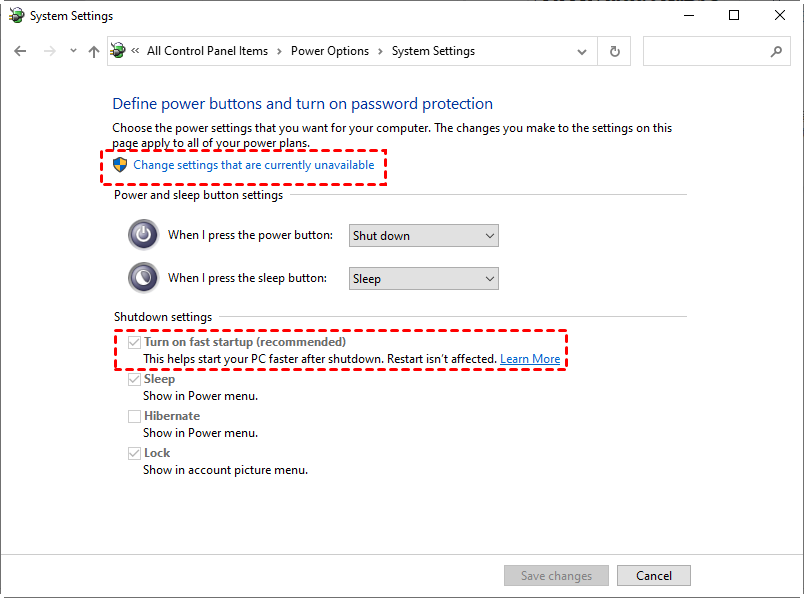
Step 2. Find and click Choose what the power buttons do.

Step 3. Find and click Change settings that are currently unavailable to make sure the Shutdown settings below are changeable. Then find and uncheck Turn on fast startup.
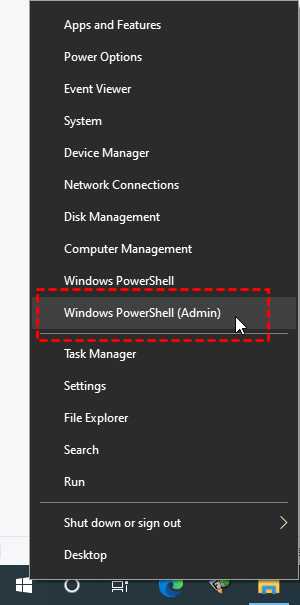
Step 1. Right-click the Start button and select Windows PowerShell (Admin) from the expanded menu.
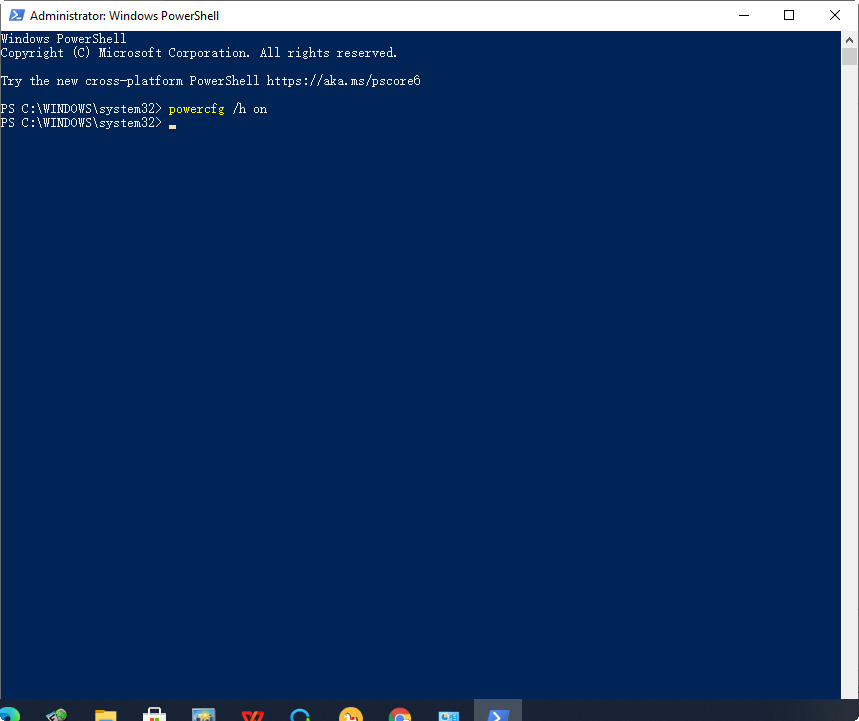
Step 2. In the Windows PowerShell window, enter “powercfg /h on”, press Enter to execute the command. Then you can see the fast startup has been turned on.
Method 8. Run SFC scan
The System File Checker (SFC) tool can help you scan your computer for damaged system files and repair them. Therefore, when the problem appears, you might as well use this tool to repair the file, which may solve this problem.
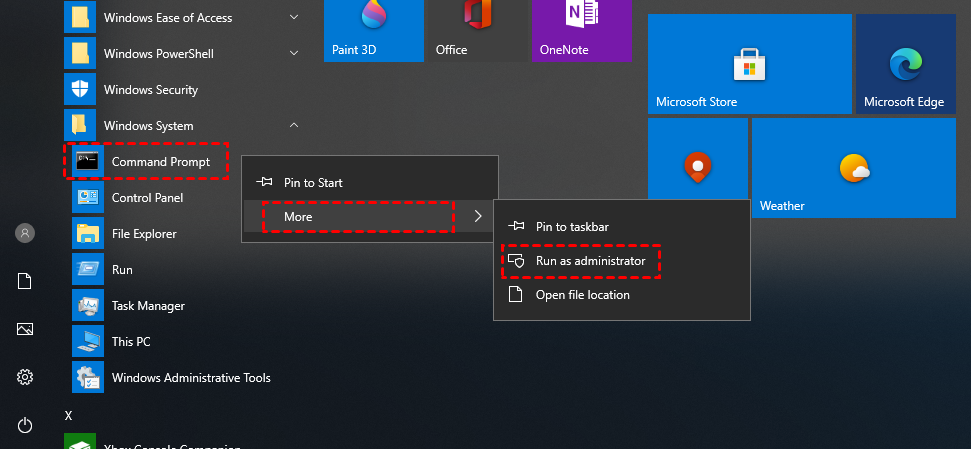
Step 1. Click Start, find Windows System, and expand it. Right-click Command Prompt, select More, and click Run as administrator.
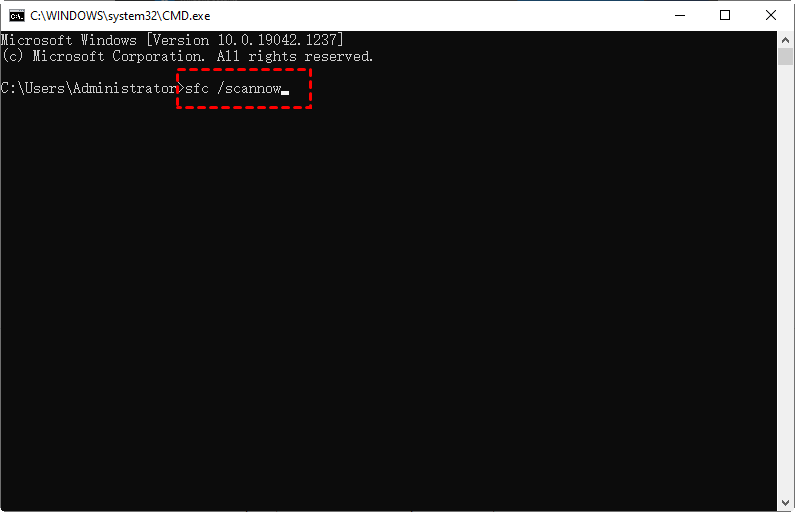
Step 2. In the Command Prompt window, enter “sfc /scannow” and then press Enter to execute the command. After that, restart the computer.
Method 9. Close client UDP and disable WDDM driver
This method entails closing the client UDP and disabling the Windows Display Driver Model. By implementing these adjustments, the aim is to tackle any potential driver-related issues that could be contributing to the remote desktop connection black screen problem.
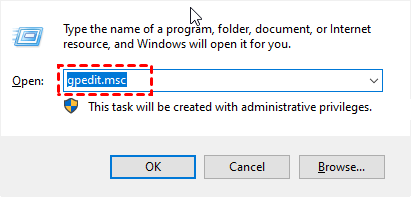
Step 1. Press Win + R to open the Run dialog box. Type in “gpedit.msc” and press OK to open up the Local Group Policy Editor window.
Step 2. Navigate here: Computer Configuration > Administrative Templates > Windows components > Remote Desktop Services > Remote Desktop Connection Client. Then click Turn off UDP On Client.
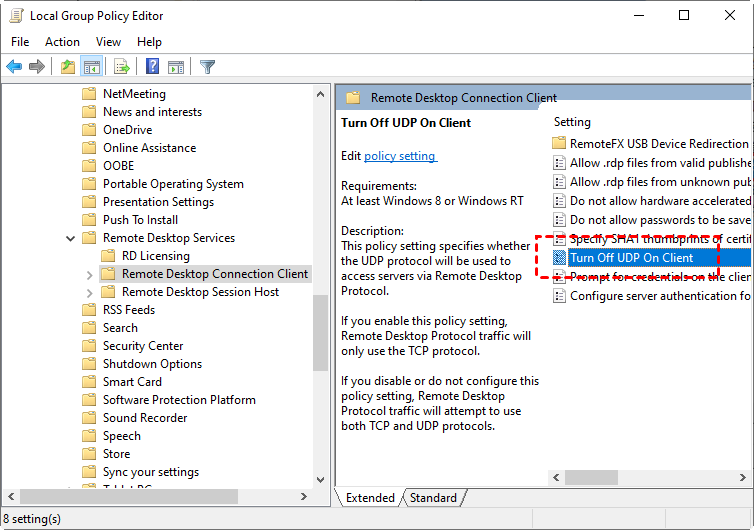
Step 3. Change its state to Enabled. Then click OK.

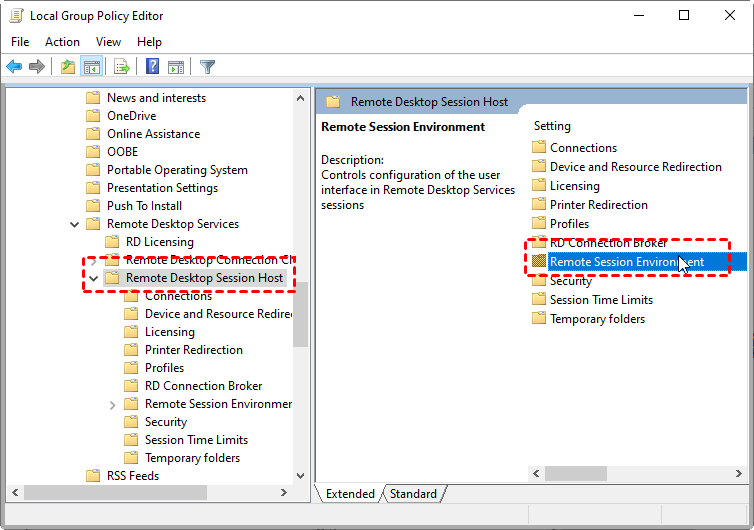
Step 4. Find Remote Desktop Session Host right below the Remote Desktop Connection Client, then click it. On the right pane, find Remote Session Environment and then click it.
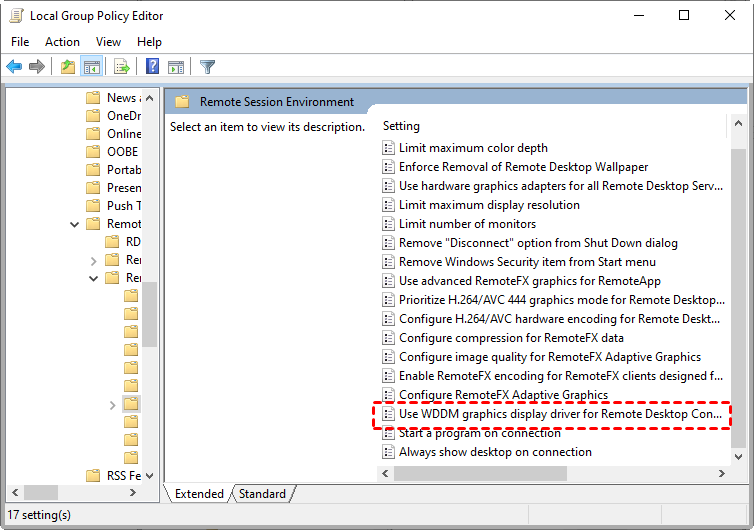
Step 5. Find Use WDDM graphic display driver for Remote Desktop Connections.
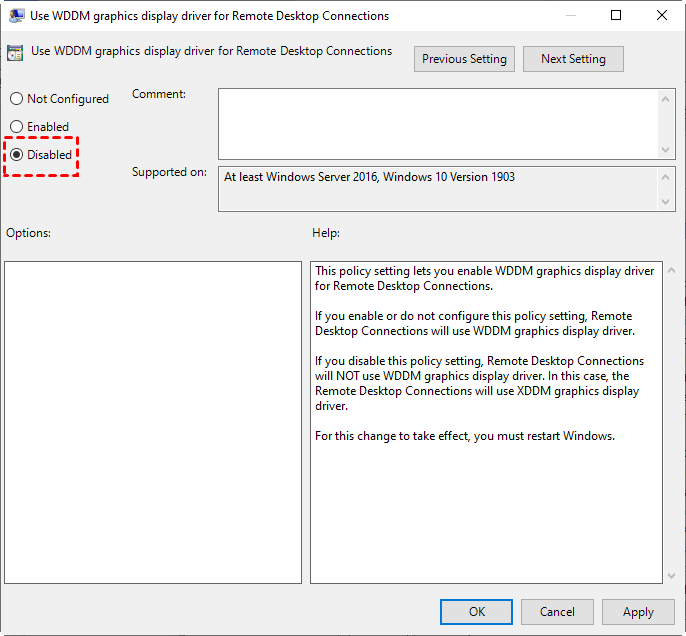
Step 6. Change its state to Disabled. Then click OK.
Method 10. Restart Remote Desktop Services
Another method to address Windows remote desktop black screen issues in Windows 10/11 is to restart the remote desktop services. This straightforward step can often initiate the troubleshooting process and potentially resolve the black screen problem.
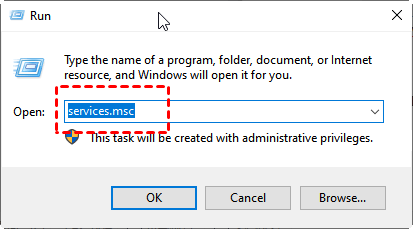
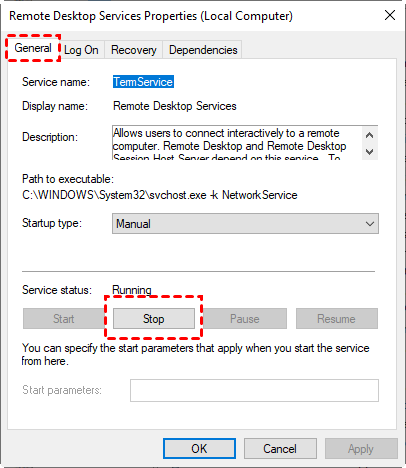
Step 1. Press Win + R to open the Run dialog box. Type in “services.msc” and press OK.
Step 2. Find Remote Desktop Services on the right pane.
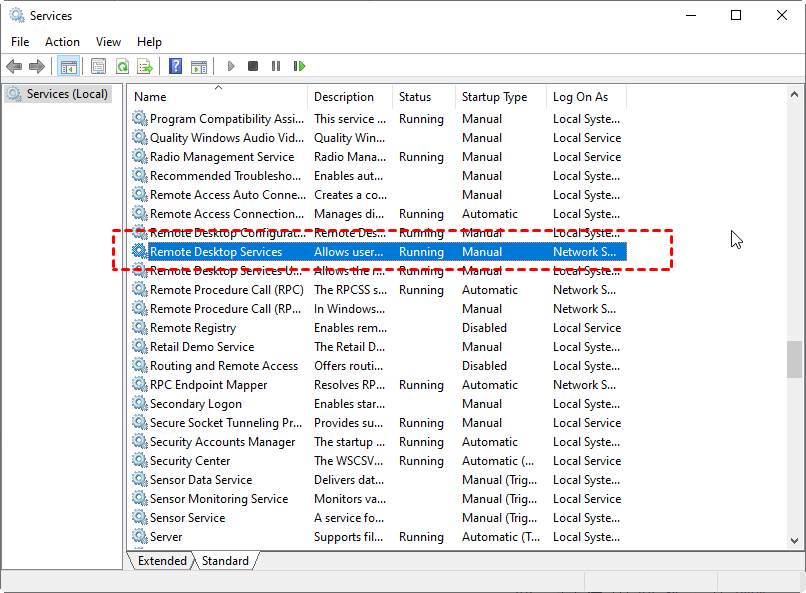
Step 3. On the General tab, click Stop, then OK.
Method 11. Use new accounts
When troubleshooting black screen issues on your Windows 10/11 remote desktop, consider creating new user accounts as a potential solution. Setting up fresh user profiles can help bypass any account-specific problems that may be causing the black screen, ultimately resolving the issue.
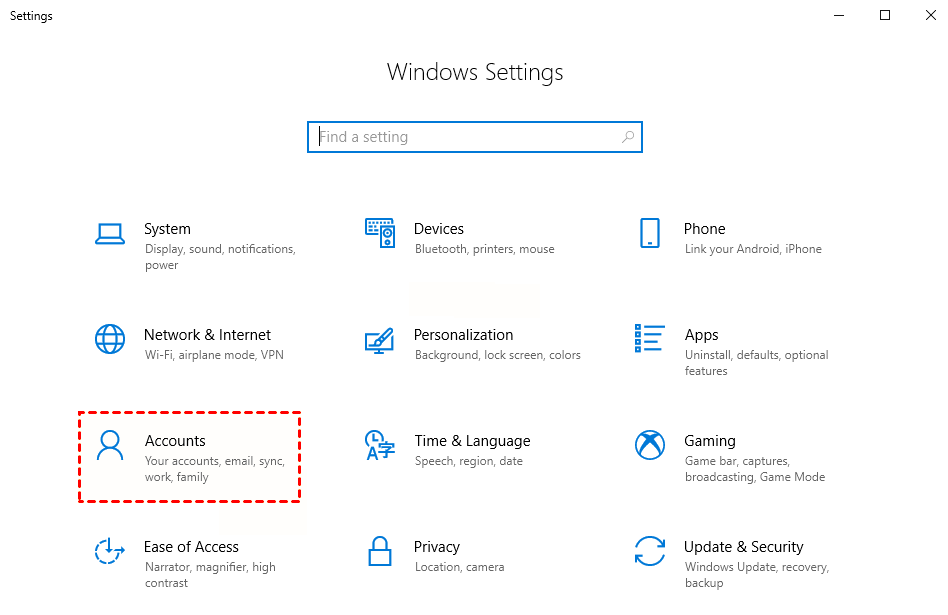
Step 1. Press Win + I to open Windows settings, find, and click Accounts.
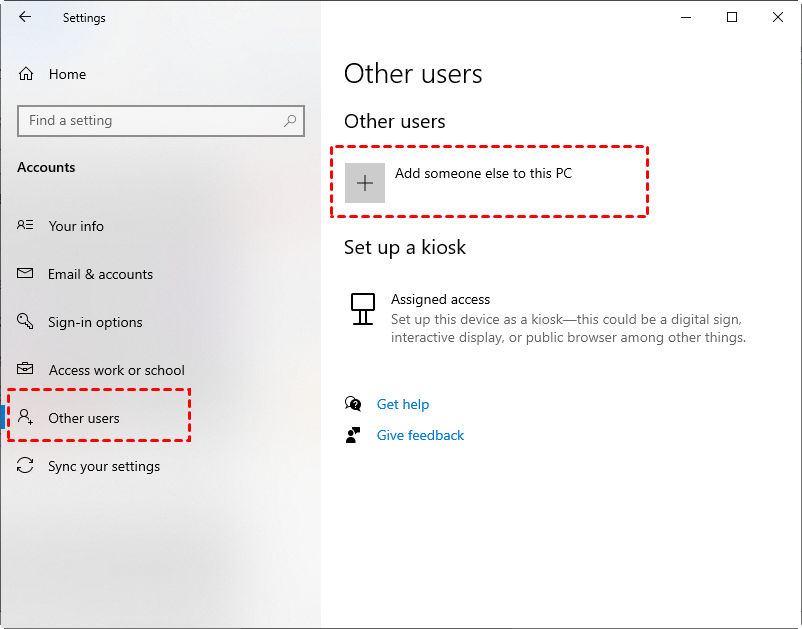
Step 2. On the left pane, find Other users and click it. Then click Add someone else to this PC.
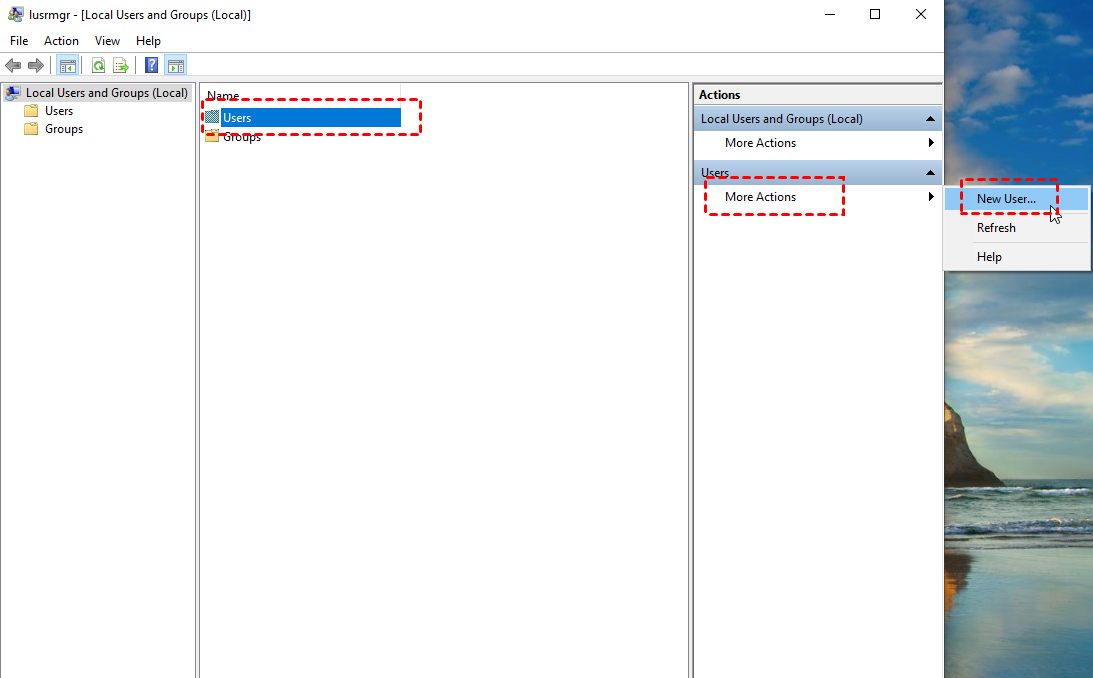
Step 3. In the Local Users and Groups window, click Users, then click More Actions, and click New Users in the expanded menu.
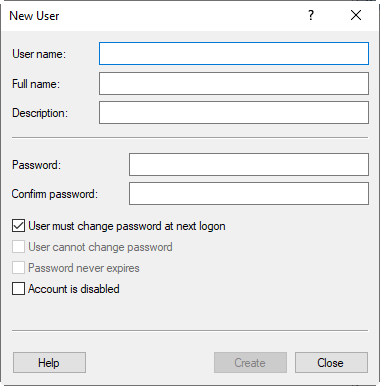
Step 4. Fill in the information needed. Then return to the Other Users interface, select the newly created account, change the account type Administrator, and then click OK.
Bonus tip: Alternative way to control remote desktop without black screen
To prevent remote desktop black screen issues in Windows 10, consider utilizing AnyViewer as a dependable solution. AnyViewer is a remote desktop software that serves as a robust alternative to address black screen problems. As a top-tier tool in remote access and support, AnyViewer offers a wide range of remote desktop features, including multi-controller support, high-speed file transfers, clipboard functionality, and drag-and-drop file sharing.
As an alternative to Windows Remote Desktop, AnyViewer has the following advantages:
-
Ease of use: AnyViewer typically offers a more user-friendly interface and setup process compared to Remote Desktop Connection, making it easier for non-technical users to establish remote connections.
-
No network configuration required: With AnyViewer, users can establish remote connections even through firewalls and NAT routers without needing to configure network settings, which can be a more cumbersome process with Remote Desktop Connection.
-
Additional features: AnyViewer includes features such as screen wall, group management, and chat functionality, which may not be available or as seamlessly integrated in Remote Desktop Connection.
-
Commercial and personal use: AnyViewer offers both commercial and personal licenses, making it suitable for businesses as well as individual users, while Remote Desktop Connection is primarily intended for business use and may require specific licensing for commercial purposes.
Next, let's see how to achieve unattended remote access with AnyViewer.
Step 1. Download, install, and launch AnyViewer on both computers. Go to Log in, then click Sign up and fill in the signup information.

Step 2. Then you can see you successfully logged in to AnyViewer. Your device will automatically be assigned to the account you've logged in to.

Step 3. Log in to the same AnyViewer account on the two devices, then you can achieve a direct connection by clicking One-click control.

- ✍ Tips: You can also upgrade your account to a Professional or Enterprise plan, which can offer:
- Faster file transfer speed of up to 10 MB/s.
- Ability to assign more devices to the same account for unattended remote access.
- Display of more currently connected devices for management purposes.
- Option to connect in privacy mode to safeguard privacy.
- Ability to create groups for enhanced management.
- Multiple screen walls for efficient monitoring of computers.
Conclusion
If you encounter the issue of a black screen on Remote Desktop in Windows 10/11, you can try the 11 methods listed above, which may help you resolve the problem. If none of the above methods prove successful, you can consider using the free third-party remote control software AnyViewer, which can effectively alleviate many RDP problems.
