
Stepwise Remote Desktop Connection Tutorial on Windows 10, 11
This post is a stepwise Remote Desktop Connection tutorial on Windows 10, 11. There are primarily two conditions, one is to use Remote Desktop Connection in local network, and another is to use it over an internet connection.
By Hester / Updated on November 21, 2022
How do I set up Remote Desktop on Windows 10, 11?
“To properly complete my work tasks, I intend to use Remote Desktop connection to remotely control my work computer from home. However, I'm not sure how to set it up. My computer is running Windows 10. Can somebody provide me with some details? Many thanks.”
Remote Desktop connection tutorial on Windows 10, 11 [2 parts]
Nowadays, Remote Desktop connection is widely used in our daily life. For example, you can use it to connect to your work computer from home or to connect to your colleagues’ computer to have teamwork. Remote Desktop connection on Windows 10/11 allows you to connect to other computers or devices on your local network or on the Internet with a public IP address. Here in the post, we provide you with a stepwise Remote Desktop connection tutorial.
Part 1. Use Remote Desktop connection in local network
Here we will introduce how to use Remote Desktop connection in local network. Before achieving remote connections via RDP, you need to configure Remote Desktop connection on the host computer. The steps can be divided into the following four points.
Configure Remote Desktop connection on the host computer
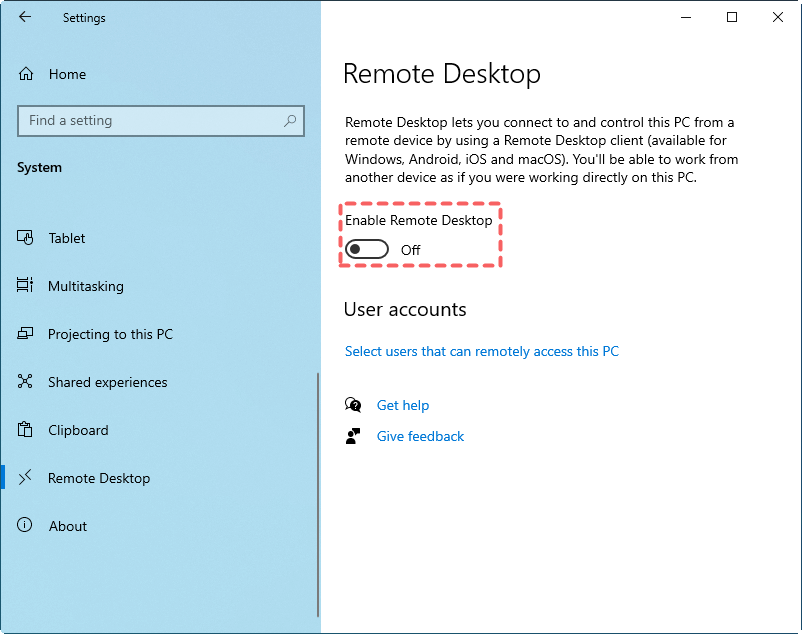
1. Enable Remote Desktop in Settings
Navigate to: Settings > System > Remote Desktop > Turn on the Enable Remote Desktop switch, and then click the Confirm button.
2. Allow remote connections to this computer in Control Panel
Step 1. Select Control Panel > System and Security > System, under the “System” section, click Remote Settings.
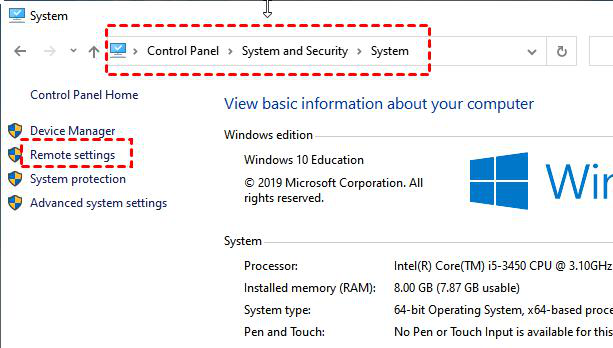
Step 2.Select the box next to "Allow remote connections to this computer" and then click OK.

3. Change Windows Firewall settings
Step 1. On the host computer, select: Control Panel > System and Security > Windows Defender Firewall.
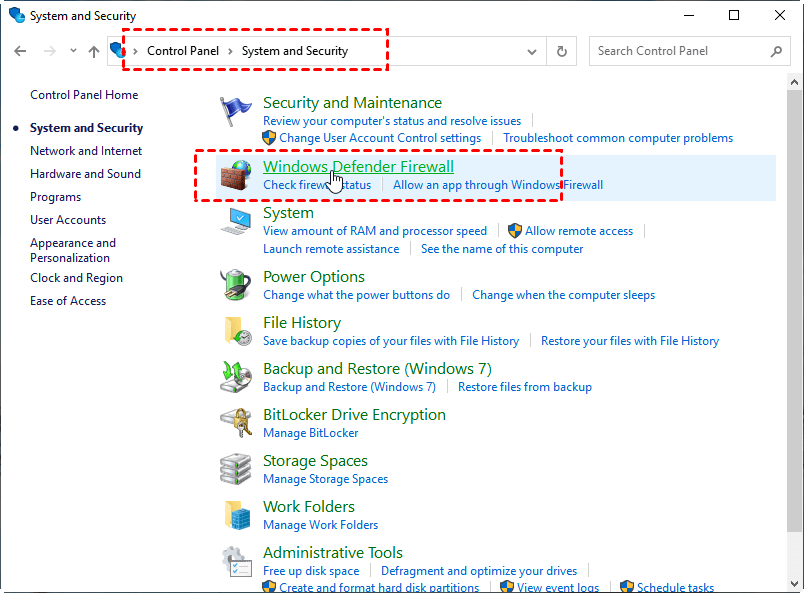
Step 2. Click “Allow an App or Feature Through Windows Defender Firewall” on the left navigation.
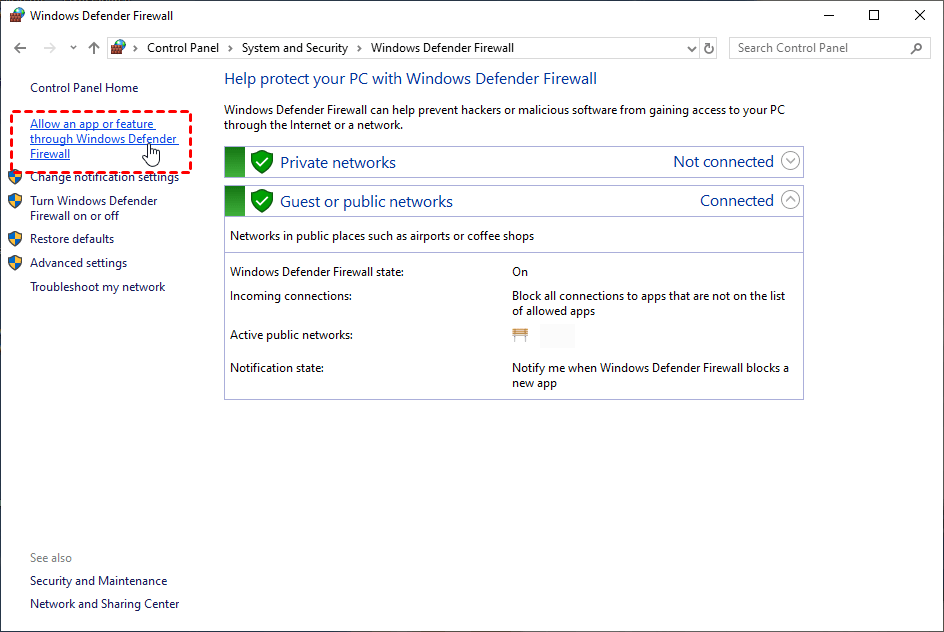
Step 3. Check “Remote Desktop” and hit OK.

4. Get the IP address and computer name
Step 1. Press Win + R on the host computer to open the Run dialog box. Enter "cmd" and then hit OK.

Step 2. To get the IP address for Remote Dekstop, enter the command "ipconfig" and note the IPv4 Address.

Step 3. To get the PC name for Remote Desktop, type in “query user”, and you can see your PC name.

Connect to the host computer from the client computer via RDP
After all you have done before, follow the next steps to connect to another computer.
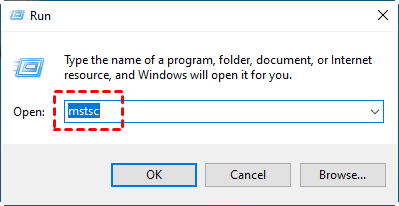
Step 1. On the client computer, press Win + R, and type “mstsc” in the Run Dialog box to open Remote Desktop connection.
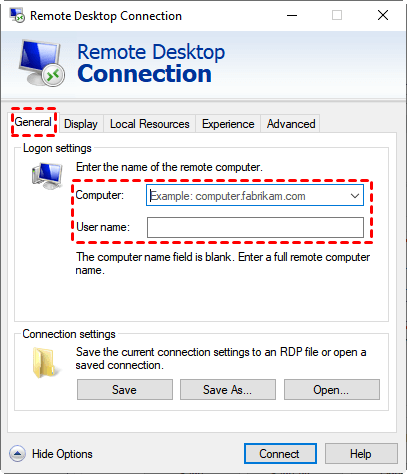
Step 2. Click Show Options, type in the IP address and name of the host computer, and then click Connect.
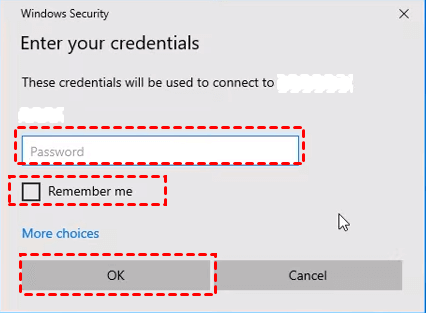
Step 3. Input the password of the client computer in the pop-up window, and press OK.
Once you complete the steps above, you can successfully use Remote Desktop connection in local network to connect to other computers.
Part 2. Use Remote Desktop connection over an internet connection
If you want to connect to another computer using Remote Desktop connection over an internet connection, you have one more thing to do. You also need to obtain the public IP address (the router's IP) and set up port forwarding after finishing configuring Remote Desktop connection on the host computer follow the steps we mentioned above.
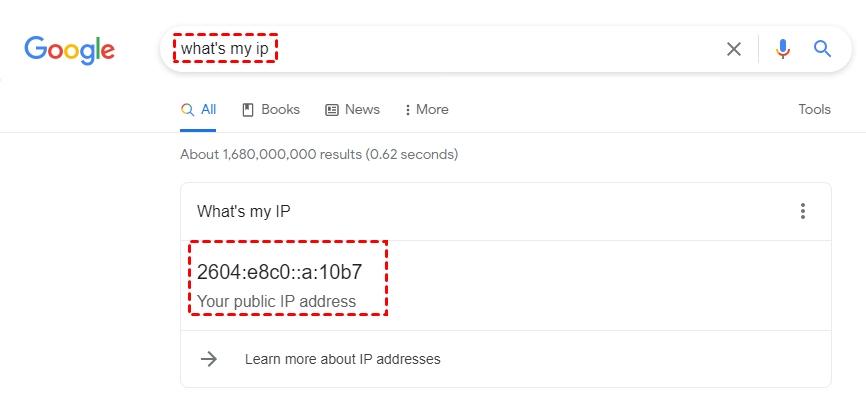
1. Find the public IP address
Open the Chrome browser, type “what is my IP” in the search box, and then note down your public IP address (not to share it with anyone else in case of security issues).
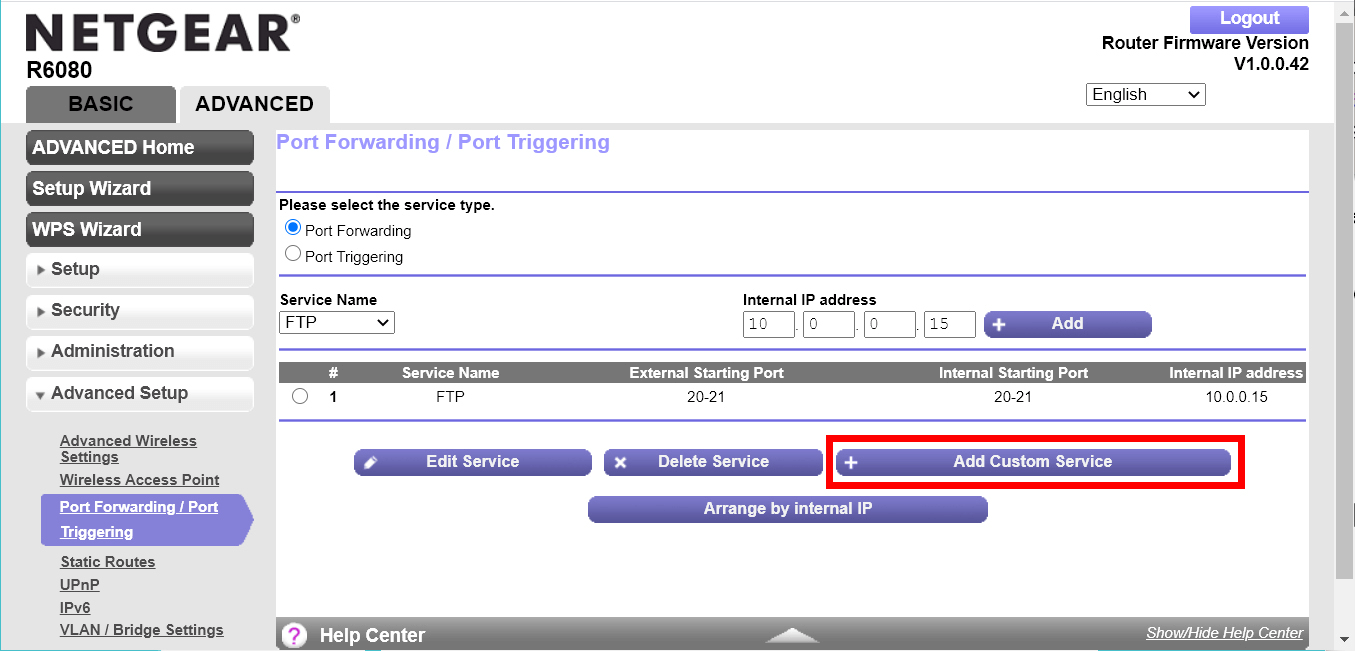
2. Set up port forwarding
Step 1. Open a web browser, and type in your router’s IP address. Then you will see a privacy warning. Click Advanced > Proceed to continue.

Step 2. Type your router's username and password in the box, then click Login.

Step 3. Choose Port Forwarding/Port Triggering from the left pane. Click Add and choose Add Custom Service to add a new port forwarding rule.
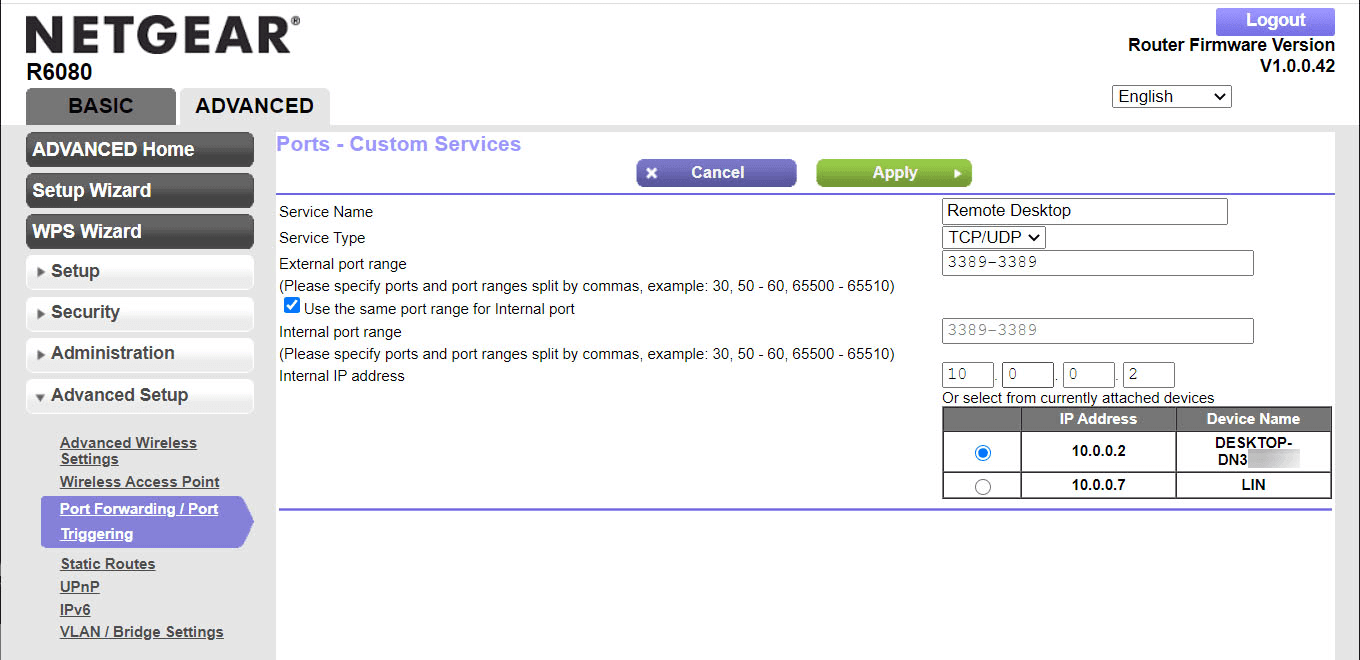
Step 4. Select the port you want to forward in the Port Forwarding interface (If you are unclear about the protocol being used, select TCP/UDP or Both under Service Type). After choosing the IP address of the device you want to port forward, click apply.
When you have done the steps above, just follow the same connecting process in Part 1 to connect to your host computer from your client computer.
Pros and cons of Remote Desktop connection
There are a few pros and cons of Remote Desktop connection on Windows 10/11 you may want to know before using it:
- Pros:
- It is a built-in program in Windows without installation.
- It is free to use.
- Cons:
- It has a complicated process to use it over an internet.
- It’s not support for Windows Home editions to receive remote control, for example, your Windows 10 Home Edition doesn’t support Remote Desktop.
- It’s not allowed to have multiple Remote Desktop connections to one PC unless you buy more CALs.
- It doesn’t have a chat box, which is not convenient for remote support.
Easiest Remote Desktop connection alternative: AnyViewer
You may feel confused about the Remote Desktop connection tutorial above, and want to look for a simple way to have a remote control. Here we would like to recommend you another remote desktop freeware AnyViewer, which is considered the easiest Remote Desktop connection alternative for the following reasons:
- It can achieve a remote connection without an IP address or username.
- It can be used over an internet connection without port forwarding or VPN.
- It is available on multiple Windows versions, including Windows 10 Home Edition.
- It’s allowed to have multiple Remote Desktop connections to one PC.
- It offers a chat box to allow text communication between the two computers.
- It has a simple interface and an easy process to achieve remote connection.
Step 1. On the host computer, click Log in on the left pane, and click Sign up (log in directly if you already have signed up).

Step 2. Complete the sign up information.

Step 3. When you successfully logged in to AnyViewer, your device will automatically be assigned to the account you’ve logged in to.

Step 4. Log in to the same AnyViewer account on the two devices, and click One-click control to achieve unattended remote access.

- ✍ Notes: You can upgrade your account to a Professional or Enterprise plan to enjoy more rights:
- Assign more devices to achieve unattended remote access to more devices.
- Connect to another computer in privacy mode, which means you can black the screen and block the mouse and keyboard of the remote computer.
- Faster file transfer speed. Transfer speed for a free account is 500 KB/s, and for a paid account is up to 10 MB/s.
Conclusion
This post is a Remote Desktop connection tutorial in two different internet conditions. RDP over an internet connection, however, takes more specialized skills. Therefore, AnyViewer is a better option if you're seeking for a simpler alternative to Remote Desktop connection.
