
How to Transfer Photos From iPhone to Laptop
Transferring photos from an iPhone to a laptop doesn't have to be complicated. Whether you prefer wireless solutions like iCloud and AnyViewer or traditional USB methods using Windows tools, this guide walks you through every reliable option step by step.
By Ellie / Updated on January 13, 2026
What is the easiest way to transfer photos from iPhone to laptop?
If you’re wondering how to transfer photos from iPhone to laptop, you’re not alone. Many users want a fast, safe, and hassle-free way to move photos from their iPhone to a Windows laptop, whether for backup, editing, or sharing.
The good news? There are several easy methods, including how to transfer photos from iPhone to laptop wirelesslyor using USB. Below, we’ll explore the best options so you can choose the one that fits your needs.
How to transfer photos from iPhone to laptop wirelessly
Wireless methods are perfect if you don’t have a cable nearby or prefer automatic syncing. If convenience is your priority, learning how to transfer photos from iPhone to laptop wirelessly can save you a lot of time.
Way 1. Remotely transfer photos from iPhone to laptop using AnyViewer
AnyViewer is a powerful cross-platform remote file transfer tool that allows you to move photos wirelessly from your iPhone to your laptop without relying on iCloud or cables.
Unlike cloud-based tools that rely on storage limits or slow syncing, AnyViewer enables real-time file transfer between your iPhone and laptop. This makes it an excellent choice if you’re looking for a flexible solution for how to transfer photos from iPhone to laptop wirelessly with full control.
Key advantages of AnyViewer include:
- True wireless transfer: No USB cable, no physical connection required
- No iCloud dependency: Avoid Apple ID restrictions and iCloud storage limits
- Fast transfer speed: Optimized for stable, high-speed file transmission
- Simple setup: Easy to install and configure, even for beginners
- Secure connection: Encrypted data transfer to protect your photos
- Cross-platform compatibility: Works seamlessly between mobile devices, macOS, and Windows computers
When is AnyViewer the best choice:
- You want to transfer photos selectively, not your entire library
- Your iCloud storage is full or disabled
- You don’t have a USB cable available
- You need to access and transfer photos remotely, even when you’re not near your laptop
- You prefer a faster and more flexible alternative to traditional photo transfer tools
Step-by-step guide:
Step 1. Download and install AnyViewer on your Windows laptop.
Step 2. Install the AnyViewer mobile app on your iPhone.
Step 3. Create an account and sign in on both devices.
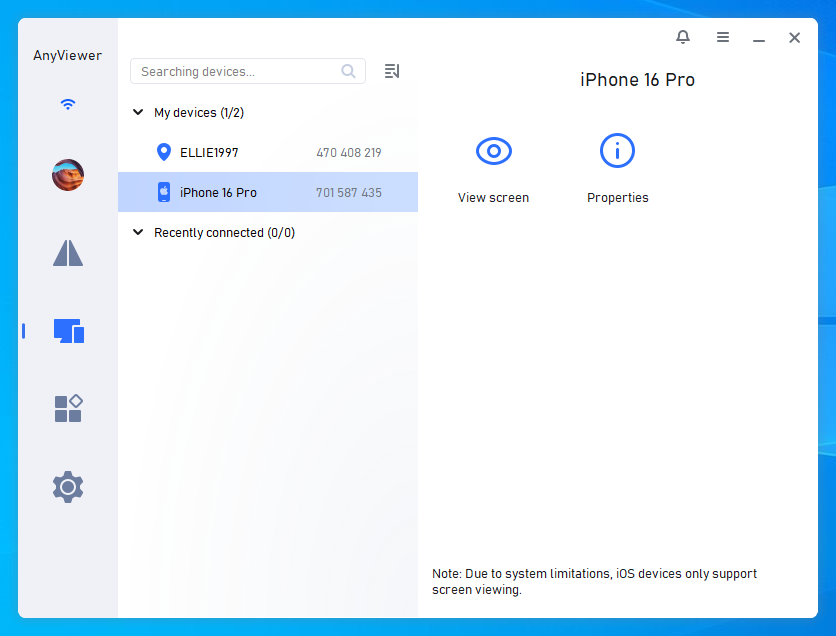
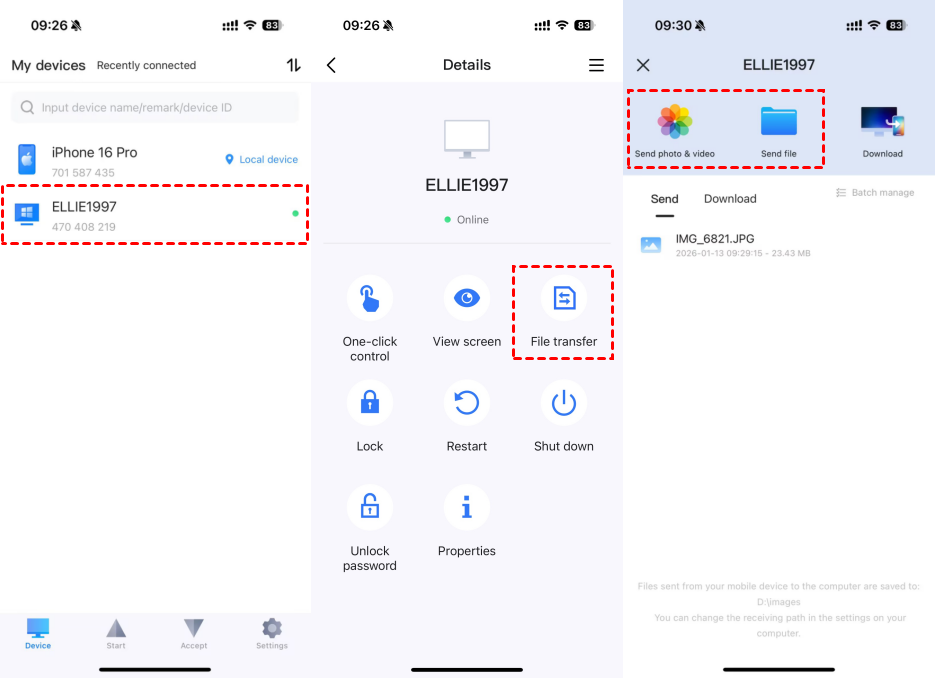
Step 4. On your iPhone, choose your Windows laptop > choose File transfer.
Step 5. Select the photos or any files you want and transfer them directly to your laptop.
Tip: AnyViewer is especially useful if you want to manage files remotely or transfer photos while away from your laptop.
Way 2. Transfer pictures from iPhone to laptop using iCloud Photos
iCloud Photos is Apple’s official cloud storage and file sharing solution for syncing photos across devices automatically. This is another popular approach for users exploring how to transfer photos from iPhone to laptop wirelessly with minimal manual effort.
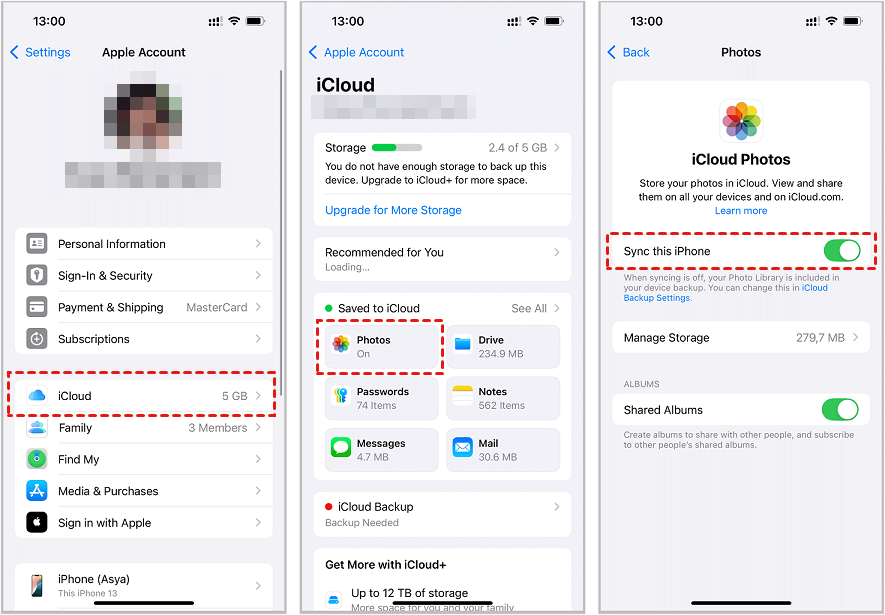
Step 1: Enable iCloud Photos on Your iPhone
- Open Settings.
- Tap your Apple ID at the top.
- Select iCloud > Photos.
- Turn on iCloud Photos.
Once enabled, your photos will upload to iCloud whenever your iPhone is connected to Wi-Fi.
Step 2: Install and Configure iCloud for Windows
- Download iCloud for Windows from Apple’s website.
- Install and launch the app.
- Sign in with the same Apple ID used on your iPhone.
- Check the box next to Photos.
- Click Options next to Photos.
- Enable iCloud Photo Library.
- Select Download new photos and videos to my PC.
- Click Done > Apply.

Step 3: Access Your Photos on laptop
- Open File Explorer
- Go to This PC > iCloud Photos > Downloads
- All synced photos will appear here automatically.
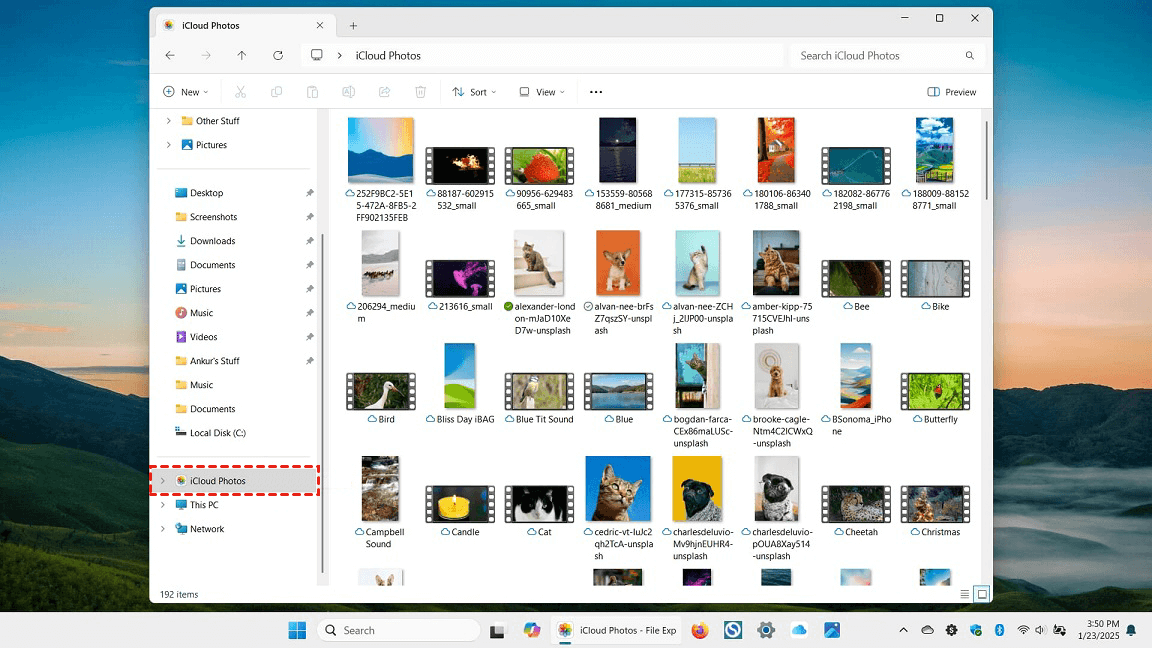
Tip: This method is ideal for users who want hands-free syncing without manual downloads.
Way 3. Download photos from iPhone to laptop using iCloud.com
If you don’t want to install any software, iCloud.com offers a browser-based solution.
Detailed Steps:
Step 1. Enable iCloud Photos on your iPhone.
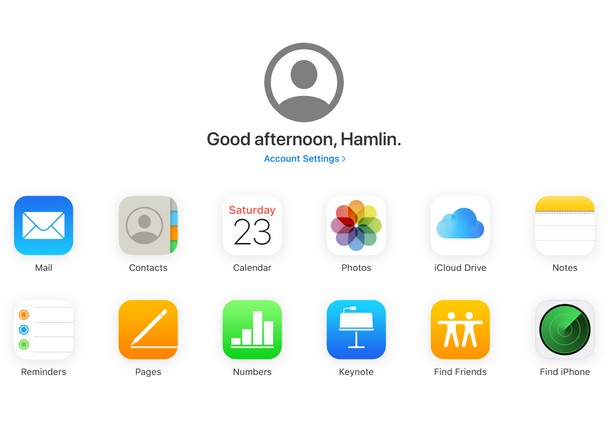
Step 2. Open a browser on your laptop and go to iCloud.com.
Step 3. Sign in using your Apple ID.

Step 4. Complete two-factor authentication if prompted.
Step 5. Click Photos to open your photo library.
Step 6. Browse photos by albums or dates.
Step 7. Select one or multiple photos.
Step 8. Click the Download icon at the top.
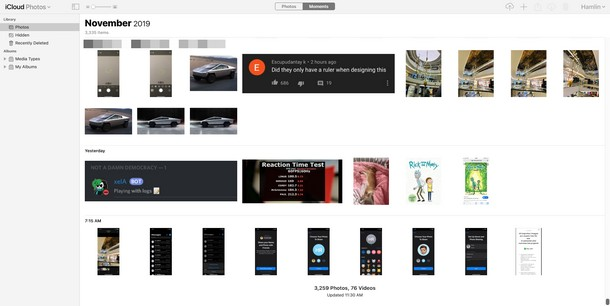
Downloaded images will appear in your Downloads folder.
How to transfer photos from iPhone to laptop with a USB cable
If you prefer a wired connection, learning how to transfer photos from iPhone to laptop using USB is ideal. USB transfers are fast, stable, and don’t require an internet connection.
Way 1. Import photos from iPhone to laptop using Windows Photos app
This is one of the most common methods for how to transfer photos from iPhone to laptop using USB on Windows 8, 10, and 11.
Step -by-Step Instructions:
Step 1. Install the latest version of iTunes on your laptop.
Step 2. Connect your iPhone using a USB cable.
Step 3. Unlock your iPhone and tap Trust This Computer.
Step 4. Open the Photos app on your laptop.
Step 5. Click Import in the top-right corner.
Step 6. Choose From a USB device.
Step 7. Select the photos you want.
Step 8. Click Import Selected.
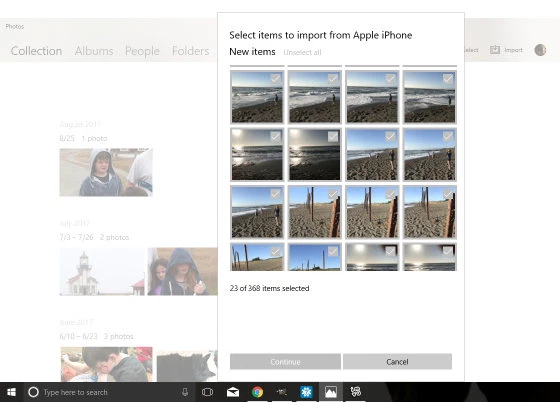
Step 9. Photos will be saved in the Pictures folder and organized by date.

Way 2. Copy photos from iPhone to laptop using Windows AutoPlay (Windows 7)
Windows 7 users can rely on AutoPlay.
Steps:
Step 1. Connect your iPhone to the laptopvia USB.
Step 2. Allow access on your iPhone.
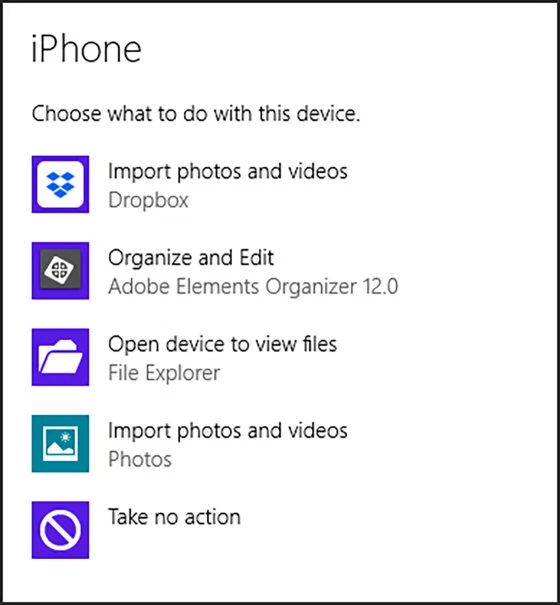
Step 3. When AutoPlay appears, select Import Photos and Videos.
Step 4. Windows will copy all photos automatically to the Pictures folder.
Way 3. Get photos from iPhone to computer using File Explorer
This manual method gives you full control.
Detailed Steps:
Step 1. Connect your iPhone to your laptopwith a USB cable.
Step 2. Unlock your iPhone and approve permissions.
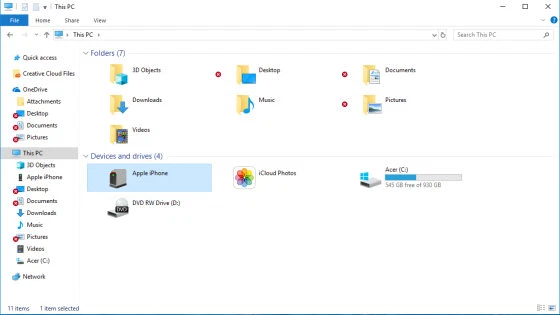
Step 3. Open File Explorer.
Step 4. Navigate to This PC > Apple iPhone > Internal Storage > DCIM.
Step 5. Open folders such as 100APPLE or 101APPLE.
Step 6. Select specific photos or entire folders.
Step 7. Copy and paste them into your Pictures folder.

Tip: This method is perfect for selective photo transfers.
Conclusion
Now that you know how to transfer photos from iPhone to laptop, you can choose the method that best fits your workflow. Wireless options like AnyViewer and iCloud offer convenience, while USB transfers provide speed and reliability. No matter which method you use, following the steps above ensures a smooth and frustration-free photo transfer experience.
