
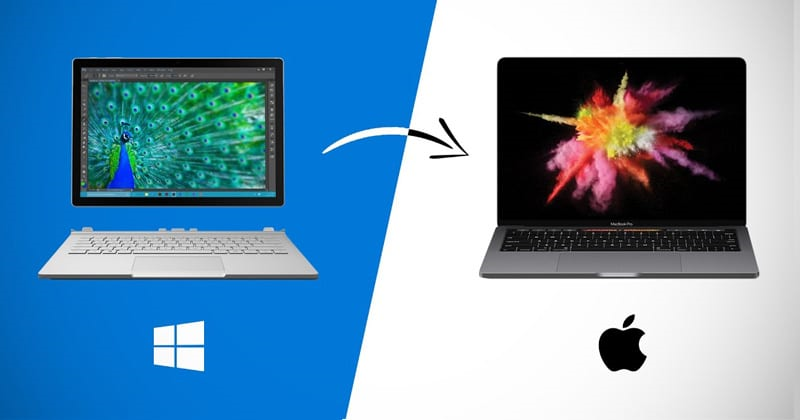
How to Transfer Files from HP Laptop to MacBook Air: 5 Simple Methods
Transferring files from your HP laptop to a MacBook Air is simple with these 5 methods. Whether using AnyViewer, Migration Assistant, file sharing, email, or an external hard drive, each option makes moving your files quick and easy.
By Ellie / Updated on April 2, 2025
How do I transfer files from my HP laptop to my Mac?
When switching between devices, transferring files is a crucial task. If you're looking to move your files from an HP laptop to a MacBook Air, you're in the right place. Here's a simple guide to make this process fast and efficient.
How to transfer files from HP laptop to MacBook Air [5 methods]
Here's how to transfer files from HP laptop to MacBook Air easily using the following 5 methods.
Method 1. AnyViewer - Transfer files between Windows and Mac
AnyViewer is an efficient and secure remote desktop solution designed for seamless file transfers between an HP laptop and a MacBook Air over the internet. This tool allows you to work remotely, making it ideal for transferring files across different networks or when you're not in the same physical location, making it perfect for a remote work environment.
When to use AnyViewer:
- When you need to transfer files between devices over the internet, even if they are on separate networks.
- When you seek an easy-to-use solution for transferring files between Windows and macOS without requiring admin credentials or passwords.
- When you need faster, more reliable file transfers backed by advanced encryption to protect your data.
- When you require additional capabilities like accessing applications, managing settings, and troubleshooting while transferring files.
Here's a simple guide on how to transfer files from HP laptop to MacBook Air using AnyViewer:
Step 1. Download and install AnyViewer on both your HP laptop and MacBook Air.
Step 2. Create an AnyViewer account, or log in if you already have one.

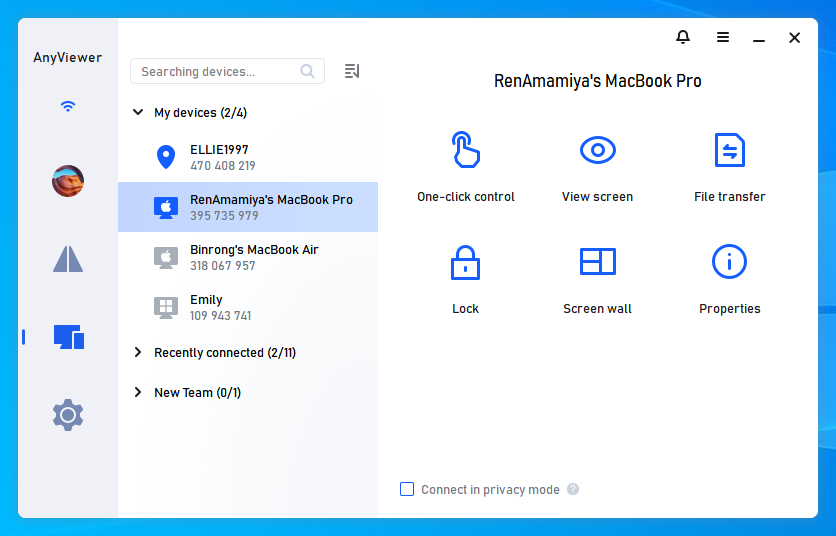
Step 3. Open the AnyViewer app on your HP laptop, then click on "Device" to view your connected devices. Find your Mac under "My Devices" and select it. From the available options, click on "File Transfer" to launch the file transfer manager.
Alternatively:
If you prefer unattended remote access during the transfer, click "One-click control" to remotely access your Mac. Once connected, you can use the file transfer manager directly from the toolbar within the remote session.
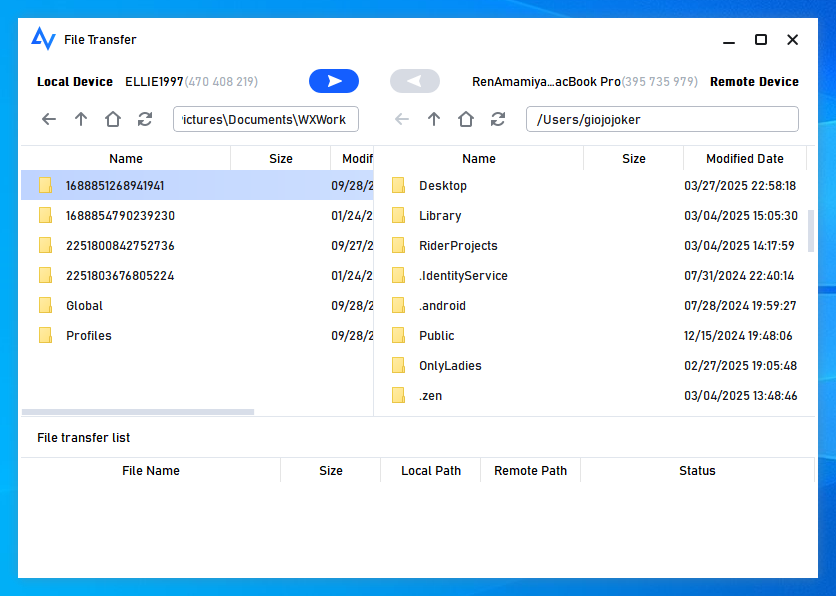
Step 4. In the file transfer manager, select the file you wish to transfer, then click the arrow to start the transfer.
- ★Tips: For better file transfer performance, consider upgrading to a Professional or Enterprise plan, which offers:
- Maximum file transfer speed: 10 MB/s
- 5 simultaneous file transfer threads
- Unlimited number of files per transfer
- Maximum single file size: 1 TB
Method 2. Migration Assistant - Migrate data from Windows to Mac
Migration Assistant simplifies transferring your contacts, calendars, email accounts, and other data from a Windows PC to your Mac, automatically placing everything in the correct locations.
When to use Migration Assistant:
- When both your Mac and HP laptop are connected to the same network.
- When you temporarily disable antivirus, firewall, or VPN software on both devices during the transfer.
- When your Windows operating system is up to date (Migration Assistant supports Windows 7 and newer versions).
- When you have the administrator account name and password for your Windows device ready.
Here's how to transfer data from HP laptop to MacBook Air using Migration Assistant:
Step 1. On your HP laptop, download and install Windows Migration Assistant 3, which is required for macOS Sonoma 14.4 or later. If your Mac is running an earlier version of macOS, use the appropriate version of Migration Assistant.
Step 2. On your Mac, go to Applications > Utilities and open Migration Assistant, or use Spotlight to search for it.
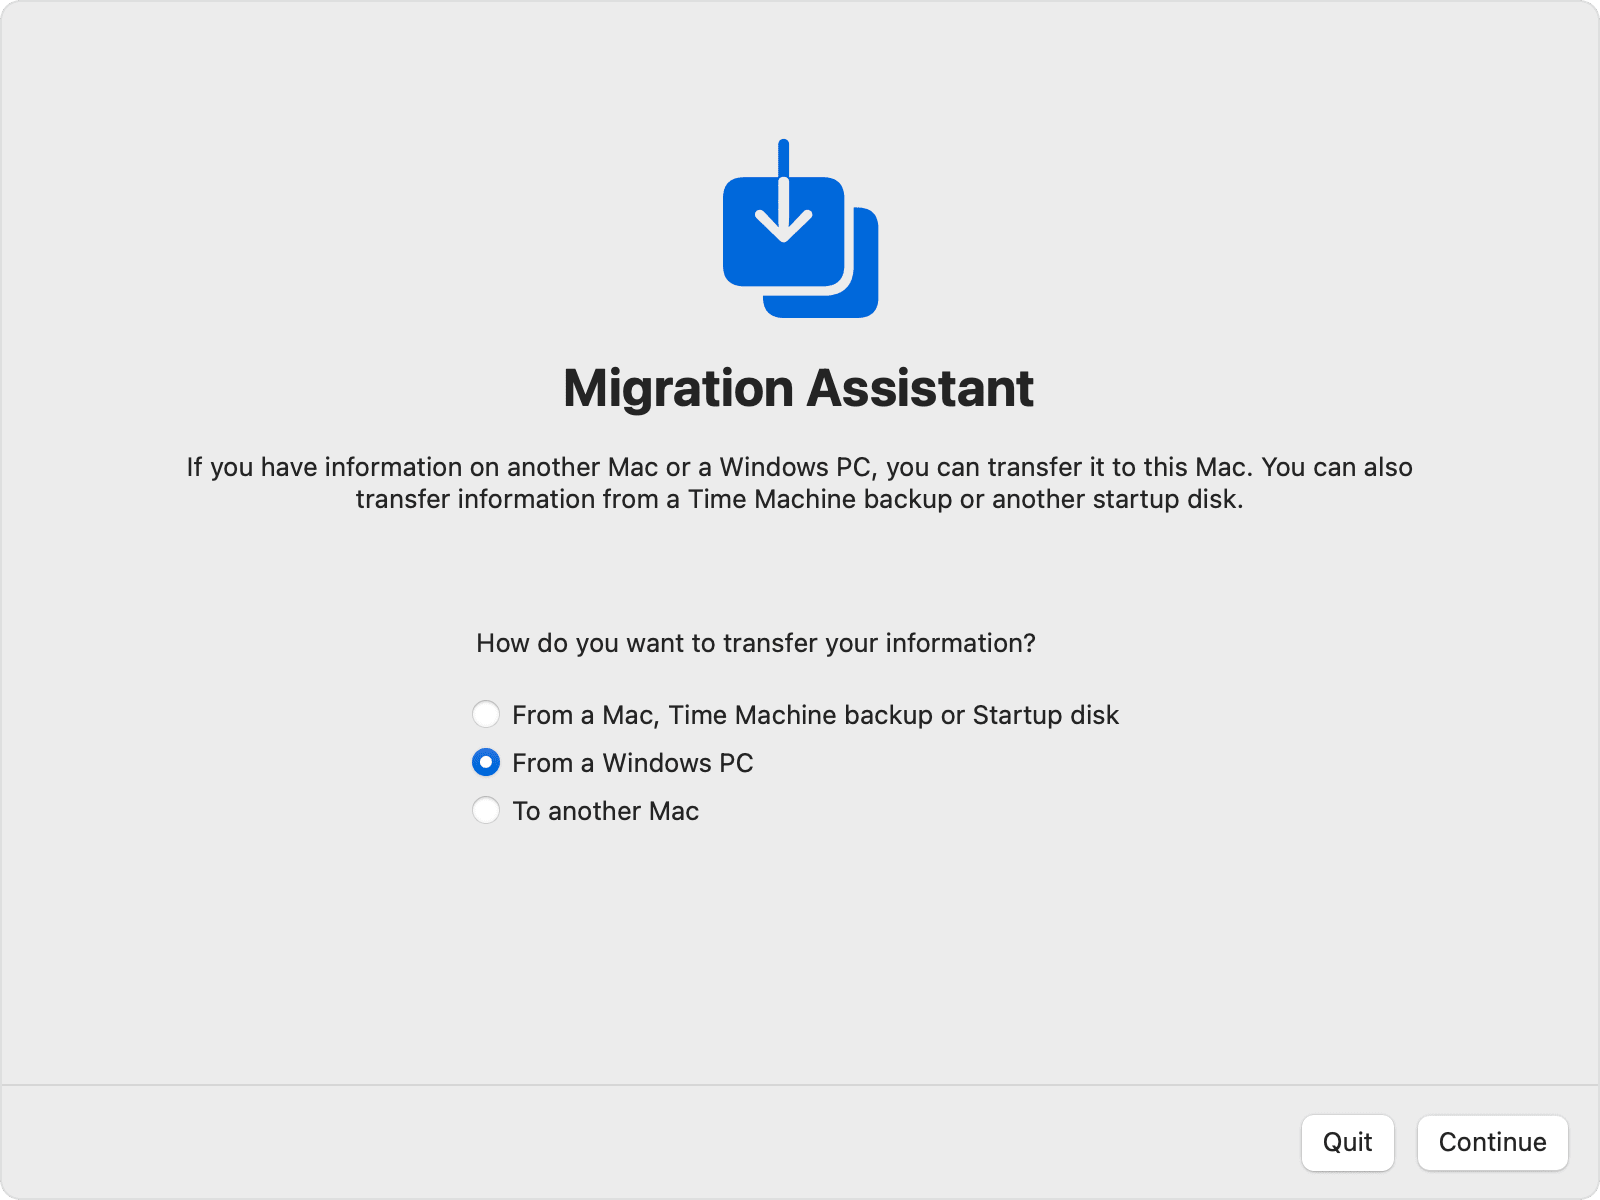
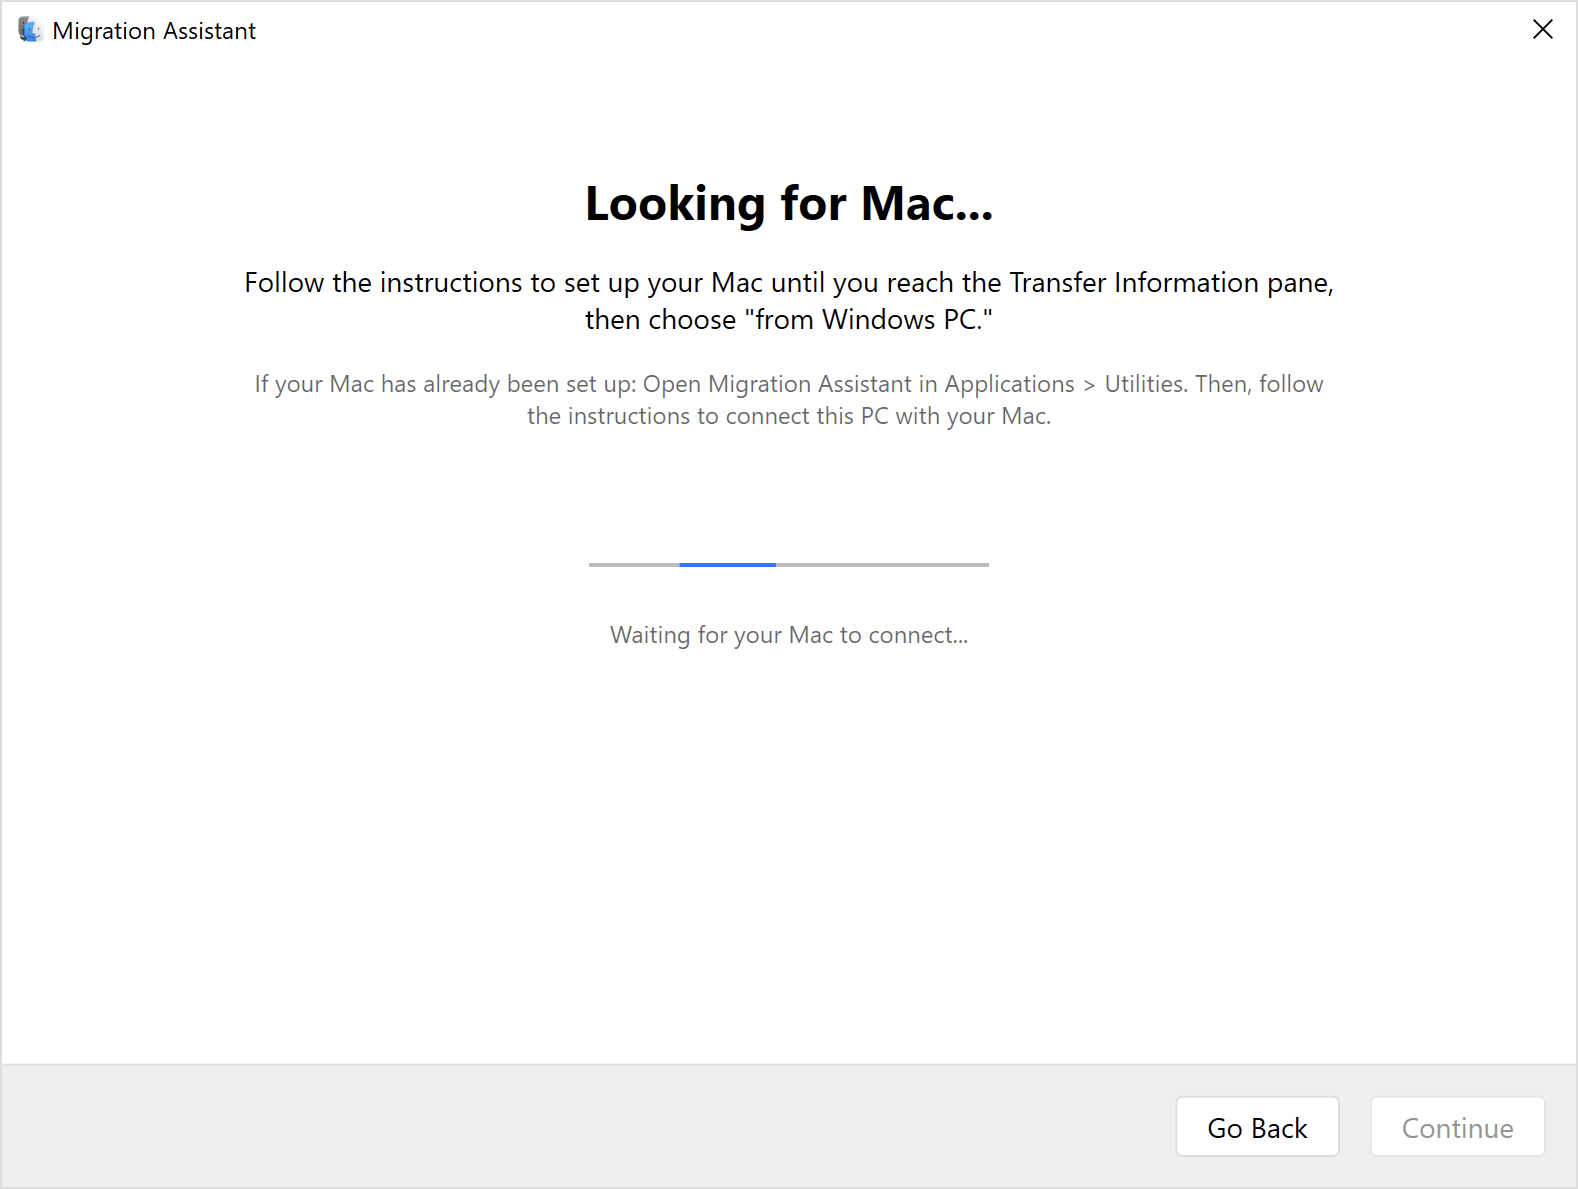
Step 3. Follow the on-screen instructions until you're prompted to choose a transfer method. Select "From a Windows PC" and click Continue.
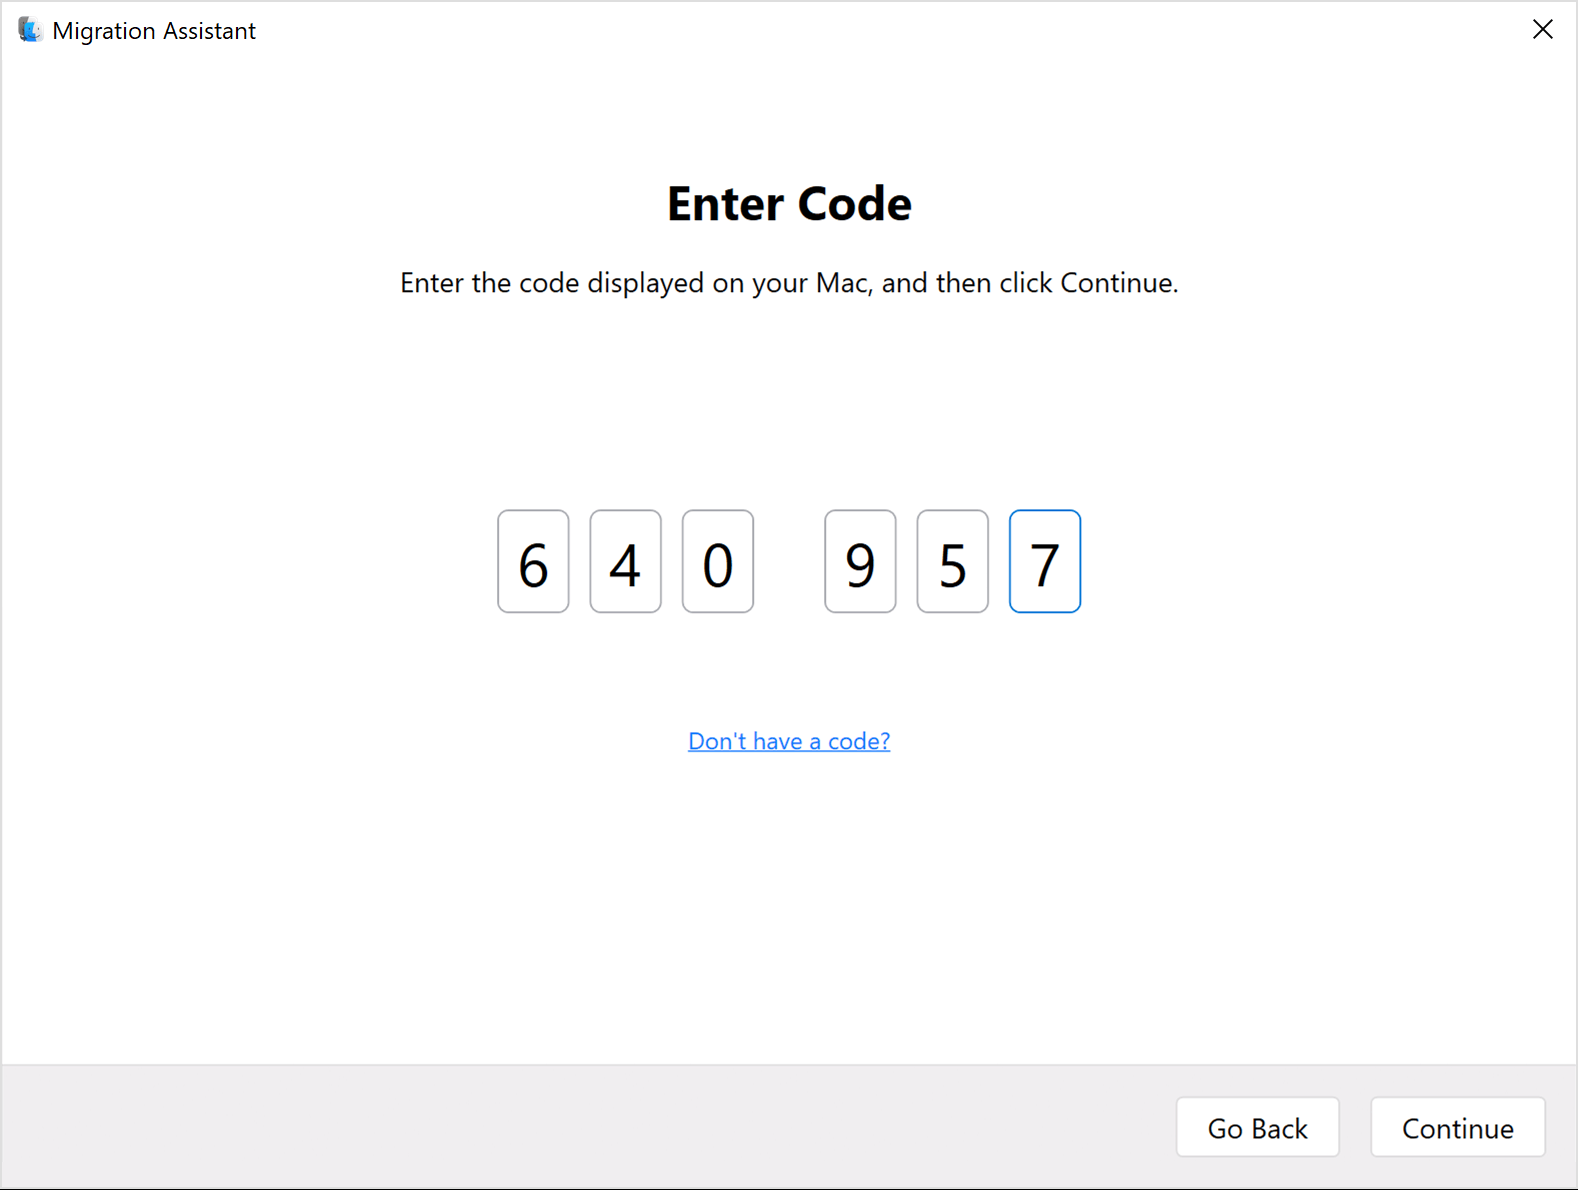
Step 4. Your Mac will display a code. Open Windows Migration Assistant on your HP laptop and enter the code shown on your Mac.
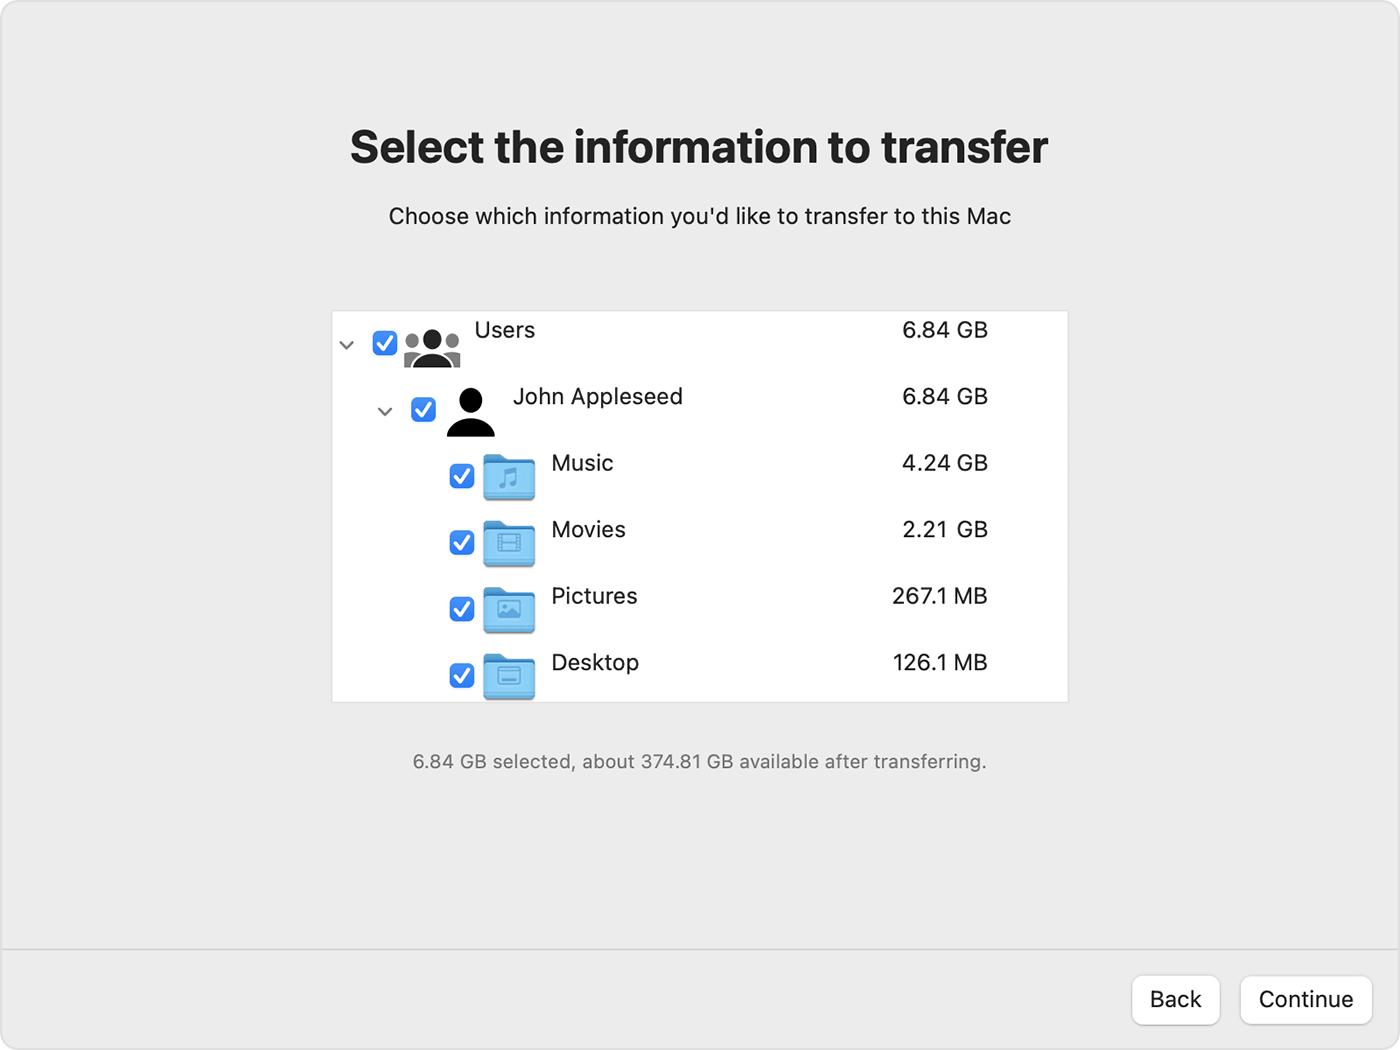
Step 5. Once connected, Migration Assistant will begin cataloging your files, which may take a few minutes.
Step 6. Select the files you wish to transfer and click Continue. Large transfers may take some time, so consider starting the process in the evening.
Step 7. Once the transfer is complete, log into your Mac account to access your files. The account name will be the same as on your HP laptop.
Step 8. Before syncing or playing content from the Apple Store, authorize your Mac for Apple purchases.
Method 3. File Sharing- Share files between Windows and Mac
Setting up and using file sharing on macOS is simple, provided your Windows PC and Mac are connected to the same network. Below, we’ll guide you through the process for both operating systems.
When to use File Sharing:
- When both your Windows PC and Mac are connected to the same network.
- When you need to share files quickly between devices without the need for additional software.
Enabling File Sharing on Windows
To access your PC files from your Mac, the first step is to enable file sharing on your Windows computer. Here’s how to do it:
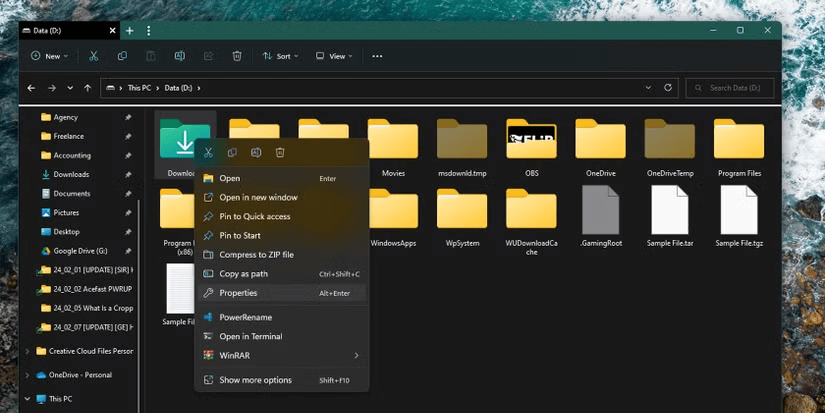
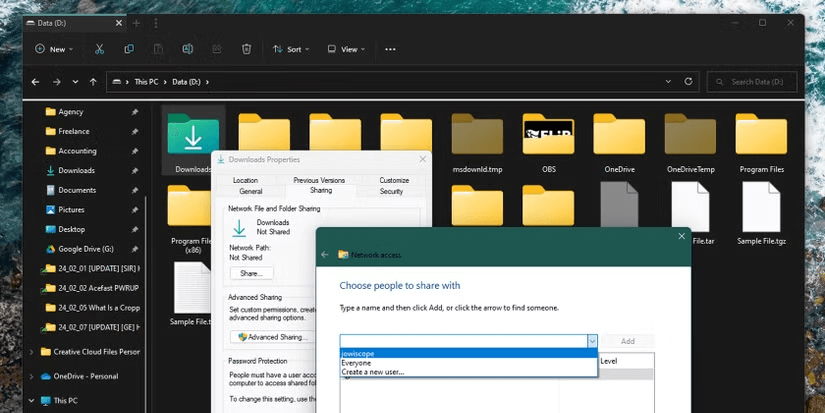
Step 1. Locate the folder you want to share. Right-click it in File Explorer and select "Properties."
Step 2. In the Properties window, go to the "Sharing" tab and click on the "Share…" button.
Step 3. In the new window, use the dropdown menu to choose the username you wish to share the folder with. Click "Add."
Step 4. Under the "Permission Level" column, decide whether to allow "Read" (view-only access) or "Read/Write" (full access with editing privileges).
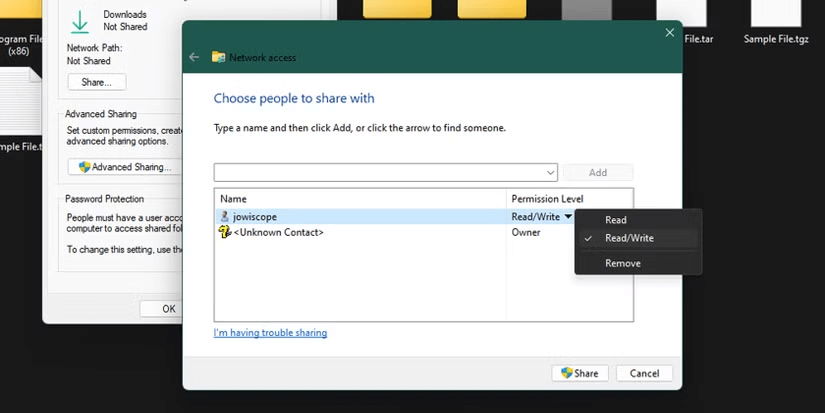
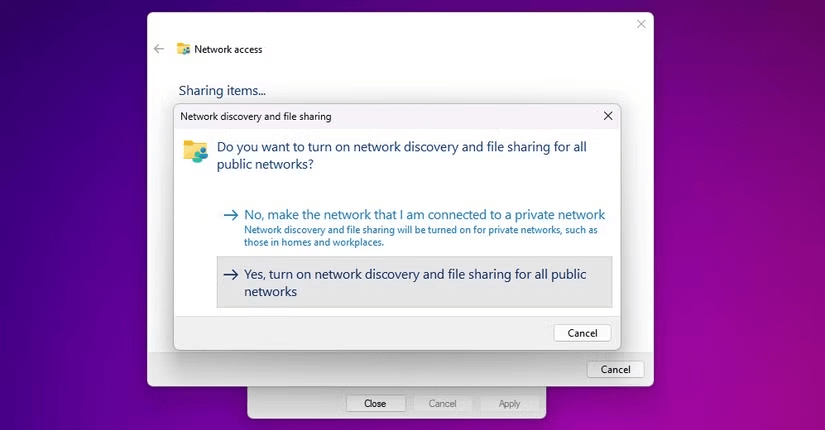
Step 5. Click "Share" to confirm. A prompt will appear asking you to enable network discovery and file sharing—select "Yes" and let the process complete.
Step 6. Open Command Prompt or PowerShell, type "ipconfig", and press Enter to locate your Windows PC's IP address, typically listed under Ethernet or Wireless LAN as the IPv4 Address.
Accessing Shared Windows Files on Your Mac
Once your Windows PC is set up for file sharing, you can access the files from your Mac, as long as both devices are connected to the same local network. Follow these steps:
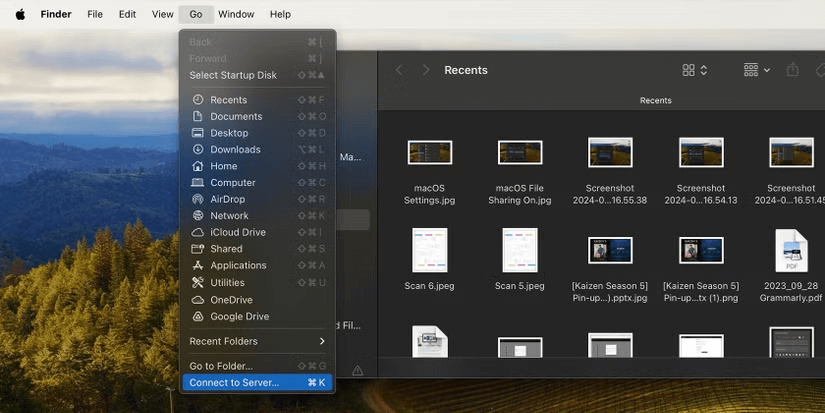
Step 1. Click the Finder icon in your Dock to open a new window.
Step 2. In the Finder menu, select "Go" and then "Connect to Server."
Step 3. In the "Server Address" field, type your Windows PC’s IP address and click "Connect."
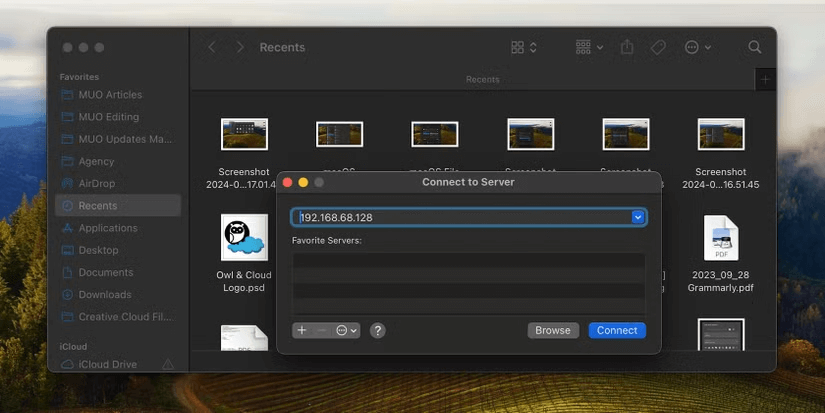
Step 4. When prompted, enter your Windows username and password, then press the "Return" key.
Step 5. Choose the folder you want to access and click "OK."
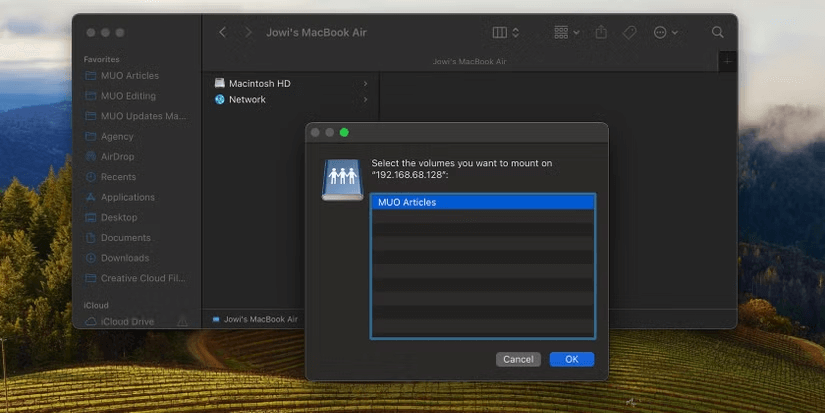
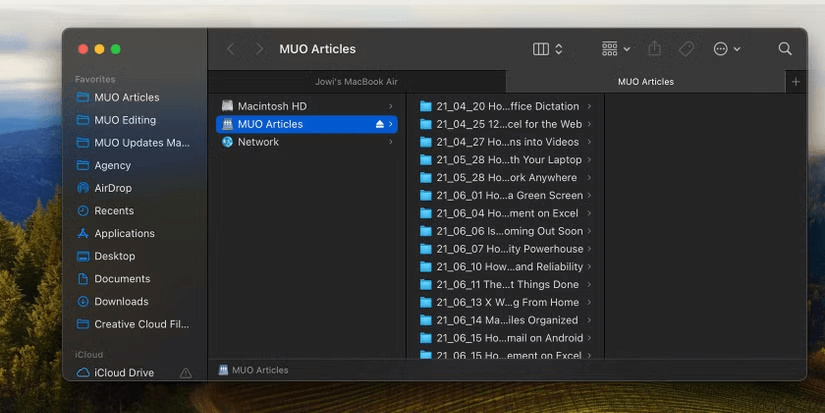
Step 6. Your Windows shared folders will now appear under the "Locations" section in the Finder sidebar.
Method 4. Email - Small file transfer from Windows to Mac
Email is a simple and effective way to transfer smaller files from your HP laptop to your MacBook Air. While this method is not ideal for transferring large files due to attachment size limits, it's quick and convenient for documents, images, and other small files. You can use any email provider to send the files, making it a flexible and easily accessible option.
When to use Email:
- When you need to transfer small files like documents, images, or PDFs.
- When both devices are connected to the internet.
- When you want a quick and easy method without needing additional software or hardware.
Steps to transfer files from HP laptop to MacBook Air using email:
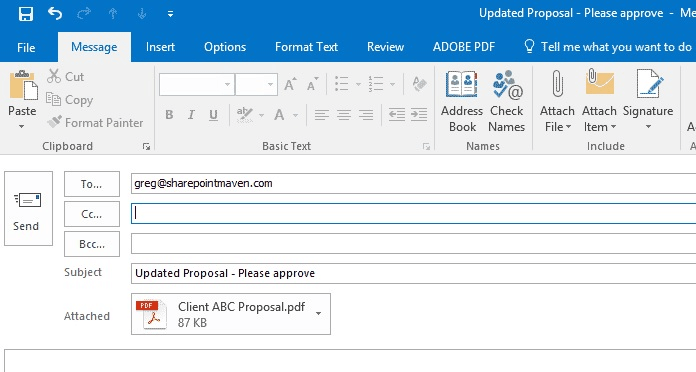
Step 1. On your HP laptop, open your preferred email client (such as Outlook, Gmail, or Yahoo Mail).
Step 2. Compose a new email and attach the file(s) you wish to transfer.
Step 3. Enter your own email address as the recipient or use an alternate email address that you can access on your Mac.
Step 4. Send the email with the attached files.
Step 5. On your MacBook Air, open the email client or webmail service you used to send the email (e.g., Gmail, Outlook).
Step 6. Open the email and download the attached files directly to your Mac.
Step 7. Save the files to your desired location on your Mac. You can now access and edit the files as needed.
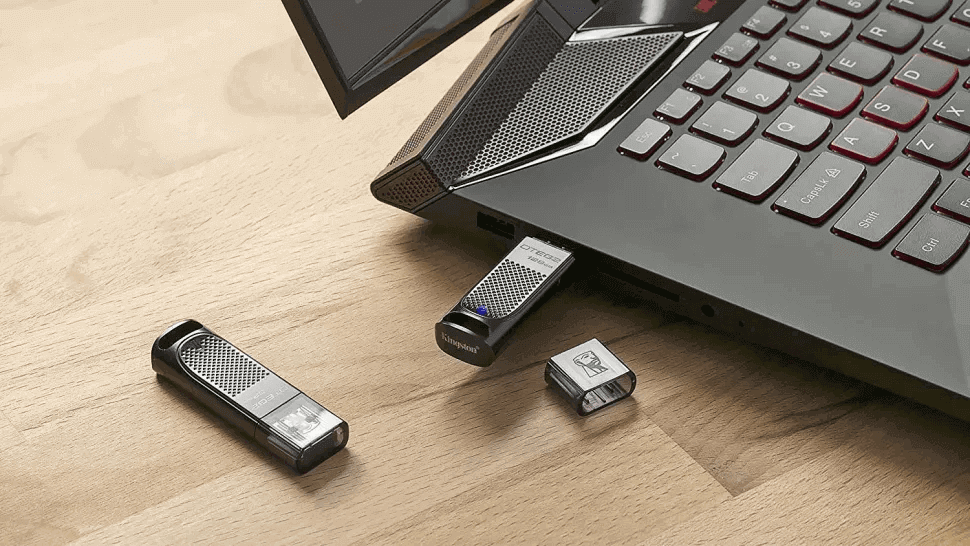
Method 5. External hard drive- Copy files from Windows to Mac without network
Using an external hard drive or USB drive is one of the simplest ways to transfer files from your HP laptop to a Mac. This method doesn’t require an internet connection, making it ideal for transferring large files.
When to use an external hard drive or USB drive:
- When you don’t have access to a network or prefer not to use one.
- When you have physical access to both your HP laptop and Mac.
- When you need to transfer large amounts of data without relying on an internet connection.
- When you prefer a simple, no-fuss way to move files without additional software.
Steps to transfer files from HP laptop to Mac using an external hard drive or USB drive:
Step 1. Plug your external hard drive or USB drive into your HP laptop and copy the files you want to transfer onto the device.
Step 2. After copying the files, safely eject the drive from your HP laptop.
Step 3. Plug the external drive into your Mac. It should appear on your Mac’s desktop or in Finder.
Step 4. Simply drag and drop the files from the external drive to your desired location on your Mac.
Conclusion
In conclusion, knowing how to transfer files from HP laptop to MacBook Air is essential for smooth device switching. Whether you choose AnyViewer for remote transfers, Migration Assistant for a seamless setup, or simple methods like file sharing or email, each option offers its own advantages. By selecting the right method based on your needs, you can ensure an efficient and secure file transfer, making the transition between devices quick and easy.
