
Stepwise Tutorial: How to Set Up ASUS BIOS Wake on LAN (WOL)
Wake on LAN (WOL) enables you to awaken computers remotely. This post primarily introduces setting up ASUS BIOS Wake on LAN (WOL). Keep reading if you’re interested.
By Ellie / Updated on December 13, 2024
How do I enable Wake-on-LAN on ASUS BIOS?
Wake-on-LAN (WOL) is a protocol allowing computers to be remotely awakened from low-power states, including sleep, hibernate, and shutdown. If you want to remotely wake up a computer that is far away when you are not around, this is somewhat helpful.
But the point is how to configure Wake on LAN. Luckily, here’s the full tutorial on how to set up and use ASUS BIOS Wake on LAN. Keep reading if you’re interested.
ASUS BIOS Wake on LAN tutorial
Before enabling ASUS BIOS Wake on LAN, you must do some preparation checks. Besides, solutions to ASUS Wake on LAN not working are also introduced.
Preparation checks
Before starting, ensure the following ASUS BIOS Wake on LAN settings and hardware requirements are fulfilled:
- Network card that supports Wake-on-LAN.
- Active internet connection.
- Connected to the Internet via LAN cable.
- Computer should be in any of the three power states: sleep, hibernate, or shut down.
How to enable ASUS BIOS Wake on LAN
Enable WOL in BIOS settings and configure the network card to wake a computer via WOL.
Enable WOL in BIOS settings
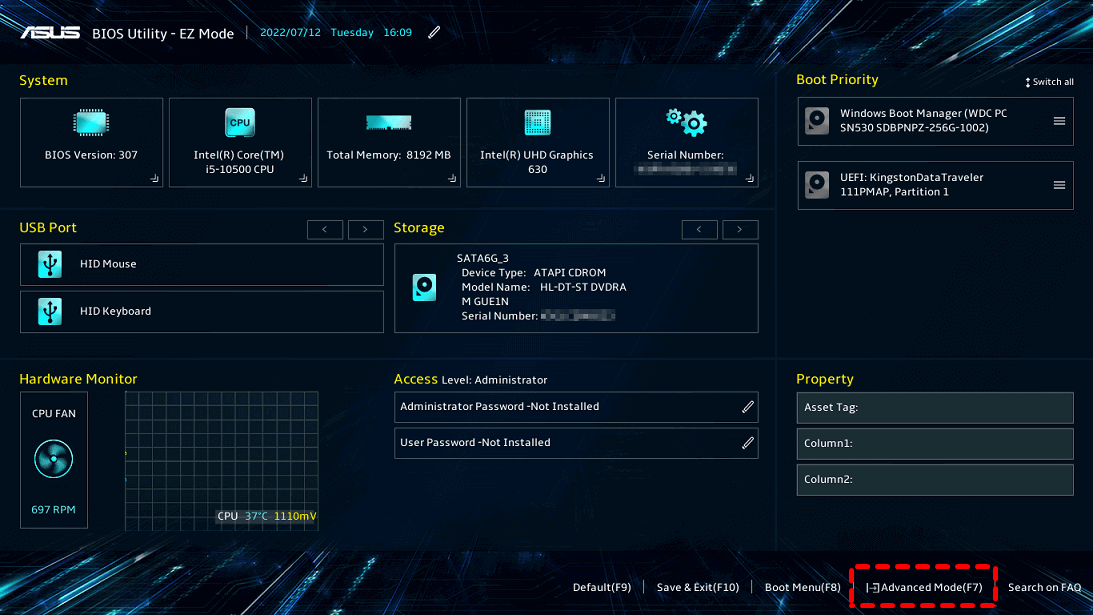
Step 1. When the computer starts, press and hold the Del key while simultaneously pressing the Power button to bring up the BIOS configuration screen.

Step 2. After entering the BIOS Utility, go to Advanced Mode by pressing Hotkey F7 or using the cursor to click.
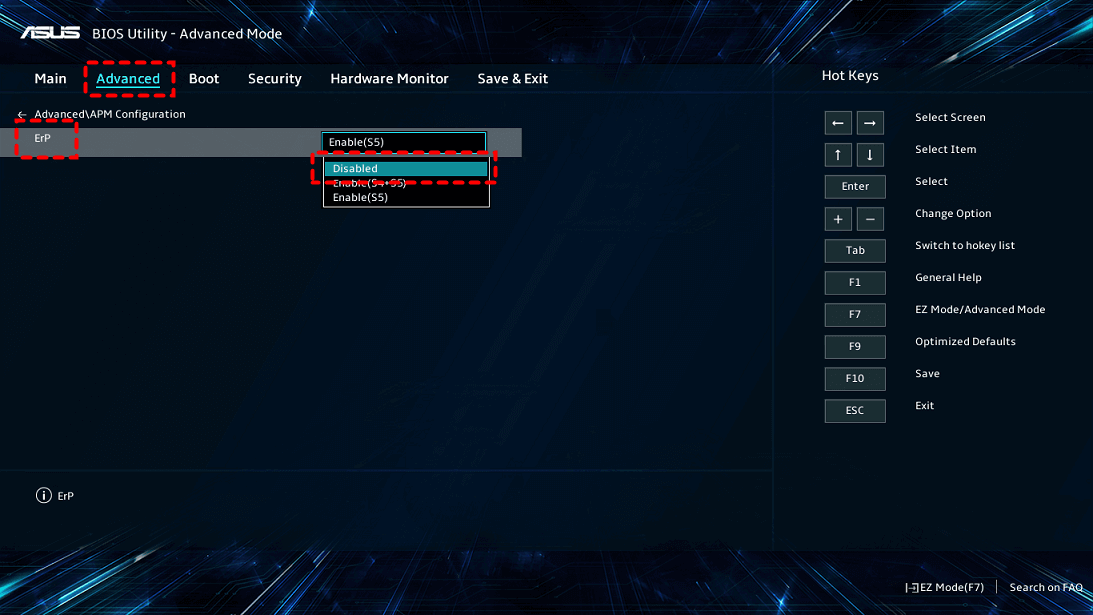
Step 3. After entering the Advanced Mode, select Advanced and then APM Configuration. After entering the APM Configuration, select ErP and set Disabled.
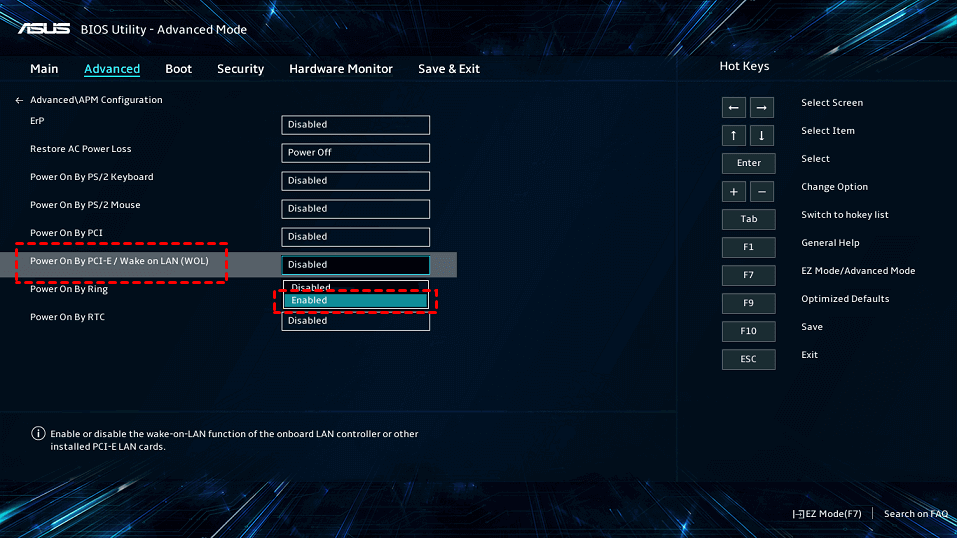
Step 4. Select Power On By PCI-E and set Enabled.
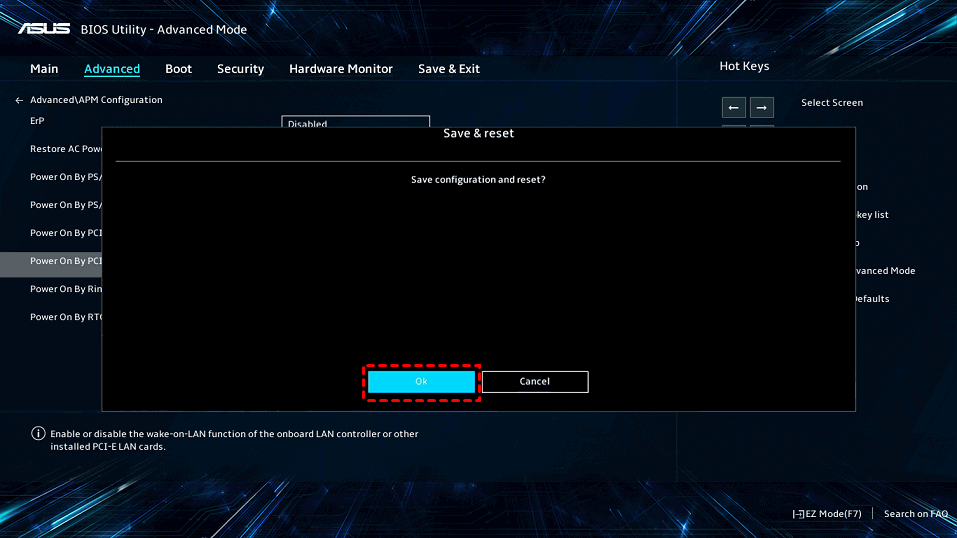
Step 5. Press Hotkey F10 and select Ok to save & exit setup.
Configure Network Card
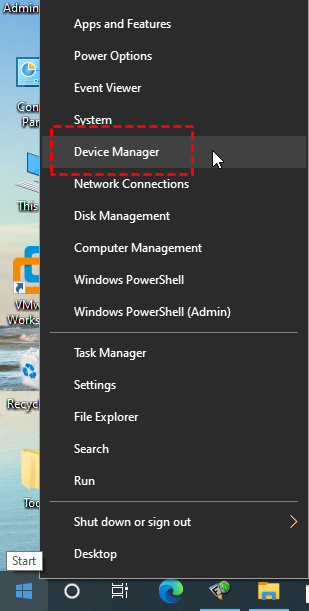
Step 1. Right-click the Start menu and click Device Manager.
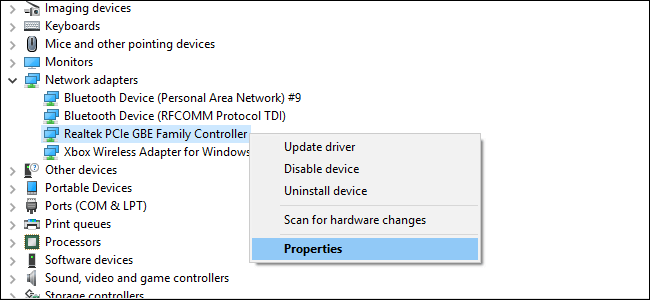
Step 2. Locate and open the Network adapters category. Right-click the network adapter that you are currently using and click Properties.
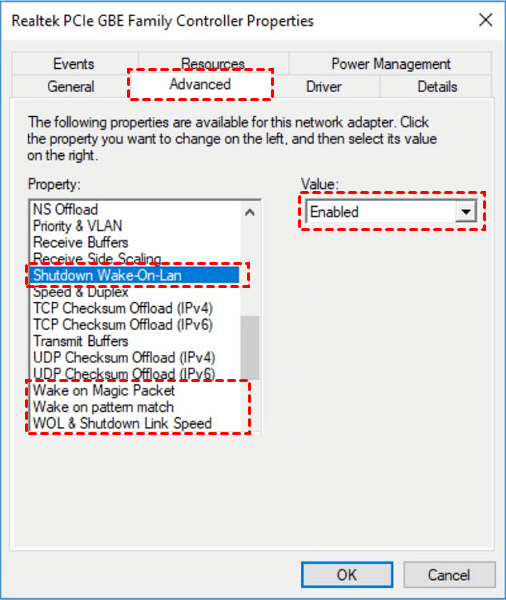
Step 3. Go to the Advanced tab, and configure the Advanced driver properties for the following settings:
- Shutdown Wake-On-Lan: Enabled
- Wake on Magic Packet: Enabled
- Wake on pattern match: Enabled
- WOL & Shutdown Link Speed: 10 Mbps
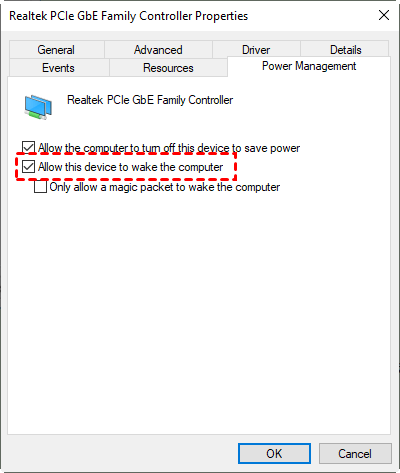
Step 4. Next, click the Power Management tab and see if Allow this device to wake the computer option is greyed out. If not, check it.
How to fix ASUS Wake on LAN not working
If ASUS BIOS Wake on LAN is not working, the following four solutions may help you fix it.
Way 1. Confirm the AC power is plugged in
The WOL doesn’t work properly if the remote computer is running on battery power. AC power is a must requirement for the WOL to work properly. Therefore, you need to confirm that the AC power is plugged in. You can download Dell Battery Meter from the following website and tick Turn Off Battery Charging:
www.dell.com/support/home/en-in/drivers/driversdetails?driverid=0kw7p

Way 2. Disable the fast startup
You can also disable the fast startup so the network devices receive power even when the computer is switched off.
Step 1. Open Control Panel, click Large icons, and select Power Options from the menu.

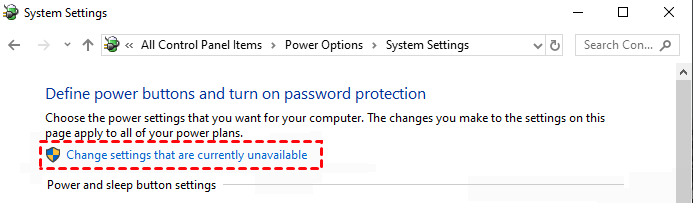
Step 2. On the left-hand side, click Choose what power buttons do option.

Step 3. Click Change settings that are currently unavailable.
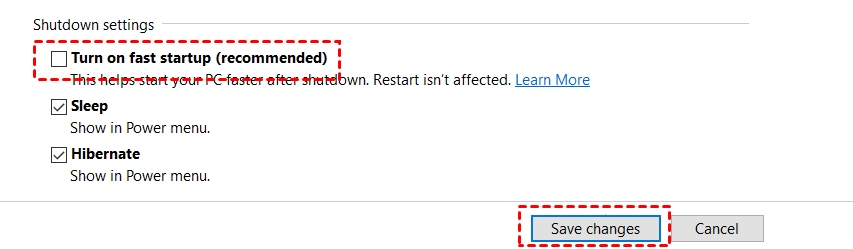
Step 4. Uncheck Turn on fast startup option and click on Save changes.
Way 3. Enable the NetBIOS over TCP/IP Feature
NetBIOS enables computers on a local area network to communicate with network hardware and send data across the network. In the meantime, the NetBIOS over TCP/IP networking protocol enables legacy computer applications that rely on the NetBIOS API to be used on modern TCP/IP networks. If your PC uses the NetBIOS API, it may be worthwhile to enable the NetBIOS over TCP/IP feature to avoid network issues while using WOL.
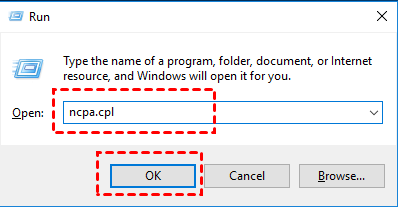
Step 1. Press Win + R to launch the Run command dialog box. Type "ncpa.cpl" and press OK to open the Network Connections window.
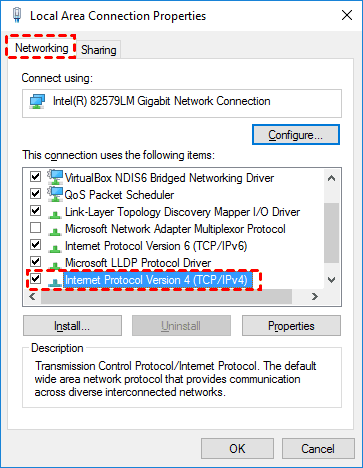
Step 2. Right-click on your Network adapter and then click Properties.

Step 3. Double-click the Internet Protocol Version 4 (TCP/IPv4) option.
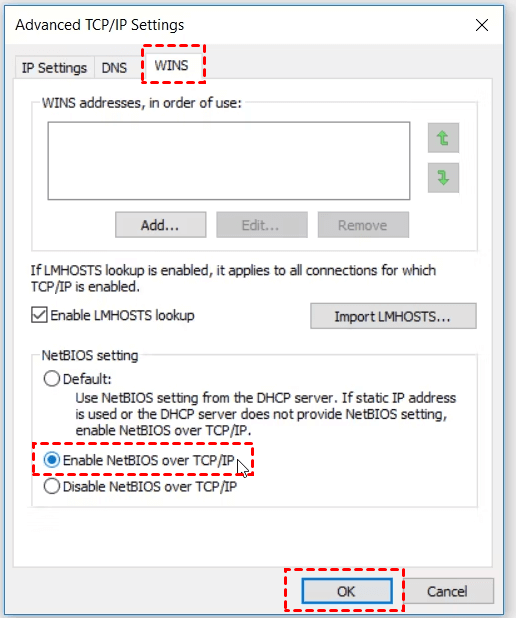
Step 4. In the next window, near the bottom-right corner, click the Advanced button. Navigate to the WINS tab in the Advanced TCP/IP Settings window, then check the Enable NetBIOS over TCP/IP box. Finally, click OK to save these modifications.
Way 4. Modify the Registry key
Please note that this solution will only work if you have a Realtek adapter.
Step 1. Press Win key + R and enter "regedit". Press Enter or click on OK.

Step 2. Go to: Computer > HKEY_LOCAL_MACHINE > SYSTEM > CurrentControlSet > Control > Class > 4de3e972-e325-11ce-bfc1-08002be10318.
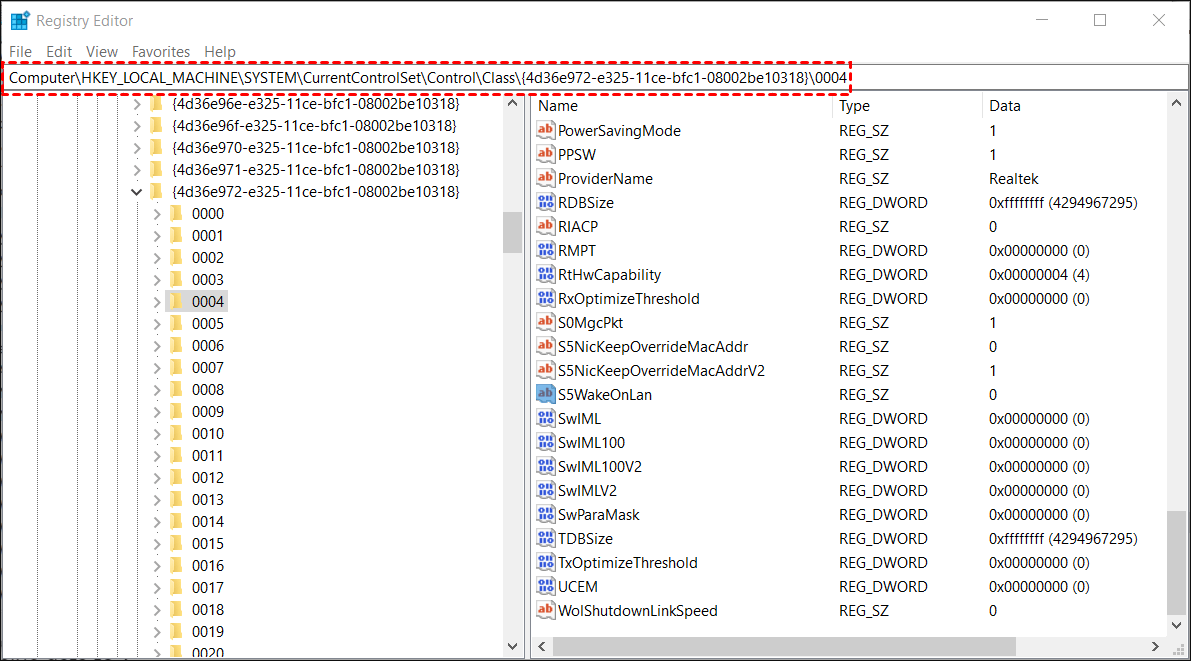
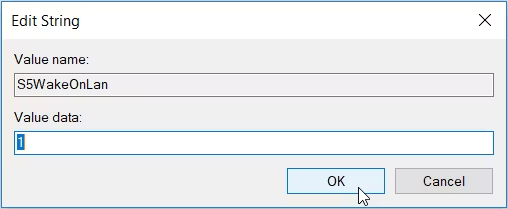
Step 3. Once you find your Realtek adapter, in the right pane you should see S5WakeOnLAN DWORD. Double-click it and change its Value data to 1.
Step 4. Now, double-click PowerDownPll DWORD and set its Value data to 0.
How to remotely control a waking computer
You should use the free remote desktop program AnyViewer to operate the awakening machine remotely. It is the best tool for remote work and remote support. As a powerful remote desktop software, AnyViewer has the following advantages:
▪ Simple installation.
▪ Fast connection speed.
▪ Instant text chat.
▪ Shortcuts for essential programs like Task Manager
▪ Simultaneous control of many PCs.
▪ iOS and Android versions available.
Step 1. Launch AnyViewer after downloading it to both machines. Go to Sign up and then Log in on the Controller computer (you can log in directly if you have previously registered on the website).

Step 2. Fill in the signup information.

Step 3. The account you've logged in to will be automatically assigned to your device.

Step 4. A direct connection can be established by selecting One-click control.

- Notes:✎...
- Additionally, it is recommended to change your account's plan to a Professional or Enterprise one. What a business or professional plan can provide for you is:
- More devices will be allowed to assign to the same account for unattended remote access.
- More connection channels for more devices to be able to start remote connection at the same time.
- One device can connect to more devices simultaneously.
- Black the remote PC screen and disable the remote keyboard & mouse click to protect privacy.
- Transfer 1TB files at 10 MB/s.
Closing words
This post primarily introduces how to set up ASUS BIOS Wake on LAN and four tested ways to fix WOL not working on ASUS. Besides, it also introduces the best remote desktop softwareAnyViewer to allow you to control the waking computer remotely. If you need to wake up your home computer from work and access files, follow the steps in this post.
