
What We Can Do to Remote Assistance Black Screen on Windows 10?
What we can do if we encounter Windows 10 Remote Desktop Assistance black screen? In this post, we’ll guide you to figure out the possible reason and the solutions.
By Ellie / Updated on December 13, 2024
Help! Meet with black screen during remote assistance
“On Windows 10, I'm having trouble with Windows Remote Assistance. I connect to a person, and it shows connected on the user's end, but I can only see a black screen on my side. The other user, on the other hand, can see me moving the mouse around the screen. What's going on? Any suggestions to fix the issue?”

Remote Assistance, a Windows built-in feature, allows us to remotely assist friends, families or colleagues, providing significant convenience for us. At this time, it must be annoying for every user to meet with the problems.
How to fix Remote Assistance black screen on Windows 10
It is said that when a standard user account has been granted some additional privileges, then the remote administrator is not presented with User Access Control elevation prompts. Thus, the issue occurs. Here in this part, we’ll talk about how to fix Windows 10 Remote Assitance black screen. Keep reading!
Note: Before the operation, close the Remote Assistance session and then take operations.
Method 1. Disable UAC in Group Policy
By disabling UAC, all elevation requests will go to the interactive user desktop, which means the remote assistance Windows 10 black screen can be fixed in this way.
Step 1. Press “Win + R” to run dialog box, and then input “gpedit” and hit “OK” to open Group Policy.
Step 2. Navigation: Computer Configuration\Windows Settings\Security Settings\Local Policies\Security Options
Step 3. Scroll down and find “User Account Control: Switch to the secure desktop...” and then double-click on it.
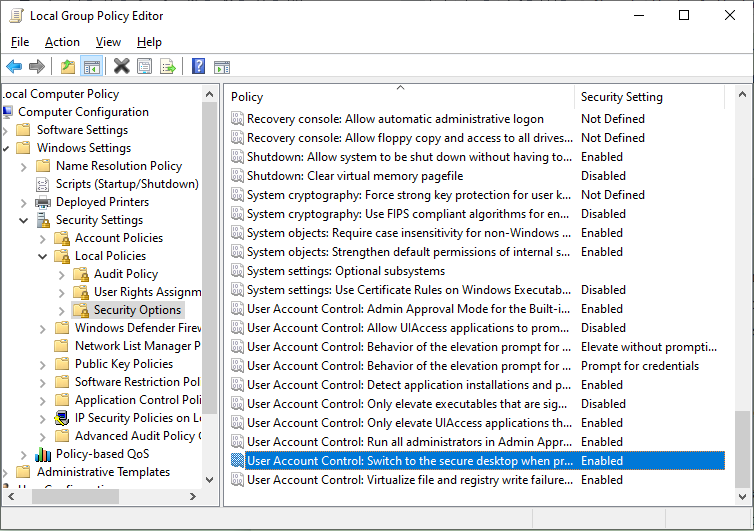
Step 4. Tick “Disabled”. Click on “Apply” and then click on “OK” to finish the operation.
Step 5. Run gpupdate /force in Command Prompt to update your computers to the latest group policy settings
Method 2. Run SFC Scannow
Remote Assistance black screen on Windows 10 may be related to the system’s corrupted files. Therefore, we can use SFC tool to scan your computer for damaged system files and repair them, which can solve the issue.
Step 1. Search “cmd” in the search box and then right-click on the option, choose “Run as administrator” to open Command Prompt.
Step 2. In the Command Prompt window, enter “sfc /scannow” and then press the Enter key to execute the command. After that, restart the computer.
Method 3. Run System Restore
The issue “Windows 10 Remote Assistance Black Screen” occurs can be related to the system bug. We can run System Store to fix the issue.
Step 1. Input “Create a restore point” in the search box, then click “Open”.
Step 2. Click “System Restore” > “Next”.
Step 3. Select a restore point you want to restore from the list, and click “Scan for affected programs” to check a list of items that will be deleted if you determine to restore to this point. Then “Close” this window.
Step 4. Click “Next”. Then confirm your selected restore point again and click “Finish”.
Step 5. Click the “Yes” button to restore your PC from your selected restore point. Then your PC will be rebooted.
Step 6. System Restore is finished after the computer restarts. Then “Close” it.
Step 7. After restoring, reconnect to the user again to see whether the issue disappears.
Get smooth remote assistance all the time -- AnyViewer
Does your issue “Windows 10 Remote Assistance black screen” has been fixed? If it is, that will be very nice. If it remains still, we recommend a free & professional alternative to Remote Assistance-- AnyViewer, which can let you get smooth remote assistance all the time.
As a remote access software, AnyViewer allows you to remotely assist your friends or families anywhere and anytime. The easy operation, fast connection speed and low latency are praised by many users. It is compatible with multiple versions, even on Windows 10 Home. Click on the blue button to get AnyViewer.
Step 1. Install AnyViewer on 2 devices. Sign up and fill in the information to create AnyViewer account. Once logged in, the PC will be assigned to the account automatically.
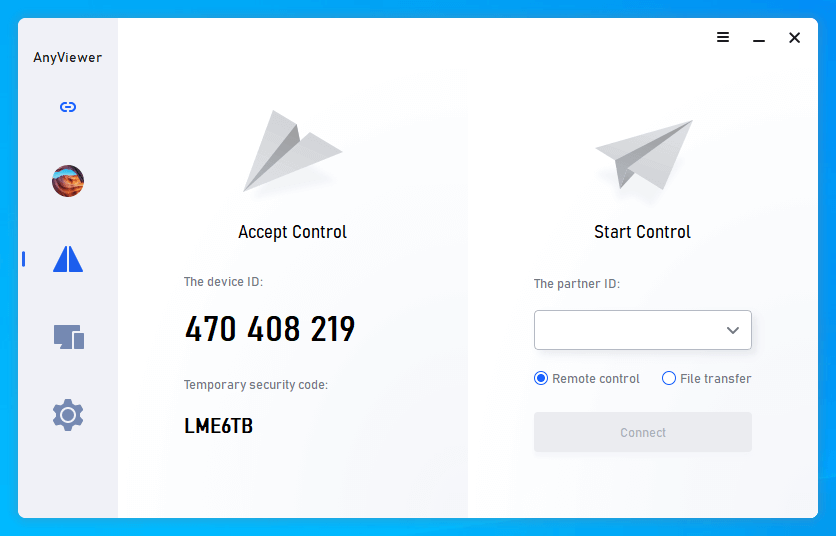
Step 2. After logging in, you can see your interface as the following picture.
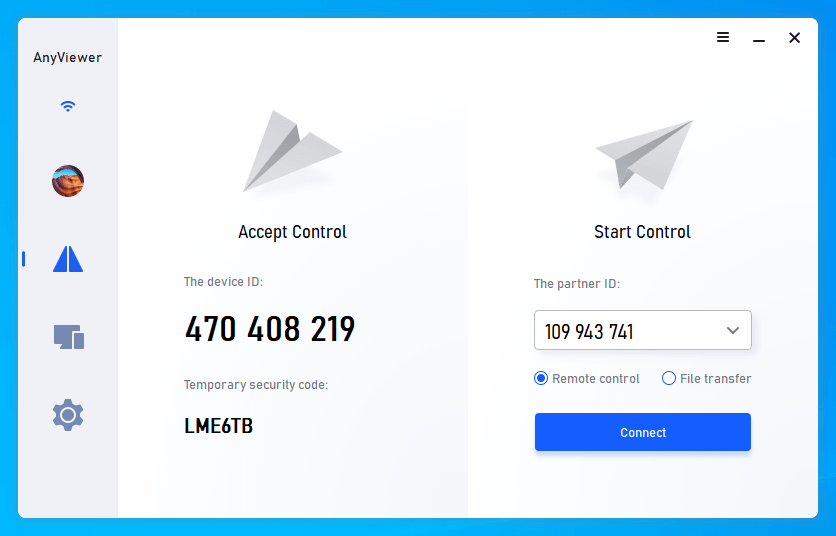
Step 3. Go to the “Connect” tab, and then you can see the device ID. Ask your friends or family member to tell you the device ID of the host PC.
Step 4. Enter the device ID of the remote PC and then click on “Connect”.
Step 5. For the 2 options, choose the first one “Send a control request to your partner”, and then click on “OK”.
Step 6. On the host PC, there will be a pop-up window on the host PC. Click on “Allow” to receive remote support. And then the connection will be realized.
Note: If you want to clarify how to offer remote assistance without permission, log into the AnyViewer account on the host PC, and then go to "Device" on the local PC, locate and click the PC that you need to control. And then click "One-click control" to achieve a remote connection with one click.
Conclusion
From the post we get that we can fix Windows 10 Remote Assistance black screen by disabling UAC, running SFC scan and so on. However, if you are looking for a simple and more professional tool to get remote assistance, AnyViewer can be a good solution for you.
