
4 Top Fixes for Remote Assistance Request Control Not Working
Are you being troubled by the issue “Remote Assistance request control not working”? Don’t worry, just read the post to easily fix your issue.
By Ellie / Updated on December 13, 2024
Remote Assistance request control not working: how to fix?
“I'm having a problem with Windows Remote Assistance. I give a remote assistance request to a Windows 10 computer from a Windows 7 Pro computer. The Windows 10 computer receives the request and accepts it. After accepting it, I can see the Windows 10 desktop, but when I click the "Request Control" button, the Windows 10 machine doesn't pop up a dialog box and I can’t control.”

4 fixes for Remote Assistance request control not working
Remote Assistance, a Windows built-in feature that allows one to get assistance or offer technical help from a distance. The one sitting in front of the host PC can see what’s happening on her or his PC. However, the user may meet with all kinds of issues when using the feature, like Allow remote assistance connection to this computer greyed out and the issue “Remote Assistance request control not working” mentioned above. In this post, there are 4 fixes to get you out of trouble To fix the error, follow me to know the concrete steps.
Fix 1. Configure GPO in Group Policy
The issue may be related to the GPO settings in Group Policy. If the related policy hasn’t been enabled, then the request control may be not working. So, we should enable the “Configure Offer Remote Assistance” in Group Policy.
Step 1. Press Win + R to run box and then input “gpedit.msc” to open Group Policy.
Step 2. Navigation:
Policies > Administrative Templates > System > Remote Assistance > Configure Offer Remote Assistance
Step 3. Double-click on Configure Offer Remote Assistance and then click on “Enabled” and then click on OK.
Fix 2. Update to the latest version
The large difference between the versions of the two computers can also trigger off the Remote Assistance request control not working issue. We can solve the issue by updating the Windows version.
Step 1. Click on the Start menu, and then click on Settings.
Step 2. Find Update & Security.
Step 3. Download and install the latest version.
Fix 3. Change settings in properties system
Obviously, if the option “Allow Remote Assistance to this computer” hasn’t been ticked, the process of remote assistance must appear a large number of issues. Thus, checking the option is necessary.
Step 1. Press Win + R and then type in “control panel” and then hit OK.
Step 2. Locate System and Security, and then choose system.
Step 3. Click Remote settings.
Step 4. Locate the Remote tab, and then tick Allow Remote Connections to this computer
Fix 4. Disable Windows Defender Firewall
The blockage of firewall can be another reason causing the problem. So, turning off the Defender Firewall can be a nice shot.
Step 1. Search Windows Firewall in the search box, and then open it.
Step 2. Click on “Turn Windows Defender Firewall on or off”.
Step 3. Tick “Turn off Windows Firewall” under the Private and Public networking settings respectively.
AnyViewer: a free software dedicated to easy remote assistance
Until now, has your issue been fixed now? If you fail to fix the issue with the above solutions, how about trying AnyViewer, free third-party software with easy operation to realize remote assistance.
Focused on achieving the ultimate user experience, AnyViewer is more and more professional and easy-operated, which is workable for multiple Windows versions, like Windows 11/10/8.1/8/7 and Windows Server 2022/2019/2016/2012 R2. AnyViewer makes it easier for the one who gets assistance or the one offers assistance to do remote assistance. Follow me and see how convenient AnyViewer is.
Step 1. Install AnyViewer on 2 PCs. Sign up and fill in the information to create AnyViewer account. Once logged in, the PC will be assigned to the account automatically. (If you sign up in the official website, you can log in directly.)

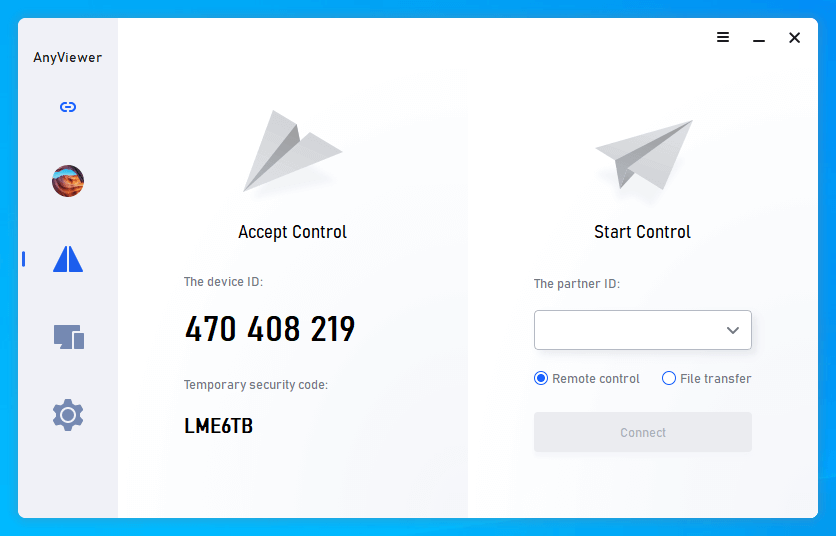
Step 2. After logging in, you can see your interface as the following picture.

Step 3. Go to the “Connect” tab, and then you can see the device ID. Ask your friends or family member to tell you the device ID of the host PC.
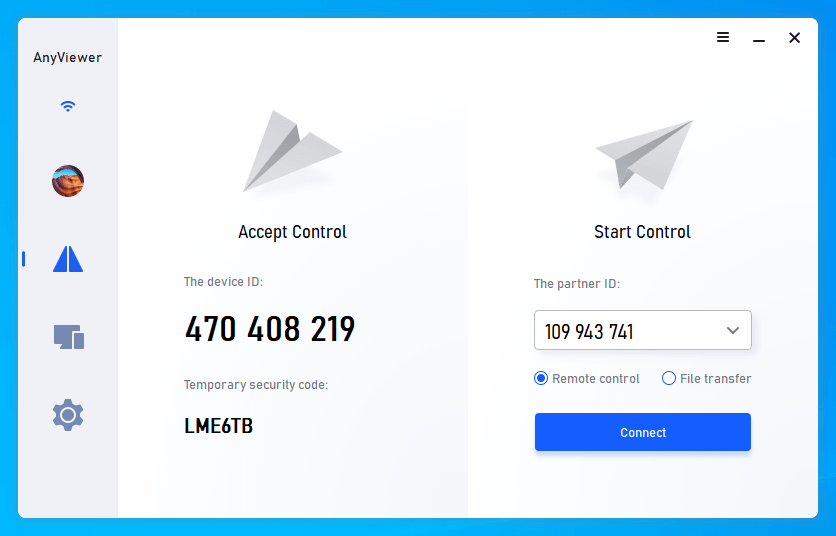
Step 4. Enter the device ID of the remote PC and then click on “Connect”.
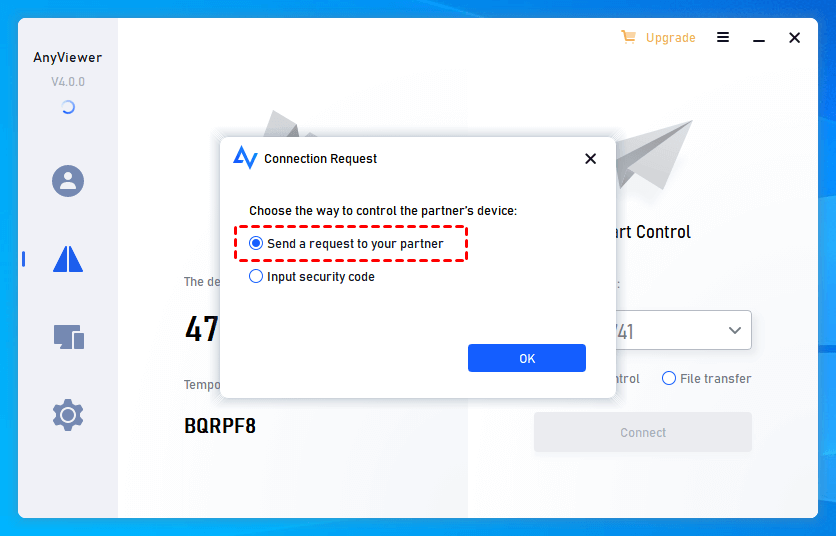
Step 5. For the 2 options, choose the first one “Send a control request to your partner”, and then click on “OK”.
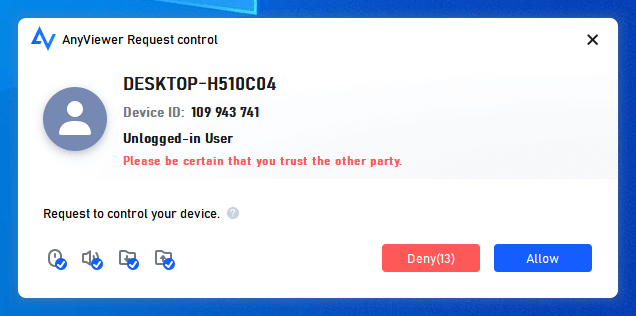
Step 6. There will be a pop-up window on the host PC. Click on “Allow” to receive remote support. And then the connection will be realized.
Note: If you want to clarify how to offer Remote Assistance without permission, log into the AnyViewer account on the host PC, and then go to "Device" on the local PC, locate and click the PC that you need to control. And then click "One-click control" to achieve a remote connection with one click.

Conclusion
What should we do when coming across the issue “Remote Assistance request control not working”? Here we introduced 4 fixes, like configuring GPO, updating to the latest version and so on. Of course, fixing the issue through trying those ways one by one seems to be time and energy-consuming. So, AnyViewer is a more suitable solution.
