
How to Transfer Data from Old MacBook to New MacBook
Want to transfer data from your old MacBook to your new MacBook? Use Migration Assistant for a seamless transfer of files, apps, and settings, or opt for AnyViewer for secure remote transfers across different networks.
By Ellie / Updated on March 28, 2025
How do I transfer everything from my old Mac to my new Mac?
When you get a new MacBook Air, one of the first things you'll want to do is transfer all your files, apps, and settings from your old Mac. The easiest and most efficient way to transfer data from old MacBook to new MacBook Air is by using Migration Assistant, a built-in tool in macOS designed to simplify the process. With Migration Assistant, you can move documents, user accounts, applications, and system settings, ensuring a seamless transition to your new device.
How to transfer data from old MacBook to new MacBook via Migration Assistant
Transferring data to new MacBook Air, including files, apps, and settings, is easy with Migration Assistant. Follow this step-by-step guide to move everything from your old MacBook to your new one.
Step 1. Prepare Both Macs
- Install the latest macOS updates on both devices.
- Ensure both Macs have Wi-Fi turned on and are placed near each other.
- If your old Mac runs OS X El Capitan or earlier, connect both Macs to the same Wi-Fi network.
- Disable any antivirus, firewall, or VPN software to prevent interference.
Step 2. Open Migration Assistant
On Your New MacBook:
- If your MacBook is in Setup Assistant mode, skip to the next step.
- If you've already set up your Mac, open Migration Assistant from Applications > Utilities or search for it using Spotlight (Cmd + Space).
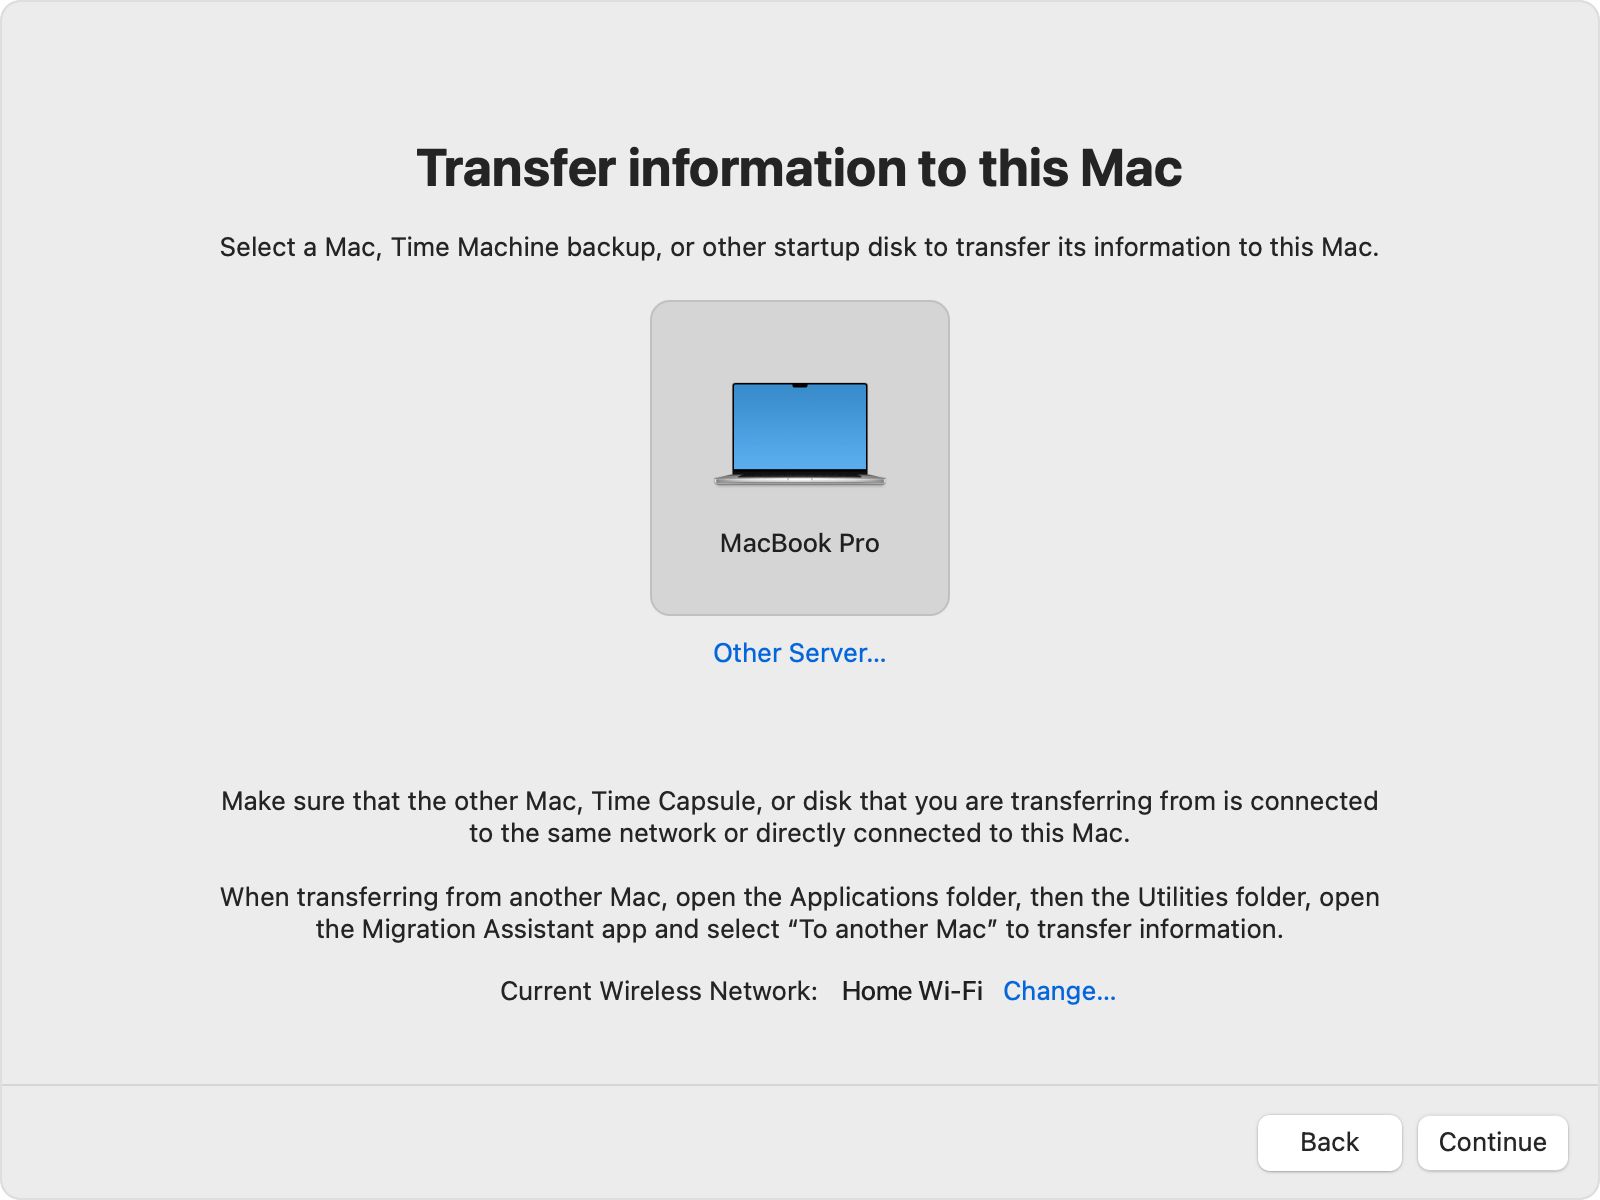
- When prompted, select "Transfer from a Mac, Time Machine backup, or startup disk" and click Continue.

On Your Old MacBook:
- Open Migration Assistant and click Continue.
- Choose "To another Mac" and click Continue.
Step 3. Connect Both Macs
- On your new Mac, select the old Mac when it appears in Migration Assistant. Click Continue.
- If a security code appears, ensure it matches on both devices and click Continue.
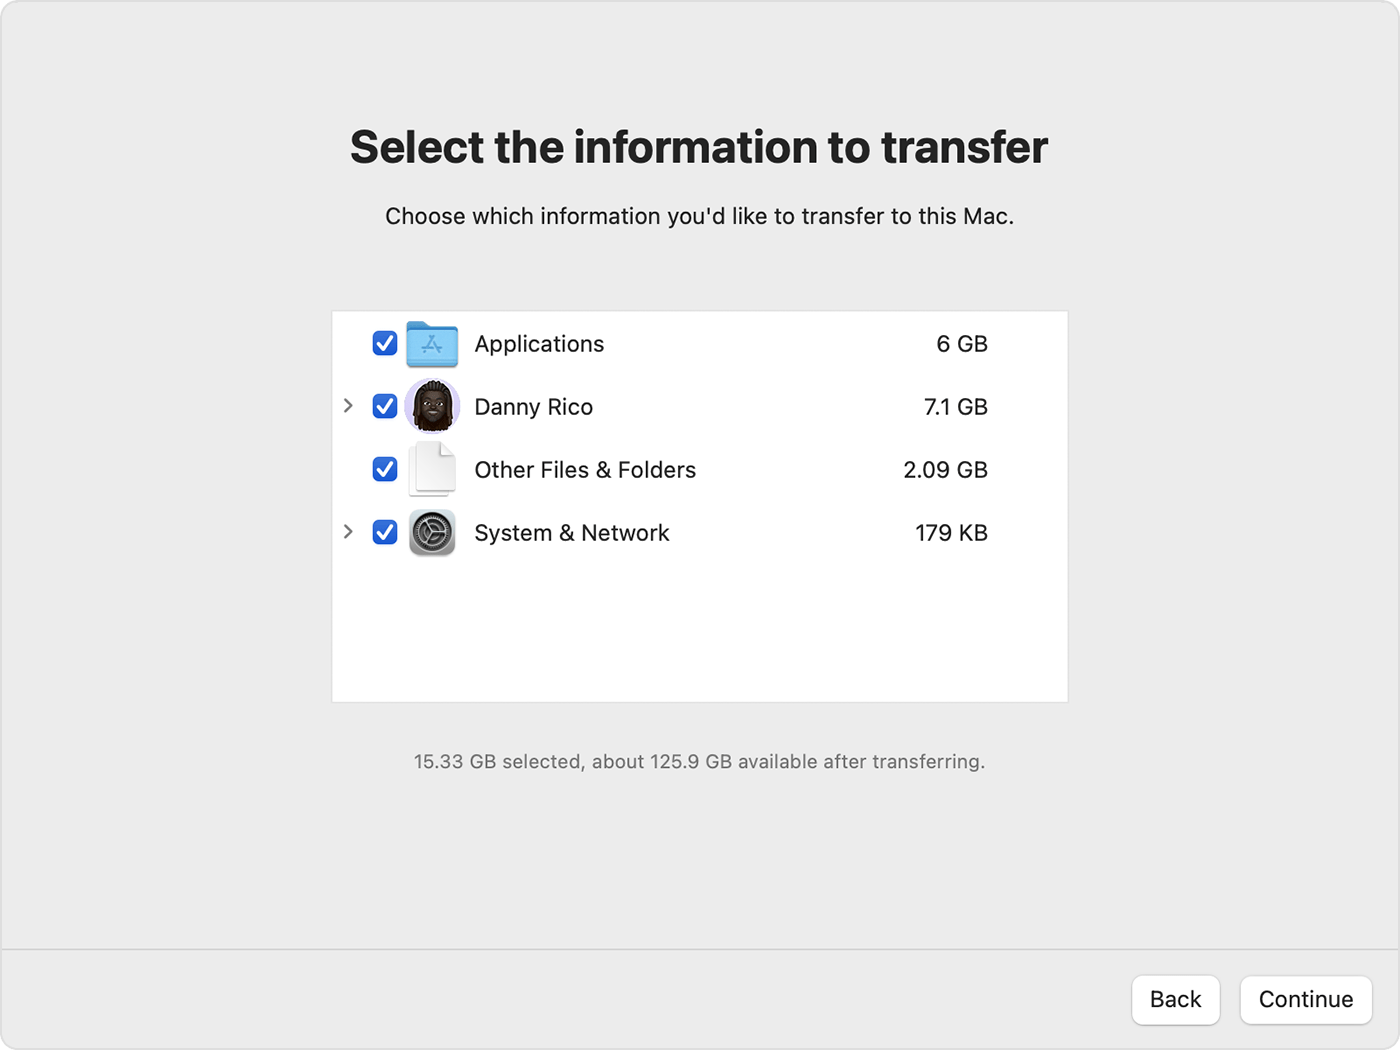
Step 4. Choose What to Transfer
- Migration Assistant will calculate the storage used by your files, apps, and settings.
- Select the categories of data you want to transfer. Click Continue.
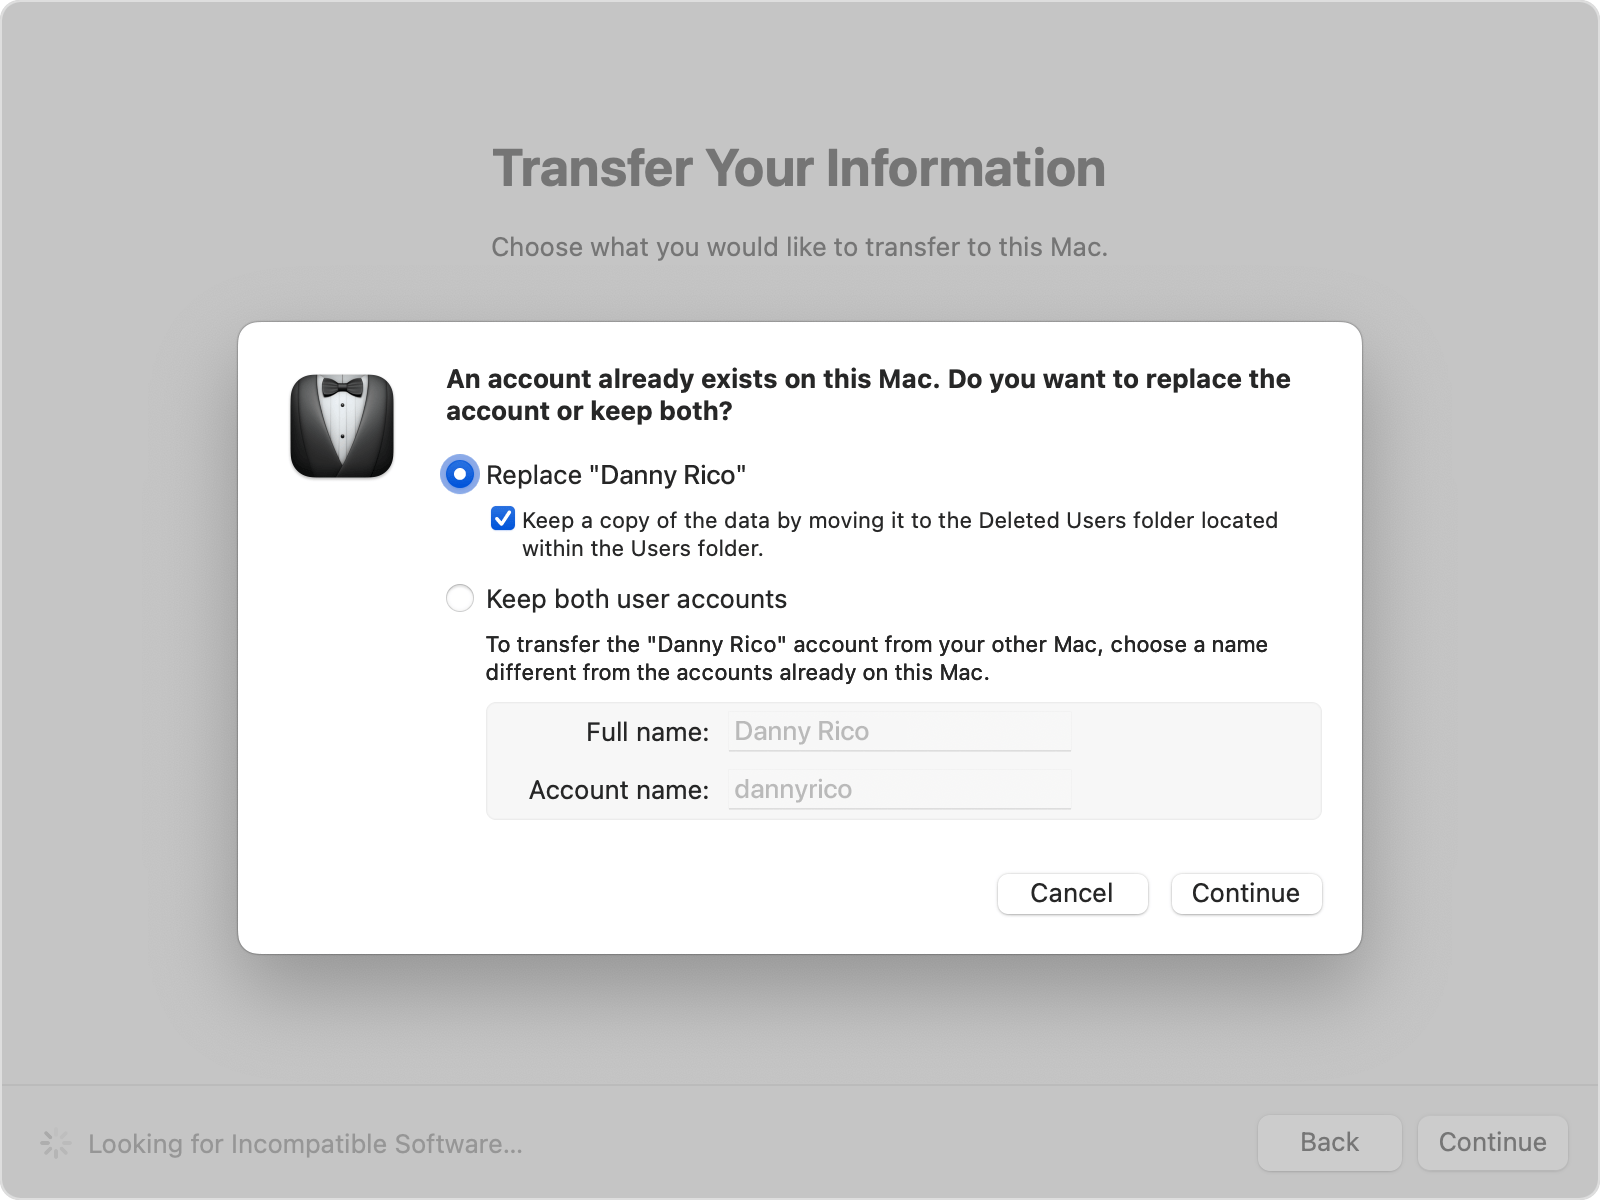
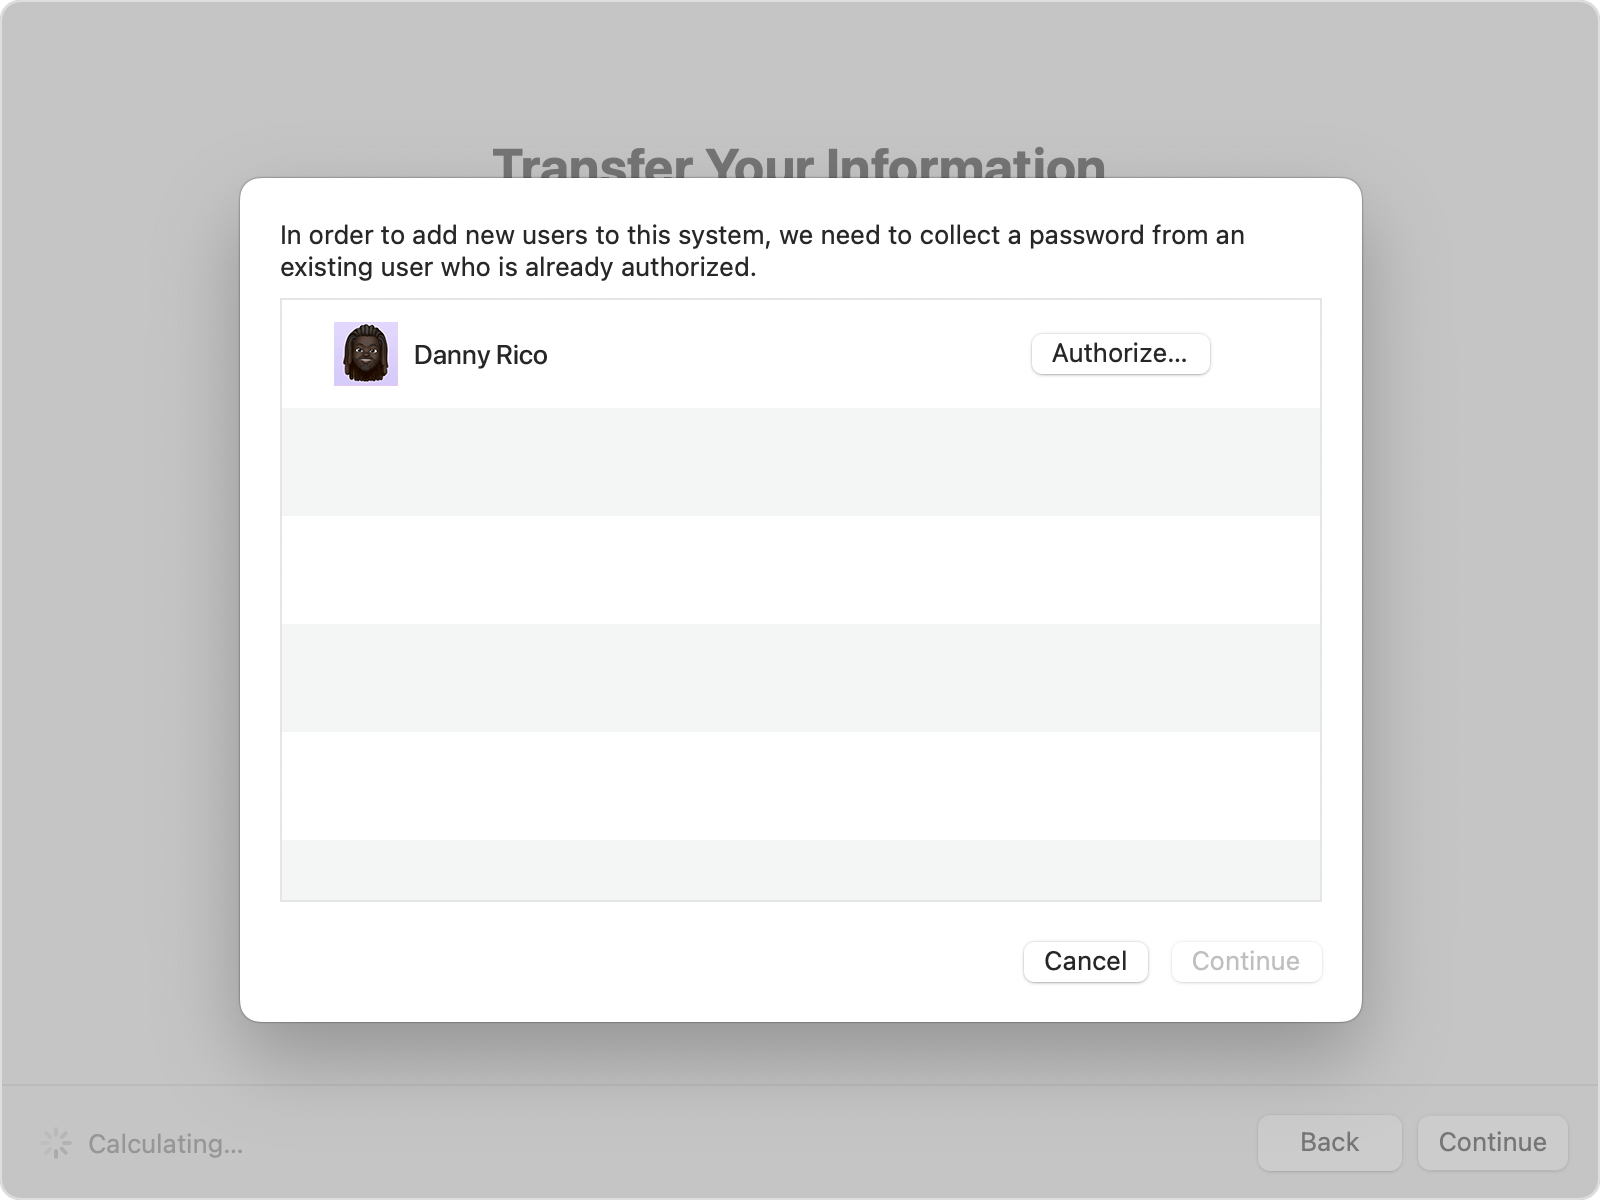
Step 5. Set Up User Accounts
If migrating a user account, you'll need to:
- Set a new password for each administrator account.
- For standard accounts, a temporary password will be assigned—users must change it after logging in.

If an account with the same name exists on the new Mac, you can:
- Replace it with the one from your old Mac.
- Keep both by renaming the old account before transferring.
Step 6. Start the Transfer
- Click Authorize if prompted for an admin password.
- Migration may take several hours depending on the file size.
- Once complete, close Migration Assistant on both Macs and log into your new Mac.
Now, you're ready to enjoy your new Mac with all your old files intact!
Bonus tip: Remote Mac-to-Mac file transfer via AnyViewer
Need to transfer files between two Macs in different locations? Or perhaps you only need to move specific files instead of transferring everything? AnyViewer is the best remote desktop solution for remote Mac-to-Mac file transfers. Unlike Migration Assistant, which requires both Macs to be on the same network, AnyViewer allows fast, secure, and stable file transfers over the internet—no matter where your devices are located.
Why Choose AnyViewer for Mac File Transfers?
- Cross-Network Flexibility – Transfer files remotely between Macs, even if they are on different networks. Migration Assistant lacks this flexibility.
- Dual Functionality – In addition to file transfers, AnyViewer offers remote desktop control, allowing you to manage settings, troubleshoot issues, and access applications—all from anywhere.
- Enhanced Security – With robust encryption protocols, AnyViewer ensures safe and secure file transfers, protecting your data from unauthorized access.
- Cross-Platform Support – Transfer files not only Mac-to-Mac but also Mac-to-PC and PC-to-Mac, making it an excellent all-in-one remote access tool.
How to Transfer Files Between Two Macs Using AnyViewer
Step 1. Install AnyViewer on both Macs.
Step 2. Log in on both devices using the same AnyViewer account.

Step 3. On your local Mac, locate the remote Mac in the device list and select "File Transfer."
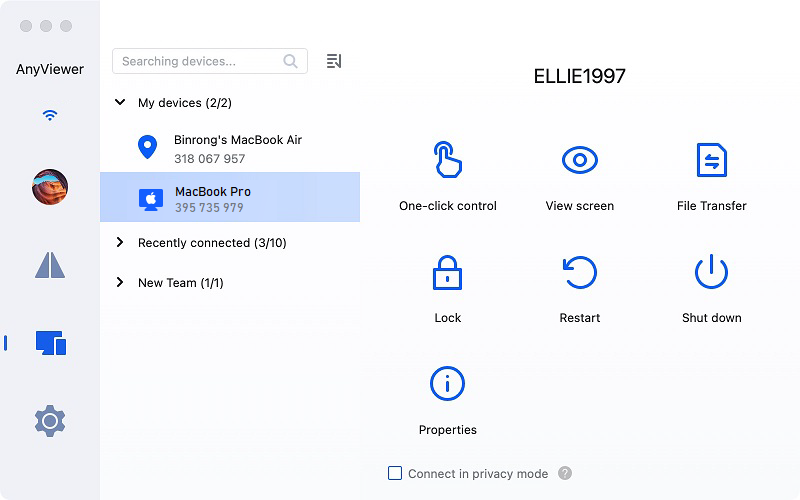
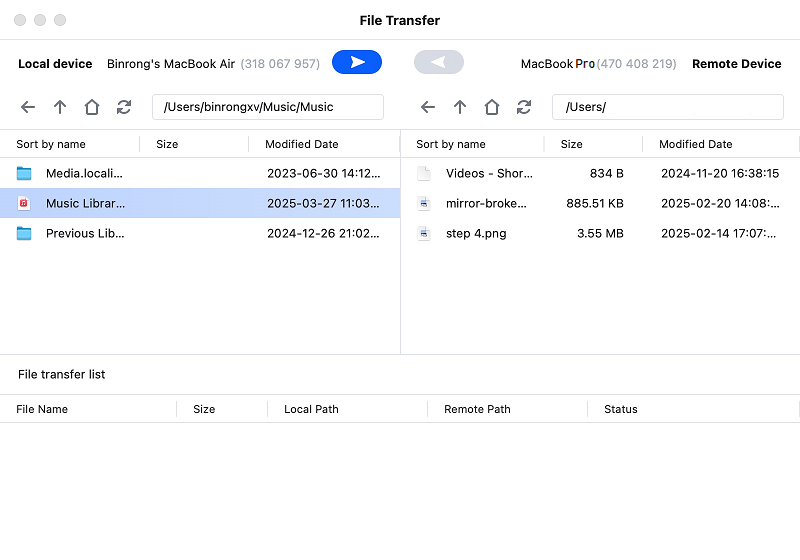
Step 4. In the File Transfer Manager, select the file(s) you want to move, then click the arrow to begin the transfer.
Optional: Choose "One-Click Control" to access the remote Mac and initiate the transfer from the toolbar. With AnyViewer, you can efficiently and securely transfer files between Macs without limitations.
Tips for Faster File Transfers with AnyViewer
For enhanced file transfer performance, consider upgrading to an AnyViewer Professional or Enterprise plan. These plans unlock premium features that significantly boost transfer speed and efficiency:
- Maximum file transfer speed: 10 MB/s
- Simultaneous transfers: Up to 5 files at a time
- Unlimited files per transfer: Move as many files as needed in a single session
- Large file support: Transfer individual files up to 1 TB in size
Conclusion
Transferring data from old MacBook to new MacBook is easy with Migration Assistant, which moves all files, apps, and settings seamlessly. For remote file transfers, AnyViewer is a great alternative, offering fast and secure transfers across different networks. Whether moving everything or just a few files, these tools make the process smooth and hassle-free.
