
Fixed: Screen Sharing Has Failed to Start Zoom [6 Ways]
Wondering why Screen sharing has failed to start Zoom error code 105035? Encountering this problem doesn't warrant any panic. Technical glitches can occur, and Zoom, like any software, may have its occasional bugs. The good news is that this article will guide you through six ways to resolve this problem.
By AnyViewer / Updated on December 13, 2024
Why is screen sharing not working on Zoom?
Zoom is a versatile video conferencing platform that facilitates virtual interaction through video, audio, or a combination of both. Additionally, it serves as a remote control tool, providing screen control access with the consent of other participants. This feature proves particularly valuable in an era where online meetings have become an integral part of our lives.
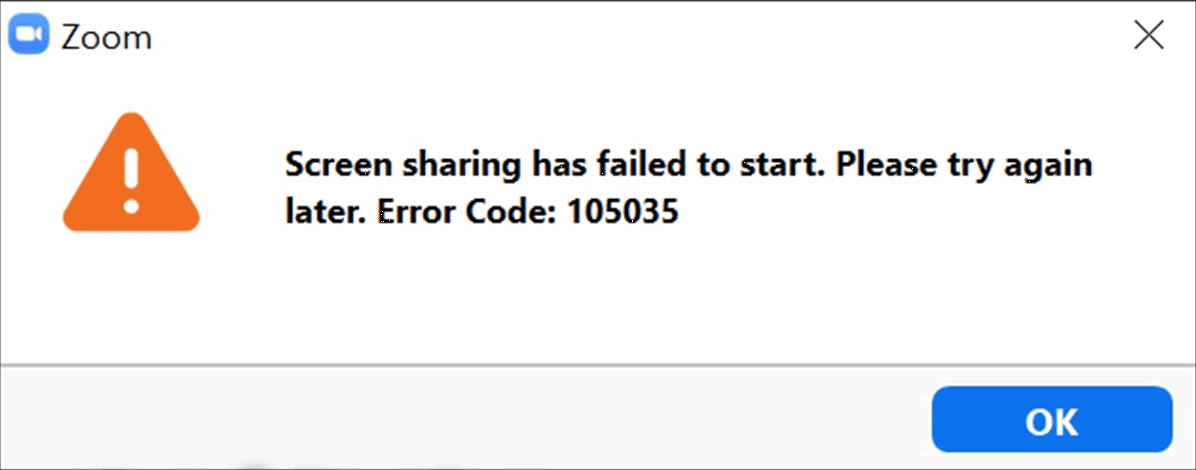
Nevertheless, errors can occasionally disrupt the seamless experience. Users may encounter issues such as Zoom sound not working, black screens, and problems where participants on the other end cannot see the shared screen. In this article, our focus will be on addressing and resolving the screen sharing error, specifically the "Screen sharing has failed to start Zoom error code 105035."
This article provides practical solutions to ensure a seamless screen-sharing experience in Zoom.
How to fix “Screen sharing has failed to start” Zoom [6 Ways]
Addressing and resolving the "Screen sharing has failed to start Zoom error code 105035" is crucial for maintaining uninterrupted virtual meetings. But don't worry, this article has compiled five common solutions for the screen sharing error, including specific steps on how to apply them.
Way 1. Enable necessary permissions in Windows
Zoom's ability to share screens relies on crucial device resources like the camera and microphone. Deactivation of these essential features may lead to issues in Zoom, causing error in the screen sharing functionality. To address the "Screen sharing has failed to start Zoom error code 105035" error on Windows, follow the steps below to ensure all necessary permissions are enabled.
For Windows users, it is crucial to activate permissions for the camera and microphone to resolve any hindrance in the Zoom screen sharing feature.
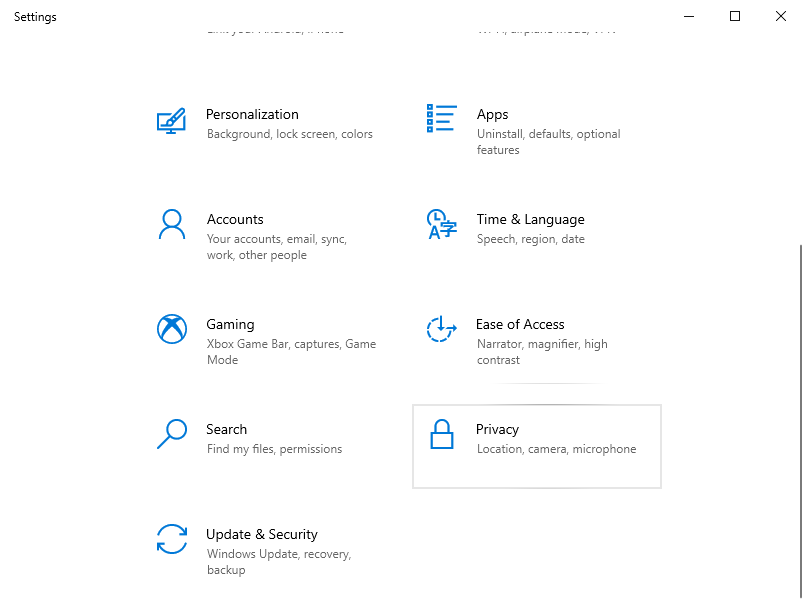
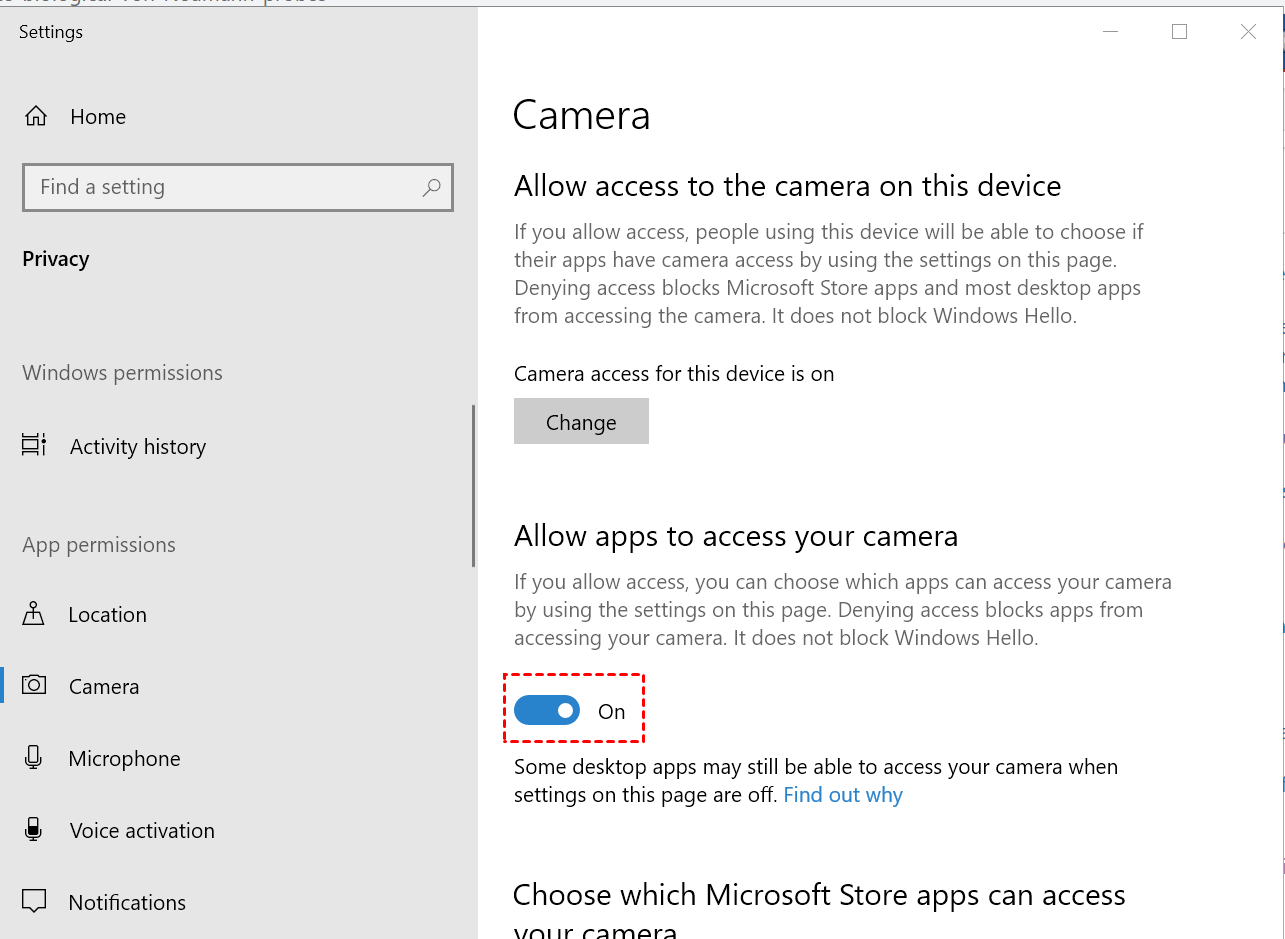
Step 1. In the search box, find and open "Privacy settings."
Step 2. Move to the "Microphone" section and ensure the slider under "Allow apps to access your microphone" is enabled.
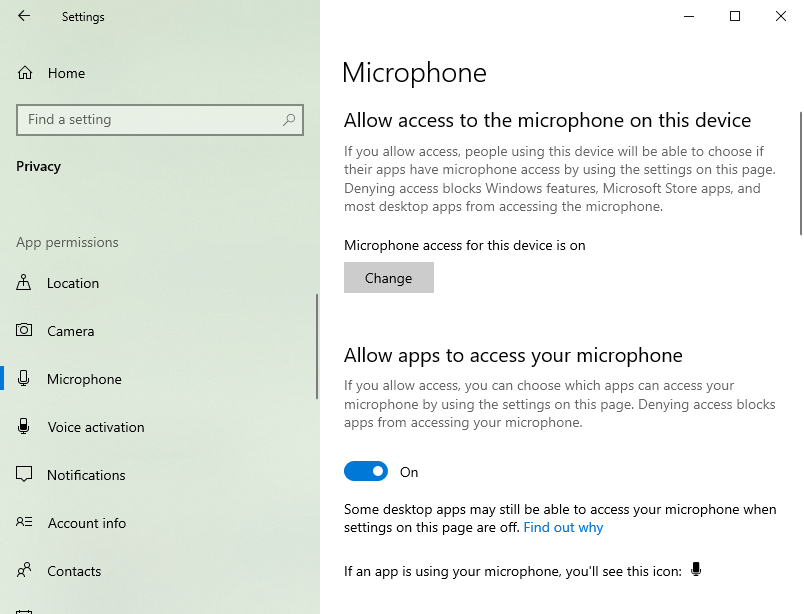
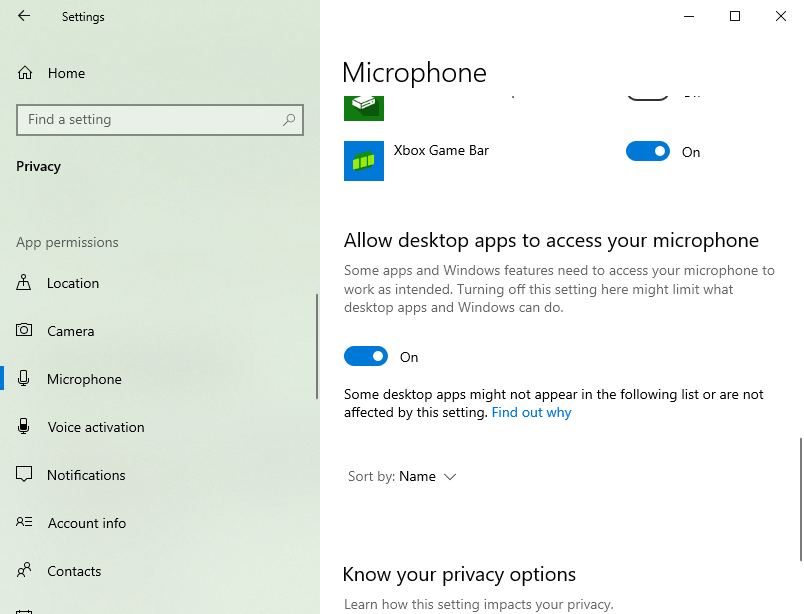
Step 3. Continue scrolling to locate "Allow desktop apps to access the microphone" and confirm it is also enabled.
Step 4. Head to the "Camera" section and verify the slider under "Allow apps to access your camera" is enabled.
Way 2. Adjust Zoom settings
Encountering the "Zoom screen sharing has failed to start" issue could be a result of misconfigured Zoom settings. To resolve this, make the necessary adjustments in your Zoom settings:
Step 1. Install and launch Zoom, then click the “gear icon” in the upper right corner to open Settings.
![]()
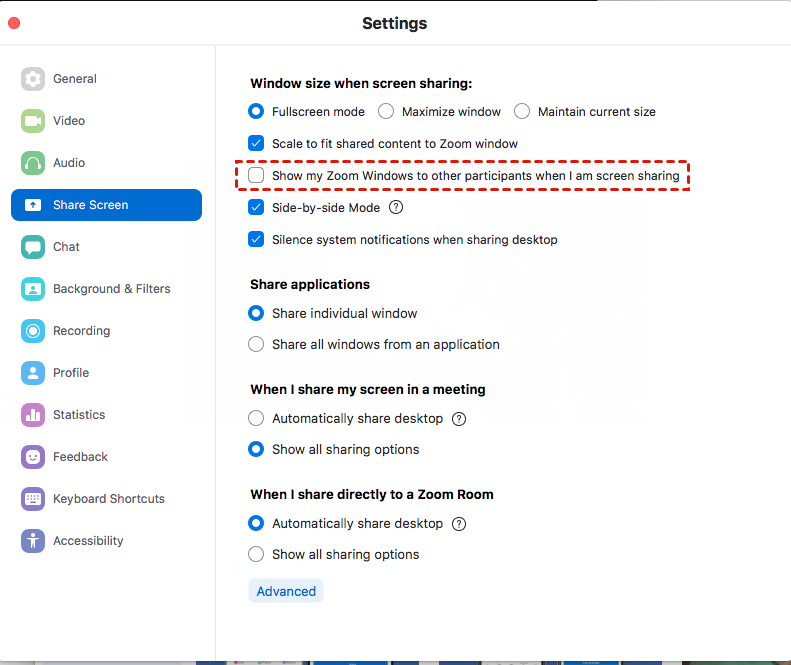
Step 2. Choose the “Share Screen” tab. Ensure to enable “Show my Zoom Windows to other participants when I am screen sharing”. (If you encounter issues checking this option, right-click the Zoom application on your desktop and select "Run as Administrator.")
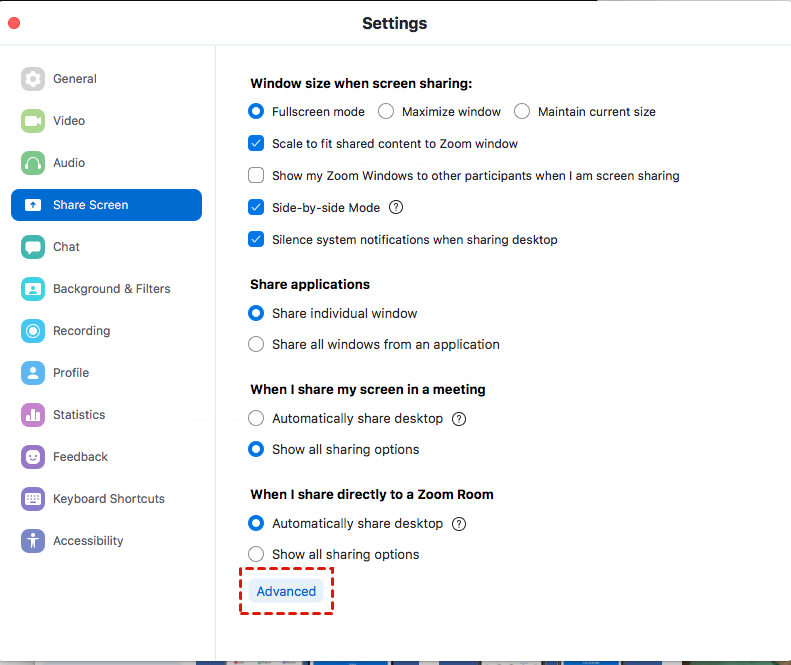
Step 3. Click "Advanced.”
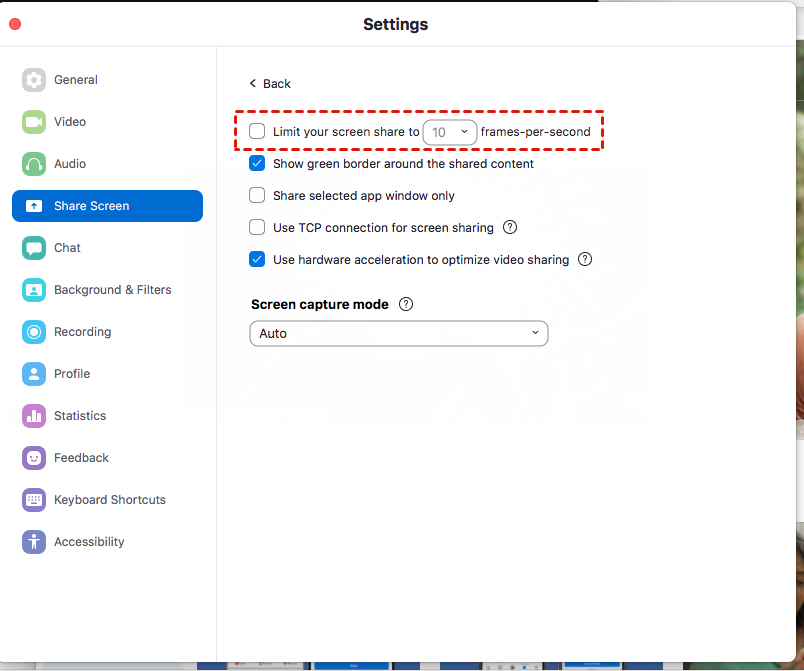
Step 4. Check the box next to "Enable Limit screen sharing to frames per second" and choose a value below 10 from the drop-down menu.
Way 3. Check your internet connection
Zoom, being a video conferencing application, demands a moderate to robust internet connection for optimal performance. To run Zoom without connectivity issues, it is recommended to have at least a robust 3G network or a moderate 4G/LTE internet connection. If you experience frequent restarts, minor crashes, or delays in your Zoom application, it's advisable to inspect your network connection for potential causes.
Way 4. Check for Zoom updates
Using an outdated version of the Zoom application can lead to functionality issues, including problems with features like screen sharing. It is crucial to ensure that you are using the latest version of Zoom to guarantee optimal performance and access to all features. Regularly updating the Zoom application helps address compatibility issues and ensures a smoother user experience.
Step 1. Click on your profile picture and choose “Check for Updates” to see if a newer version of Zoom is available for download.
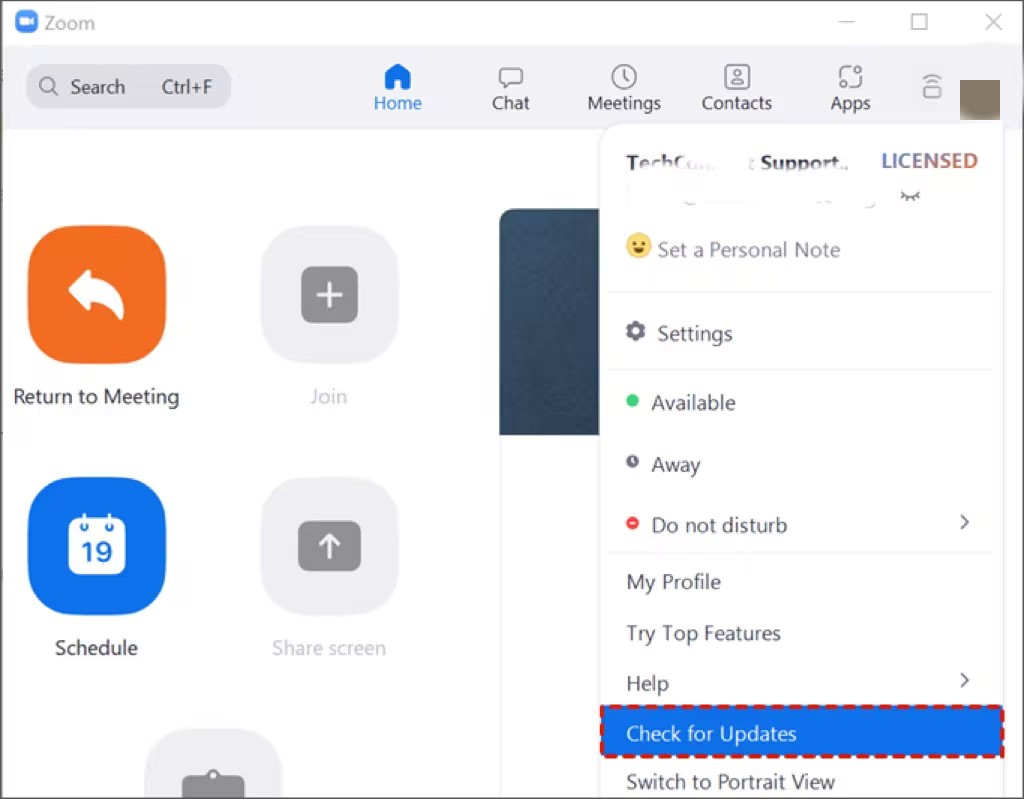
Step 2. If an updated version is found, proceed to update and download the latest version before restarting Zoom. This guarantees that you are using the most recent version, optimizing your experience with Zoom.
Way 5. Troubleshoot the Zoom SDK client
Encountering error code 105035 with the Zoom SDK client can occur during the re-signing of certain system files or if the CptControl.exe and CptInstall.exe files are absent from the bin directory. To troubleshoot this issue, consider the following steps:
Step 1. Upgrade to the Latest Version: Ensure you are using the most recent version of the Zoom SDK client.
Step 2. Check for File Re-signing: Verify whether the following files are being re-signed:
- CptControl.exe
- CptHost.exe
- CptInstall.exe
- CptService.exe
- CptShare.dll
- zzhost.dll
- zzplugin.dll
- aomhost64.exe
- Notes:✎... Zoom has updated the filenames of the shared resources listed below:
- CptHost.exe has been renamed to zcscpthost.exe.
- airhost.exe has been renamed to zcsairhost.exe.
- CptService.exe has been renamed to zCSCptService.exe.
Step 3. Confirm the integrity and authenticity of these files during the re-signing process. Upgrading to the latest version and validating the re-signing of specific files can help resolve error code 105035 in the Zoom SDK client.
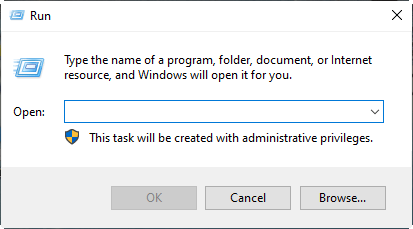
Way 6. Reinstall Zoom
If you've exhausted previous troubleshooting steps and still encounter the "Screen sharing has failed to start Zoom error code 105035," consider uninstalling and reinstalling the Zoom application. This process prompts Zoom to download fresh files when connecting to its servers, potentially resolving the persisting issue.
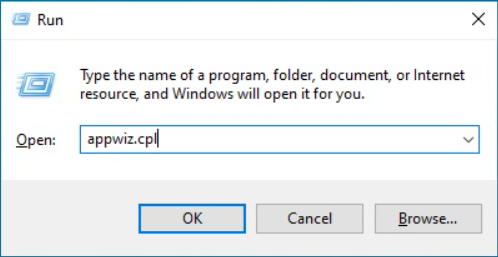
Step 1. Press “Win+R” at the same time to open the Run prompt.
Step 2. Enter “appwiz.cpl” and press “OK”.
Step 3. Right-click Zoom and choose “Uninstall”.
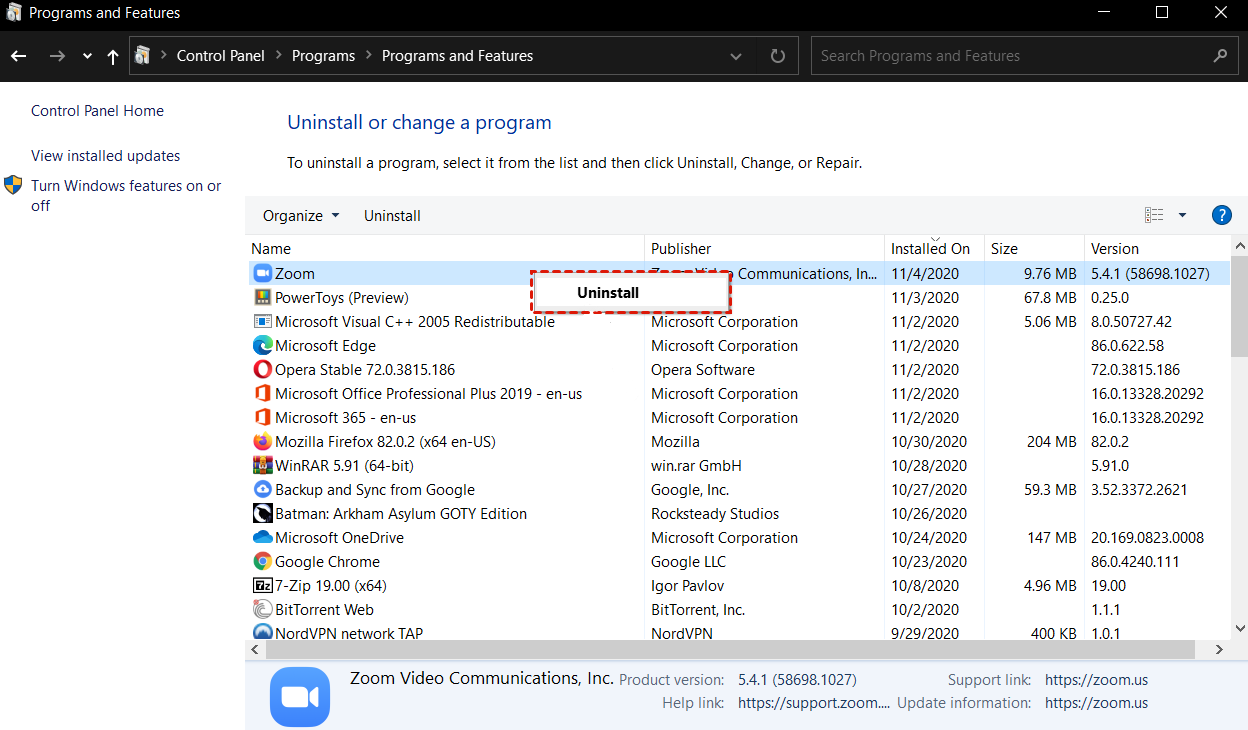
Step 4. Download the most recent version of Zoom from the official Download Center.
AnyViewer: Best free Zoomalternative without screen share problem
Tired of always having trouble using Zoom? Then it's worth exploring alternatives to Zoom. Consider exploring AnyViewer as a reliable alternative for screen sharing. Consider AnyViewer as an excellent all-in-one remote desktop software with screen share. Its free plan caters to both personal and commercial use, offering a rich set of features and permissions. AnyViewer provides a cost-effective solution that aligns with your requirements without straining your budget. Embrace the efficiency and affordability that AnyViewer brings to the table.
Next, you'll see the benefits AnyViewer has to offer:
- Performance.
- AnyViewer is a noteworthy option, providing a robust desktop-sharing experience in full-screen mode.
- Known for its stability and smooth performance, AnyViewer delivers clear picture quality, surpassing many other software options available in the market.
- Compatibility.
- Compatible with Windows 8, 8.1, 10, 11, and Windows Server, AnyViewer facilitates seamless screen sharing between computers.
- Additionally, it allows sharing the screen of Windows computers with Android and iOS devices.
AnyViewer stands out not only as a screen-sharing solution but also as a prominent remote control tool.
- Additional Features.
- The platform facilitates a one-click remote control connection when both devices are logged into the same AnyViewer account.
- Moreover, AnyViewer is highly commendable for unattended remote access, providing the convenience of managing the device as if physically present.
- Beyond its core functionalities, AnyViewer incorporates convenient features like file transfer, text chat, and multi-session support. These attributes contribute to making AnyViewer a comprehensive and integrated solution for efficient remote collaboration.
Step 1. Start by downloading, installing, and launching AnyViewer on both your devices.
Step 2. Access the "Log in" option and click "Sign up." If you've previously registered on the official website, login instantly.

Step 3. Complete the sign-up form and press "Sign up" to establish an AnyViewer account.

Step 4. After a successful login, your device is automatically linked to the logged-in account.

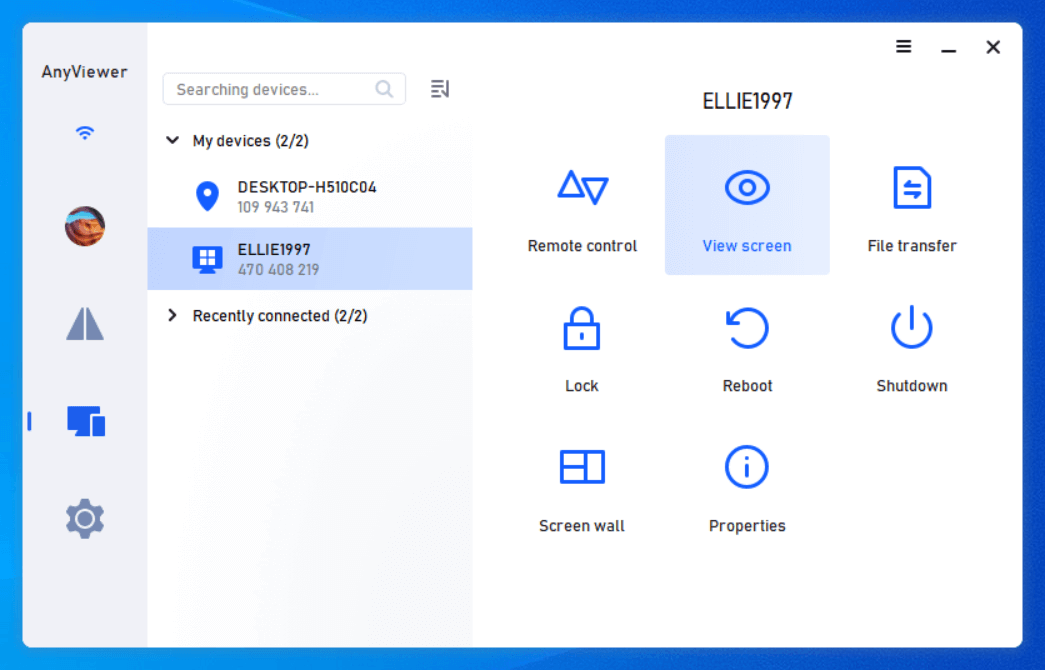
Step 5. Head to "Device," pick the desired computer, and click "View Screen" to observe the remote screen without seeking permission.
- ★Tips: Consider upgrading your account to the Professional or Enterprise plan for enhanced benefits:
- Expand your account's capacity for unattended access by adding more devices.
- Connect one computer device to multiple devices simultaneously.
- Enjoy unrestricted file transfers, accommodating files up to 1TB each.
- Access convenient features like Privacy Mode, allowing deactivation of the keyboard, mouse, and remote screen.
- Efficiently manage large device numbers by creating groups for your enterprise.
- Experience superior image quality for an enhanced remote viewing experience.
- ...
Conclusion
In summary, implementing the five methods outlined above can effectively address the issue of the "Screen sharing has failed to start Zoom error code 105035”. Users can resolve screen sharing problems during Zoom sessions by enabling essential permissions, configuring app settings, updating the application, ensuring a stable internet connection, troubleshooting the Zoom SDK client, and reinstalling the application. Furthermore, considering AnyViewer as an alternative to Zoom offers users advanced screen sharing and remote control capabilities, enhancing the overall meeting experience.
