
Check Remote Desktop Connection Computer List Easily
Want to see the RDP connections your computer has made? Follow the steps mentioned in this post to check the Remote Desktop Connection computer list.
By Ellie / Updated on December 13, 2024
How do I view all RDP connections my computer has made?
“RDP has been greatly helpful in saving my time as I can remote into my work computer from my home computer. But I’m also curious about who my computer has been connected to before. How can I view the Remote Desktop Connection computer list on my home computer?”
How to check Remote Desktop Connection computer list [2 methods]
Here in this part, we’ll introduce how to check the Remote Desktop Connection computer list in two ways when using RDP.
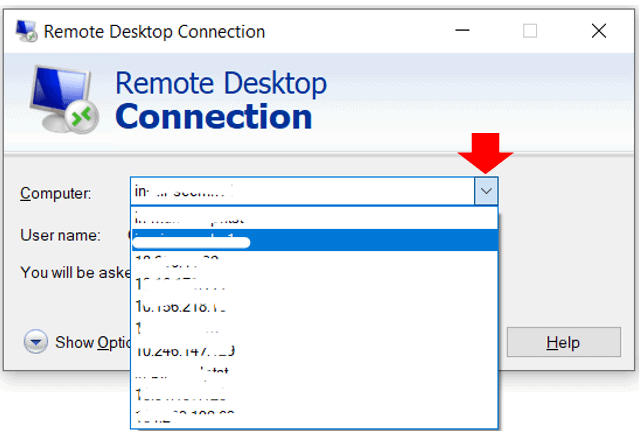
Method 1. Check the connection history via Remote Desktop Connection
The easiest and the most direct way to check the connection computer list is to open your Remote Desktop Connection. Find out the drop-down arrow next to the Computer box. Here you’ll see all the connections your computer has made.
Method 2. Check the RDP connection history via Registry
The second method is to check the RDP connection history you’ve made via Registry.
Step 1. Press Win + R to invoke the Run dialog box, then type in “regedit” and press OK.
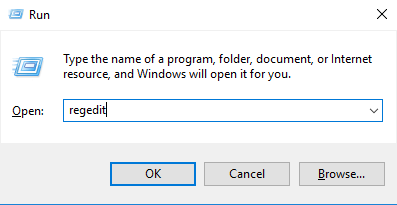
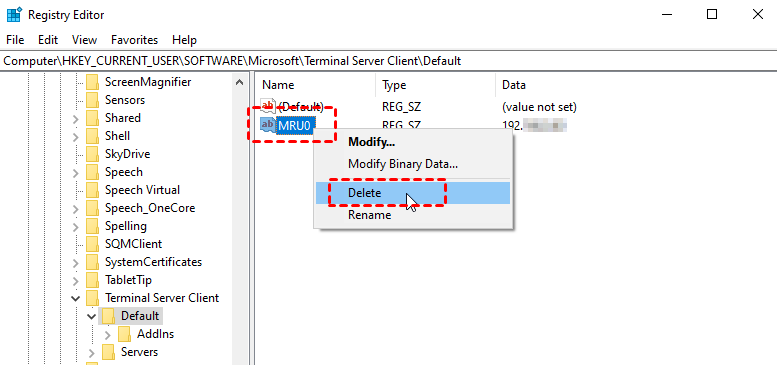
Step 2. Navigate here: HKEY_CURRENT_USER > SOFTWARE > Microsoft > Terminal Server Client > Default. Then you can see the RDP connections you’ve made here.

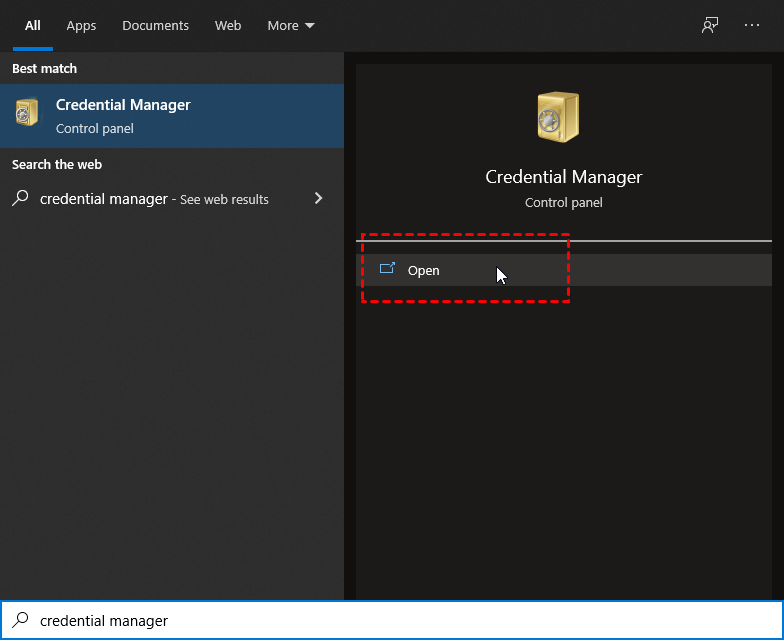
Option 3. Check the saved RDP credentials
RDP credentials are the connection details saved on a particular host for an RDP connection in order to achieve a quick authentication if the users tend to authenticate multiple times to the host. You can check the saved RDP credentials on your computer to see who you have connected.
Step 1. Press Win + S to open the Search box, type in Credential Manager, and then open it.
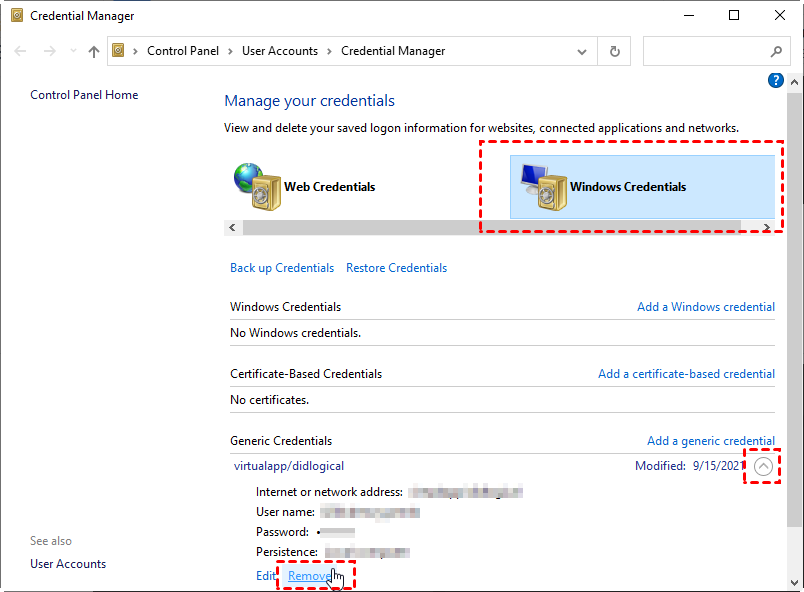
Step 2. Switch to Windows Credentials. Here you’ll see the saved credentials. You can also delete the credentials by clicking Remove.
Tips: How to clear connection history of Remote Desktop on Windows 10
Some users may also wonder how to remove Remote Desktop Connection history on their computer. Here we provide you with two options to clear the RDP cache easily.
- Option 1. Clear the RDP cache from the Registry
Step 1. After you’ve seen the RDP connection history follow the steps in Method 2 above, right-click it and then choose Delete.
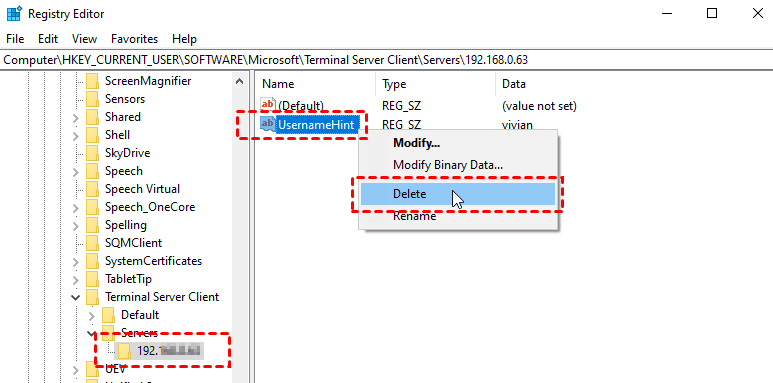
Step 2. On the left pane, locate and expand the Servers key, which contains information about all RDP connections made from this machine. Choose the user (or users) to delete, then right-click UsernameHint and select Delete.
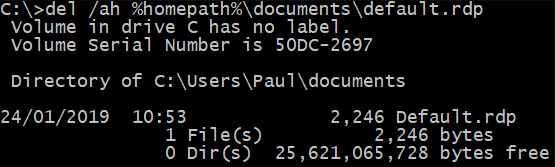
Step 3. Finally, remove the default.rdp file from your home path. This is a hidden file that will not be displayed or deleted by default. Press Win + R and then type “cmd”.

Step 4. Then enter the following delete command:
del /ah %homepath%\documents\default.rdp
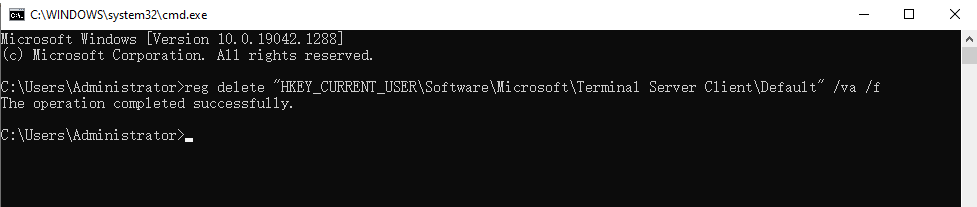
- Option 2. Clear RDP cache via CMD
Open Command Prompt, enter the following commands and press enter one by one. Here we take the first command as an example. You only need to enter the next command once the former operation has been completed successfully.
- reg delete “HKEY_CURRENT_USER\Software\Microsoft\Terminal Server Client\Default” /va /f
- reg delete “HKEY_CURRENT_USER\Software\Microsoft\Terminal Server Client\Servers” /f
- reg add “HKEY_CURRENT_USER\Software\Microsoft\Terminal Server Client\Servers” del /ah %homepath%\documents\default.rdp

AnyViewer: Easier way to check and clear remote connection histories
Even the ways to check the Remote Desktop Connection computer list and clear connection histories are not difficult, there’s much easier for you to check and clear remote connection histories if you’re using AnyViewer, the free and easy third-party remote desktop software.
Except for the easier way to check and clear remote connection histories, AnyViewer has the following three more advantages over RDP:
- It doesn’t require an IP address or computer name to achieve a remote connection.
- It doesn’t require the two devices to be onthe same network.
- It supports almost all versions of Windows, including Windows 11/10/8.1/8/7 and Windows Server 2022/2019/2016/2012 R2.
Check out the following steps to see how easy to get started with it, check out its connection histories, and delete connection histories.
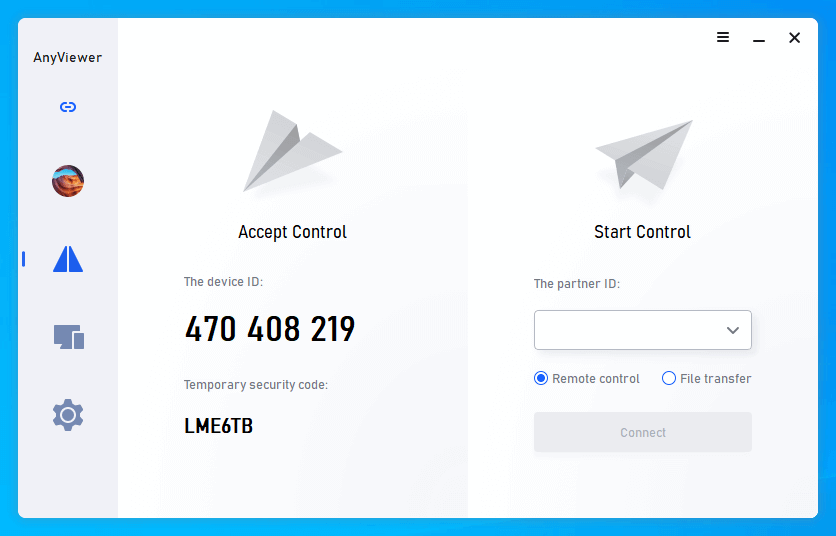
Step 1. Download, install, and launch AnyViewer on both computers.
Step 2. On your host computer, go to Log in, and then click Sign up. (If you already have signed up on its official website, you can log in directly.)

Step 3. Fill in the signup information.

Step 4. Then you can see you successfully logged in to AnyViewer. Your device will automatically be assigned to the account you’ve logged in to.

Step 5. On your client computer, log in to the same AnyViewer account, then click One-click control to achieve unattended remote access to your host computer.

Note: If you upgrade your account to a Professional or Enterprise plan, then you’ll have more rights:
- You can assign more devices to achieve unattended remote access.
- You can connect to another computer in privacy mode, which means you can black the screen and block the mouse and keyboard of the remote computer.
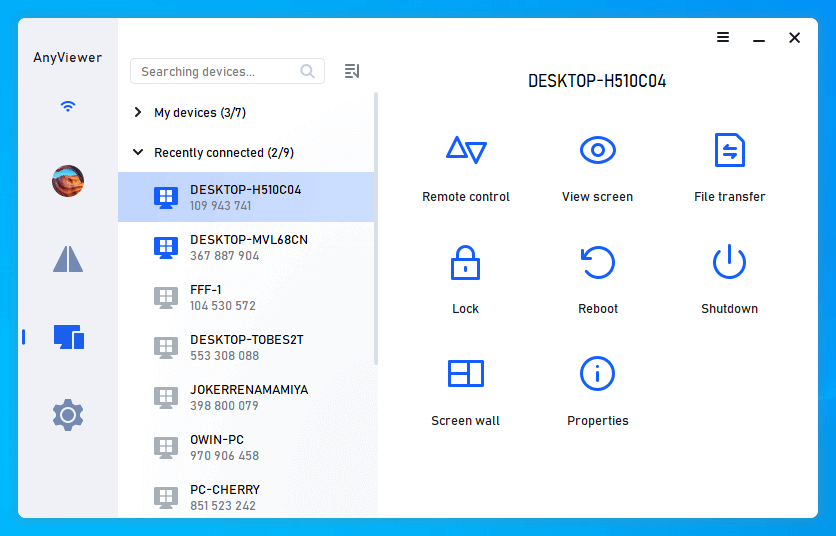
Step 6. Go to the Device tab, then you can see all your connection history here.
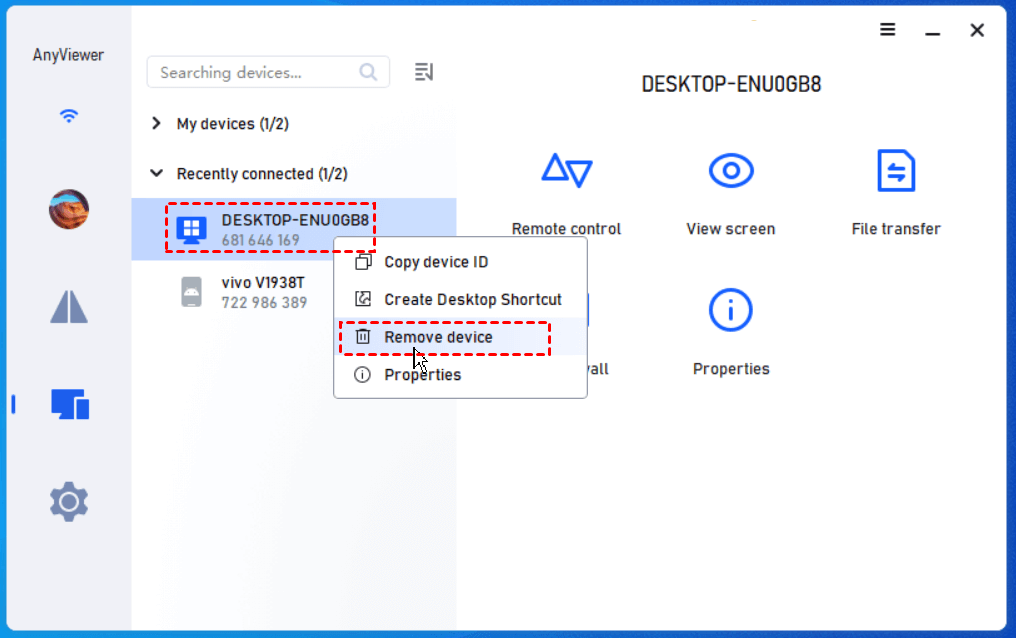
Step 7. If you want to delete the connection history, you can right-click the device and choose Remove device to clear the connection history.
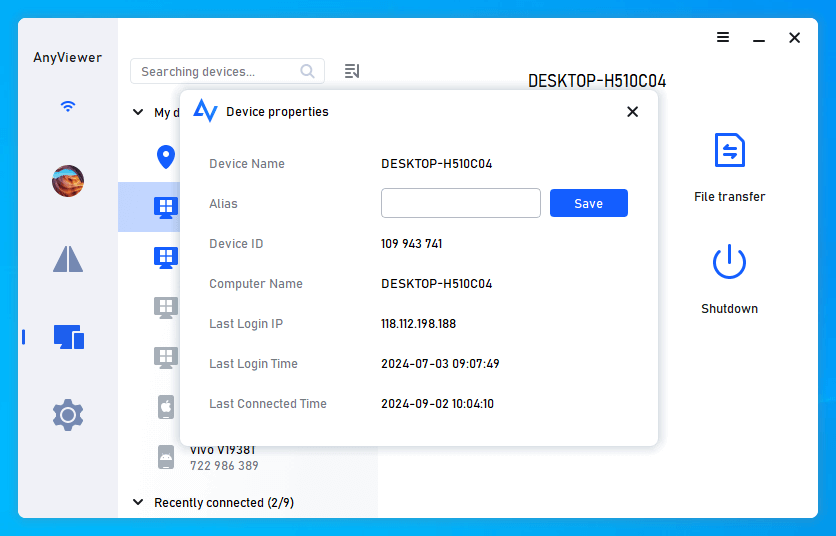
Step 8. You can also choose Properties to see more detail about the remote connection, for example, the login IP and login time.
Bonus tips: View the history of remote connections to your computer
You may also be concerned about someone remoting into your computer without your knowledge. To help users clear their doubts, we also give two methods in this part to see who has connected to your computer before. Follow the steps below to check the connection history of RDP.
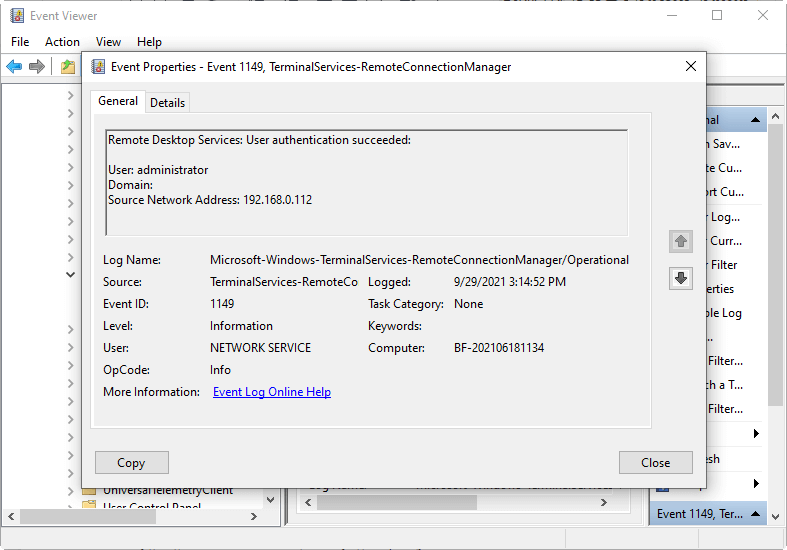
Method 1. Check the RDP connection history via Event Viewer
The first method to check Remote Desktop Connection history on Windows 10 is to use the Event Viewer.
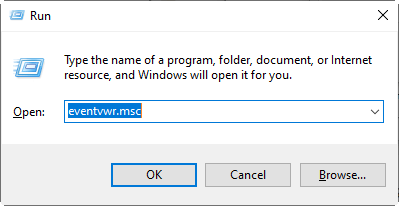
Step 1. Press Win + R to invoke the Run dialog box, then type in “eventvwr.msc” and press OK to open Event Viewer.
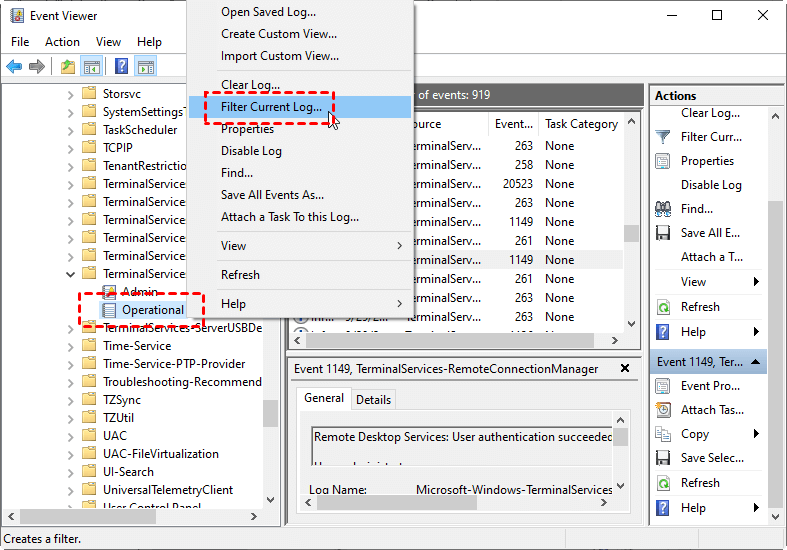
Step 2. Navigate here: Applications and Services Logs > Microsoft > Windows > TerminalServices-RemoteConnectionManager > Operational. Right-click Operational and choose Filter Current Log.
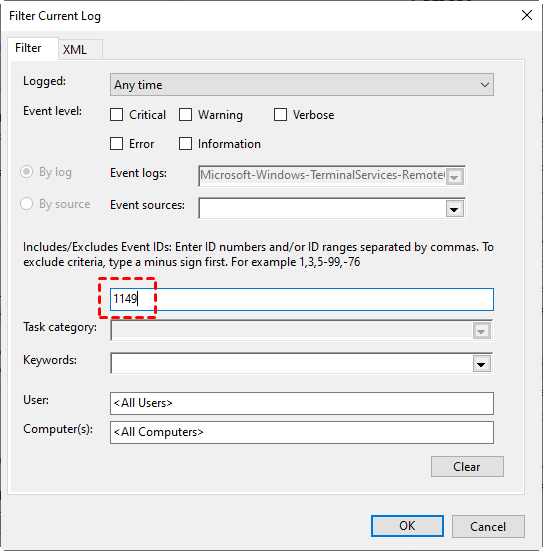
Step 3. The EventID of Remote Desktop Services is 1149. Then enter 1149 to filter the log.
Step 4. Then you will get an event list with the history of all RDP connections to this server.
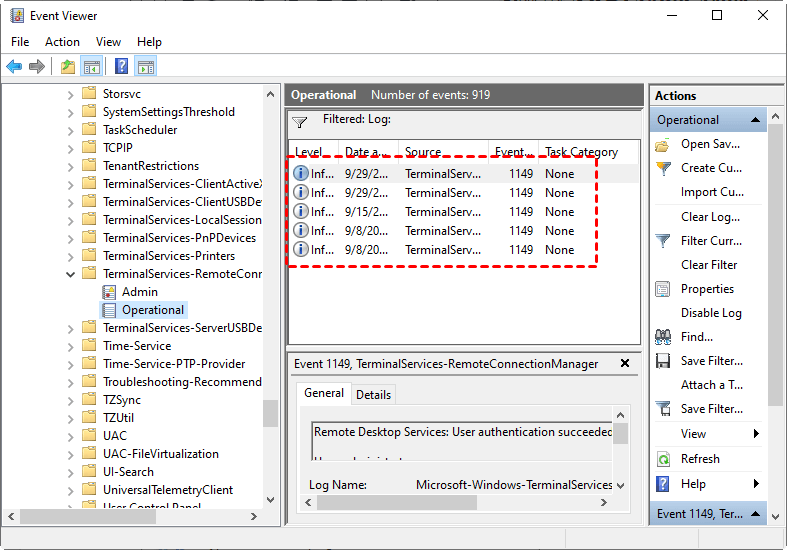
Step 5. Click one of them, then you can see the details of the RDP connection, including IP address, computer name, login time, etc.
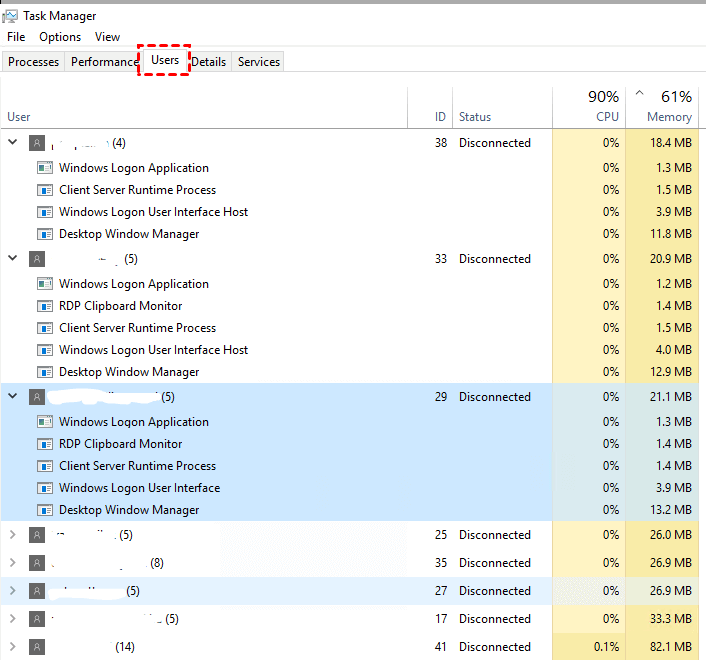
Method 2. Check the currently active RDP computer list
The second method here only allows you to see a list of currently active Remote Desktop users on your computer with Task Manager.
Step 1. Press Ctrl + Shift + Esc at the same time to open Task Manager, then go to the Users tab. There you will get users currently active.
Step 2. Simply click on any column of the list, say User, then right-click on it and select Session. The list will then show a session column with the types of connections to remote, such as RDP, console, terminal, or services, and so on.
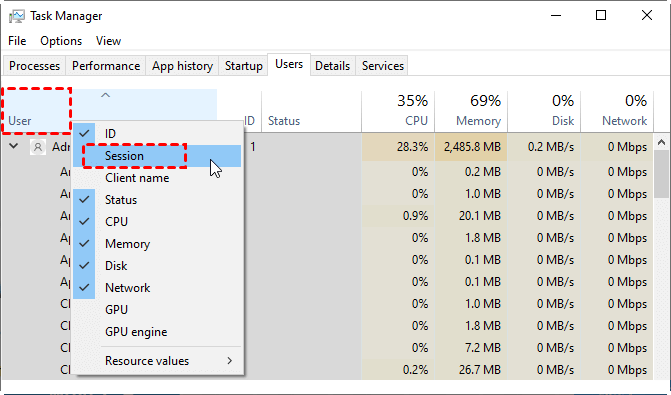
Step 3. Then you can distinguish which users are connected via RDP connection.

Conclusion
This post mainly introduces how to check Remote Desktop Connection computer list and clear RDP connection histories easily. You can choose from the several methods mentioned in this post. To confirm the result, you can open the Remote Desktop Connection, the removed computer will no longer appear in the Computer box drop-down menu. If you’re using AnyViewer for remote connections, checking and clearing remote connection histories will be even easier for you.
