
Is Quick Assist Not Working in Windows 11 or 10? Here are 4 Solutions!
Is your Quick Assist stuck on loading, connecting or signing into Microsoft account? This post shows you four ways to fix Quick Assist not working in Windows 11/10 and introduces a great tool for accessing computer remotely.
By AnyViewer / Updated on December 13, 2024
Why is Quick Assist not working?
Quick Assist, only available in Windows 10 1607 or later, helps you control another computer over the internet to solve some computer problems in Windows 11/10. Sometimes, you find that Quick Assist is stuck on loading, signing into a Microsoft account, or connecting. Usually, Quick Assist services is not working can be caused by a little glitch in it or some third-party programs that block it.
How do you get Quick Assist to work?
Four solutions are listed to get it to work if you are stuck on Quick Assist not working issue. It's unnecessary to try them one by one but try the most possible solutions based on different causes. Or you can use a third-party tool to access another computer and offere remote support.
Solution 1. Uninstall and reinstall the Quick Assist
If Quick Assist is stuck on loading, singing, or connecting out of its own glitch (usually it happens after an update), uninstalling and reinstalling it can be the most effective way. Follow these steps:
Step 1. In Windows 10/11, press "Start" menu and click "Settings".
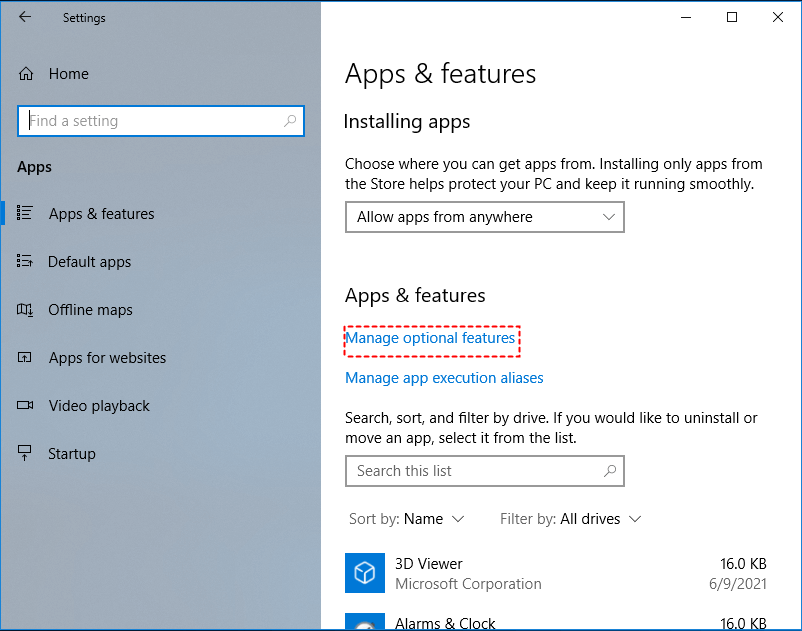
Step 2. Click "Apps", and click “Manage optional features” in the "Apps & features" window.
Step 3. Click "Microsoft Quick Assist" and click "Uninstall".

Step 4. After uninstalling, reboot your PC, click "Add a feature" on the "Manage optional features" window; search for "Microsoft Quick Assist" and install it. Then you can open Quick Assist again to see whether it can work.
Solution 2. Start a clean Boot and launch Quick Assist
To exclude the possibility of third-party programs blocking Quick Assist, try to start a clean boot and fire up Quick Assist.
Step 1. Press "Windows" + "R" to open the "Run" dialogue.
Step 2. Type “msconfig” and click "OK" to open "System Configuration" window.
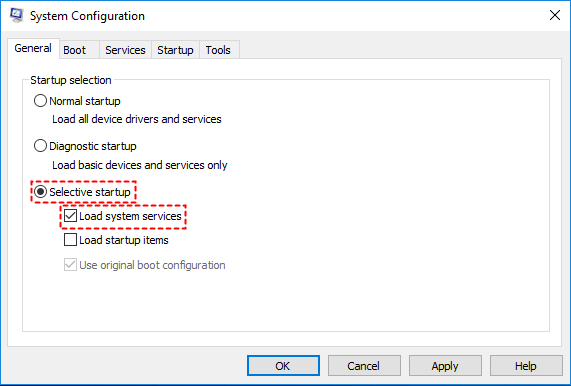
Step 3. Go to "General" tab, select “Selective startup” and check “Load system services”.
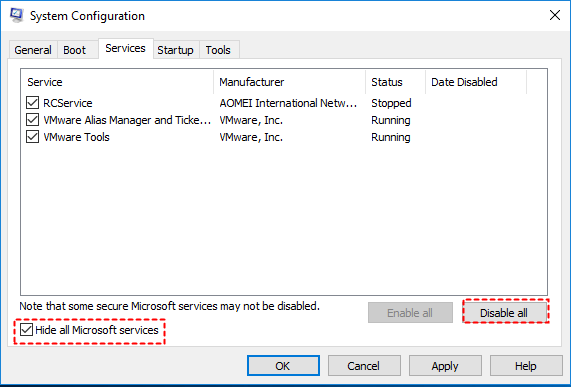
Step 4. Click "Services", check "Hide all Microsoft services" and then you can see non-Microsoft services, click "Disable all" to diable them. Then, click "OK".
Step 5. Boot your computer and run Quick Assist.
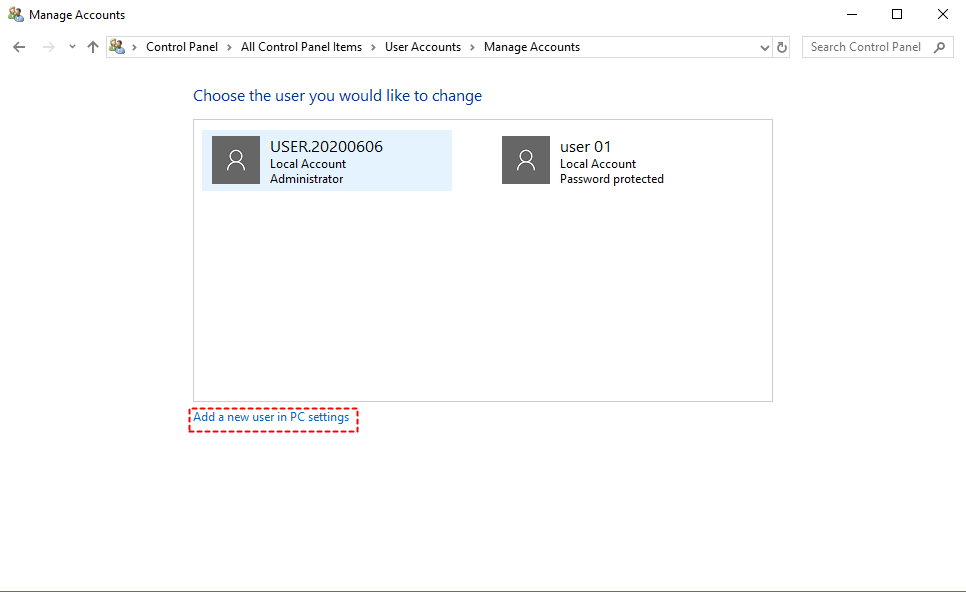
Method 3. Create a new user account
Based on many users' feedback, it's very effective to create a new account and use Quick Assist.
Step 1. Press "Windows" and "R" to open "Run" box. Type “control panel” and press Enter.
Step 2. In the control panel window, find "User Account" and click it.

Step 3. On the "Manage Accounts" window, click "Add a new user in PC settings".
Step 4. Fill up all necessary information and click "Next" to create a new user account.
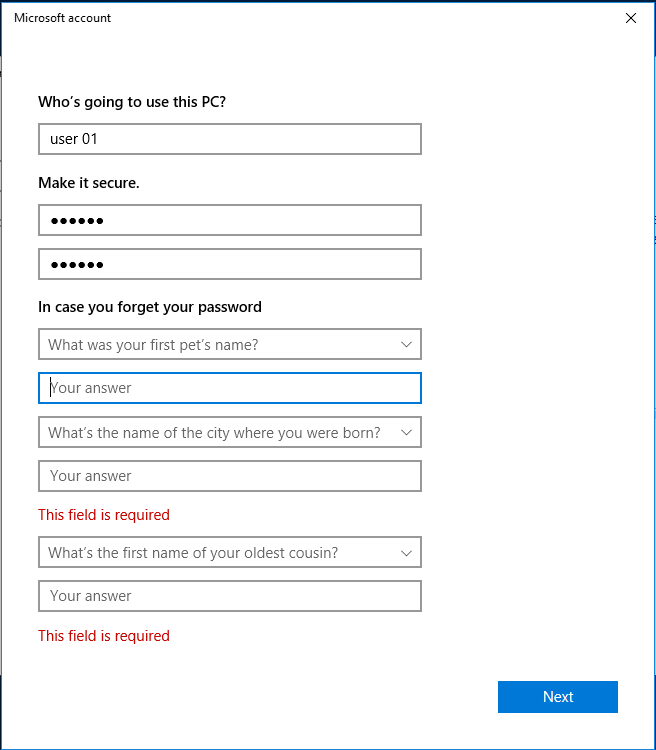
Step 5. Press "Ctrl" + "Alt" +"Del" and choose "Switch User"; then switch to the newly created user account.

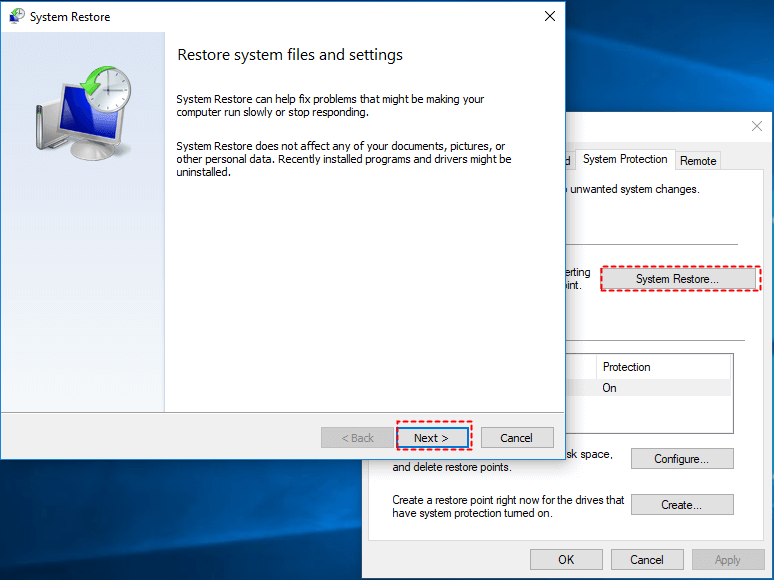
Solution 4. Restore system to its previous status
If Quick Assist still isn't working and the issue happens after the Windows update, you can retrieve your system to its former status.
Step 1. Press "Windows" key and "R", type” sysdm.cpl” in the entry bar, and press Enter.
Step 2. Go to "System Protection" tab, and click "System Restore." In the "System Restore" window, click "Next". Then follow the prompts to complete the whole process.
An ultra-simple workaround for Quick Assist not working
Tired of fixing Microsoft Quick Assist not working in Windows 10 or Windows 11? Why not try the stable & safe Quick Assist alternative, AnyViewer? It offers a stable and fast remote connection and can work with more Windows operating systems (from Windows 7 to Windows 11; from Server 2012 R2 to Windows Server 2022). What’s more, you can use it to offer not only attended remote support but also unattended remote support. Free download the Quick Assist alternative, install it and run it on both devices. To offer support from a mobile device, you can download an AnyViewer mobile app.
Option 1. Attended remote support
To connect another computer to assist in resolving PC problems just for once and there is someone on the other end to accept your request, you can choose attended access.
Step 1. On the PC that you need to access, locate the device ID of it.
Step 2. On your computer, sign up and sign into an AnyViewer account, type in the ID of the remote computer, choose "Remote control" and click "Connect".
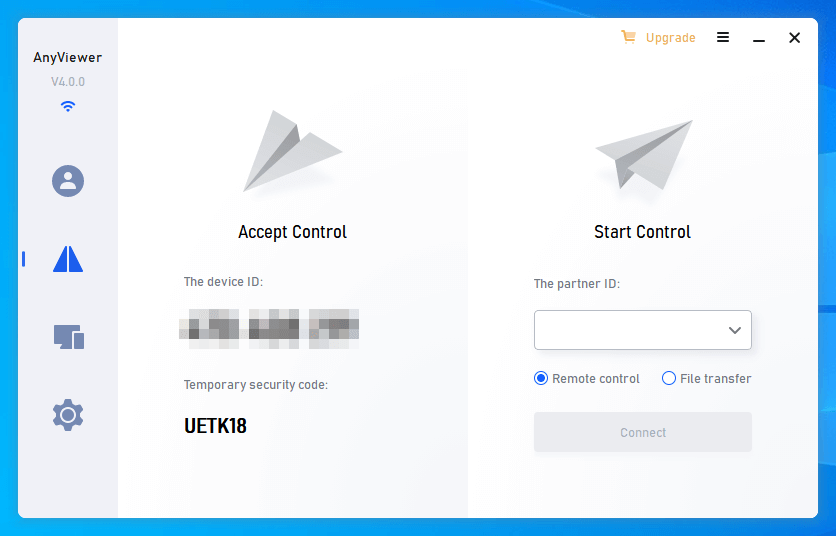
Note: If you only need to transfer files between two computers, choose "File transfer" and click "Connect".
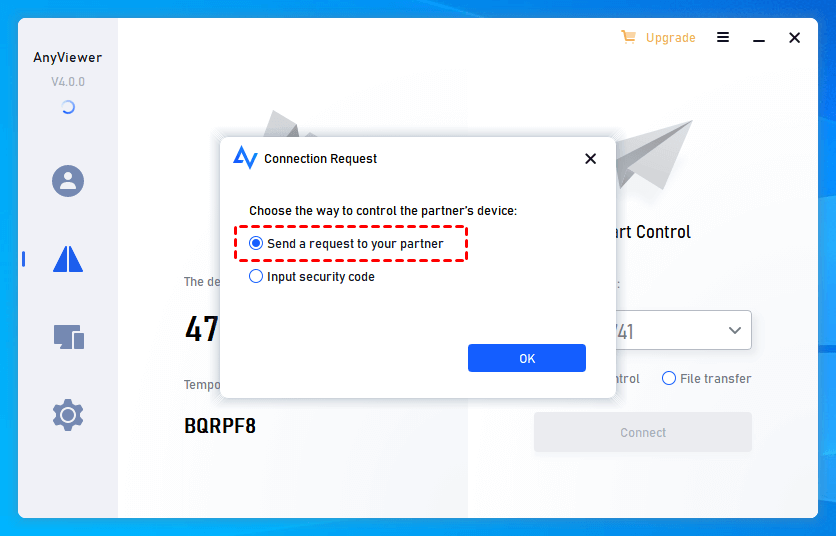
Step 3. Choose "Send a control request to your partner" and click "OK".
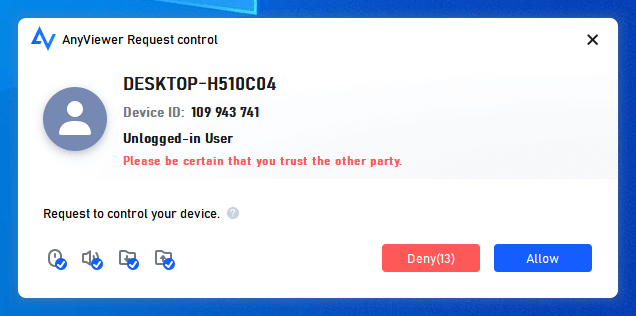
Step 4. The one on the other end will receive a request. If "Allow" is chosen, you will remote into that computer. Otherwise, the connection will fail.
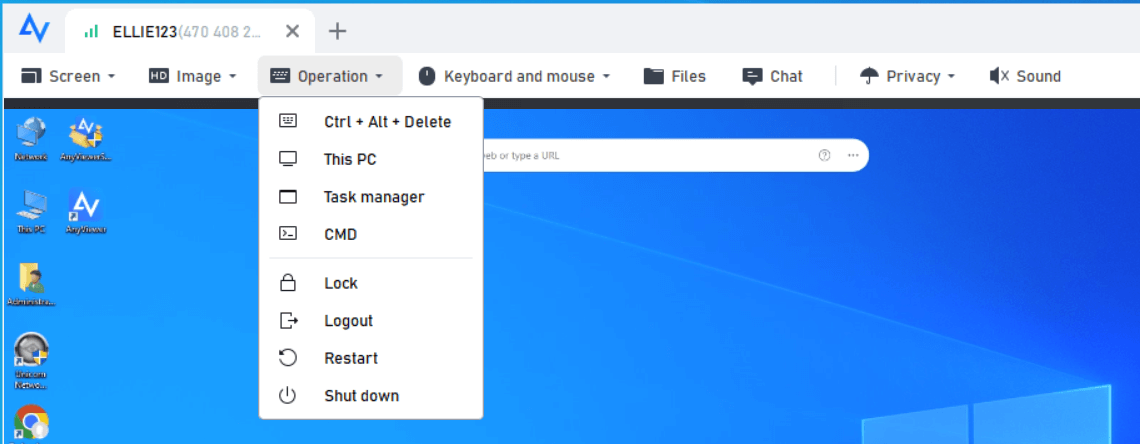
After that, you can see the screen of the remote computer and solve issues on it.
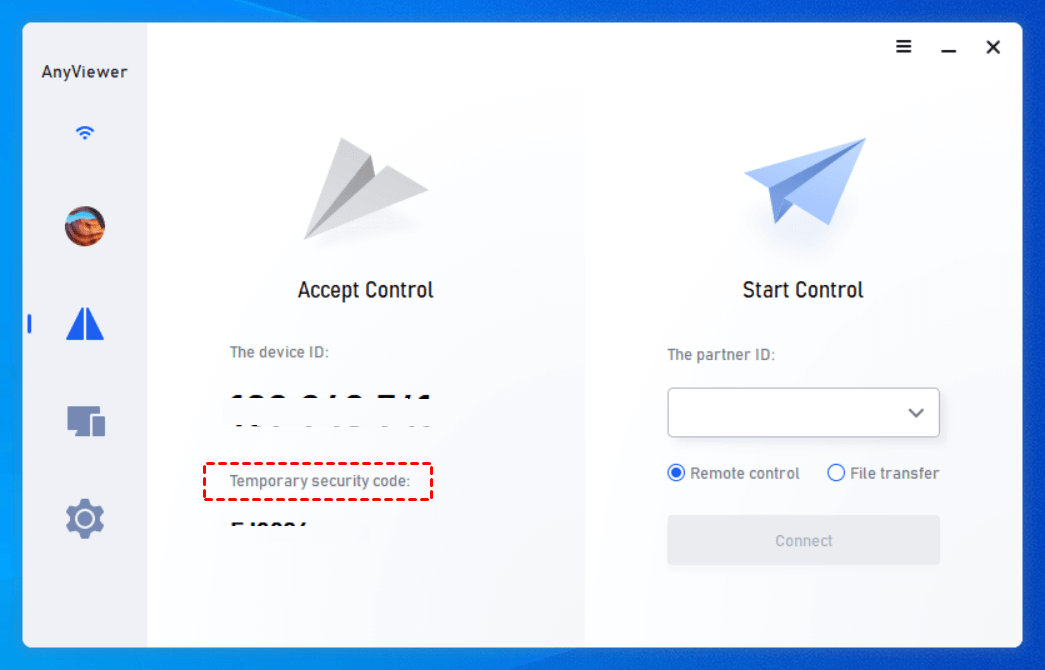
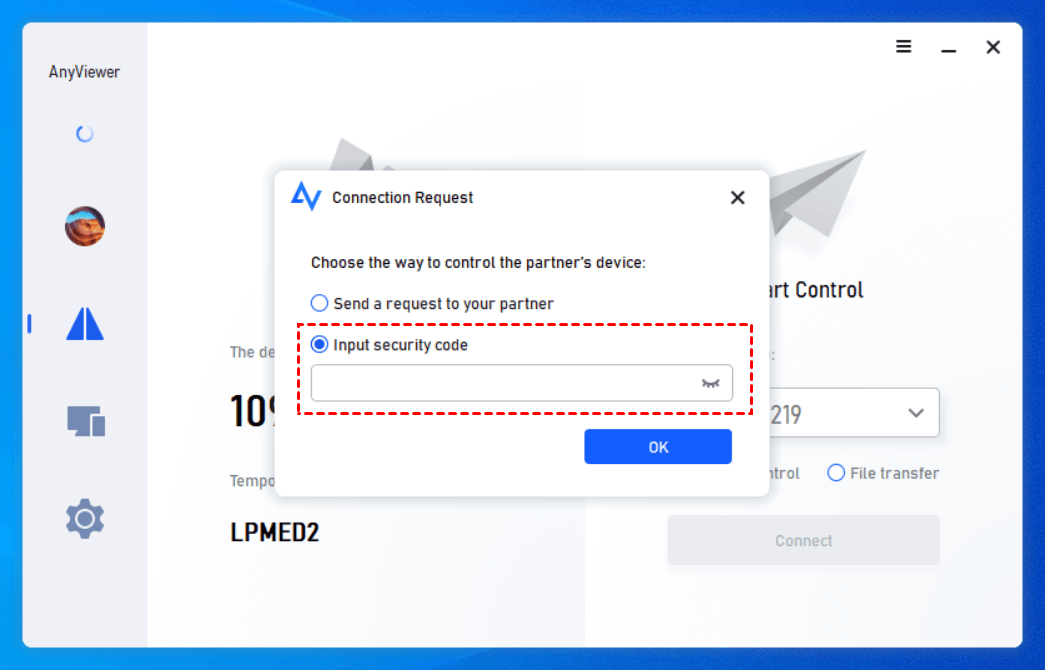
Option 2. Unattended remote support
If the one that needs your help isn't sitting in front of the computer to accept your request, it's OK to choose unattended remote access and then offer support.
The first two steps are as same as the first two steps in option 1. Then choose Input security code and type in the temporary security code of the remote PC to control it. Then, click "OK". Or log into the same AnyViewer account on both computers and then start one-click control.
✍ Note: It's recommended to upgrade to Professional or Enterprise, thus you can enjoy advanced features, including high-quality image, accessing remote devices in privacy mode, etc.
Conclusion
What to do when Quick Assist isn't working? Uninstall and reinstall it? Restore the operating system to its previous status? Or just switch to another remote desktop utility that offers more choices and is ultra-simple to use? Surely you have your own answer.
