
Two Methods: Go into Quick Assist Administrator Mode
Do you know how to go into Quick Assist administrator mode? If you don’t know, don’t worry, here we have two methods for you.
By Ellie / Updated on December 13, 2024
How do I go into Quick Assistadministrator mode?
I’ve had problems with Quick Assist on Windows 10. All users within the firm are designated as ‘Standard Users’, and they are not permitted to operate any program as Administrator. My problem is that I frequently need to insert an Administrator account when using Quick Assist to complete the process to provide remote support. I can’t find a screen where I may type in the administrator account and password cause the whole screen goes black. How am I going to solve it?”
- Question from Ada
![]()
Two methods to go into Quick Assist administrator mode
Quick Assist is widely used to offer remote assistance to a remote computer. If you have ever encountered Quick Assist black screen admin when trying to run a program as an administrator, keep reading to realize two methods to go into Quick Assist administrator mode.
Method 1. Disable PromptOnSecureDesktop using Registry
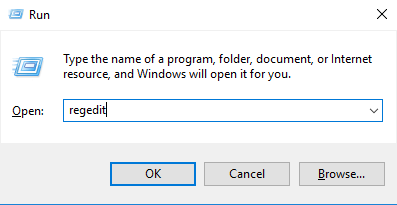
Step 1. Press Win + R to invoke the Run dialog box, then type in “regedit” and press OK to open Registry.
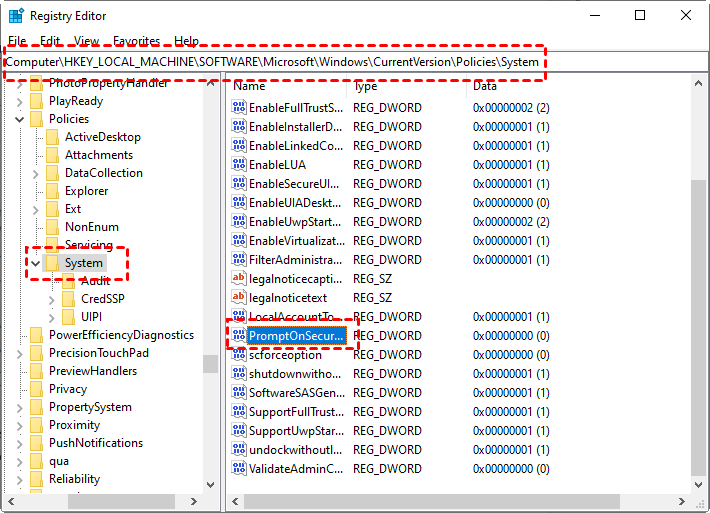
Step 2. Navigate to: Computer > HKEY_LOCAL_MACHINE > SOFTWARE > Microsoft > Windows > CurrentVersion > Policies > System. On the right pane, find and double-click PromptOnSecureDesktop.
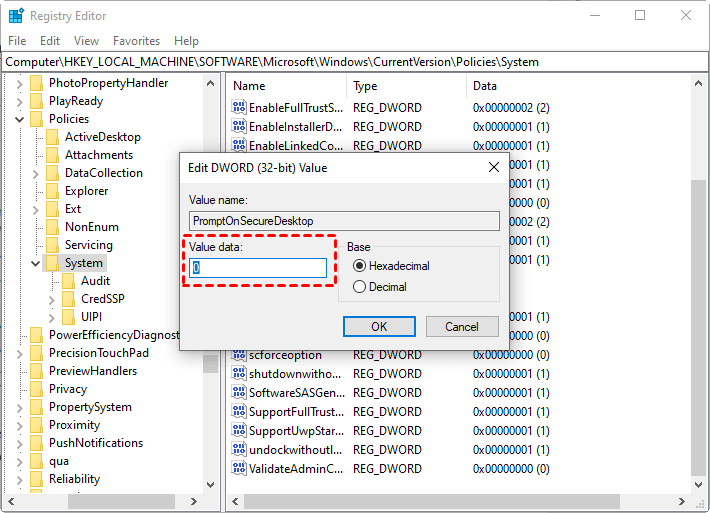
Step 3. Change its value data to 0 to disable it.
Method 2. Disable User Account Control in Group Policy
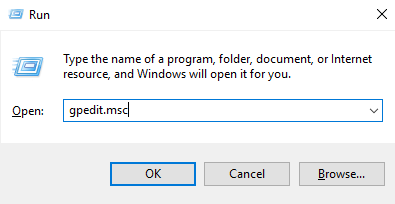
Step 1. Press Win + R to open the run dialog box, and type in “gpedit.msc” to open the Local Group Policy Editor.
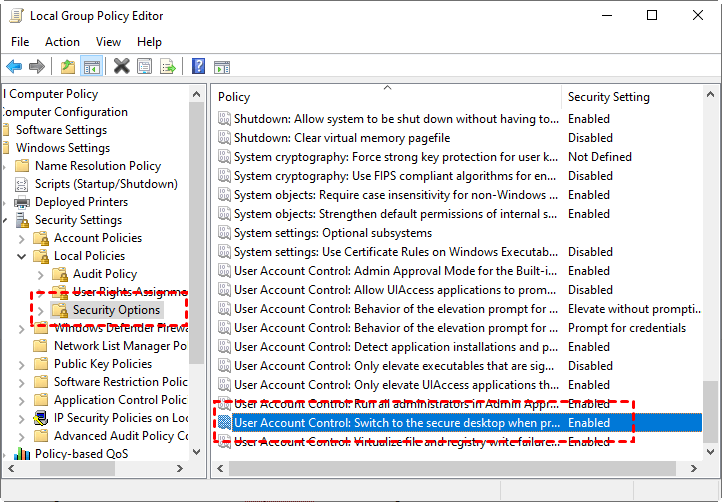
Step 2. Navigate to: Computer Configuration > Windows Settings > Security Settings > Local Policies > Security Options. Find and double-click User Account Control: Switch to the secure desktop when prompting for elevation.
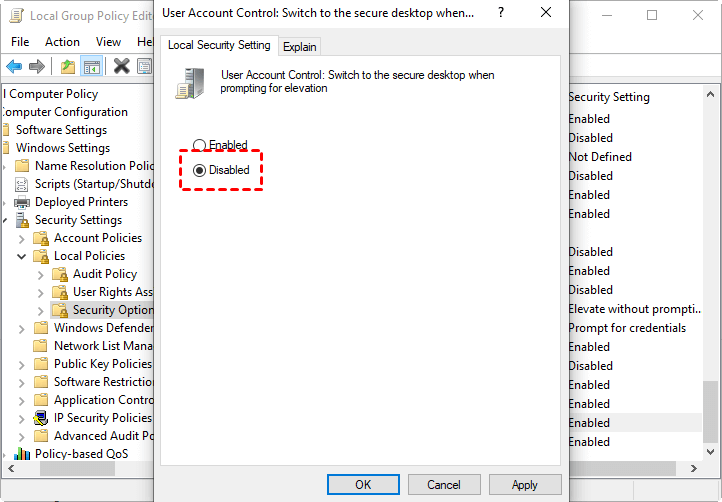
Step 3. Change its status to Disabled.
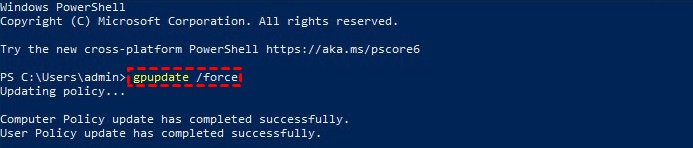
Step 4. Open Windows PowerShell and run gpupdate /force to update your computer to the latest group policy settings.
Suppose you are using Quick Assist to provide others with remote support and can’t run programs as an administrator on their computers. In that case, we provide you with two methods to help you go into Microsoft Quick Assist administrator mode. But pay attention; disabling these two policies would also be a big security risk. So please do it after careful consideration.
AnyViewer: Run programs on the remote computer as an administrator
If you would like a secure way to run programs on the remote computer as an administrator, you can use the free remote desktop software, AnyViewer. It enables you to offer instant remote support or access unattended computers. Once you’ve successfully connected to another computer with AnyViewer, you can run any program as an administrator on that computer without any restriction, just like you’re actually using it. Let’s see how to do this.
Step 1. Free download, install, and launch AnyViewer on both computers. To access computers from mobile devices, you can download AnyViewer mobile apps.
Step 2. Go to Log in > Sign up to create an AnyViewer account. If you have already signed up on its official website, you can log in directly.

Step 3. Then you can see you successfully logged in to AnyViewer. Your device will automatically be assigned to the account you've logged in to.

Step 4 . Log in to the same AnyViewer account on the two devices, then click One-click control to achieve unattended remote access.

✍ Note: Upgrade your account to a Professional or Enterprise plan; Then you can assign more devices to your account for one-click unattended remote access, control more computers at the same time from one PC, and enjoy advanced features like accessing in privacy mode to protect your privacy when the PC is in an open place.
After you’ve successfully connected to another computer, then you can run any program as an administrator. Here we’ll take Windows PowerShell as an example. Right-click Start, and then choose Windows PowerShell (Admin).
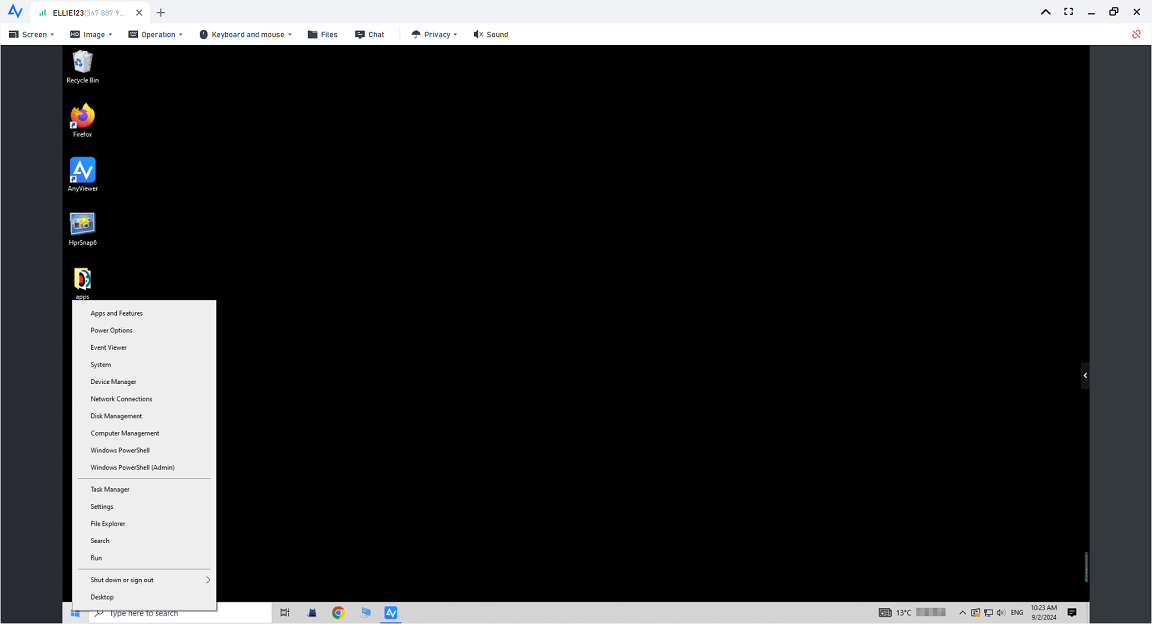
Then you can open Windows PowerShell as an administrator.

Conclusion
If you are trying to provide remote support to someone with Quick Assist and need to run a program as an administrator, you’ll find unable to do this as the whole screen goes black. According to this, here in this post, we provide you with two methods to go into Quick Assist administrator mode. Besides, you can also use AnyViewer to remote into another computer and run any program as an administrator on it.
