
Five Easy Ways to Fix Quick Assist Black Screen
How can I fix Quick Assist black screen? Here in this post, we will offer you several solutions to solve this problem. If you encounter the same issue, you are going to the right place! Please keep reading to get the solutions!
By AnyViewer / Updated on December 13, 2024
How do I fix a black screen on my Quick Assist?
Hi. How do I fix Quick Assist black screen? When I try to remote to my Windows 10 computer, the remote screen turns black. I can connect to the device but can not see what I am doing. Does someone know the answer? Please tell me.”
- Question from Microsoft Forum
How to fix Quick Assist black screen [5 solutions]
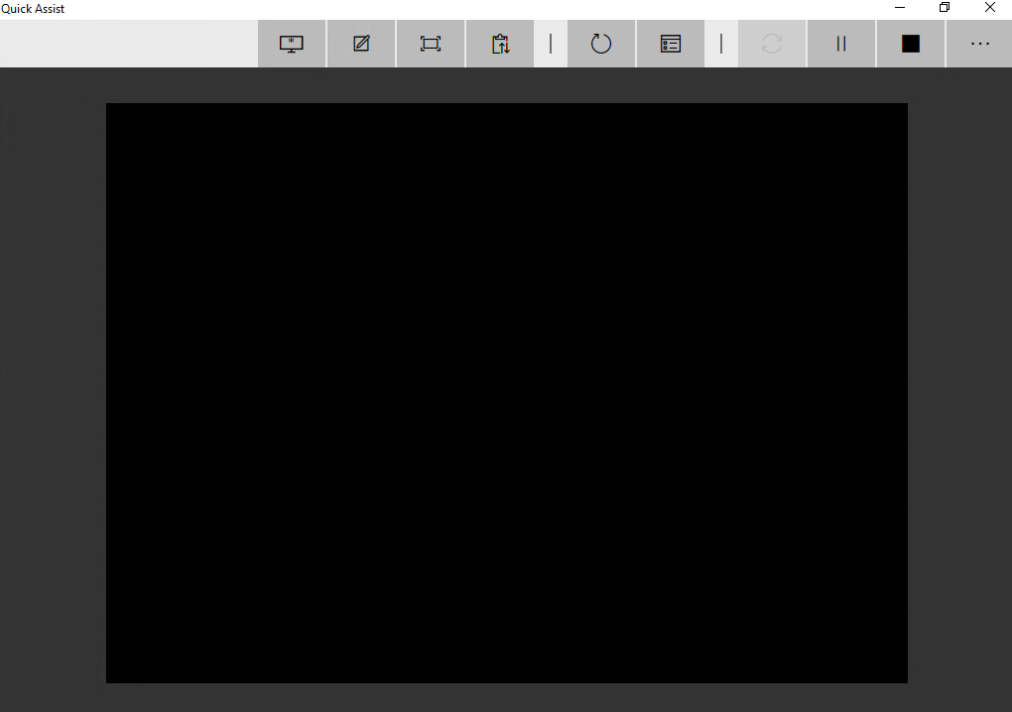
Quick Assist is an administrative tool with Windows operating system to help users view or control a computer remotely. It’s so good that it does not require third-party program downloading. However, this tool also has its drawbacks. For example, sometimes Quick Assist shows black screen in a remote session. In this post, we will cover how you can fix Quick Assist black screen.
Solution 1. Reset the Quick Assist app
If you are running Windows 11, you can easily reset Quick Assist with the repair tool.
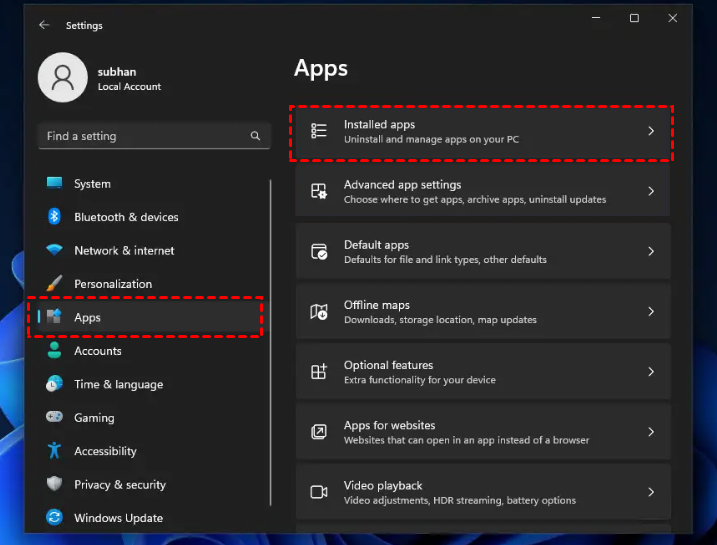
Step 1. Open Settings, click Apps on the left and click Installed apps.
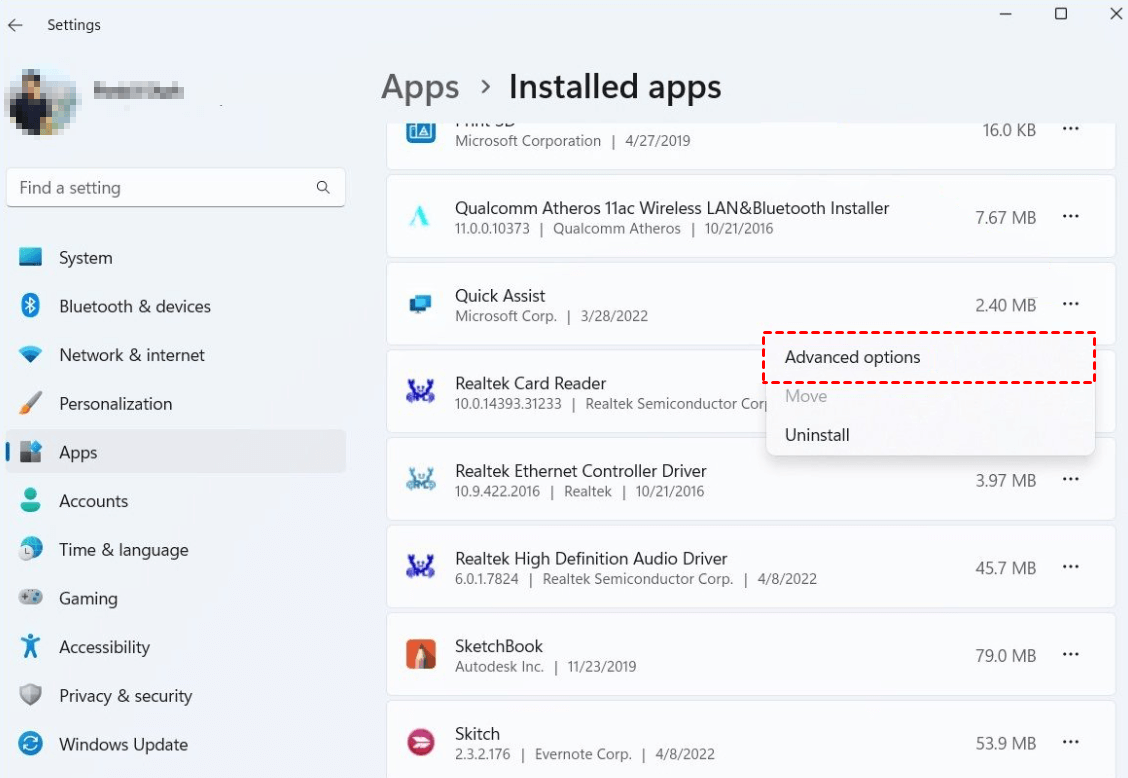
Step 2. Locate Quick Assist app, click the three-dotted option, and click Advanced options.
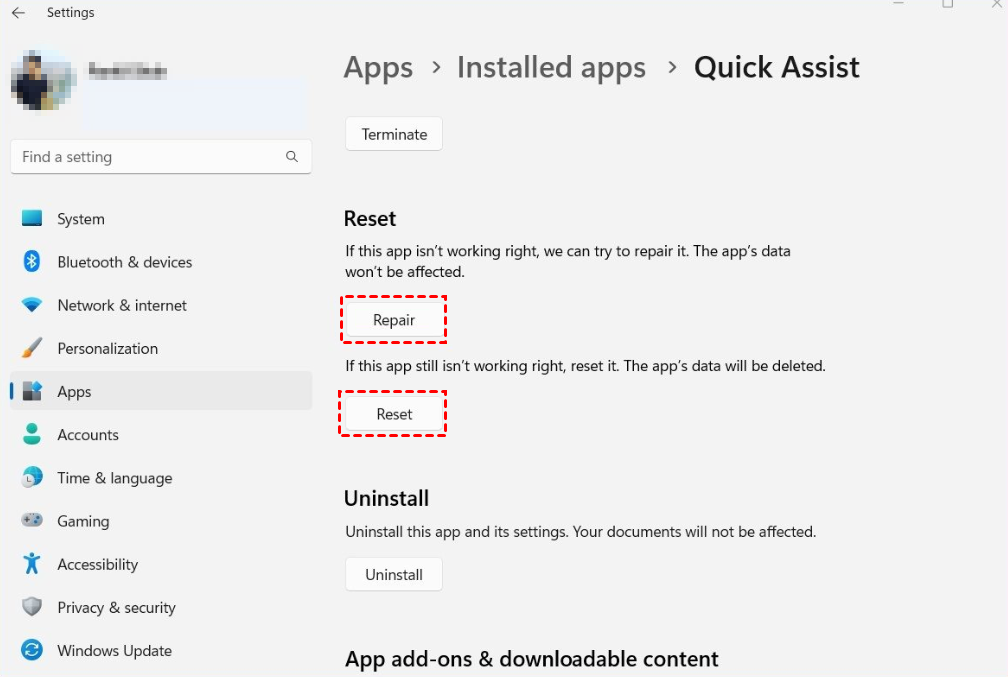
Step 3. Click Repair and open Quick Assist again. If the issue persists, click Reset with the same steps.
Solution 2. Reset the Internet settings
You can also reset the Internet settings to fix black screen on Quick Assist.
Step 1. Search Internet Options from the start menu and open it.
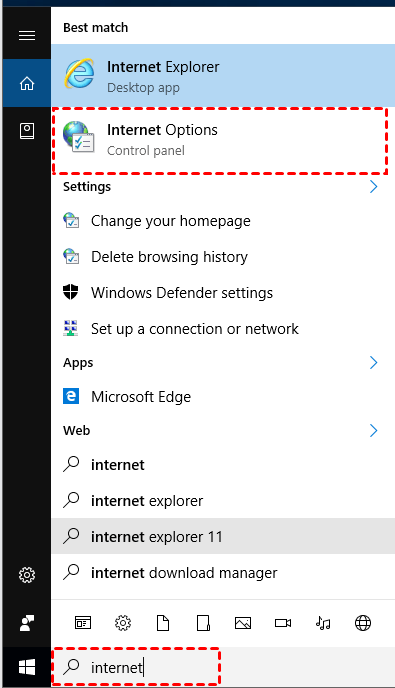
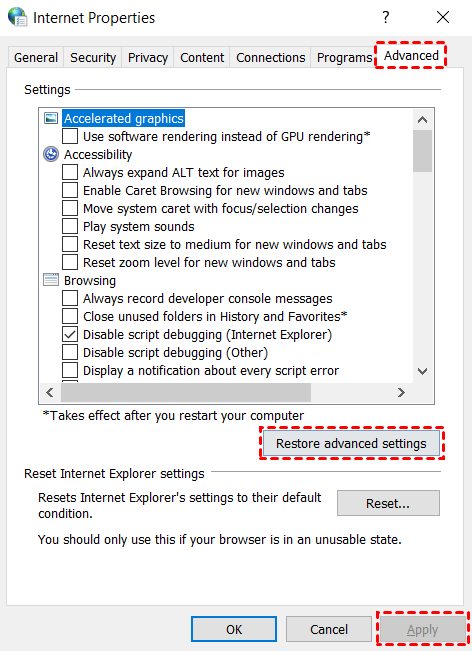
Step 2. Go to Advanced tab, click Restore advanced settings, and click Apply > OK to take effect.
Solution 3. Deploy a new configuration profile
Quick Assist black screen may be due to the UAC Secure Desktop feature kicking in. You can follow the next steps to deploy a UAC fix for Quick Assist.
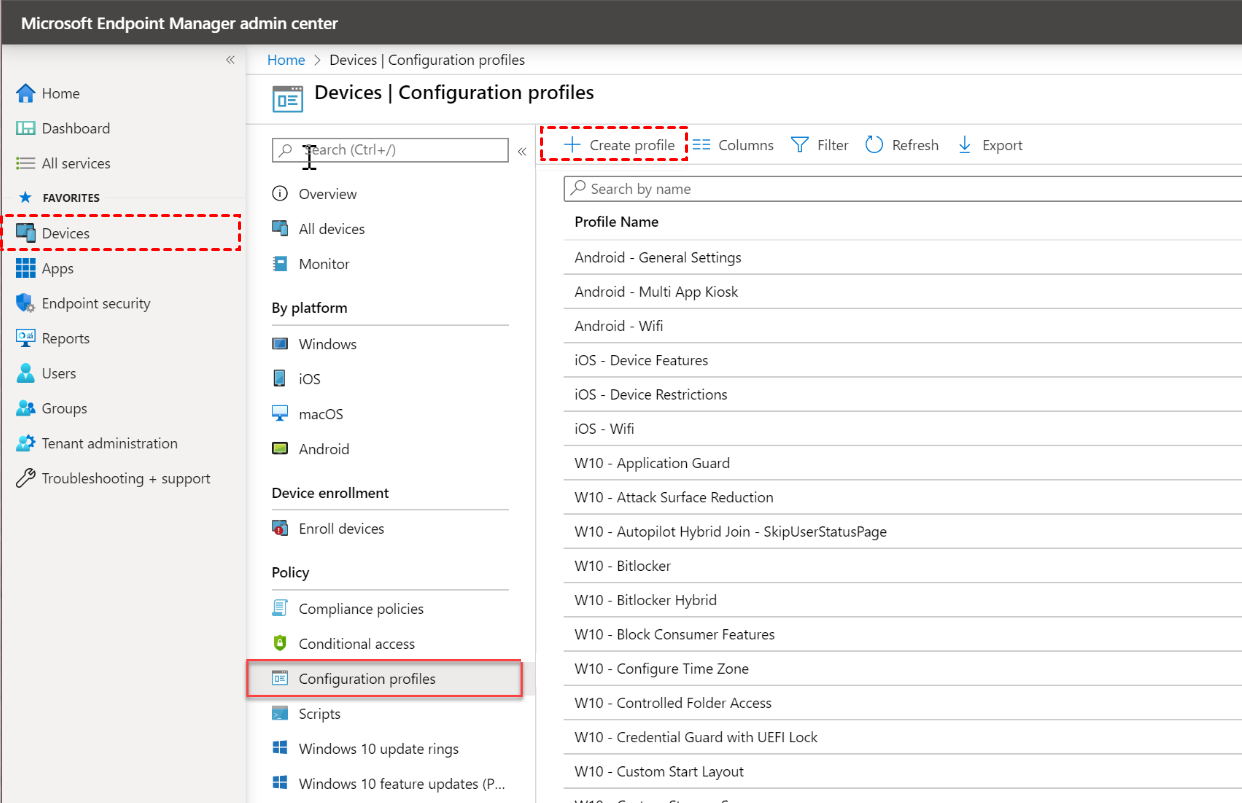
Step 1. Go to Microsoft Endpoint Manager console. Click Devices on the left, and click Configuration profiles > Create profile.
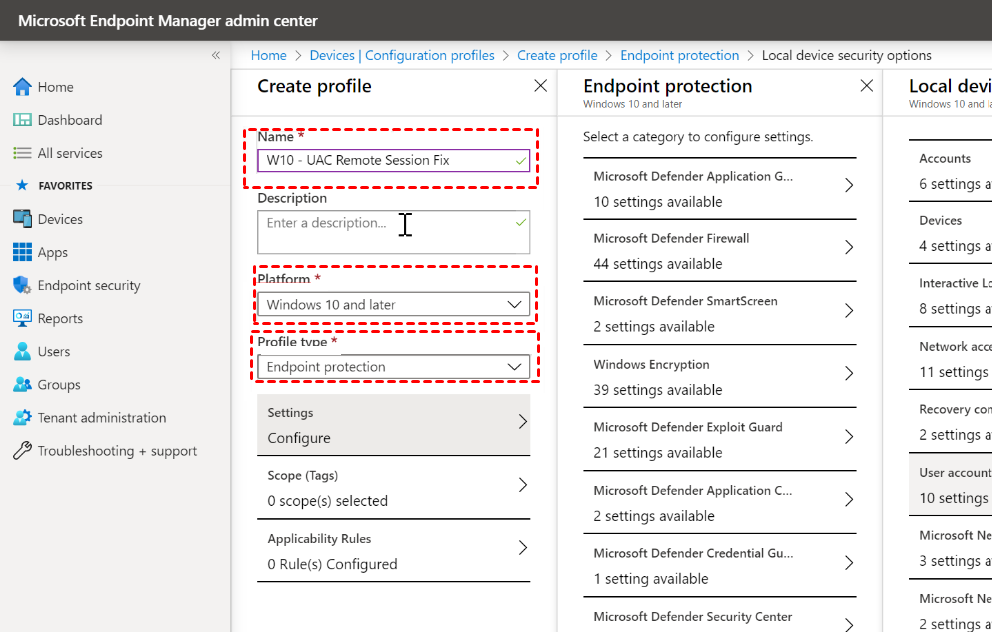
Step 2. Select a name for the new profile. Under Platform, select Windows 10 and later. Under Profile type, select Endpoint protection.
Step 3. Click Settings > Local device security options > User account control, and enable Route elevation prompts to user’s interactive desktop. Click OK three times and click Create to create the new profile.

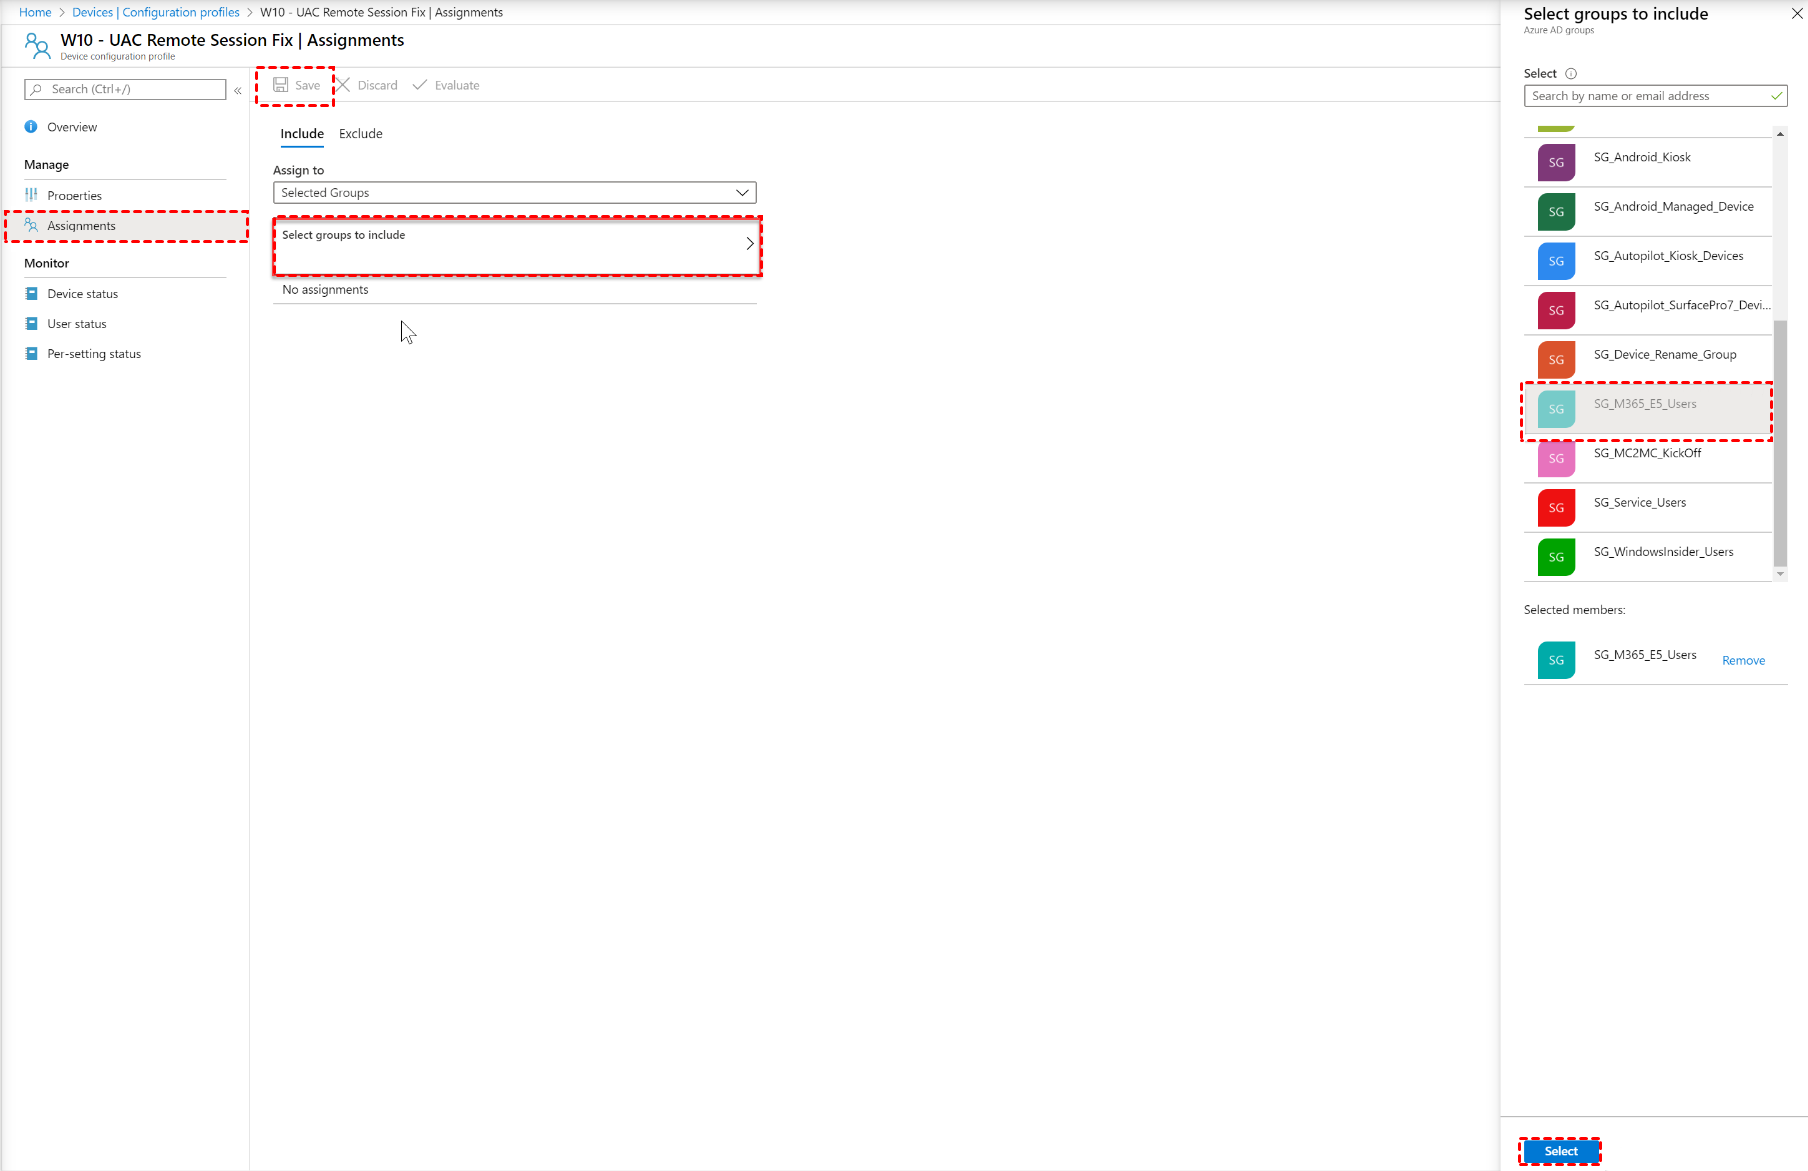
Step 4. In your new profile, click Assignment > Select groups to include, and select the group you want to assign this profile. (We recommend you use a test group first.) Click Select > Save.
Solution 4. Uninstall and reinstall Quick Assist
Uninstalling and reinstalling the program can also resolve the issue.
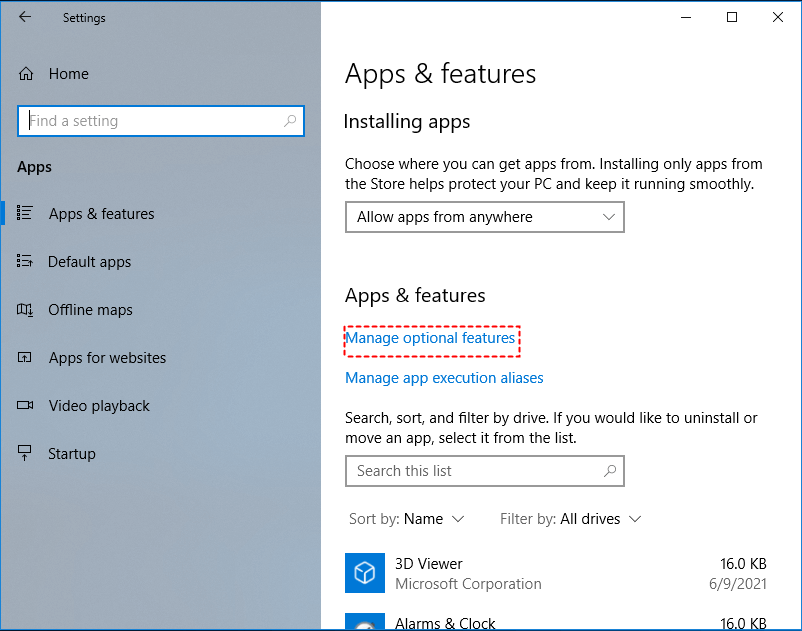
Step 1. Open Settings, click Apps & features > Manage optional features.
Step 2. Click Microsoft Quick Assist and click Uninstall.

Step 3. Restart your computer after uninstalling. Then repeat the same steps to add Quick Assist feature.
Solution 5. Use error-free Quick Assist alternative
If the above solutions do not work for you, we recommend you use Quick Assist alternative, which also supports remote view screen and remote control. For example, AnyViewer, professional yet powerful remote desktop software, enables users to perform unattended remote access and transfer files in an error-free environment.
➤AnyViewer supports all Windows OS and Windows Server, while Quick Assist is available on Windows 10, 11 only.
➤AnyViewer supports flexible file transfer, while Quick Assist lacks file transfer feature.
➤AnyViewer allows chat during a remote session, while Quick Assist does not.
➤AnyViewer has a fast and stable connection environment, while Quick Assist has slow resonse speed.
AnyViewer is easy to operate. Download it on your devices and let's get started!
Step 1. Start AnyViewer on the host computer, and click Sign up to register a new account.

Step 2. Enter your information and click Sign up.

Step 3. Start AnyViewer on the client computer and log in the same account. The device will automatically assign to the account when you successfully log in.

Step 4. Go to Device, click the computer you want to connect to, and click One-click control to establish a session.

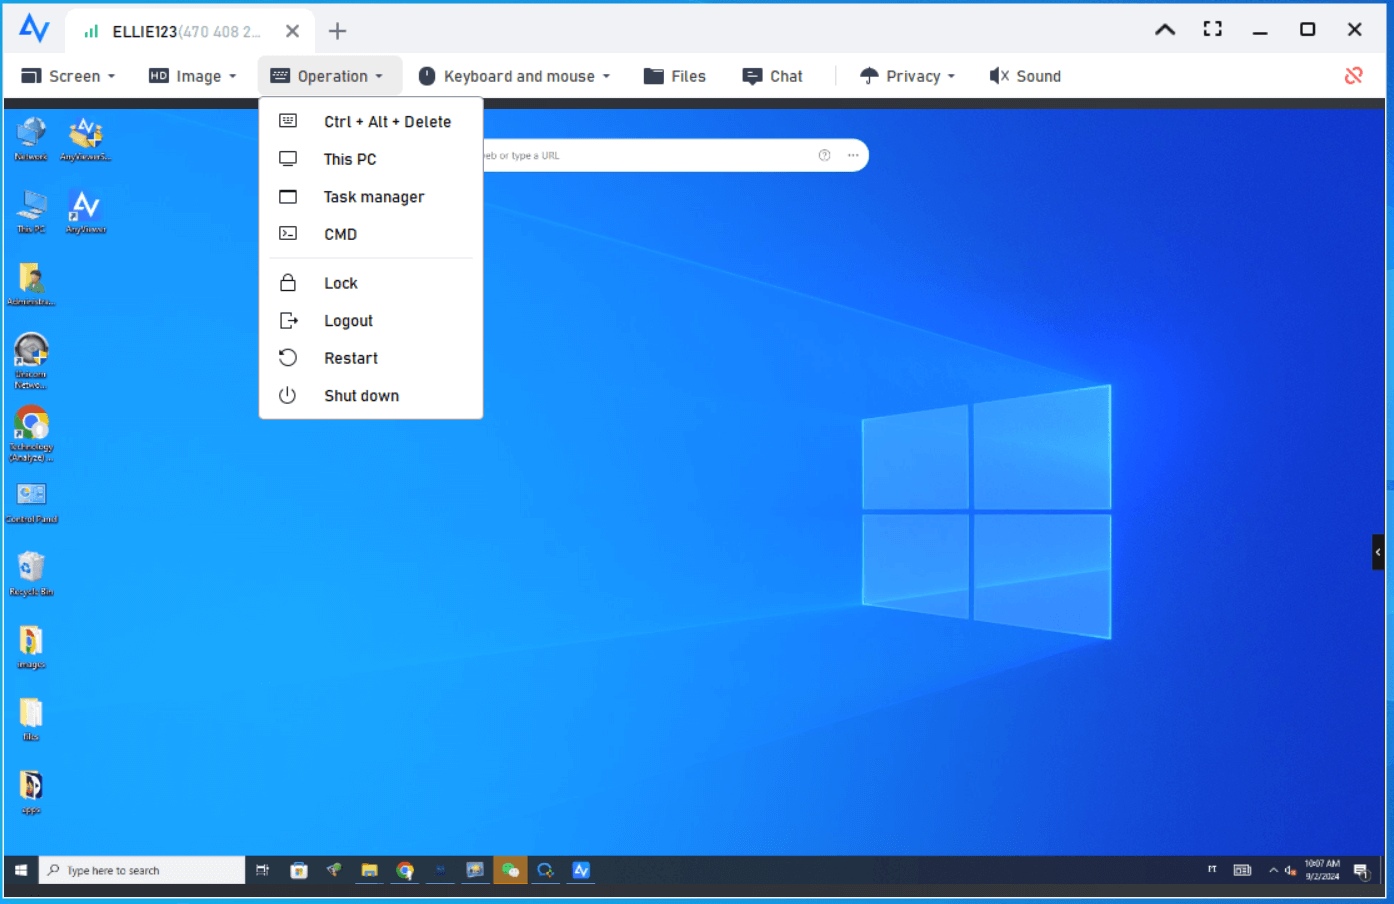
Now you can control the remote computer like you were physically using it. There are several options you can use in the toolbar. For example, chat with your partner, change the screen resolution, etc.
- ✎Notes: AnyViewer also has specified plans for businesses. You can select Professional or Enterprise plan to enjoy more rights!
- More concurrent channels.
- More simultaneous sessions.
- More assigned devices to an account.
- Privacy mode.
- Unlimited file transfer at high speed.
- Mass Deployment(MSI).
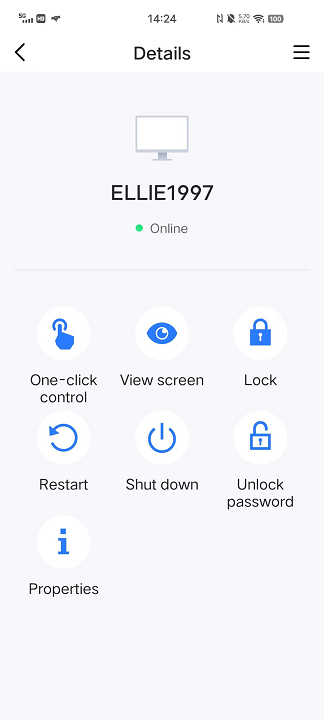
AnyViewer for mobile is available, too. You can access your Windows PC from phone or tablet conveniently!
Conclusion
Quick Assist is helpful for users to perform remote tasks, but it often runs into several troubles. This post helps you how to fix Quick Assist black screen. If you are looking for other remote access tools to avoid errors happening again, it's worth trying AnyViewer.
