
3 Top Ways for Quick Assist An Error Has Occurred
Meet with the problem “Quick Assist an error occurred”? Take it easy and the post can relieve you from troubles and help you figure out the reasons and solutions.
By Ellie / Updated on December 13, 2024
Quick Assist: An error has occurred
Connecting to Quick Assist in the same network, 3 computers are getting errors "Quick Assist An error has occurred. We’ve run into a problem...try again later” as the picture is shown below after entering the code I gave them. Is there something wrong with this? Is there a solution?
How to fix Quick Assist an error occurred?
Quick Assist is a Windows 10 feature that allows a user to remotely assist another Windows 10 computer over the Internet. If you encounter the same issue, you can refer to the methods below with concrete steps that surely can help you out of the issue. Just do it step by step.
Method 1. Re-registering the app
During computing, it’s inevitable to come across default apps that are not working properly or some important data have been deleted by accident, which may lead to the Quick Assist an error has occurred. Through re-registering the app, the issue can be fixed.
Step 1. Type PowerShell in the search box. Right-click on PowerShell and select Run as administrator.

Step 2. Type the following command and press Enter:
Get-AppxPackage -AllUsers| Foreach {Add-AppxPackage -DisableDevelopmentMode -Register "$($_.InstallLocation)\AppXManifest.xml"}
Step 3. After the completion of the process, reboot the PC and run Quick Assist again.
Method 2. Changing settings in Internet options
It's possible that your computer's Internet Options are not set properly, that's why you're experiencing an error with Quick Assist. Kindly make sure that your computer is allowed to save encrypted pages by following these steps
Step 1. Search internet options in the search box and then open it.
Step 2. Locate “Advanced”, and then scroll down to find and uncheck “Do not save encrypted pages to disk”, and then click on “OK”.
Step 3. Once done with the steps, try to use Quick Assist again, then check if the issue persists.
Method 3. Running DISM and SFC commands
The DISM and sfc /scannow command will scan all protected system files and replace corrupted files with cached copies. Both of the commands will take some time, so wait with patience. After that, the issue of Quick Assist not working can be fixed.
Step 1. Search cmd in the search box, right-click and select the Run as administrator option.
Step 2. Type the following command to perform a quick check and press Enter: DISM /Online /Cleanup-Image /CheckHealth.
Step 3. After the completion of DISM, run cmd again as the above steps, enter SFC/scannow and press Enter key.
A free and stronger way to quick assist-- AnyViewer
Hey guys, if you have tried the above solutions and found that the results to fix the issue "Quick Assist an error has occurred" are not what you expected, how about trying a free and more powerful way to quick assists, like AnyViewer. It's not only can remotely assist your friends and family with IT issues, but also not be limited to Windows 10, which works with Windows 11/10/8.1/8/7 and Windows Server 2022/2019/2016/2012 R2.
Compared to Quick Assist, the high speed of connection and the lag-free connection process of AnyViewer are worthy to appraising. In addition, AnyViewer can either connect remotely with no one on the opposite side by setting a security code, or by accepting requests when someone is present. Wanna know more about AnyViewer ? Follow me to figure out.
Step 1. Install AnyViewer on 2 PCs. Sign up and fill in the information to create AnyViewer account. Once logged in, the PC will be assigned to the account automatically. (If you sign up on the official website, you can log in directly.)

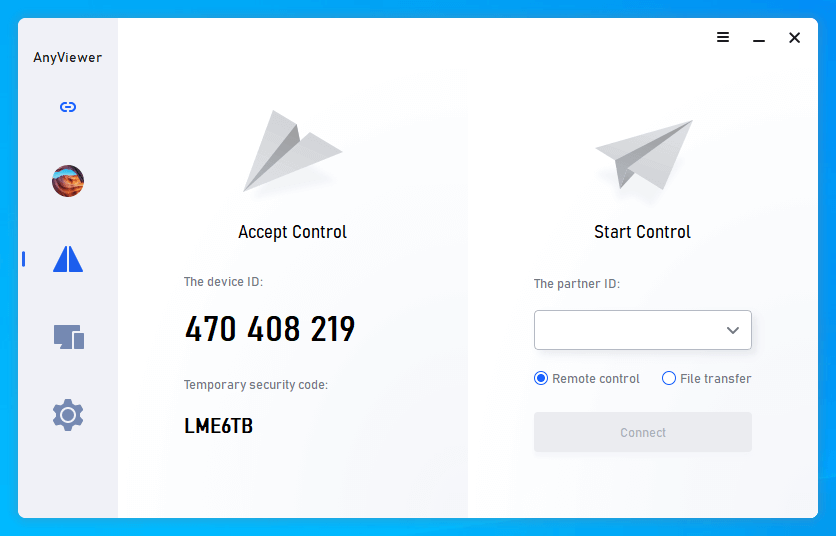
Step 2. After logging in, you can see your interface as the following picture.

Step 3. Go to the “Connect” tab, and then you can see the device ID. Ask your friends or family member to tell you the device ID of the host PC.
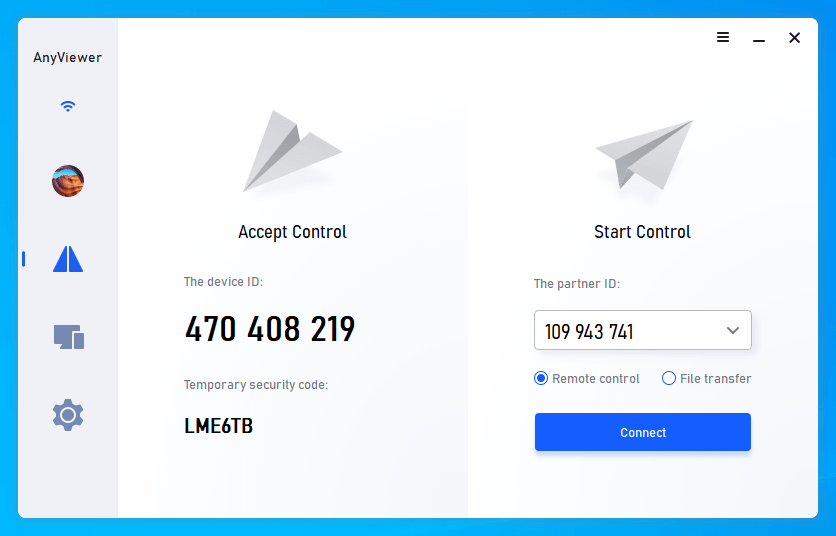
Step 4. Enter the device ID of the remote PC and then click on “Connect”.
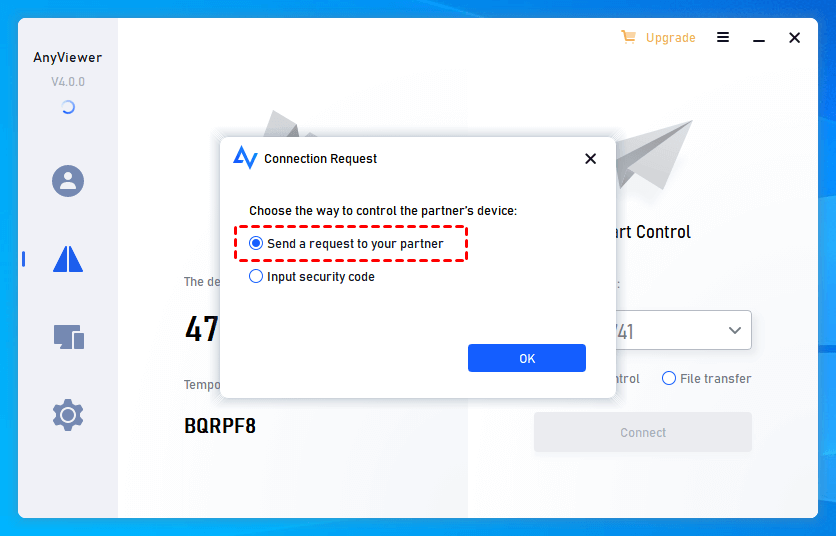
Step 5. For the 2 options, choose the first one “Send a control request to your partner”, and then click on “OK”.
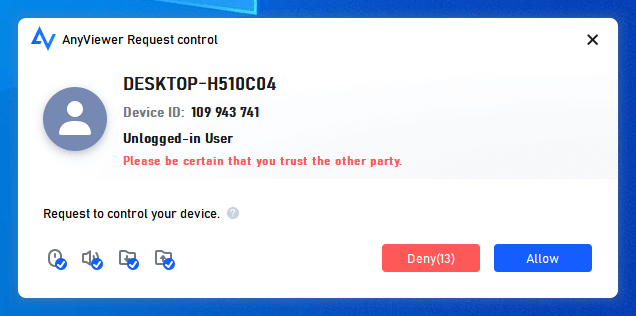
Step 6. There will be a pop-up window on the host PC. Click on “Allow” to receive remote support. And then the connection will be realized.
Note: Are you looking for how to offer Remote Assistance without permission? Actually, it’s kind of easy. Log into the AnyViewer account on the host PC, and then go to "Device" on the local PC, locate and click the PC that you need to control. And then click "One-click control" to achieve a remote connection with one click.

Conclusion
Quick Assist provides an easy way for those who need help and need to assist others. But it makes the users frustrated when Quick Assist an error occurred and something went wrong so that asks you to try again later. So, if the error is not dealt with properly after trying those methods, it’s wise to choose a 3rd party software, AnyViewer, which definitely can give you a better experience.
