
How to Move a Premiere Pro Project to Another Computer
Moving an edit takes more than copying a project file. This guide helps editors package their footage, choose a transfer method, restore missing dependencies, and verify the project before continuing on a different computer.

By Ellie / Updated on November 4, 2026


To move a Premiere Pro project to another computer, collect the project and its media, transfer the collected folder, then open the copied project and check its links. Premiere Pro’s Project Manager handles the collection step; an external drive or an online transfer tool handles delivery.
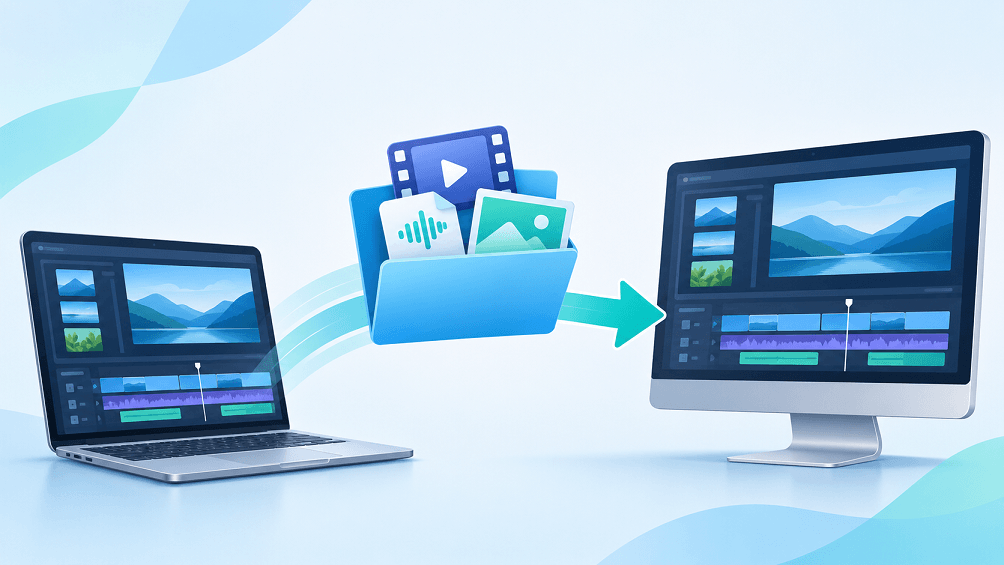
The .prproj file stores your edit and references to source files. It does not embed the original footage or audio. Copying that file alone can leave an otherwise intact timeline full of offline clips. This guide walks through a complete handoff, including remote retrieval with AnyViewer and checks before you resume editing.
Before you start
- Save a backup of the original project. Keep the source media until the destination copy has passed playback and export checks.
- Install Premiere Pro on the destination and use the same version where possible. A project saved by a newer release may not open in an older one.
- List required fonts, third-party plugins, LUTs, motion graphics, linked After Effects projects, and proxy locations. Install or activate licensed dependencies separately.
- Allow storage space for the collected media, project files, cache, and exports. Check drive compatibility if moving between Windows and macOS.
For example, footage may be on an external drive while music is in Downloads and a logo is on the desktop. Moving the camera folder alone would miss those other assets.
Step 1. Collect the project and media
Use Project Manager to gather the media needed by the sequences you plan to move. Adobe documents this workflow in its Copy projects guide.
- Open your latest saved project on the source computer. Resolve any already-offline media before collecting it.
- Choose File > Project Manager.
- Select the sequences needed for the handoff, including alternate cuts you expect to revise.
- Under Resulting Project, choose Collect Files and Copy to New Location. Use this option for a straightforward copy; choose consolidation or transcoding only when you specifically need a different media workflow.
- Review Exclude Unused Clips. Select it when you only need media used by the selected sequences. Leave it off when unused imported clips may be needed for revisions, and verify the resulting package. Files never imported into the project still require separate copying.
- Choose a new destination folder, such as Documentary_Handoff_2026-11-03. Select Calculate to estimate storage requirements.
- Select OK and let the collection finish. Find the copied .prproj inside the output folder; this is the project you will open on the destination.


- Notes:✎
- A collected package is not a complete backup of your editing environment. Review Dynamic Link compositions separately. Keep the After Effects project and its source assets together, using After Effects collection tools where appropriate. If the recipient only needs the finished appearance, consider rendering that element while retaining an editable source backup.
Step 2. Transfer the complete collected folder
Choose a transfer route based on distance and package size. Preserve the collected folder structure and avoid renaming clips during the move. Repeated camera filenames can make relinking ambiguous if folders are flattened.
| Your situation | Practical transfer route | Main check |
| Both computers are nearby | External SSD or other suitable storage | Destination can read the drive and has enough space |
| Computers are in different locations | Online transfer of the collected package | Upload capacity and complete local downloads |
| A file remains on a remote workstation | AnyViewer file transfer on supported computers | Source is online, and access is configured |
After copying, compare folder sizes and file counts as an initial check, review transfer errors, and retry failed items. For cloud delivery, ensure files are downloaded locally rather than remaining placeholders. Opening and testing the project is still necessary.
Transfer files remotely with AnyViewer
AnyViewer file transfer can help retrieve a collected package or a missing graphic from an authorized remote workstation. The request-based workflow below follows its official file transfer guide. Check file transfer support for your operating systems before starting; availability of remote control on a platform does not by itself establish file transfer support.
- Install and run AnyViewer on both supported computers. Keep the source computer online and awake. Sign in to the same AnyViewer account on both computers.
- Go to Device, select the target remote computer from the list, and click File Transfer to start the transfer directly without needing a partner request confirmation.
- If you need to access the desktop instead of just transferring files, click One-click Control in the Device list to instantly establish authorized unattended remote access.
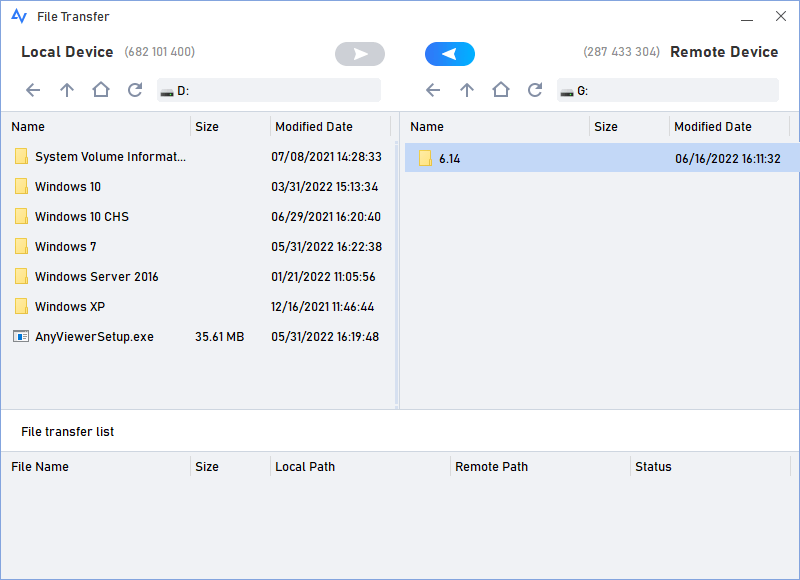
- In the File Transfer window, locate the collected folder or missing assets on the source side and select the destination folder on the receiving side. Use the transfer arrow pointing toward the receiving computer.
- Monitor the transfer status, resolve errors, and confirm completion before opening the copied project. Relink any newly retrieved assets as described below.
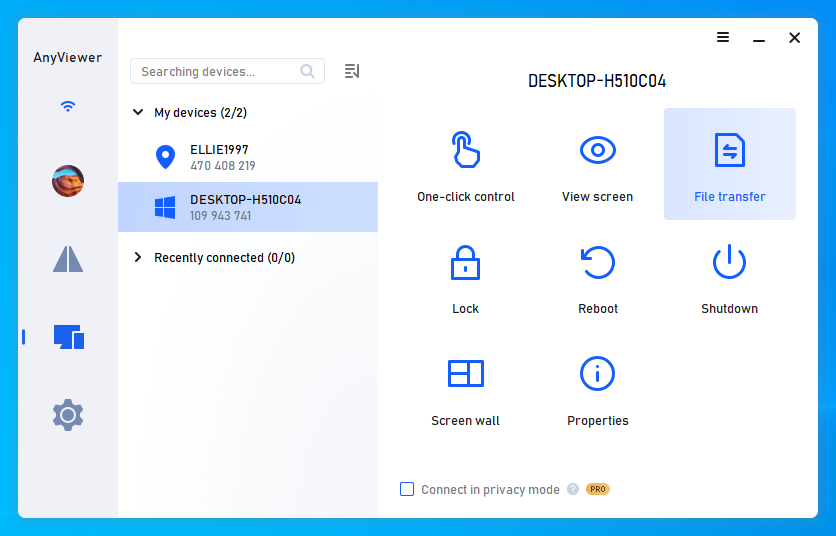
For your own already-bound devices signed into the same account, the official guide also describes opening Device, selecting the remote computer, and choosing File Transfer. Only use devices and files you are authorized to access.
Before sending video footage, compare your largest individual clip and total package size with the current plan limits. Speed, concurrent transfer threads, batch limits, and maximum file size can vary by plan. Check the current requirements rather than assuming the free plan can handle a large editing package.
Allow enough time for the upload. At a sustained 10 MB/s, 100 GB would take approximately 2.8 hours, using decimal units and ignoring overhead. This is a calculation, not a measured transfer result; your actual speed may be lower. For a nearby workstation and hundreds of gigabytes, an external SSD is often more practical.
Remote control lets you operate the original workstation. File transfer copies assets to the destination. Neither process automatically installs fonts or plugins, or keeps independently edited project copies synchronized.
Step 3. Open the copied project and relink media
On the destination computer, open the .prproj from the collected folder. If Premiere reports missing media, first confirm that those files actually arrived. Relinking cannot restore files that were never transferred.
- In the Project panel, select an offline clip, right-click it, and choose Link Media. You may also see the Link Media dialog when opening the project.
- Check the missing clip’s filename and original path. Choose Locate and browse to the corresponding file in the transferred package.
- Verify the match before confirming. If several camera clips share a filename, use their folder location and other identifying details to select the correct source.
- If your version offers Relink others automatically, use it to help locate related files. Review the remaining offline items and repeat as needed.
- Save the destination project. Check proxy connections separately and confirm that full-resolution originals are available for final output.
Step 4. Verify the project before continuing
A successful open is only the first check. Save the destination project, then test it with the original source storage safely disconnected or otherwise unavailable. Close applications using that storage before disconnecting it. This reveals links that still point to files left behind.
- Play the beginning, middle, and end of every required sequence, plus transitions and sections with complex effects.
- Inspect titles, fonts, graphics, LUTs, third-party effects, and linked After Effects compositions.
- Check audio synchronization, channel assignments, and representative camera clips.
- Export a short section containing titles, effects, and audio. Review the exported file for missing elements or unexpected changes.
- Agree which project copy becomes the working version. Use clear revision names to avoid conflicting edits.
Keep the original project and footage until these checks pass and your normal backup is in place. Do not delete or rename source files simply to test the move.
Troubleshooting common migration problems
| Symptom | What to check first | Next action |
| Media Offline | Missing files or changed paths | Finish copying, then use Link Media |
| Wrong clip appears | Duplicate filenames | Relink to the correct camera folder and verify the image |
| Titles look different | Missing or substituted fonts | Install or activate the required fonts and review titles |
| Effects are missing | Plugin availability and version | Install the licensed plugin or agree on a rendered replacement |
| AE composition is offline | AE project and its source assets | Transfer those dependencies and restore the link |
| Preview works but export fails | Original media access and reported errors | Verify originals, then test the affected section |
Conclusion
Collect the required sequences and media, transfer the complete folder, open the copied project, and verify the result. Use AnyViewer when a prepared package or missing asset needs to be retrieved remotely. Keep the source copy until the destination plays and exports correctly.



 as a preferred
source on Google