
Mac Remote Desktop Dual Monitor Guide
Learn how to use Mac Remote Desktop dual monitor and multiple monitors, optimize settings, troubleshoot issues, and explore tools like Microsoft Remote Desktop and AnyViewer for smooth remote work.
By Ellie / Updated on November 5, 2025
Does Mac Remote Desktop support dual monitors?
If you’ve ever tried working remotely from a Mac, you know the convenience of accessing another computer from anywhere. But when it comes to productivity, one monitor just doesn’t cut it. Enter the Mac Remote Desktop dual monitor setup, a game-changer for multitaskers, developers, and creative professionals. Whether you’re coding, designing, analyzing data, or managing virtual machines, having two screens during remote sessions doubles your efficiency and clarity.

In this comprehensive guide, we’ll explore how to set up, optimize, and troubleshoot dual monitor configurations on a Mac using remote desktop tools like Microsoft Remote Desktop (RDP). You’ll also learn performance tweaks, security tips, and real-world tricks to make the most of your remote work setup.
So, grab your Mac, plug in those extra displays, and let’s dive into everything you need to know about Mac Remote Desktop multiple monitors, your ticket to a smoother, more productive workflow.
Benefits of Using Dual Monitors in Remote Desktop
Dual monitors aren’t just about having more screen space; they’re about working smarter and faster. When using Mac Remote Desktop with dual monitors, you can operate exactly as if you were sitting in front of your physical workstation. Imagine coding on one screen while running live tests on another, or editing a video timeline on one display while previewing the final cut on the second. That’s the power of a dual-screen setup.
The most noticeable advantage is increased productivity. Studies show that people who use two monitors can complete tasks up to 30–40% faster than those using one. Why? Because there’s less window switching and more visual room to keep applications side by side. This makes it ideal for designers managing layers in Photoshop, developers debugging code, or financial analysts comparing multiple data dashboards.
Another key benefit is better multitasking. Remote work often means juggling multiple applications, email, project management tools, and communication apps like Slack or Zoom. Having Mac Remote Desktop multiple monitors lets you dedicate one screen for communication and another for core work, keeping your flow uninterrupted.
Additionally, the dual monitor setup enhances situational awareness. For IT administrators or cybersecurity professionals who need to monitor multiple systems in real time, two screens make it possible to keep dashboards visible while performing configurations on another screen.
And let’s not forget comfort and ergonomics. When your digital workspace mirrors your physical setup, it reduces eye strain and helps maintain focus. In short, combining Mac Remote Desktop dual monitor support gives you the freedom and efficiency of working locally, even when you’re miles away.
Detailed Steps to Set Up Mac Remote Desktop Dual Monitor
Setting up a dual monitor Remote Desktop on Mac might sound technical, but don’t worry, it’s simpler than it seems. Follow the steps below to make sure everything runs smoothly.
Setting Up Dual Monitors on macOS
Setting up dual monitors on macOS is quite straightforward, whether you’re using them locally or through remote desktop. First, make sure both monitors are connected to your Mac using HDMI, USB-C, or Thunderbolt ports. Once plugged in, head to System Settings > Displays. Here, you’ll see both screens represented as boxes.
Drag the display icons to match the physical arrangement of your monitors, side by side, one above the other, or even diagonally if that’s your preference. Adjust resolution and scaling as needed to balance performance and clarity.
For remote desktop purposes, the goal is to extend your desktop, not mirror it. Mirroring duplicates the same content on both screens, while extending gives you two independent workspaces.
If you’re using a remote session, some applications (like Microsoft Remote Desktop) detect dual monitors automatically once both displays are configured on the local machine. Others may require enabling dual monitor mode within the app’s settings.
To ensure smooth operation:
- Set both displays to the same refresh rate if possible.
- Disable “True Tone” temporarily during remote sessions, it can cause color inconsistency.
- Check “Display arrangement” for the correct screen order to avoid mouse-tracking issues.
Once everything is set up, your Mac is ready to mirror this dual display configuration in any remote desktop software that supports it. This foundation ensures that once you connect remotely, both monitors appear seamlessly.
Enable Dual Monitors in Microsoft Remote Desktop for Mac
Microsoft Remote Desktop (RDP) remains the most popular tool for connecting Macs to Windows systems. It’s powerful, secure, and, most importantly, supports dual monitor configurations natively. Here’s how to get it up and running:
Step 1. Visit the Mac App Store and search for Microsoft Remote Desktop. Download and install the latest version.
Step 2. Open the app, click the “+” icon, and choose Add PC. Enter the IP address or computer name of your remote Windows machine.

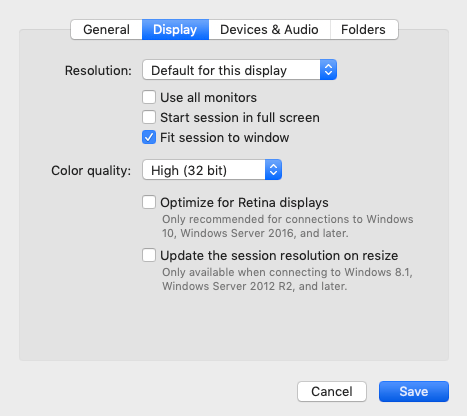
Step 3. Before connecting, click Display in the connection settings. Enable the option that says “Use all monitors” or “Start session in full screen across all monitors”.
Step 4. Hit Connect. Once logged in, the remote Windows desktop will extend across both monitors. You can move apps, drag files, and use the taskbar seamlessly across screens.
If your monitors aren’t aligning properly, return to the settings and ensure “Optimize for Retina Displays” is checked off. Sometimes, this option interferes with scaling when using mixed resolutions.
Performance tip: Lowering resolution slightly or disabling background effects on the remote machine can improve responsiveness across both screens.
Whether you’re a software developer, system admin, or digital artist, using dual monitors through Microsoft Remote Desktop on Mac provides a near-native, lag-free experience. It’s like carrying your entire workstation wherever you go.
Optimizing Display Settings for Best Performance
To truly maximize performance while using dual monitors via Remote Desktop on your Mac, fine-tuning your display and connection settings is key.
Here’s how to get the most out of your setup:
1. Adjust Resolution and Scaling
- Set both monitors to identical resolutions to prevent scaling mismatches.
- Lower resolution slightly (e.g., 1080p instead of 4K) if you experience lag.
- Disable “Retina scaling” within Remote Desktop settings for smoother visuals.
2. Optimize Network Performance
- Always prefer Ethernet connections.
- If using Wi-Fi, connect to 5GHz channels.
- Use a wired mouse and keyboard for minimal input lag.
3. Enhance Remote Display Settings
- In Microsoft Remote Desktop, disable “Use hardware acceleration” if your Mac shows screen flickering.
- Turn off desktop background and animations in the remote session.
- Enable “Persistent bitmap caching” to speed up image rendering.
4. Balance Brightness and Color Profiles
- Use identical color profiles across both monitors for consistent visuals.
- Disable “True Tone” and “Night Shift” to avoid inconsistent brightness levels.
5. Manage Power and Sleep Settings
- Disable auto-sleep on both local and remote devices.
- Keep your Mac plugged in during long sessions to maintain stable GPU output.
Once these optimizations are applied, your Mac Remote Desktop dual monitor setup will feel significantly more responsive, perfect for intensive tasks like video editing, 3D modeling, or virtual lab management.
Troubleshooting Common Dual Monitor Issues in Remote Desktop
Even with the best setup, technical hiccups can occur when using Mac Remote Desktop with dual monitors. The good news? Most issues stem from minor misconfigurations and can be fixed quickly. Below are the most frequent problems users encounter, and how to solve them.
1. Second Monitor Not Detected
- Cause: Outdated Remote Desktop app or disabled “Use all monitors” setting.
- Fix: Go to your remote desktop client settings and ensure “Use all monitors” is checked. Then, confirm your remote computer also supports multiple displays. For Microsoft RDP, check Display Settings >Multiple Displays >Extend these displays on the remote Windows machine.
2. Displays Are Mirroring Instead of Extending
- Cause: macOS defaults to mirroring when new displays are connected.
- Fix: On your Mac, navigate to System Settings >Displays, and uncheck Mirror Displays. Arrange the displays side by side for an extended workspace.
3. Lag or Input Delay Across Screens
- Cause: Insufficient bandwidth or high resolution.
- Fix: Lower the remote display resolution slightly. Disable background animations, wallpapers, and unnecessary visual effects on the remote computer. A wired Ethernet connection or 5GHz Wi-Fi band can significantly reduce lag.
4. Mouse Tracking Issues Between Displays
- Cause: Display arrangement mismatch.
- Fix: On your Mac, open Display Preferences and drag the display boxes to match the physical layout of your monitors. If your cursor jumps between screens oddly, adjust the top alignment of both displays for smoother transitions.
5. Black Screen or Flickering Display
- Cause: Hardware acceleration conflict or GPU driver mismatch.
- Fix: Disable hardware acceleration in the remote desktop client’s advanced settings. Restart the app afterward. If the issue persists, update your macOS and the remote system’s display drivers.
Pro Tip: For consistent performance, always restart both the Mac client and the remote machine after making major display changes. This helps reinitialize the RDP or ARD display protocols cleanly.
Troubleshooting might sound tedious, but once these minor settings are fine-tuned, your dual monitor remote desktop setup will run smoothly and without interruptions.
Alternative Tools for Mac Remote Desktop with Dual Monitor Support
If Microsoft Remote Desktop or Apple Remote Desktop doesn’t quite align with your workflow, you’re not out of options. There’s a wide selection of third-party remote desktop tools for Mac that support dual monitor setups, offering robust performance, secure connections, and greater flexibility.
Each of these tools shines in different scenarios; some prioritize speed and simplicity, while others focus on security, cross-platform compatibility, or professional-grade control. Below, we’ll dive into the most popular and effective alternatives you can use for dual monitor remote desktop access on macOS.
1. AnyViewer
AnyViewer is an emerging yet rapidly growing remote desktop solution designed to simplify secure remote access between Macs, Windows PCs, and mobile devices. It’s developed with performance and accessibility in mind, offering smooth control even under limited bandwidth. With its intuitive interface and robust security measures, it’s quickly becoming a go-to alternative for both personal and business users.
Key Advantages:
- Cross-Platform Access: Connect easily between Mac, Windows, iOS, and Android devices.
- End-to-End Encryption: Uses ECC (Elliptic Curve Cryptography) for military-grade security.
- Instant Connection & Easy Setup: Just log into your AnyViewer account and connect to remote devices in seconds, no complicated configuration required.
- Session Management: Manage multiple remote sessions at once, transfer files securely, and chat in real time during connections.
- Custom Display Scaling: Optimize resolution for each monitor to balance performance and clarity.
Dual Monitor Support:
AnyViewer includes comprehensive dual monitor support, automatically detecting multi-display setups on the remote device. You can:
- View both monitors simultaneously in “All Displays” mode.
- Switch between displays seamlessly.
- Display multiple monitors in separate windows.
- Adjust scaling independently for each screen to improve readability and speed.
Ideal For:
- Small businesses and IT teams need reliable, secure remote access.
- Personal users who want an intuitive, free remote desktop option.
- Mac users connecting to Windows workstations for cross-platform workflows.
2. Apple Remote Desktop (ARD)
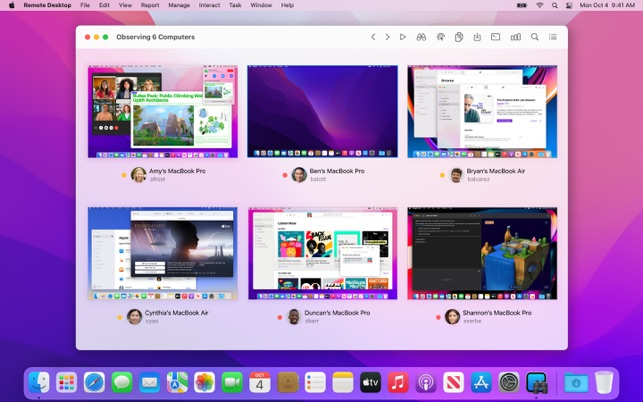
Apple Remote Desktop (ARD) is Apple’s native remote management tool, specifically designed for macOS environments. While it’s primarily targeted at IT administrators managing fleets of Macs, it’s still a powerful choice for users who want to remotely access their Mac and utilize a dual monitor setup.
To get started, you’ll need to install ARD from the Mac App Store on your primary device. On the remote machine, ensure Remote Management is enabled by navigating to: System Settings > General > Sharing > Remote Management.
Once connected, you can select the screens you want to view. By default, ARD lets you:
- View all displays at once (side by side).
- Switch between different monitors.
- Control each display individually.
However, there’s one key caveat, ARD does not natively support “spanning” your session across both monitors the same way Microsoft Remote Desktop does. Instead, it allows you to toggle between screens or view both in a combined window.
For users who need full dual monitor interactivity (such as dragging windows between screens), you can use third-party display managers or screen aggregation tools alongside ARD. Apps like DisplayLink Manager or SwitchResX can help bridge that gap by syncing extended displays virtually.
Performance-wise, ARD delivers crisp visuals and low-latency control, especially over local networks. Its encryption and authentication are robust, making it one of the most secure ways to connect to another Mac remotely.
If your workflow is Mac-to-Mac, ARD is still one of the best options. While it lacks true dual-screen spanning, its reliability and seamless macOS integration make it a dependable choice for creative professionals and support teams alike. You may need an Apple Remote Desktop alternative like AnyViewer.
3. TeamViewer

One of the most established names in the remote desktop world, TeamViewer remains a top-tier solution for individuals and enterprises alike. Its global infrastructure and easy-to-use interface make it an excellent tool for remote support, collaboration, and cross-platform connectivity.
Key Advantages:
- User-Friendly Interface: Setup is simple, requiring no advanced network knowledge.
- Broad Compatibility: Works seamlessly across macOS, Windows, Linux, ChromeOS, iOS, and Android.
- Enterprise-Grade Security: Employs AES-256-bit encryption, two-factor authentication, and trusted device verification.
- Built-In Collaboration Tools: Includes features like screen sharing, session recording, and remote printing.
Dual Monitor Support:
TeamViewer provides outstanding dual monitor capabilities, automatically detecting multi-display setups. Users can:
- Switch between monitors with one click.
- View all displays simultaneously in multi-monitor mode.
- Move applications across displays during live sessions.
Ideal For:
- IT support teams managing clients remotely.
- Businesses with mixed device environments (Mac, Windows, Linux).
- Freelancers or consultants offering technical assistance remotely.
4. AnyDesk
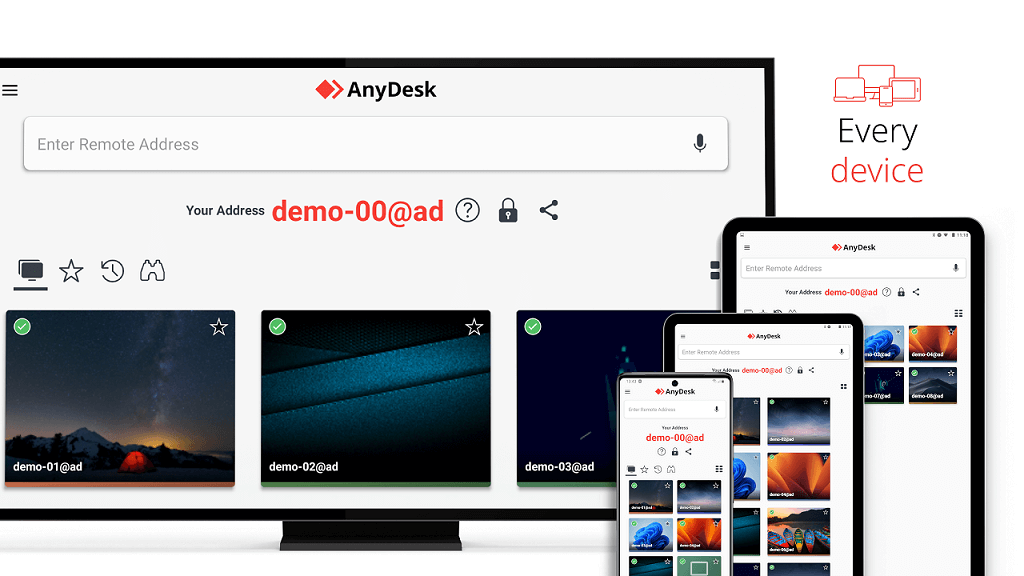
AnyDesk is a fast, lightweight, and responsive remote desktop app optimized for both personal and professional users. Built with the DeskRT video codec, it ensures high-quality visuals and smooth streaming even with low bandwidth. Its sleek interface and blazing-fast connection speeds make it one of the best alternatives to Microsoft Remote Desktop for Mac.
Key Advantages:
- Lightning-Fast Performance: Offers low-latency transmission with minimal delay.
- Efficient Bandwidth Use: Performs exceptionally well on slower internet connections.
- Advanced Customization: Configure frame rate, resolution, and bandwidth limits manually.
- Portable Version Available: Run AnyDesk without installation, ideal for temporary access.
Dual Monitor Support:
AnyDesk offers flexible dual monitor options to fit any workflow:
- View All Displays: Monitor multiple screens at once in a unified view.
- Switch Display Mode: Instantly toggle between monitors with a single click.
- Independent Control: Adjust display quality or resolution per monitor.
Ideal For:
- Remote professionals who need high-speed responsiveness.
- Designers and editors working over slower networks.
- IT support needing a lightweight, stable connection tool.
5. Jump Desktop
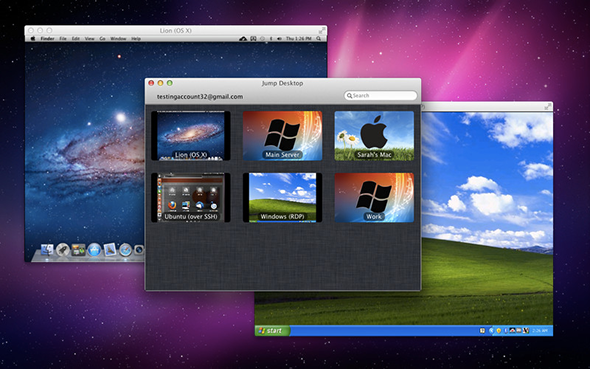
Jump Desktop is a professional-grade remote desktop app designed for performance-driven users. It’s compatible with both RDP (Remote Desktop Protocol) and VNC, providing unmatched flexibility for connecting to various systems. Optimized for macOS, it takes full advantage of Apple’s Metal graphics acceleration and M1/M2 chips to deliver an ultra-smooth experience.
Key Advantages:
- Full Dual and Triple Monitor Support: Works effortlessly with multi-display setups.
- Fluid User Experience: Maintains stable 60 fps video streaming and real-time mouse tracking.
- Secure and Reliable: Uses SSH tunneling and strong encryption for data protection.
- Powerful Customization: Offers keyboard shortcuts, clipboard syncing, and gesture support.
Dual Monitor Support:
Jump Desktop provides one of the most seamless dual monitor experiences available. You can:
- Extend your remote session across two or three monitors.
- Move apps between screens naturally, with zero lag.
- Scale displays independently for detailed control.
Ideal For:
- Developers working on multiple virtual machines.
- Designers and creative professionals who require pixel-perfect accuracy.
- Enterprise users managing secure, always-on workstations.
6. Chrome Remote Desktop

Chrome Remote Desktop, Google’s free remote access solution, is perfect for quick connections and lightweight tasks. While it doesn’t include advanced customization or true multi-display spanning, it excels in simplicity and accessibility.
Key Advantages:
- Free and Accessible: 100% free with a Google account.
- Simple Setup: Install the Chrome extension and connect instantly.
- Cross-Platform: Runs smoothly across macOS, Windows, Linux, Android, and iOS.
- Secure by Default: Uses Google’s robust authentication framework.
Dual Monitor Support:
Dual monitor functionality is limited, but you can switch between screens using the in-session toolbar. Although it doesn’t support extended dual-screen operation, it’s still useful for quick administrative tasks and light file management.
Ideal For:
- Casual users who need occasional remote access.
- Students and freelancers working across devices.
- Users who prefer a lightweight, browser-based solution.
Each of these remote desktop tools brings unique strengths to the table. If your top priority is true dual monitor functionality with high-definition streaming and minimal lag, Microsoft Remote Desktop and Jump Desktop remain the gold standards.
For users seeking speed, cross-platform support, and simplicity, AnyDesk, AnyViewer, and TeamViewer are excellent, well-rounded alternatives. And for those who just need quick, no-fuss access, Chrome Remote Desktop offers unbeatable convenience, all at zero cost.
Conclusion
A Mac Remote Desktop dual monitor setup is more than a luxury; it’s a strategic advantage in today’s digital workspace. From expanding visual space to simplifying multitasking, dual displays make remote work feel as natural as being in the office.
Whether you use Microsoft Remote Desktop, Apple Remote Desktop, or a third-party tool like Jump Desktop, the key lies in optimizing your settings, securing your connection, and mastering workflow habits. Once everything is dialed in, you’ll discover that working remotely with two monitors isn’t just convenient, it’s empowering.
So go ahead, set up those screens, connect to your workstation, and enjoy a truly seamless, productive, and future-ready remote experience.
