
How to Add a Computer to RemotePC: A Complete Step-by-Step Guide
A quick guide on how to add a new computer to RemotePC via direct install or shareable links. It also features AnyViewer as a simpler option that lets you add devices just by logging in.
By Ellie / Updated on February 12, 2026
In an era where the "office" can be a coffee shop in Paris, a home study, or a tray table on a train, remote access software has transitioned from a luxury to a necessity. Have you ever left the office only to realize you forgot to hit "send" on a critical report or left a vital file on your desktop? You aren't alone.
Solutions like RemotePC allow users to bridge the physical gap, providing a portal into their distant workstations from anywhere in the world. However, before you can enjoy the freedom of remote work, you must first set up your network.
This comprehensive guide will walk you through exactly how to add a computer to RemotePC, while also exploring why modern professionals are increasingly looking toward agile RemotePC alternatives like AnyViewer for a more seamless experience.

Prerequisites for Adding a Computer to RemotePC
Before we dive into the "how-to," ensure you meet these basic requirements:
- A Valid Account: You must have a registered RemotePC account (usually tied to a Gmail or a professional email address).
- Active Subscription: Unlike some tools that offer permanent free versions for personal use, RemotePC requires an active paid plan or an active free trial to manage devices.
- Browser Compatibility: RemotePC is highly optimized for Google Chrome. Users on Microsoft Edge or Safari may encounter occasional compatibility hurdles.
How to Add a Computer to RemotePC: Step-by-Step
The process of adding a computer depends on whether you have physical access to the machine or if you are trying to add a device located elsewhere.
Method 1: Adding a Computer You Have Physical Access To
If you are currently sitting in front of the machine you want to be able to access later, follow these steps:
Step 1: Account Preparation
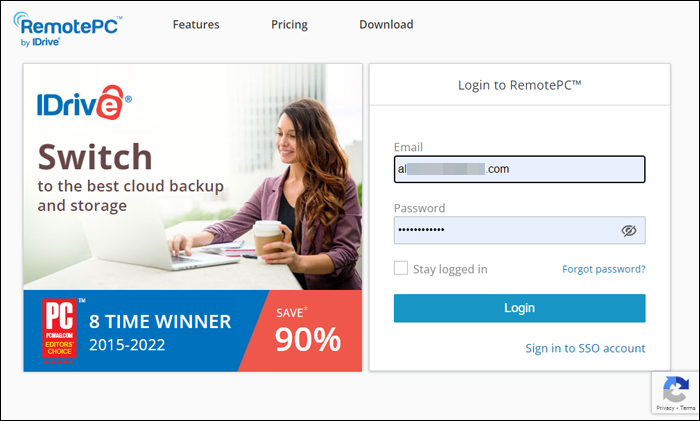
- Launch Google Chrome and navigate to "remotepc.com". Log in to your dashboard.
- Create a new account using your email and password.
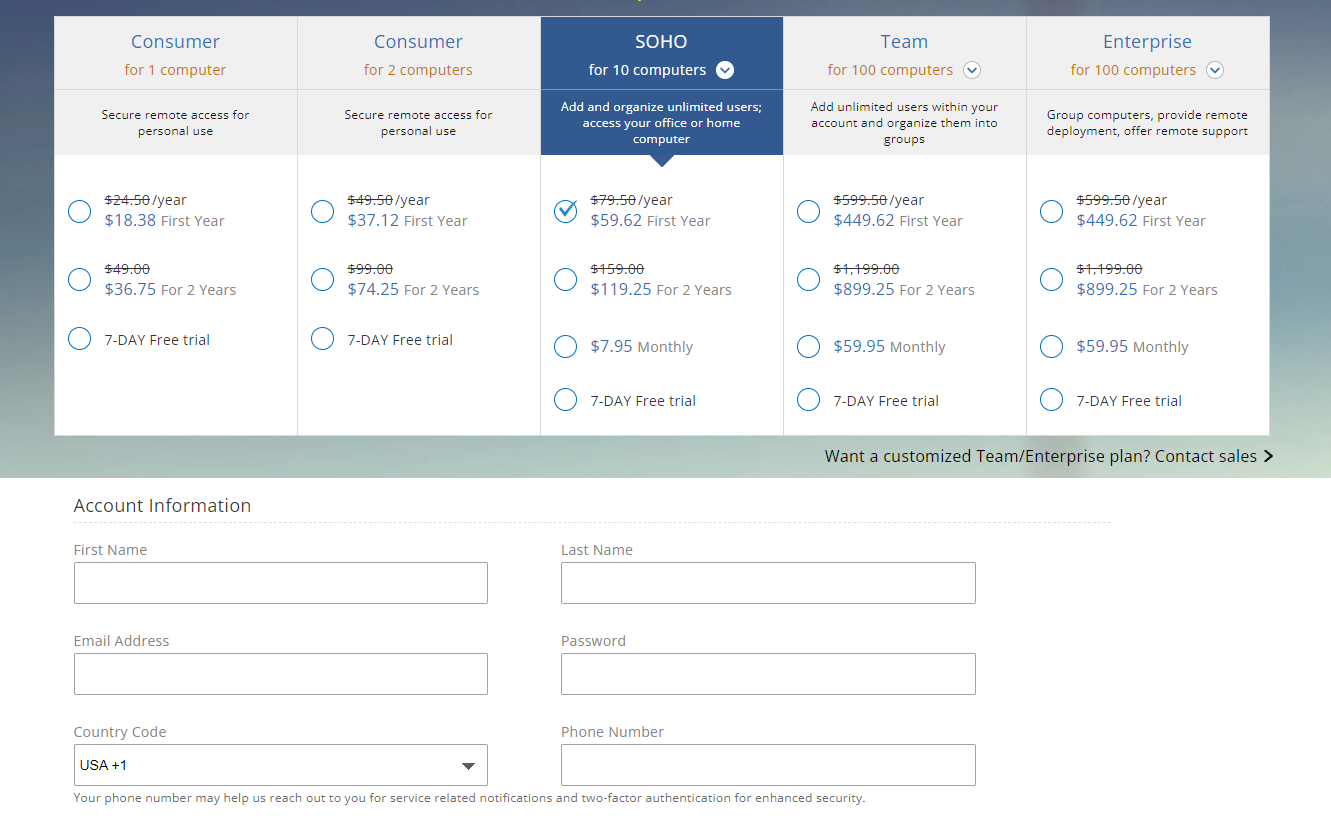
- If you haven’t purchased a plan yet, you will need to select a subscription (Consumer, Team, or Enterprise) before the "Add Computer" options become fully functional.
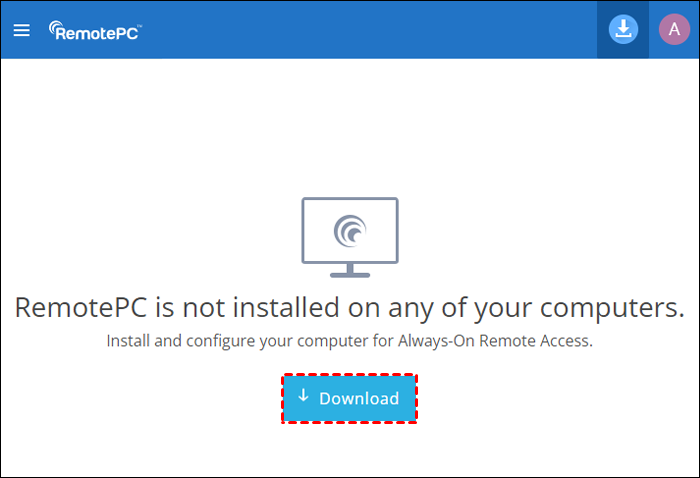
Step 2: Download and Install the Host Software
While you can view some settings via the web, the computer you wish to control must have the RemotePC desktop application installed.
- On your dashboard, locate the "Download" area.
- The site should automatically detect your operating system (Windows or macOS) and recommend the correct installer.
- Run the ".exe" or ".dmg" file and follow the on-screen prompts.
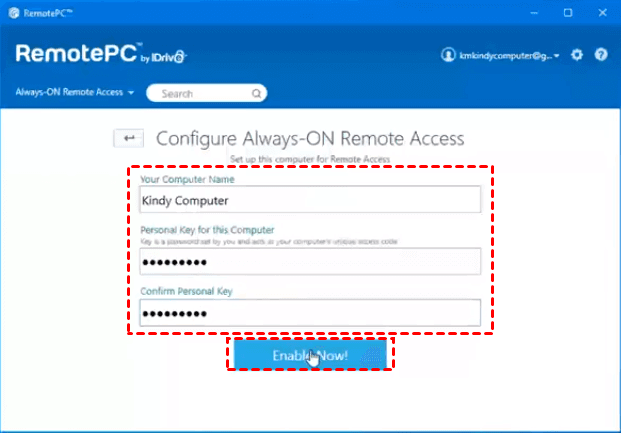
Step 3: Configure Always-on Remote Access
Once the app is installed, you must permit it to be "always reachable."
- Sign in to the desktop app using your credentials.
- A pop-up will usually appear at the bottom saying "Configure Now." Click it.
- Assign a computer name.
- Set a personal key. Do not lose this, as it acts as your final gatekeeper for remote sessions.
- Click "Enable Now."
Method 2: Adding a Second (or Third) Computer
If you are adding more devices to your fleet:
Step 1. Go to the second computer and log in to the RemotePC website.
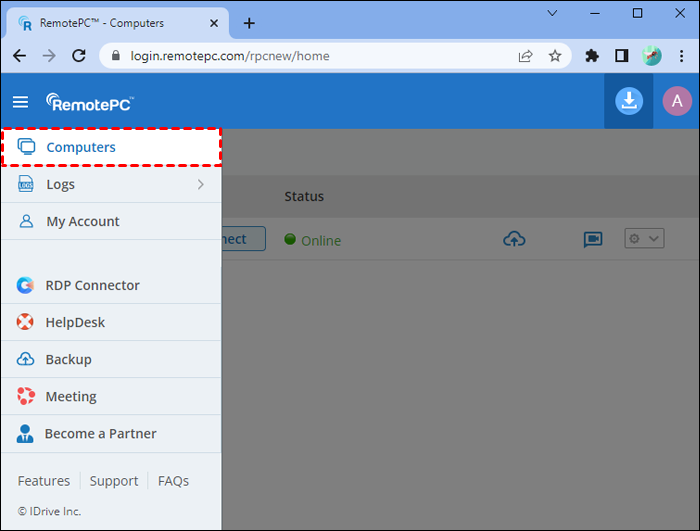
Step 2. Navigate to the "Computers" tab and select "Add Computer" > "Add this computer."
Step 3. Download the installer and repeat the configuration process mentioned above.
Method 3: Adding a Remote Computer (No Physical Access)
If you need to add a colleague's computer or a server in a different city:
Step 1. Log in to your RemotePC dashboard via Chrome.
Step 2. Select "Add Computer."
Step 3. Look for the tab labeled "Add different computer."
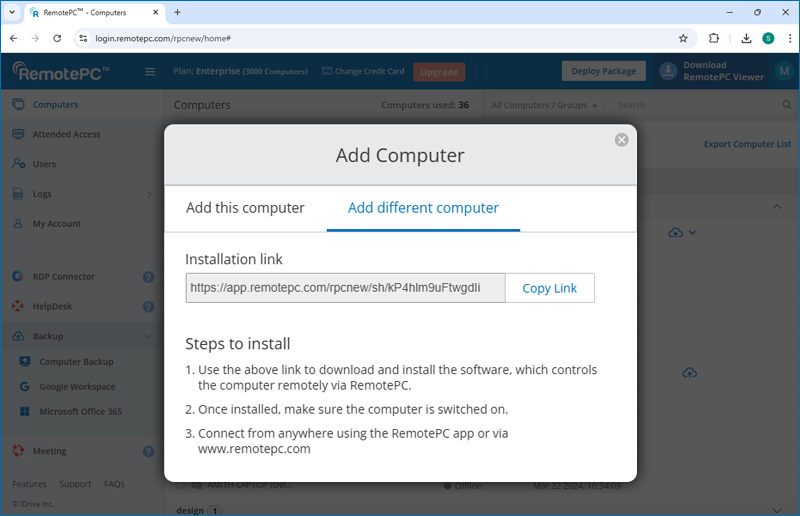
Step 4. RemotePC will generate a deployment link. Copy this link and email/message it to the person at the remote location.
Step 5. The recipient must click the link, install the software, and provide the necessary permissions. Once they finish, the machine will appear in your "Computers" list.
Why You Might Need an Alternative: Introducing AnyViewer
While RemotePC is a solid choice, many users find the setup process—particularly the browser restrictions and the mandatory subscription tiers—a bit cumbersome. If you are looking for a more modern, user-friendly, and cost-effective solution, AnyViewer is the leading alternative.
AnyViewer is a professional-grade remote desktop software designed for Windows, macOS, iOS, and Android. It strikes a perfect balance between high-end security and extreme ease of use.
Why choose AnyViewer over RemotePC?
- Free for Personal Use: Unlike many competitors, AnyViewer offers a truly functional free version that isn't bogged down by constant "trial expired" pop-ups.
- Faster Setup: Adding a computer in AnyViewer is often as simple as logging into the same account on both devices—no complex deployment links required for basic setup.
- One-Click Access: Once assigned to your account, you can access remote PCs with a single click, bypassing the need to enter a "Personal Key" every single time if you choose to save the credentials.
- High Performance: AnyViewer uses advanced image optimization algorithms to ensure a 60 FPS experience, even on slower internet connections.
How to Use AnyViewer
Compared to RemotePC, adding a computer to AnyViewer is much more intuitive:
Step 1. Install & Sign Up: Download AnyViewer on both devices.
Step 2. Log in to Sync: Log in to the same account on both PCs. By doing this, the remote computer is automatically added to your account list—no "Personal Keys" or manual configuration needed.

Step 3. One-Click Access: Simply go to your "Device" list, select the computer you just added, and click "One-click control."

Comparison Table: RemotePC vs. AnyViewer
| Feature | RemotePC | AnyViewer |
| Best For | Enterprise management | Ease of use & Speed |
| Free Version | Limited Trial | Yes |
| Browser Support | Primarily Chrome | App-based (High stability) |
| Mobile App | Yes | Yes (iOS/Android) |
| Setup Difficulty | Moderate | Easy |
| File Transfer | Supported | Supported (Drag & Drop Included) |
Conclusion
Knowing how to add a computer to RemotePC is the first step toward reclaiming your work-life balance. Whether you are adding a local machine via the direct installer or a distant PC via a deployment link, the key is ensuring that the "Always-on Access" is correctly configured.
However, if you find yourself struggling with the "Chrome-only" limitations or the pricing structure of RemotePC, don't settle for a frustrating experience. AnyViewer offers a streamlined, high-speed alternative that makes remote desktop access feel like the computer is right in front of you.
Ready to simplify your remote work life? Download AnyViewer today and see how easy it is to connect to your PC from anywhere in the world—for free!
