
How to Create Remote Assistance Invitation on Windows 10, 11
Do you know how to use Remote Assistance? This post mainly introduces the detailed way on how to create Remote Assistance invitation on Windows 10 and how to receive Remote Assistance support from Microsoft.
By Ellie / Updated on December 13, 2024
How do I offer remote assistance in Windows 10?
My computer and my mother’s are both Windows 10. I need to remotely help her troubleshoot computer issues via Remote Assistance. How can I create Remote Assistance invitation?”
- Question from Reddit
Remote Assistance is the Windows built-in feature used to give partial control of the remote computer or receive control from the remote computer for instant technical support. It is easy to use if you have followed the right tutorial.
Detailed steps to create Remote Assistance invitationon Windows 10 and 11
Except for giving detailed steps on how to create Remote Assistance invitationon Windows 10 and 11, we’ll also mention how to receive Remote Assistancesupport from Microsoft. So, this section consists of three parts:
- Part 1. How to enable Remote Assistanceon Windows 10 and 11
- Part 2. How to create Remote Assistance invitationon Windows 10and 11
- Part 3. How to receive Remote Assistancesupport on Windows 10and 11
Part 1. How to enable Remote Assistance on Windows 10 and 11
Enabling Remote Assistance is the first step that you need to do before creating Remote Assistance invitation. Here are two ways.
Way 1. Enable Remote Assistance in System Properties
Step 1. Right-click on This PC and then select Properties.

Step 2. Locate Remote settings on the left pane.
Step 3. Switch to the Remote tab, and then tick the option “Allow Remote Assistance to this computer”
Way 2. Enable Remote Assistance by using Registry Editor
Step 1. Press Win + R and then input “regedit”, and then hit OK to open Registry Editor.
Step 2. Navigate here: HKEY_LOCAL_MACHINE > SYSTEM > CurrentControlSet > Control > Remote Assistance.
Step 3. Locate fAllowFullControl and fAllowToGetHelp.
Step 4. Double click fAllowFullControl and change the value data to 1 and click OK.
Step 5. Double click fAllowToGetHelp and change the value data to 1, then click OK.
Part 2. How to create Remote Assistance invitation on Windows 10 and 11
After enablingRemote Assistance, you can start to create Remote Assistance invitation on Windows 10 and 11. Let’s see how to send a Remote Assistanceinvitation on Windows 10.
Step 1. Press Win + R and then type in “msra”in the box, hit OK to open Remote Assistance.
Step 2. Choose Invite someone you trust to help you on the host PC and click Save this invitation as a file.
![]()
Step 3. Save this file on the desktop and a pop-up window that contains a password will appear. Send the file and password to the computer that provides remote assistance.
Part 3. How to receive Remote Assistance support on Windows 10 and 11
Next, let’s see how to receive Remote Assistance support.
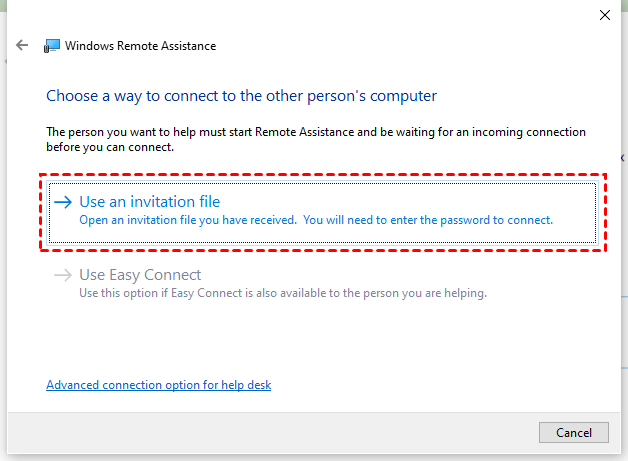
Step 1. On the computer that provides remote assistance, choose Help someone who has invited you.

Step 2. Choose Use an invitation file.
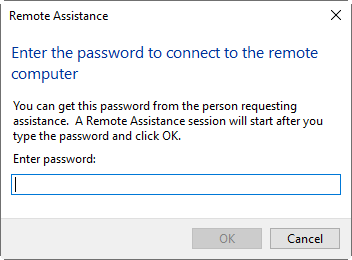
Step 3. Choose the Remote Assistance invitation and then you’ll be asked to enter the password. Click OK after inputting the password.
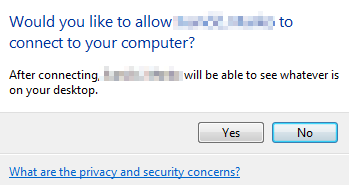
Step 4. On the computer that receives remote assistance, there will be a pop-up window asking whether to allow the remote computer to connect to this computer, click Yes.This computer screen will be shown on the remote computer.
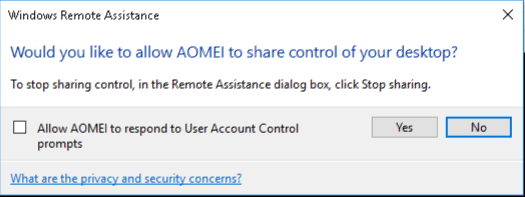
Step 5. On the computer that provides remote assistance, click Request control to send control request.

Step 6. Click OK on the computer that receives remote assistance.
Note: If you want to start Remote Assistance more easily and quickly, you can create an RA shortcut on your desktop.
AnyViewer: Best Remote Assistance alternative
Why you may need a Remote Assistance alternative?
- Remote Assistance only supports limited Windows systems. Remote Assistance, the same as Remote Desktop, is available on Windows Pro Edition but not available in Windows Home Edition.
- Remote Assistance doesn’t support unattended remote access. It is impossible to provide remote support to an unattended computer, because you are not able to offer remote assistance without permission.
If you need remote support tool who supports Windows Home editions and unattended remote access, you can use AnyViewer, the best Remote Assistance alternative. It is the free remote support tool allowing you to remotely support your customers, families or friends to help them solve any IT problem instantly.
Step 1. On both computers, download, install, and launch AnyViewer. Go to Log in on the Controller computer, and then click Sign up (if you have already signed up on its official website, you can log in directly).

Step 2. Fill out the signup form.

Step 3. You should now see that you have successfully logged into AnyViewer. Your device will be assigned to the account to which you have logged in automatically.

Step 4. Sign in with the same AnyViewer account on both computers, then click the One-click control for unattended remote access.

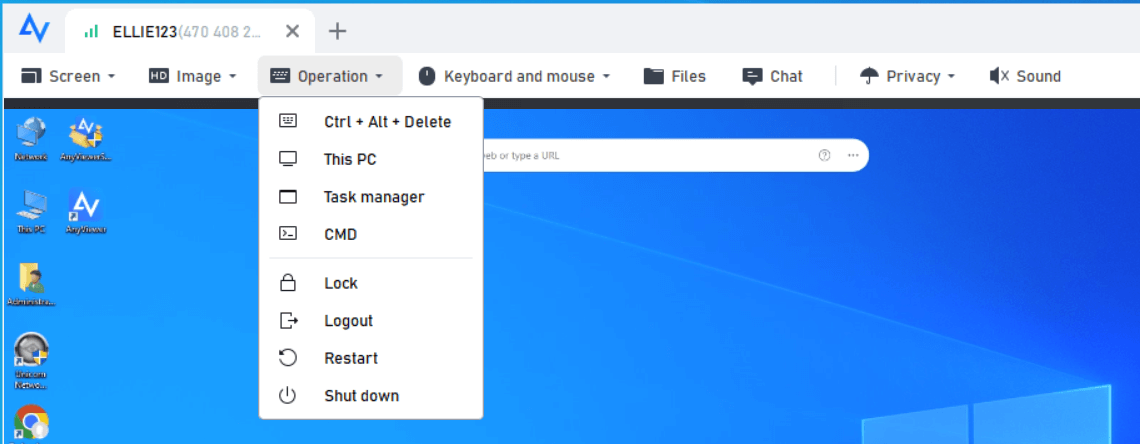
Step 5. The remote desktop will appear once the connection is established. After that, you have complete control over it. You can also click Operation from the toolbar to get operation shortcuts.
- Notes:✎...
- It is recommended to upgrade your account to a Professional or Enterprise plan. What can a professional or enterprise plan brings to you:
- More devices can be assigned to the same account for unattended remote support.
- Connect in privacy mode to protect your privacy. This means the Controller can black out the remote PC screen and disable the remote keyboard and mouse click.
- File transfer speed will be increased. Transfer speed is 500 KB/s for a free account and up to 10 MB/s for a paid account.
Conclusion
This post primarily introduces how to enable Remote Assistance, how to create Remote Assistance invitationon Windows 10and 11, and how to receive Remote Assistancesupport. If you need a Remote Assistance alternative, we highly recommend you to use AnyViewer.
