
How to Access Remote Server from Windows 10/11 [4 Ways]
Which ways can be used to connect to a remote server from Windows 11/10/8/7, Here we mainly introduce 4 top remote server connection solutions with detailed steps to guide you to connect to server remotely. Read carefully and take into practice.
By Ellie / Updated on December 13, 2024
How do I connect to a remote server in Windows?
Hello fellow geeks, please forgive me that I’m a new man in the IT domain. I’m heading out of my home for several weeks but I need to use my home PC during that time. That means maybe I need to remote into my home server. But I have no idea. How do I connect to a remote server from Windows?"
- Question from Quora

Accessing remote servers from a Windows machine is crucial for various purposes, enabling efficient administration and monitoring without physical presence. Tasks such as testing, troubleshooting computer issues, and data transfer become more manageable.
How to access remote server from Windows [4 simple ways]
Remotely accessing another server from Windows is not a complex process. The following outlines four methods with step-by-step guides on how to connect to a remote server on Windows 10 and 11.
Way 1. How to access server remotely via AnyViewer [Simplest]
Finding a simple remote access software is the most efficient way to help you access your remote server from Windows. Among all the software, AnyViewer seems to be a great choice. It is a meticulously crafted free remote access software exclusively designed for Windows. Highly endorsed for individuals and businesses seeking seamless remote server access from Windows.
- High Compatibility: AnyViewer works seamlessly on various platforms like Windows, iOS, and Android with continuous multifunctional updates.
- Comprehensive Features: AnyViewer comes packed with essential features such as file transfer, privacy mode, CMD mode, remote voice, clipboard synchronization, and multi-session support. It allows unattended remote access to computers, enabling connections even in the absence of the user.
- Robust Security Measures: AnyViewer prioritizes security with end-to-end encryption, ensuring the privacy and integrity of remote connections. The inclusion of two-factor authentication adds an extra layer of protection for enhanced data security.
- Efficient Performance: Designed for speed and reliability, AnyViewer performs well even on low-bandwidth connections. Users appreciate its responsiveness, contributing to a positive overall experience.
Note: If you need to access Windows Server from iPhone, iPad, or Android, you can download AnyViewer for mobile devices from the App Store or Google Play.
Step 1. Download and install AnyViewer on both computers. Then Sign up for an AnyViewer account and Log in to this account on both computers.

Step 2. After that, you can see 2 devices automatically assigned to the account you’ve logged in to.

Step 3. Then, click "Device", choose the PC that will be accessed, and choose "One-click control". Then, you can take full control of the remote PC with one click.

- High-Definition Device Control: Remote control of other devices with the clearest visual experience.
- Streamlined Multi-Tasking: Manage multiple remote sessions simultaneously, making multitasking a breeze.
- Fastest File Transfer: Accelerate the movement of large files between devices, boosting overall efficiency.
- Privacy Mode: Guarantee discreet access to remote devices by dimming the screen and disabling the keyboard, adding an extra layer of privacy.
Way 2. How to connect to a server remotely via Windows Remote Desktop
Accessing a remote server from Windows is facilitated by the built-in Remote Desktop (RDP) feature. Establishing a connection between two servers within the same network or WLAN is a straightforward process. However, when the two PCs are situated on separate LANs, the imperative step involves executing port forwarding. The ensuing steps elucidate this process:
Part 1. Configure Remote Desktop connection on the host computer
Step 1. Allow remote connections to this computer in the Control Panel
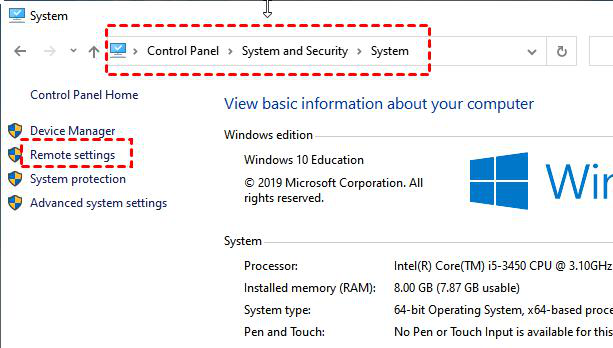
1. Select Control Panel > System and Security > System, under the System section, click Remote Settings.
Step 2. Mark the checkbox adjacent to Enable remote connections to this computer and then click OK.

Step 2. Change Windows Firewall settings
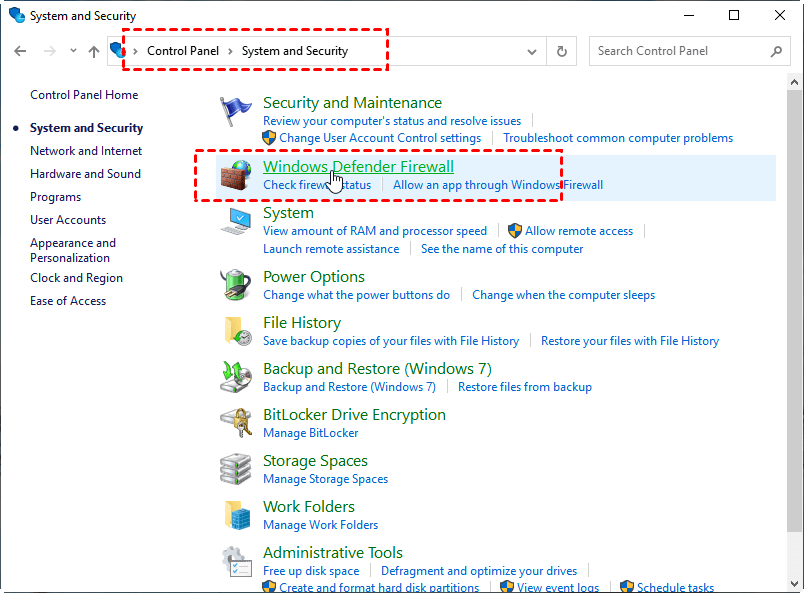
1. On the host computer, select Control Panel > System and Security > Windows Defender Firewall.
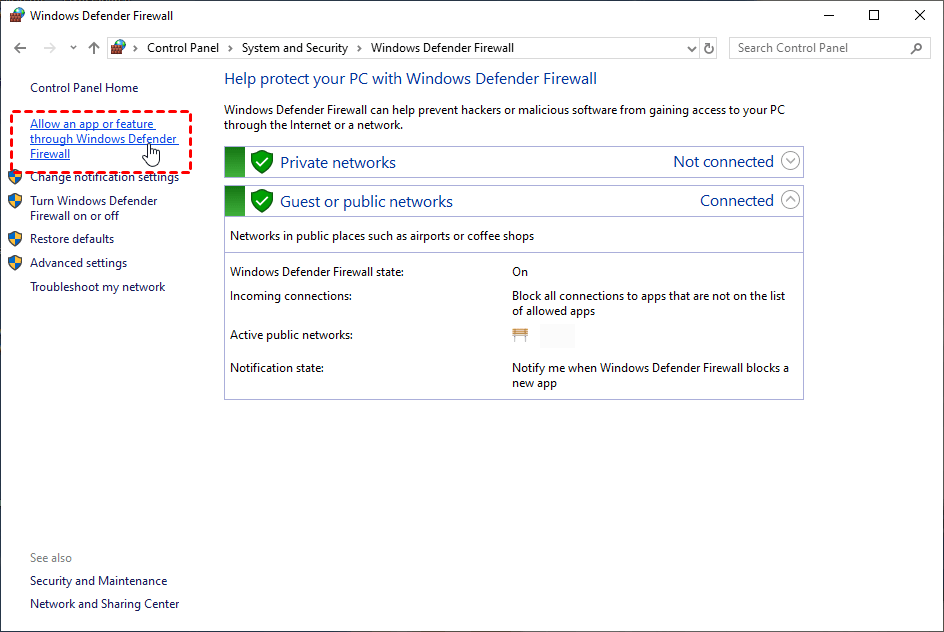
2. Click Allow an App or Feature Through Windows Defender Firewall on the left navigation.
3. Tick Remote Desktop and hit OK.

Step 3. Get the IP address and computer name
1. Press Win + R on the host computer to open the Run dialog box. Enter "cmd" and then hit OK.

2. Retrieve the IP address for the Remote Desktop by entering the command "ipconfig" and making note of the IPv4 Address.

3. Find your PC name for Remote Desktop by typing in "query user." This will display your PC's name.

Step 4. Get valid login credentials
Before you attempt remote access, make sure you have the necessary login credentials, including the username and password for the Windows computer you intend to access remotely. Having these essential details readily available is crucial for a successful remote connection.
Step 5. Port forwarding (Not necessary if the two devices are within the same network or WLAN)
1. Type "ipconfig" in CMD (as admin) and then locate the Default Gateway.

2. Find the username and password behind the router.
3. Open a web browser. Type your router’s IP address into the address bar. When a privacy warning appears, just click Advanced > Proceed to continue.
4. Next, enter your router’s username and password.
5. Click on Port Forwarding/Port Triggering on the left pane. Choose Add Custom Service.
6. Then enter the Internet IP address of the device you want to port forward, and then click Apply to save the changes.
7. Finally, apply your settings.
Part 2. Connect to the host computer from the client computer via RDP
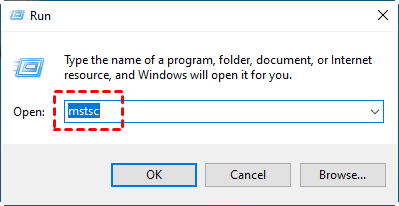
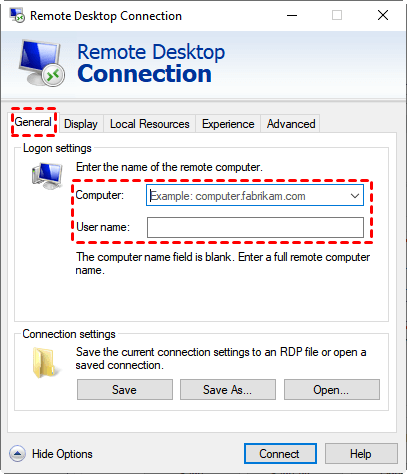
Step 1. On the client computer, press Win + R, and type “mstsc” in the Run Dialog box to open the Remote Desktop connection.
Step 2. Click on Show Options, and then enter the IP address and hostname of the host computer. Afterward, click Connect.
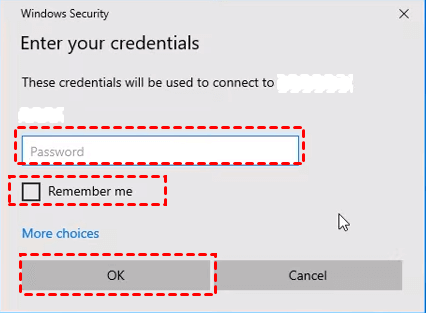
Step 3. In the pop-up window, enter the password for the client's computer, and then click OK.
Way 3. How to connect to remote server via VPN
While you are far away from the remote PC, in most cases, you can also configure the VPN if 2 servers are not on the same network. It’s worth mentioning that the Internet of the remote PC must be changed to private so that the remote PC will be visible to other PC.
Step 1. Press Win + I to open Settings. Select Internet & Network. And then locate the VPN. Click Add a VPN Connection.
Step 2. Type the name that you want to use for the connection and the other required details (such as server name or address, VPN type, username, and password). After finishing, click on Save.
Step 3. Click the VPN connection that you want to use. Then click Connect.
Step 4. Once the connection is established, you receive a confirmation from your PC. Close the Settings window. Now you can use your VPN connection to access a remote server from Windows.
Way 4. How to access a server remotely via SSH
SSH, or Secure Shell, is a cryptographic network protocol that provides a secure and encrypted means of connecting to and managing remote servers. PuTTY is a popular SSH client for Windows. The following is the stepwise tutorial on how to connect to server on Windows via SSH through PuTTY.
Step 1. Download PuTTY and launch it to get started.
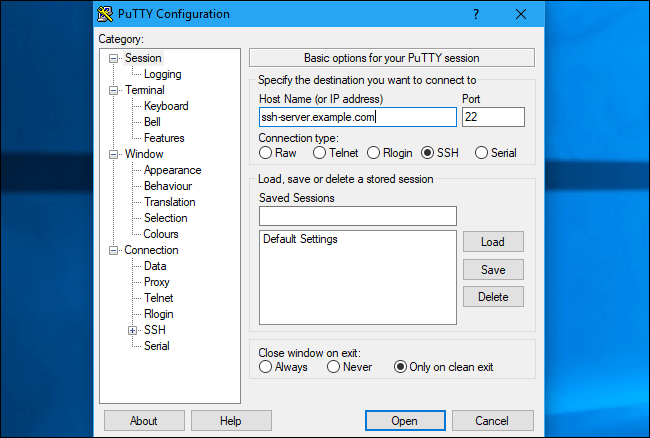
Step 2. Enter the SSH server’s hostname or IP address in the Host Name (or IP address) box. Check that the port number in the Port box matches the port number required by the SSH server. To connect, click Open.
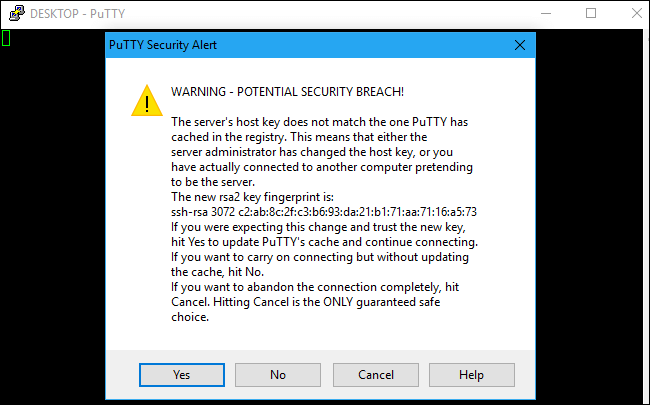
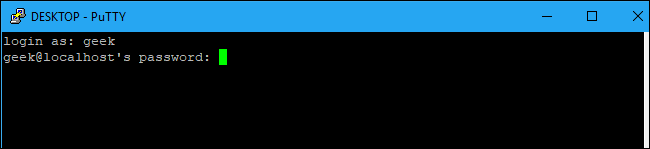
Step 3. You’ll see a security alert the first time you try to connect to a server. This tells you that you haven’t previously connected to this server. That’s expected, so click Yes to continue.
Step 4. You’ll be prompted to enter the username and password for your account on the SSH server. After you do, you’ll be connected.
Step 5. To end the SSH connection, just close the window.
Conclusion
The 4 top ways to access remote server from Windows 11, 10, 8, and 7 are shown above. After the detailed reading or practicing, you must master it. However, if port forwarding is too complicated for you and your VPN connection is not working for you, just try AnyViewer. AnyViewer can make up for those difficulties and bring about more convenience for you.
