
[Full Tutorial] How to Allow Remote Access to Server on Windows
What should I do if I failed to connect to the remote computer and received the “Remote access to the server is not enabled” error? Don’t worry, this post teaches you several options on how to allow remote access to server, helping fix your problem.
By Ellie / Updated on December 13, 2024
How do I remote into a Windows server?
When I use Remote Desktop to remote into a server. I got an error message saying that remote access to the server is not enabled. Is there anything wrong? How do I remote into a Windows server?”
- Question from Server Fault forum
When remote into a Windows server, users who are failed to connect to the remote computer are most likely to receive the following error:
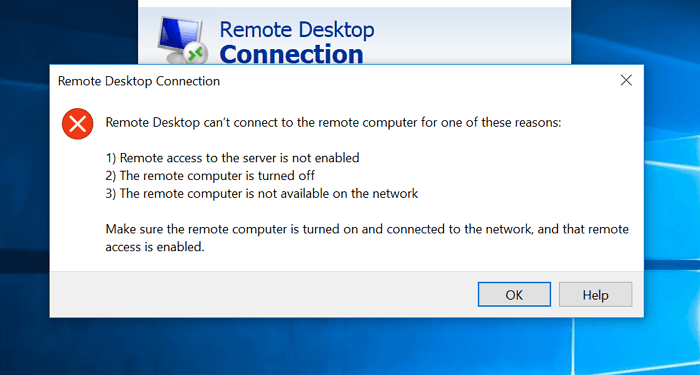
If you are certain that the remote computer is turned on and accessible via the network, the issue is that Remote access to the server is not enabled. Identifying how to grant remote access to the server could aid in the resolution of this issue.
How to allow remote access to server on Windows
Here in this post, we’ll introduce how to allow remote access to server on Windows. As there’s a great difference between the remote access settings of Windows OS and Windows Server OS, we’ll divide this section into two parts.
Part 1. How to allow remote access to server on Windows OS
First, let’s see how to enable remote access to server in Windows 10/11.
Method 1. Enable Remote Desktop on Windows 10 using Settings
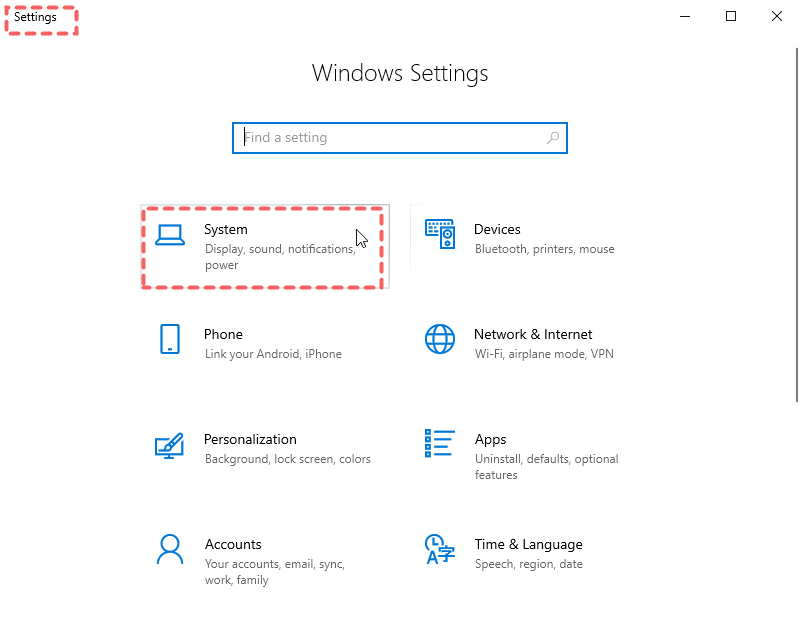
Step 1. Navigate here: Start > Settings > System.
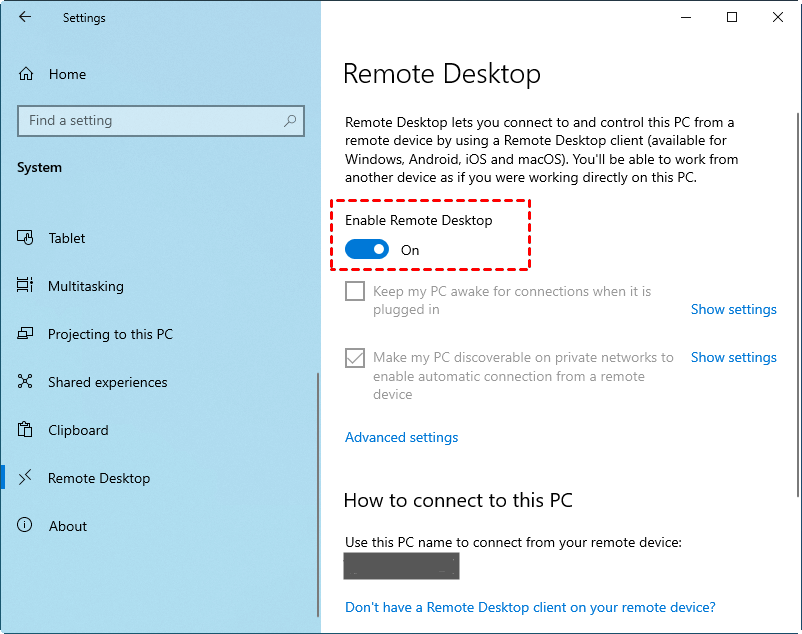
Step 2. Find Remote Desktop on the left pane, and make sure Enable Remote Desktop is turned on.
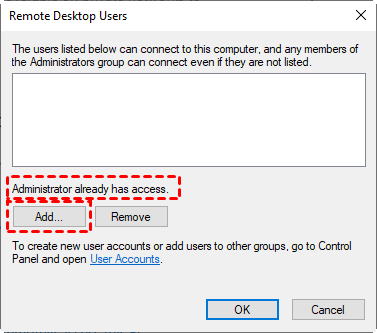
Step 3. Find User accounts and click Select users that can remotely access this PC.
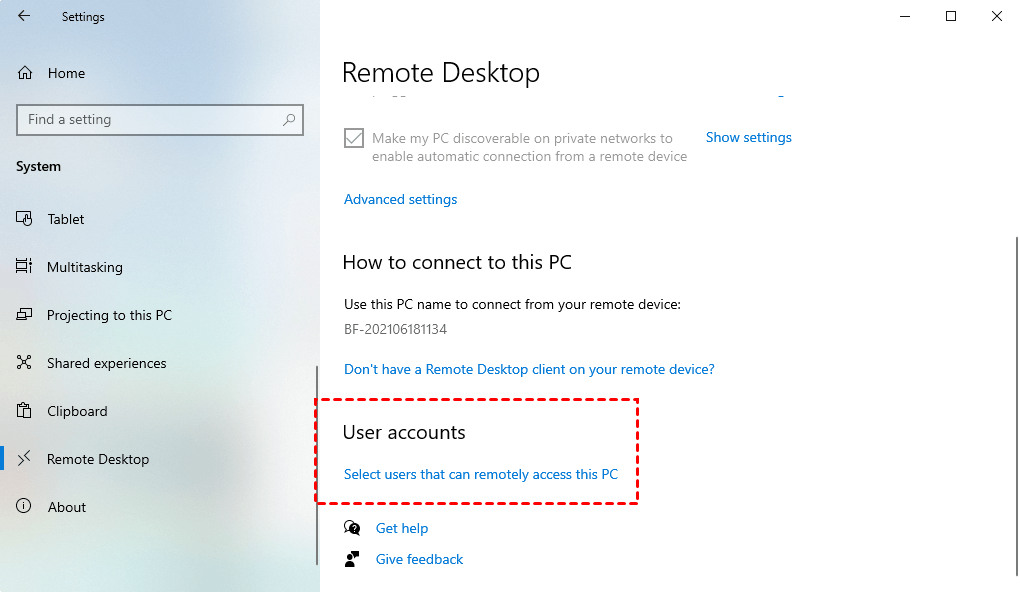
Step 4. After opening the Remote Desktop Users window, click Add to add users who are allowed to access this computer.
Method 2. Allow remote access using System Properties
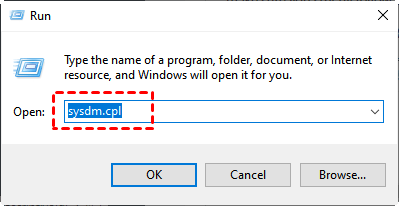
Step 1. Press Win + R. Then, to open System Properties, type in "sysdm.cpl" and click OK.
Step 2. Go to the Remote tab and make sure "Allow remote connections to this computer" is checked.

Method 3. Allow remote access to a server through Windows Firewall settings
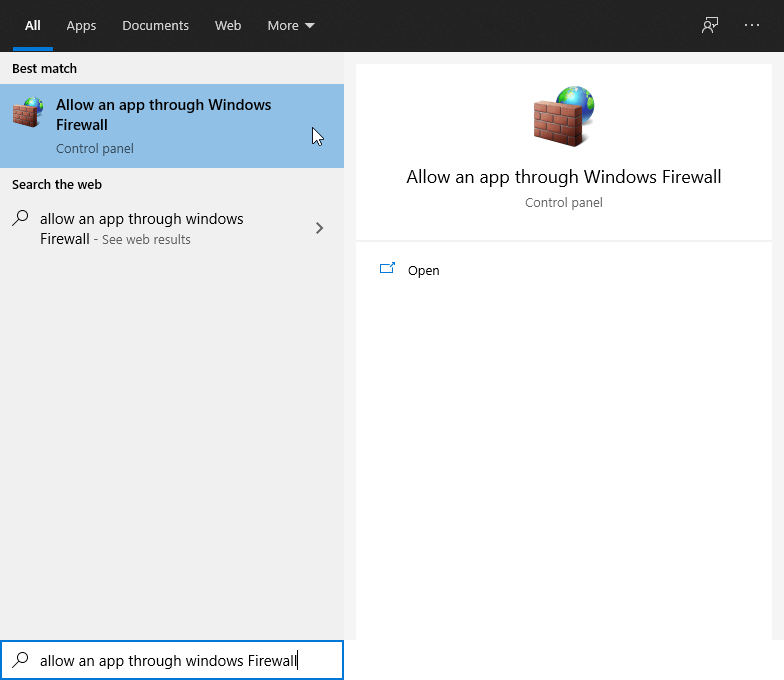
Step 1. Press Win + S, then enter "Allow an app through Windows Firewall". Click Open.
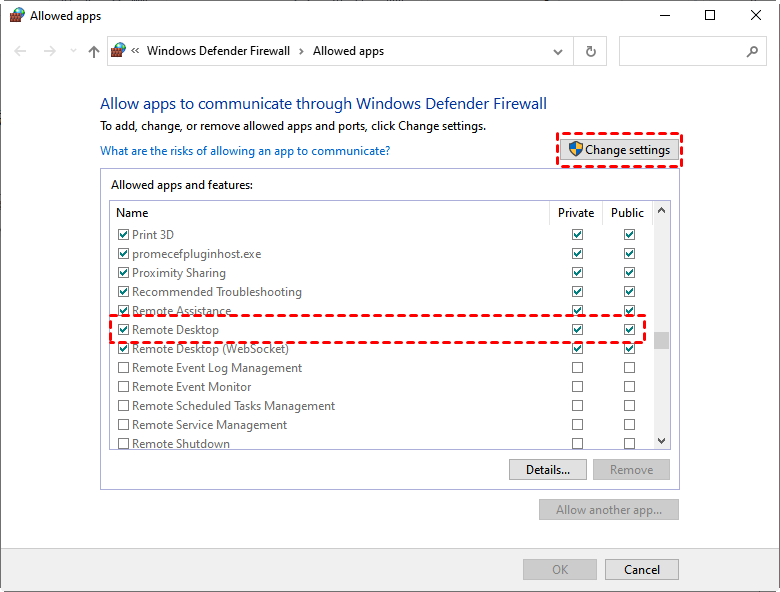
Step 2. Click Change settings and then check Remote Desktop.
Method 4. Enable remote access to a server via the Group Policy setting
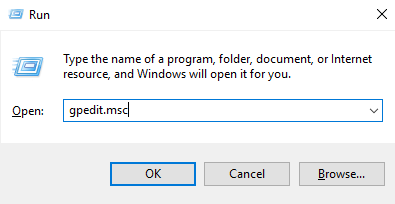
Step 1. Press Win + R and then type in “gpedit.msc” to open Local Group Policy Editor.
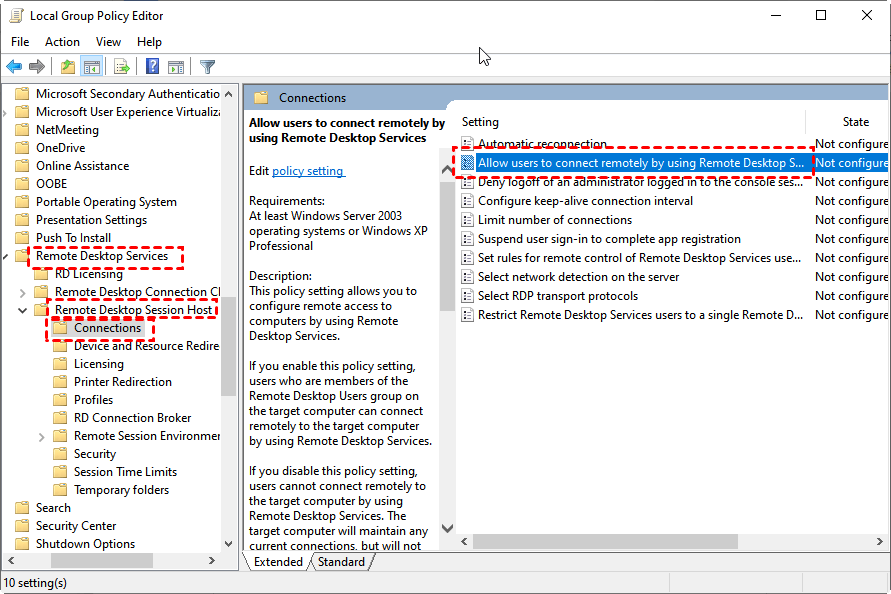
Step 2. Navigate here: Computer Configuration > Administrative Templates > Windows Components > Remote Desktop Services > Remote Desktop Session Host > Connection. On the right pane, find and click Allow users to connect remotely by using Remote Desktop Services.
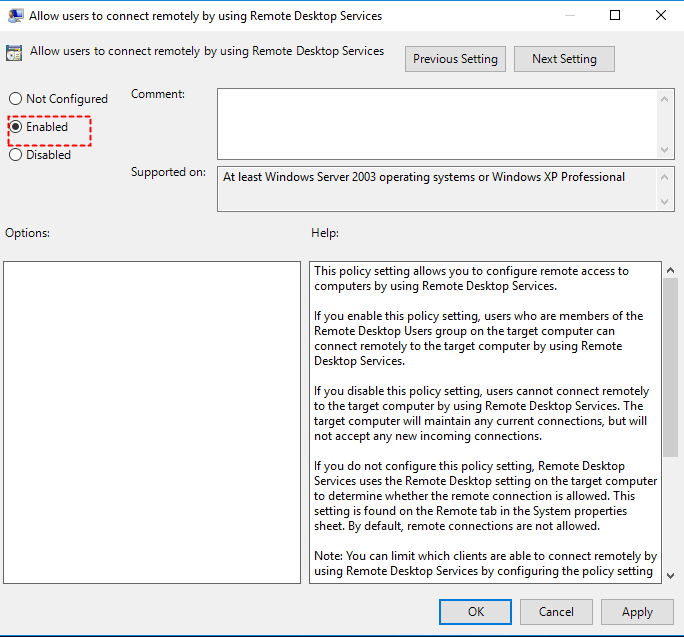
Step 3. Set it to Enabled.
Part 2. How to allow remote access to server on Windows Server OS
Next, let’s see how to allow remote access to server on Windows Server OS.
Method 1. Enable Remote Desktop from Server Manager
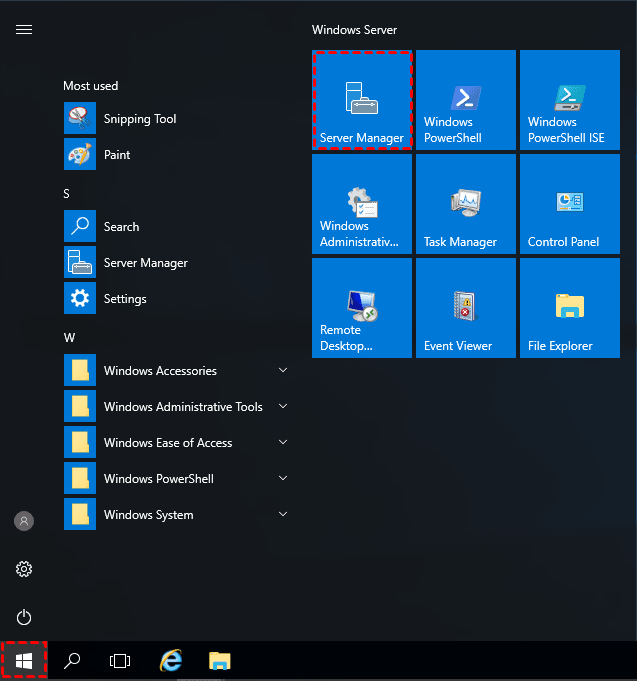
Step 1. Click on the Start button and you can see Server Manager.
Step 2. Click on Local Server on the left in the Server Manager window. We can see that Remote Desktop is Disabled.
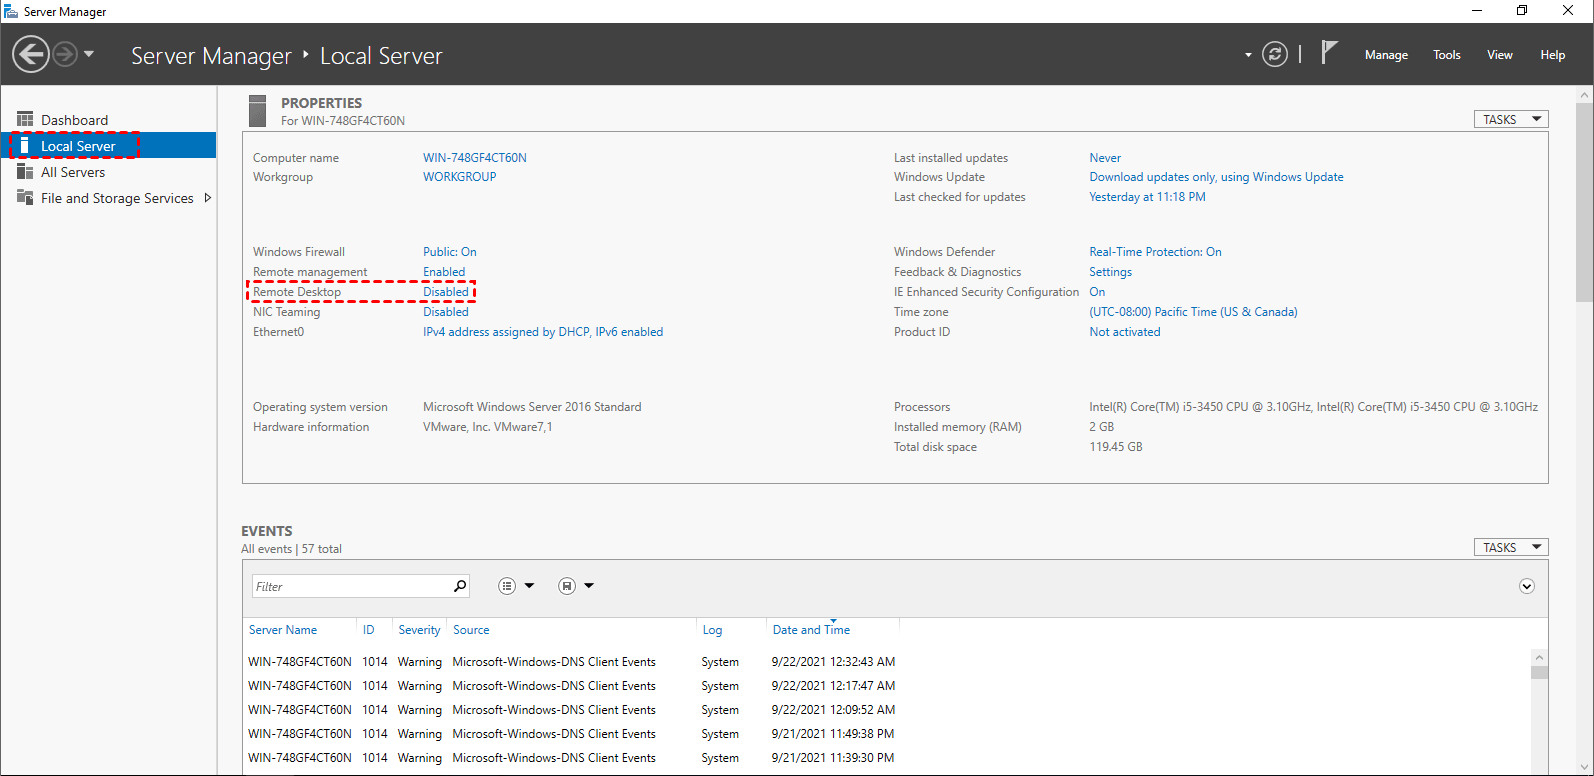
Step 3. Click on the Disabled text to open the System Properties, and then go to the Remote tab. Tick “Allow remote connections to this computer”.
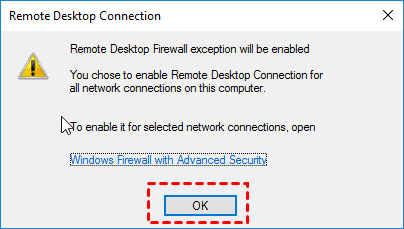
Step 4. You’ll receive a warning message after the above step, click on OK.
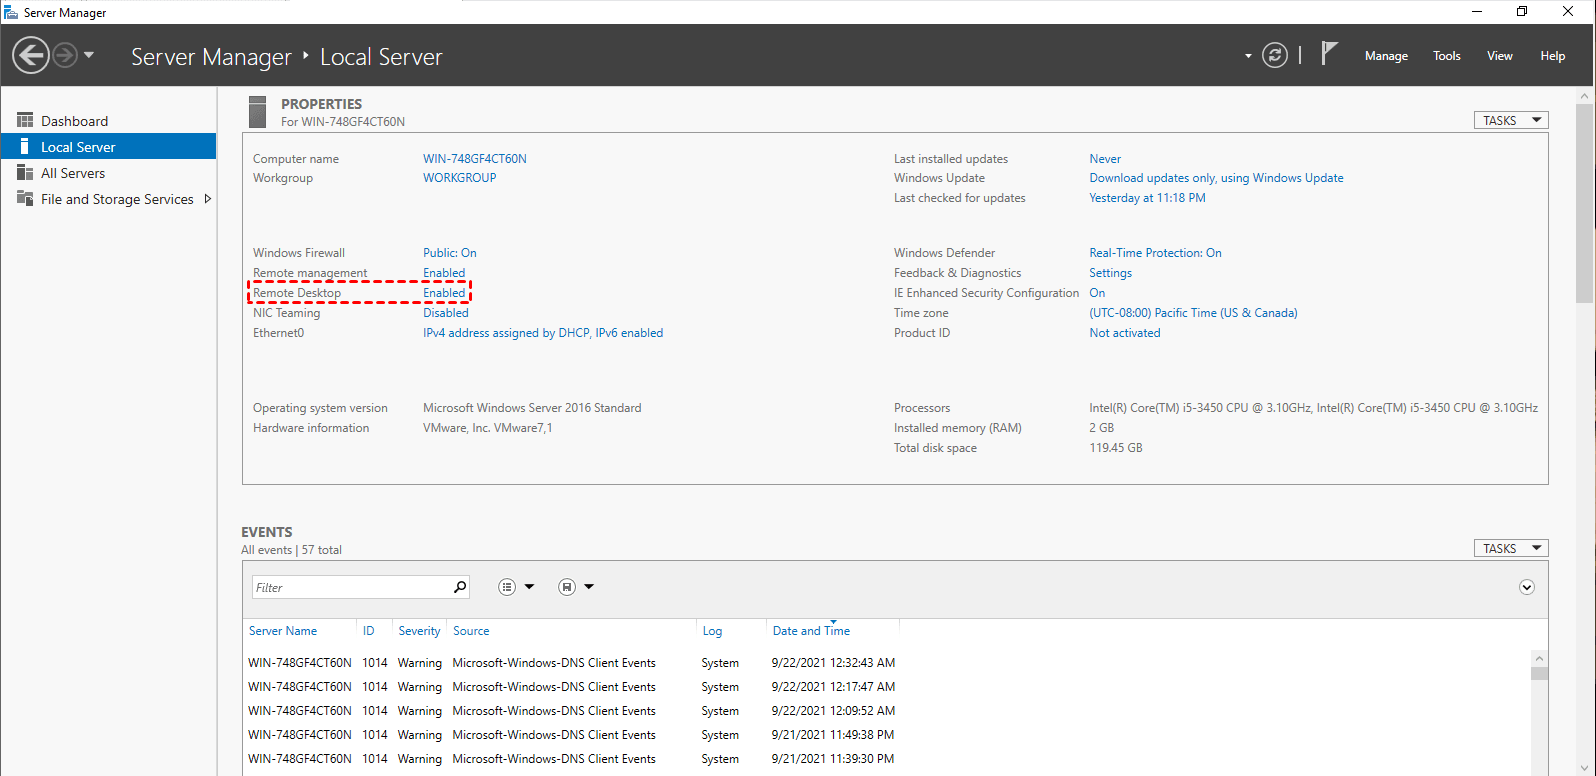
Step 5. Now, Remote Desktop may still show as Disabled, you can refresh or press Control + F5 to refresh to Enabled.
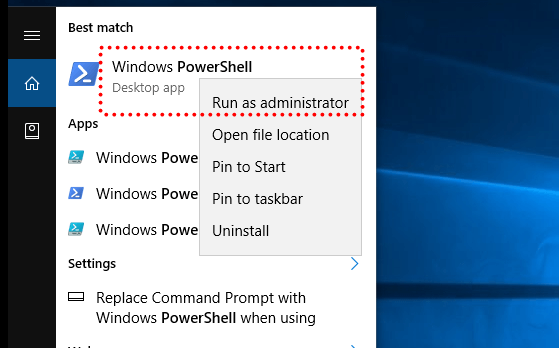
Method 2. Allow remote access on WindowsServerfrom Powershell
Step 1. Search “PowerShell” in the Search box and then select Run as Administrator.
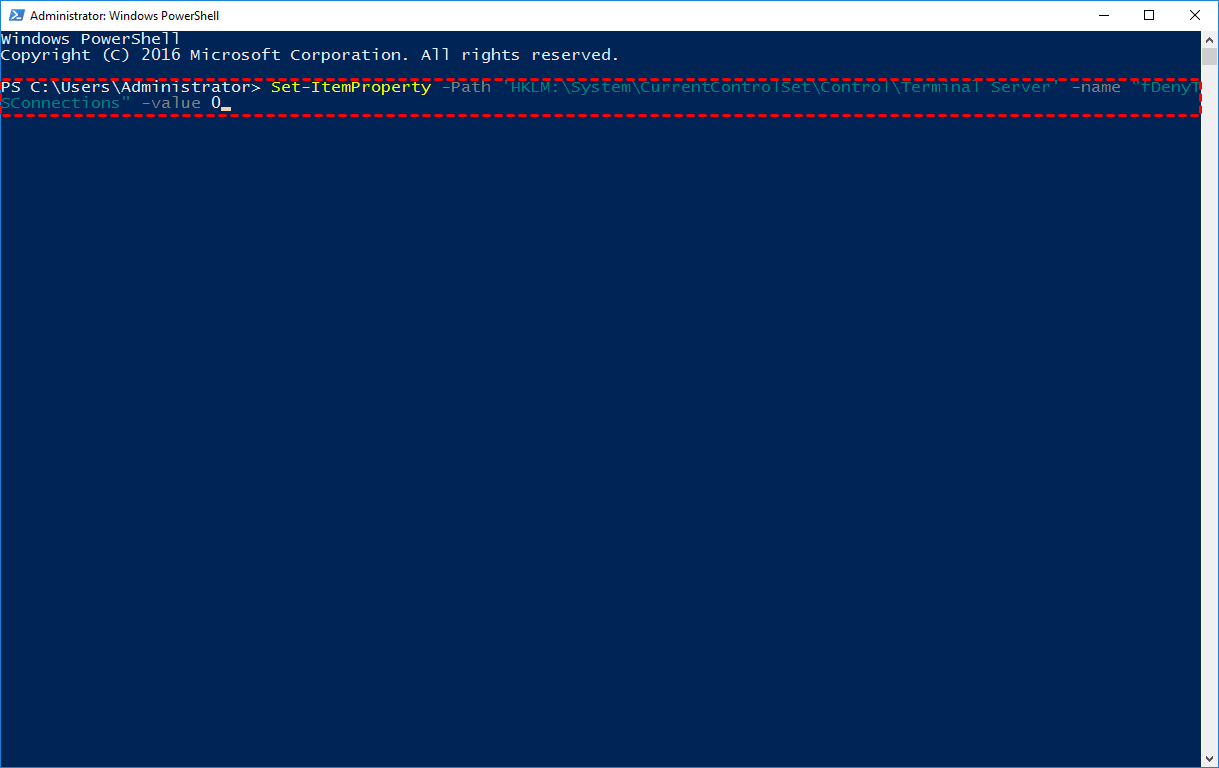
Step 2. Type the following command and then press Enter.
☞ Set-ItemProperty -Path‘HKLM:\System\CurrentControlSet\Control\Terminal Server’-name “fDenyTSConnections”-value 0
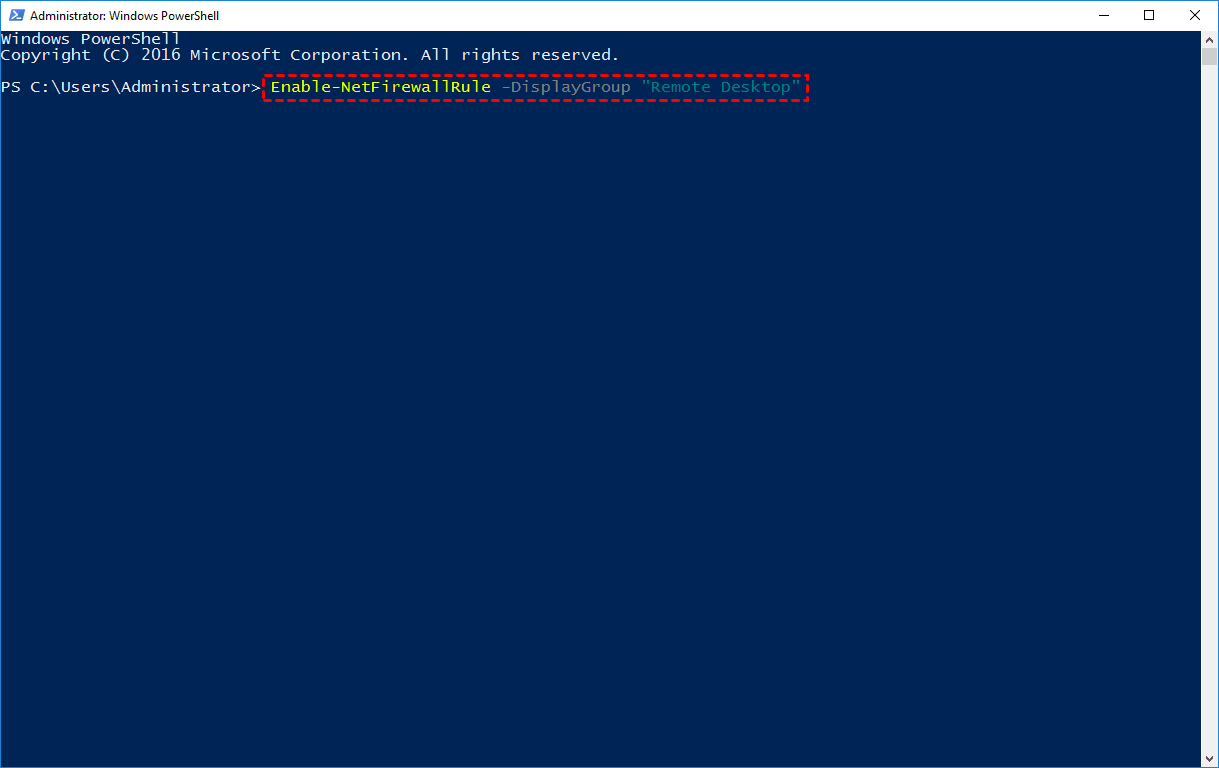
Step 3. By default, remote desktop connections are blocked by the Windows Firewall. Execute the following command to configure the firewall to allow remote desktop connections.
☞ Enable-NetFirewallRule -DisplayGroup "Remote Desktop"
An easier way to remotely access Windows PCs & Servers
After you've enabled remote access on the remote computer, you're able to remotely access Windows PCs via Remote Desktop.
Before the end, we'd like to recommend a free Remote Desktop alternative. AnyViewer is a free remote desktop application that works on Windows, iOS, and Android. Why do we say AnyViewer is an easier way to remotely access Windows PCs & Servers? Because it doesn't require complex configurations on the remote computer.
Besides, it is referred to as the best Remote Desktop replacement also for the following reasons:
- AnyViewer is easier to use. Remote Desktop requires an IP address and computer name to achieve remote connections, while AnyViewer doesn’t.
- AnyViewer has fewer restrictions. Remote Desktop requires that the two devices be on the same network, while AnyViewer doesn’t.
- AnyViewer is more compatible with Windows versions. Remote Desktop can’t be used to connect to computers running Windows Home and standard editions, while AnyViewer is fully compatible with both.
Step 1. On both computers, download, install, and launch AnyViewer. Go to Log in on the Controller computer, and then click Sign up (if you have already signed up on its official website, you can log in directly).

Step 2. Fill out the signup form.

Step 3. You should now see that you have successfully logged into AnyViewer. Your device will be assigned to the account to which you have logged in automatically.

Step 4. Sign in with the same AnyViewer account on both computers, then click the One-click control for unattended remote access.

Step 5. The remote desktop will appear once the connection is established. After that, you have complete control over it.
- Notes:✎...
- It is recommended to upgrade your account to a Professional or Enterprise plan. What can a professional or enterprise plan brings to you:
- More devices can be assigned to the same account for unattended remote support.
- Connect in privacy mode to protect your privacy. This means the Controller can black out the remote PC screen and disable the remote keyboard and mouse click.
- File transfer speed will be increased. Transfer speed is 500 KB/s for a free account and up to 10 MB/s for a paid account.
Closing words
This post primarily introduces how to allow remote access to server on Windows and Windows Server. If you happen to encounter the above-mentioned error when connected to the remote computer. You can follow the methods in this post to check if remote access is enabled.
In the end, we recommend a Remote Desktop alternative to you. If you’re looking for an easier way to remotely access another computer, try it right now.
