
Allow Remote Access to the Plug and Play Interface: Enable or Disable?
Do you have the confusion about whether to enable or disable “Allow remote access to the Plug and Play interface”? If you do, you’ve come to the right place. This post will uncover the answer for you. Keep reading.
By Ellie / Updated on December 13, 2024
What is “Allow remote access to the Plug and Play interface”?
“Allow remote access to the Plug and Play interface” is a group policy setting designed for Remote Assistance. By default, its status is set to “Not Configured”. This is standard for GPOs. Normally, GPOs set policies to Not Configured and you must manually configure everything you intend to use.
Should you enable or disable “Allow remote access to the Plug and Play interface”?
Before answering this question, let’s see a question from the Server Fault forum.
“I have a Windows Server2012R2 Core server that's not joined to any domain. What configuration must Ido on the server and client to connect with MMC\Device Manager? I have managed to connect with the Computer Management to the server and I can access everything in there but the Device Manager. When I click the Device Manager I get the following error. What should I do?”
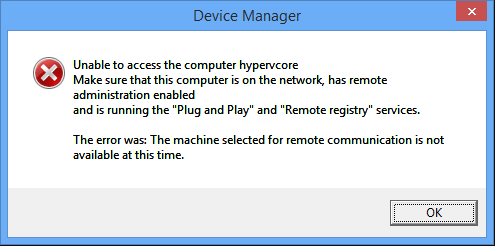
Actually, the “Allow remote access to the Plug and Play interface” policy setting controls whether or not you can access a machine's Plug and Play service remotely (which is what the device manager actually connects to). The solution to this problem is to enable “Allow remote access to the Plug and Play interface” on the remote server, then create a new MMC and add the Device Manager snap-in.
However, some argue that enabling remote access to the Plug and Play interface could allow unauthorized devices to connect and could give hackers another attack vector to the system. This setting must be disabled.
It is hard to say whether you should enable or disable “Allow remote access to the Plug and Play interface” or not. But the advice we give here is, you’d better enable it when needed and disable it when needn’t to minimize the risk of it.
How to configure "Allow remote access to the Plug and Play interface" [2 methods]
This section will give you two options on how to configure “Allow remote access to the Plug and Play interface” on Windows 10/11.
Method 1. Configure “Allow remote access to the Plug and Play interface” via GPO
Follow the steps below to configure “Allow remote access to the Plug and Play interface” via GPO.
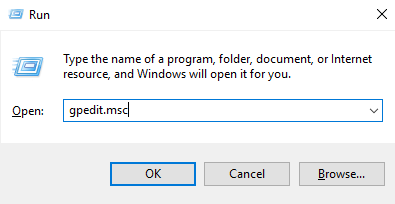
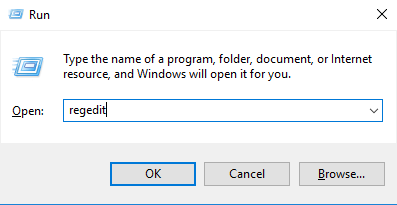
Step 1. Press Win + R, type in “gpedit.msc” on the box, and then press Enter.
Step 2. Navigate to: Computer Configuration > Administrative Templates > System > Device Installation > Allow remote access to the Plug and Play interface.
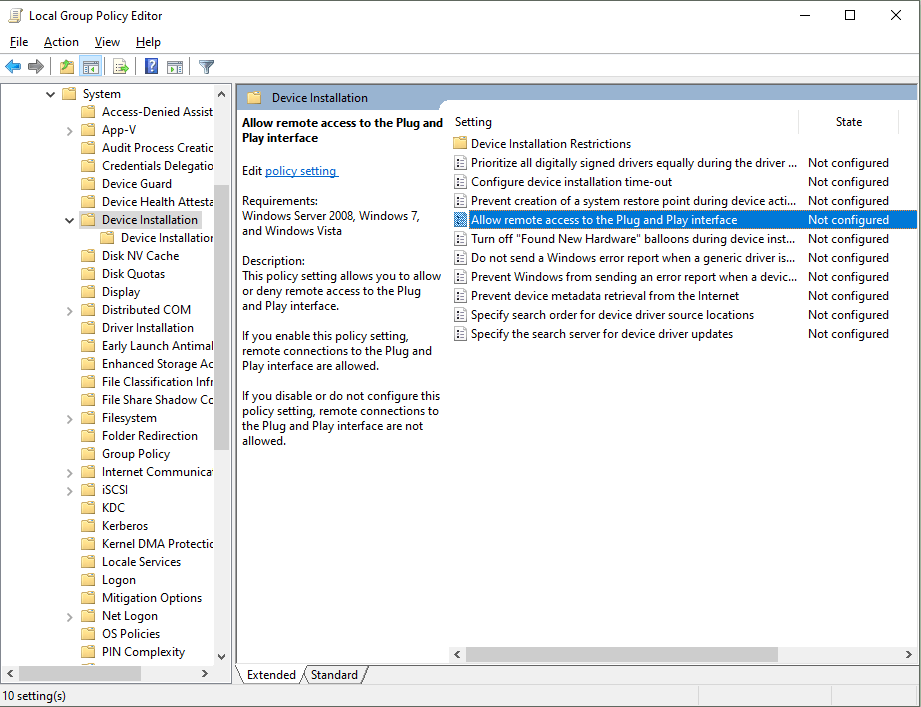
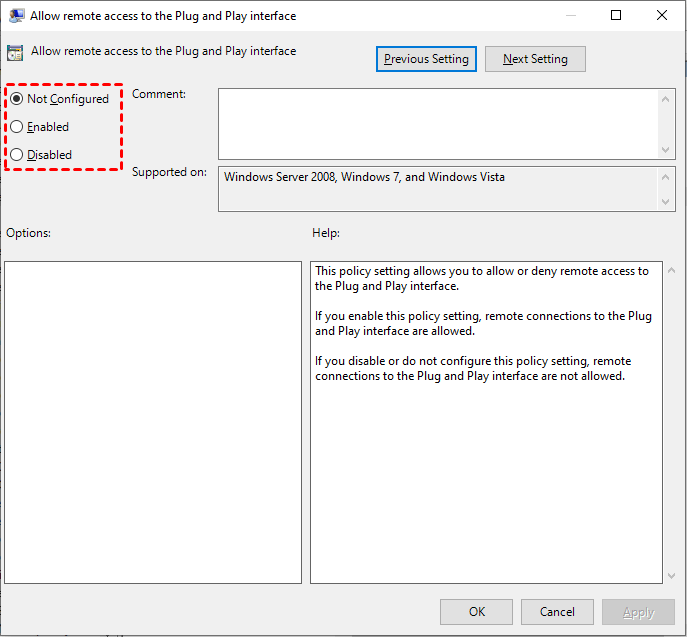
Step 3. Then you can enable or disable “Allow remote access to the Plug and Play interface”.
Method 2. Configure “Allow remote access to the Plug and Play interface” via Registry
Follow the steps below to configure “Allow remote access to the Plug and Play interface” via Registry.
Step 1. Press Win + R, type in “regedit” on the box, and then press Enter.
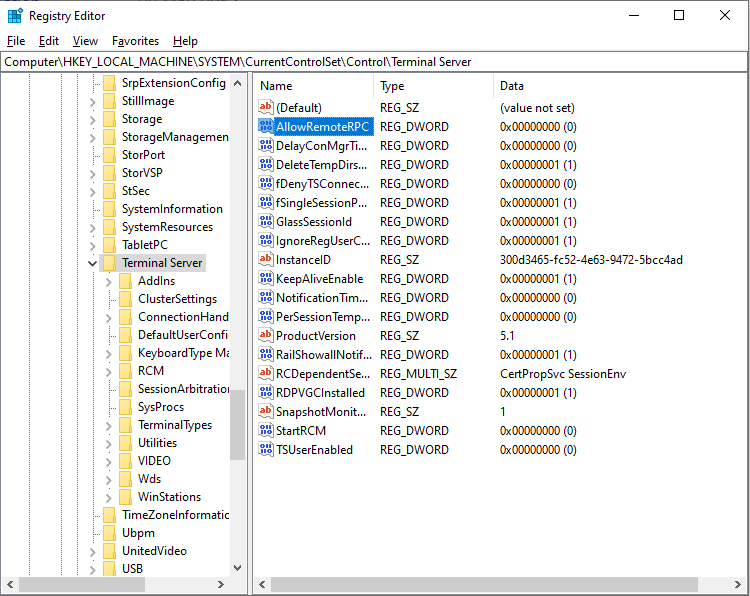
Step 2. Navigate to: HKEY_LOCAL_MACHINE > SYSTEM > CurrentControlSet > Control > Terminal Server > AllowRemoteRPC.
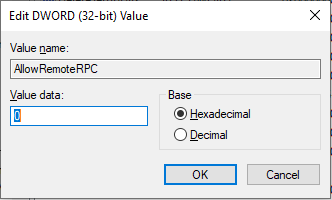
Step 3. Double-click to change its value. The enabled value is 1 and the disabled value is 0.
Bonus tip: A free Remote Assistance alternative
Remote Assistance allows you to assist others or receive assistance from others from a distant place. However, obtaining remote assistance via RA will necessitate the approval of others. This can sometimes be inconvenient when there’s no one sitting in front of the other side people from the other side don’t how to do this all. At this time, you need a tool that allows you to offer remote assistance without permission.
AnyViewer is a free remote assistance software for Windows, iOS, and Android. It can meet all your demands. With an account, you can easily connect to the devices that have been assigned to the same account. Let's see how this works.
Step 1. On both computers, download, install, and launch AnyViewer. Go to Log in on the Controller computer, and then click Sign up (if you have already signed up on its official website, you can log in directly).

Step 2. Fill out the signup form.

Step 3. You should now see that you have successfully logged into AnyViewer. Your device will be assigned to the account to which you have logged in automatically.

Step 4. Sign in with the same AnyViewer account on both computers, then click the One-click control for unattended remote access.

Step 5. The remote desktop will appear once the connection is established. After that, you have complete control over it.
- Notes:✎...
- It is recommended to upgrade your account to a Professional or Enterprise plan. What can a professional or enterprise plan brings to you:
- More devices can be assigned to the same account for unattended remote support.
- Connect in privacy mode to protect your privacy. This means the Controller can black out the remote PC screen and disable the remote keyboard and mouse click.
- File transfer speed will be increased. Transfer speed is 500 KB/s for a free account and up to 10 MB/s for a paid account.
Closing words
This post primarily introduces what “Allow remote access to the Plug and Play interface” is and gives you advice on whether to enable it or not. Besides, we also recommend free Remote Assistance to you just in case you need to offer or provide remote assistance without permission.
