
How to Perform Windows Server Remote Connection
This tutorial teaches you how to realize Windows Server remote connection. You’ll learn two methods to enable Windows Server remote connection and the detailed steps to realize Windows Server remote connection.
By Ellie / Updated on December 26, 2025
The scenario: How can I use Remote Desktop on Windows Server
I need to learn how to use remote connection because of my job requirements. I’m using a Windows Server 2016 now. Most tutorials on remote connection now are about Windows 10 Remote Desktop Connection. There are not many remote connection tutorials related to Windows Servers, including Windows Server 2012 R2/2016/2019. I don’t know is there any difference in operation? Could anyone teach me how to use Remote Desktop on Windows Server 2016?”
- Question from Microsoft Community
How to complete Windows Server remote connection
Actually, the setup process of Windows Server Remote Desktop Connection is not complicated. The operation steps of the Remote Desktop Connection of Windows 2012 R2/2016/2019 are similar to the operation steps of Remote Desktop Connection on Windows 10.
Here, we'll take Windows Server 2016 as an example, teaching you how to easily use Remote Desktop on Windows Server 2016. The way to enable Remote Desktop on Windows Server 2019/2022 is the same.
Part 1. Enable Remote Desktop on Window Server [Two methods]
Before we finally realize Windows Server Remote Connection, we need to enable Remote Desktop on Window Server first using one of the following two methods.
Method 1. Enable RDP on Windows Server 2016 via the Graphical User Interface
In terms of operation method and user interface, Windows Server 2016 has many similarities with Windows 10, but there are also many differences. The most obvious difference is the server manager, which is the key point to enabling Windows Server remote connection.
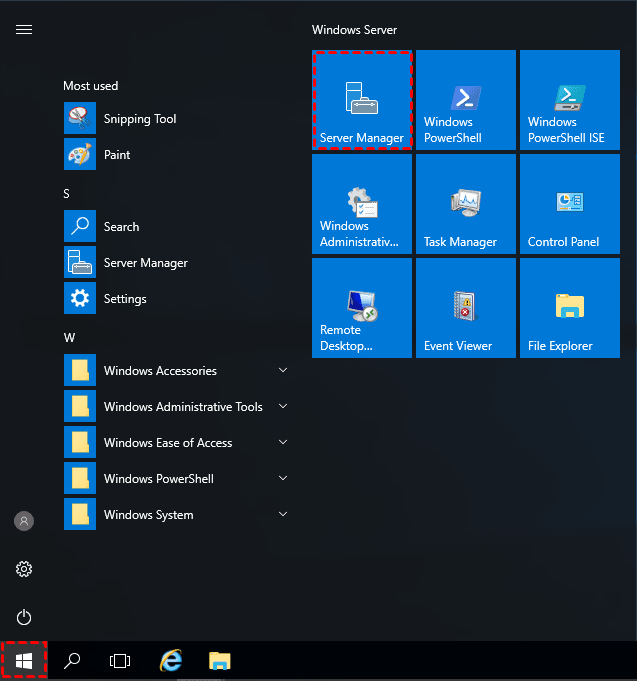
Step 1. Click the Start in the lower-left corner, find and click Server Manager in the expanded menu.
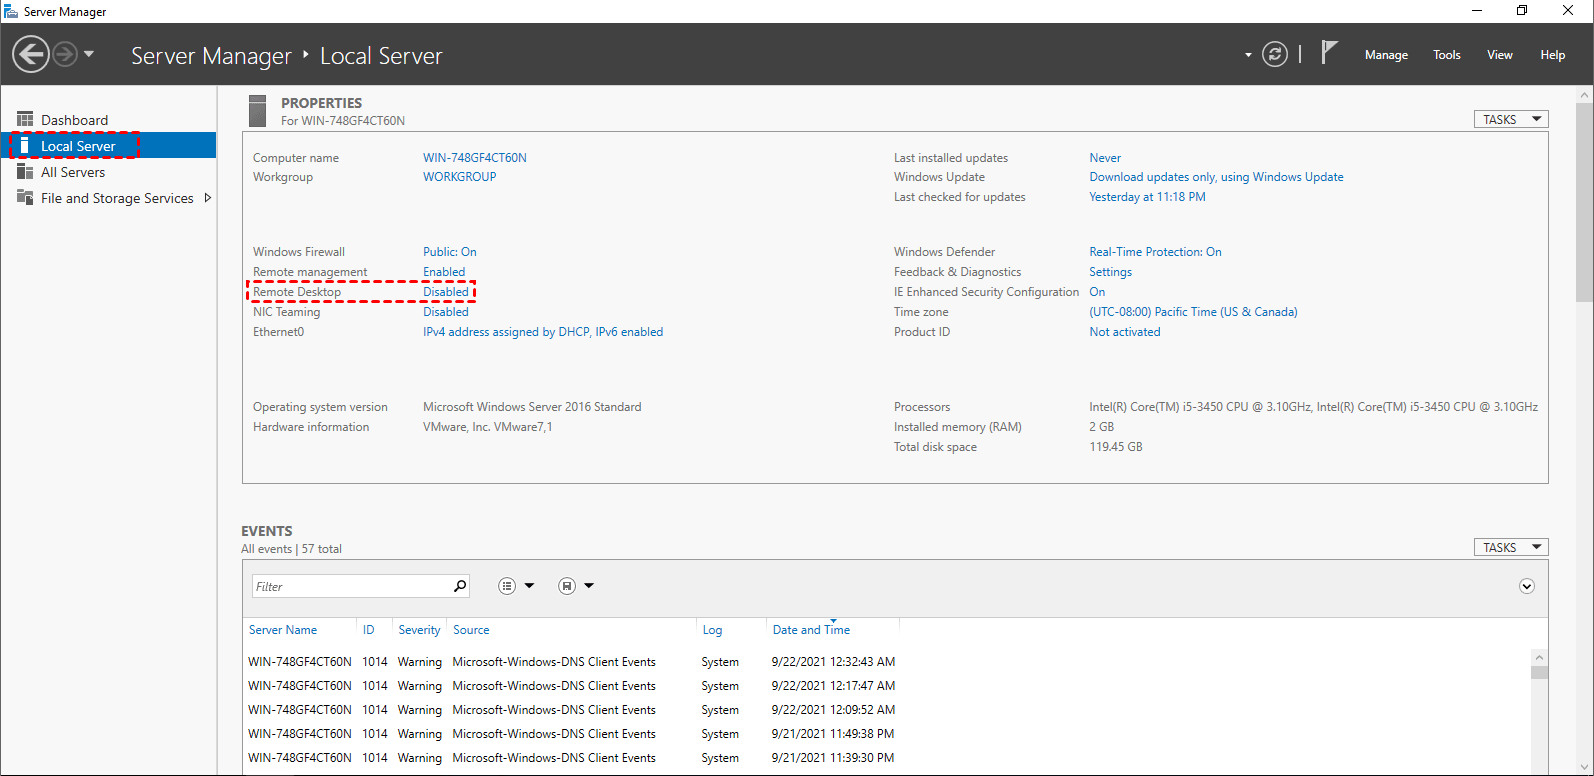
Step 2. Select the Local Server tab on the left pane, find the Remote Desktop column on the right pane, and click the Disable button next to it.
Step 3. Press Win + R to invoke the Run dialog box. Then type in “sysdm.cpl” and hit OK to open System Properties. Find the Remote tab in the System Properties window, and tick Allow remote connections to this computer.

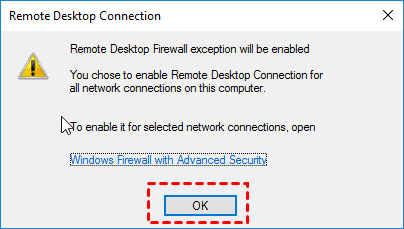
Step 4. A warning window of Remote Desktop Connection will pop up automatically, then click OK. This pop-up window is mainly used to inform the user to enable the required firewall rules in the Server to allow the network to connect to the Server remotely.
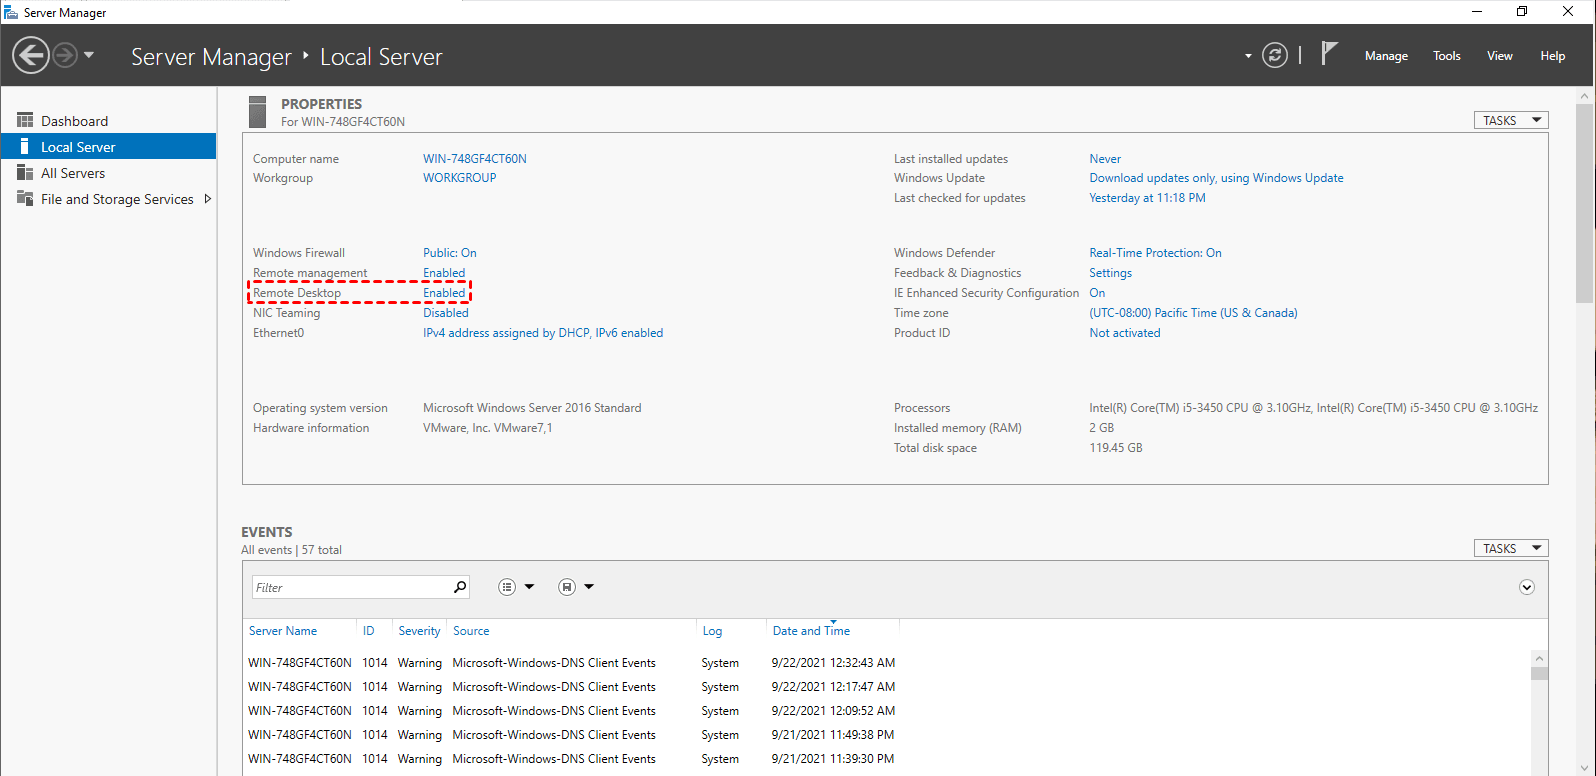
Step 5. Then you can see that Remote Desktop is switched to Enabled on the Local Server tab, which means that the Windows Server remote connection is enabled.
Method 2. Enable Remote Desktop on Windows Server 2016 via Windows PowerShell
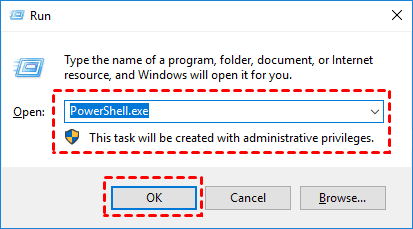
Step 1. Press Win + R to open the running dialog box, type in PowerShell.exe and click OK to open the PowerShell window.
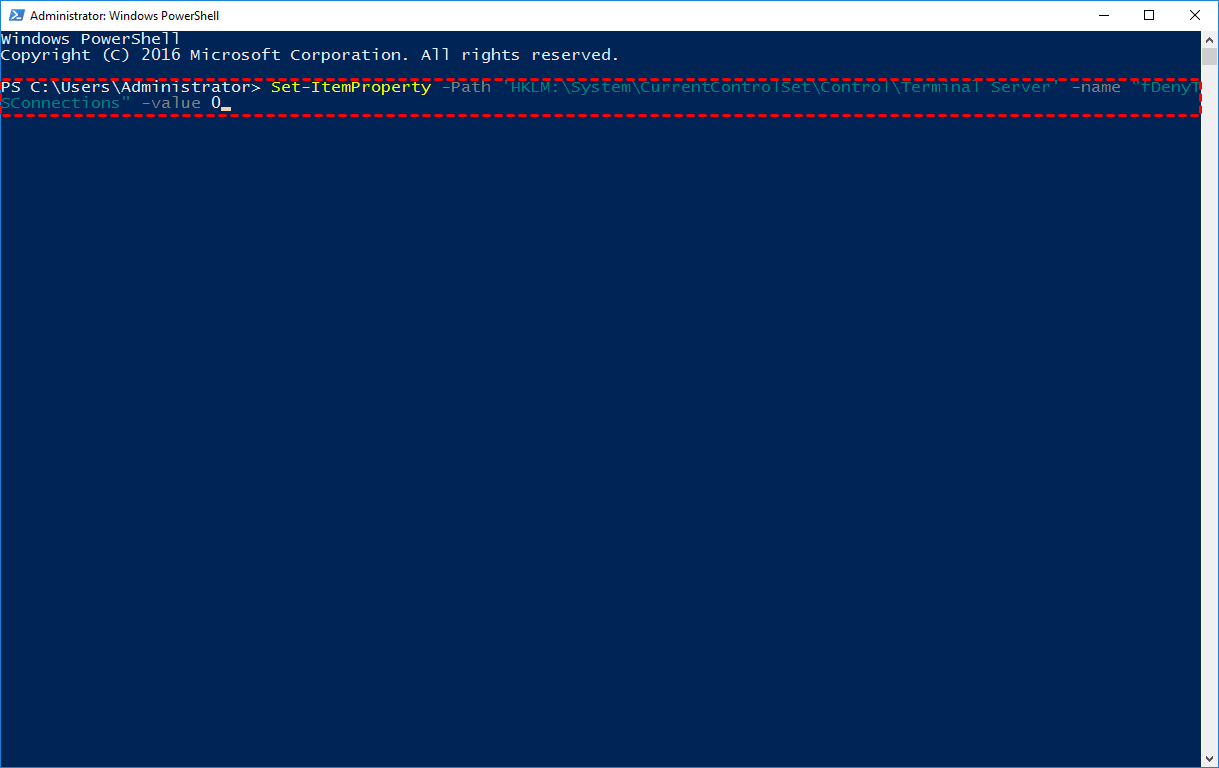
Step 2. Enter Set-ItemProperty -Path’HKLM:\System\CurrentControlSet\Control\
Terminal Server’ -name “fDenyTSConnections” -value 0 to enable Remote Desktop Registry value.
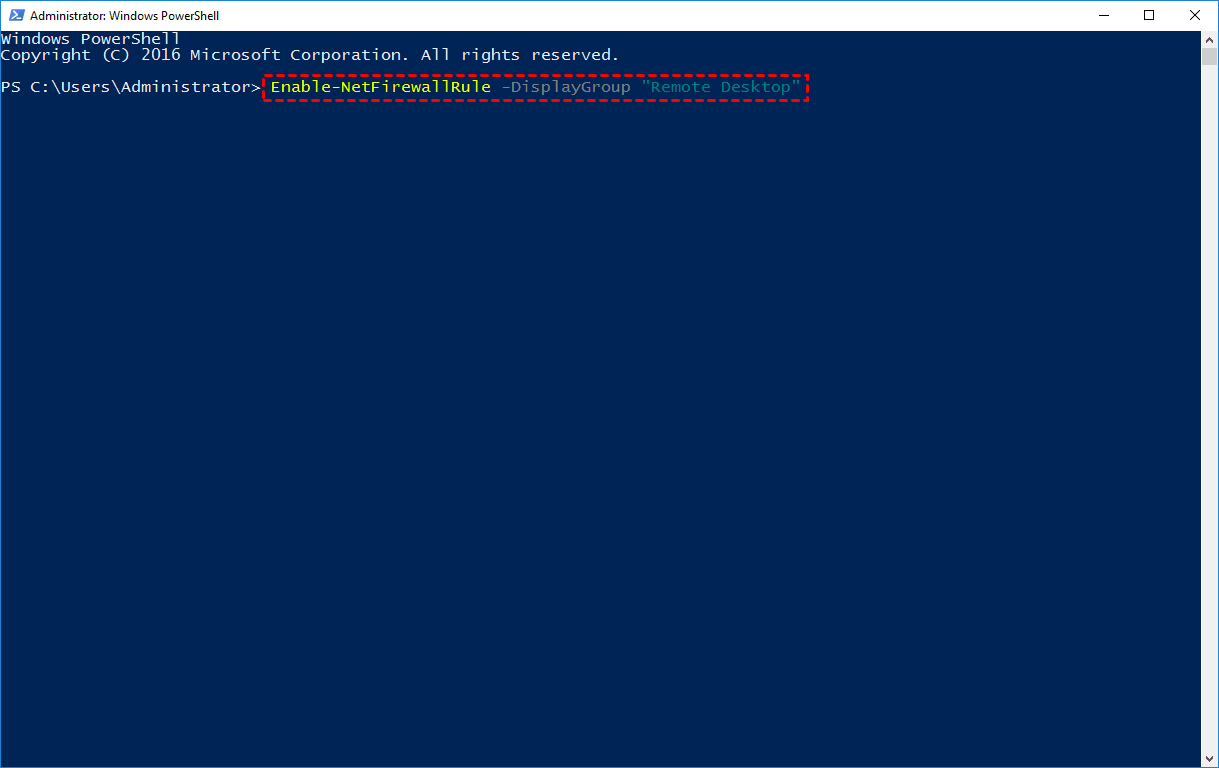
Step 3. Then enter Enable-NetFirewallRule -DisplayGroup “Remote Desktop” to set up the Windows firewall to allow Remote Desktop Connection.
If you want to confirm whether the Remote Desktop Connection has been opened, you can open the Server Manager, find Remote Desktop in the Local Service, and see if the status is switched to Enabled.
Part 2. Access Windows Server using Remote Desktop
After enabling Remote Desktop Connection on Windows Server via the Graphical User Interface or Windows PowerShell, the next step is to realize the remote connection. If you know how to operate Windows 10 Remote Desktop Connection, you will find that the steps to operate Windows Server Remote Desktop Connection are the same.
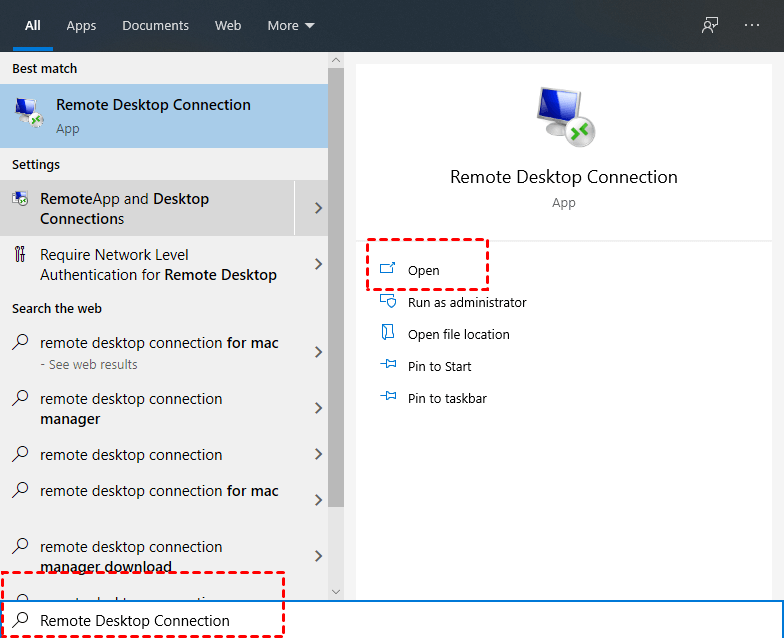
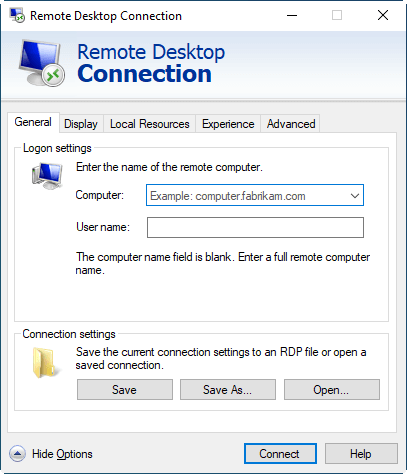
Step 1. On the Windows Server 2016, search for Remote Desktop Connection in the search box, and then click to open Remote Desktop Connection.
Step 2. Enter the IP address and user name of the account that you want to log in the Remote Desktop Connection interface to achieve connection.
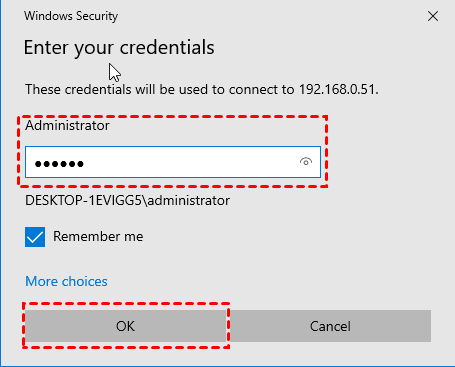
Step 3. In the pop-up Windows Security window, enter the corresponding password of the remote computer and click OK.
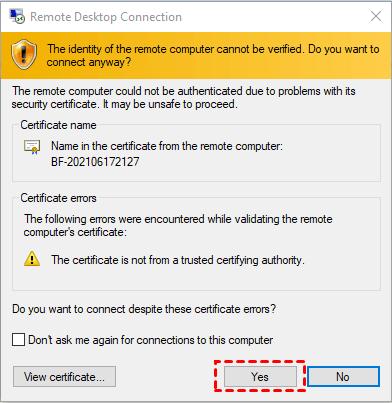
Step 4. In the authentication pop-up window, directly click Yes to successfully establish a remote connection.
Actually, Windows Remote Desktop Connection is not the only choice for Windows Server remote connection. And there are chances that you encounter issues like the remote session was disconnected License Servers. Then, you can try AnyViewer, a third-party free remote desktop software for Windows, which is even more convenient than Windows Remote Desktop Connection.
Free Windows Server remote connection software: AnyViewer
AnyViewer is perfectly compatible with multiple Windows versions, including Windows Server 2022/2019/2016/2012 R2 and Windows 11/10/8.1/8/7. It is the best alternative to Windows Remote Desktop Connection. It is superior to RDC because it can realize remote connection without IP address and user name, and has more practical functions.
Preparation work:
- Connect the client computer (the controller computer) and the host computer (the controlled computer) to the Internet.
- Download and install AnyViewer on the client computer and the host computer respectively.
Step 1. Launch AnyViewer on both computers.
Step 2. Go to Log in, and then click Sign up. (If you already have signed up on its official website, you can log in directly.)

Step 3. Fill in the signup information.

Step 4. Then you can see you successfully logged in to AnyViewer. Your device will automatically be assigned to the account you've logged in to.

Step 5. Log in to the same AnyViewer account on the two devices, then click One-click control to achieve unattended remote access.

- Notes:✎...
- You can also upgrade your account to a Professional or Enterprise plan to enjoy more rights:
- Faster file transfer speed. Transfer speed for a free account is 500 KB/s, and for a paid account is up to 10 MB/s.
- Increasing number of files transferred in a single time.
- Larger size of a single file that can be transferred.
- More devices can be assigned to the same account for unattended remote access.
- More Currently connected devices are displayed for connection history.
- Connect in privacy mode to protect privacy.
- Initial more concurrent connections to one computer.
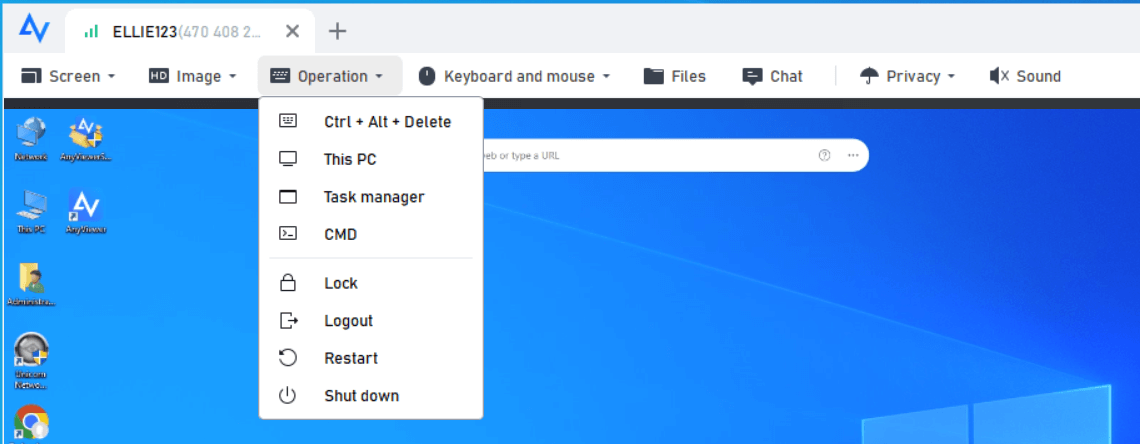
As we mentioned before, AnyViewer has more practical functions. After the remote connection is successful, you can adjust the resolutions and image quality according to your needs. You can also lock, log out, restart, shutdown computer remotely.
Conclusion
If you are planning to realize Windows Server remote connection, Remote Desktop Connection is not your only choice. You can use AnyViewer, a free yet professional remote control solution. With it, you can easily realize the remote connection, no matter whether you are using a Windows Server 2016 or Windows Server 2019.
