
9 Tested Ways to Fix Windows 10/11 Network Sharing Not Working
This post is an intuitive troubleshooting guide for Windows 11 network sharing not working. It will greatly help you if you face the same problem when you want to perform Windows file sharing. Please keep reading to learn more.
By AnyViewer / Updated on December 13, 2024
Why is Windows 11 not connecting to network share?
Hello, there are multiple PCs in our office. All of the machines were configured for network file sharing over the Internet. The Win11 PC can still see all the resources on the Win10 PC, but none of the Win10 PC can see or access the Win11 PC. I'm curious why Windows 11 network sharing not working and how I can resolve this issue."
- Question from a user
Network sharing is a Windows feature that allows you to access files from another computer. However, file sharing is never truly error-free or smooth. Windows network sharing not working can frequently occur due to incorrect system settings, problems with the current OS version, a lack of permissions, etc. Fortunately, fixing this problem is relatively easy. Please continue to read.
How to fix Windows 10/11 network sharing not working [9 solutions]
If you need help fixing network sharing not working on Windows 10/11, here are nine solutions to resolve the issue.
Solution 1. Make sure network sharing is enabled
First, you need to ensure the network sharing is enabled on your computer.
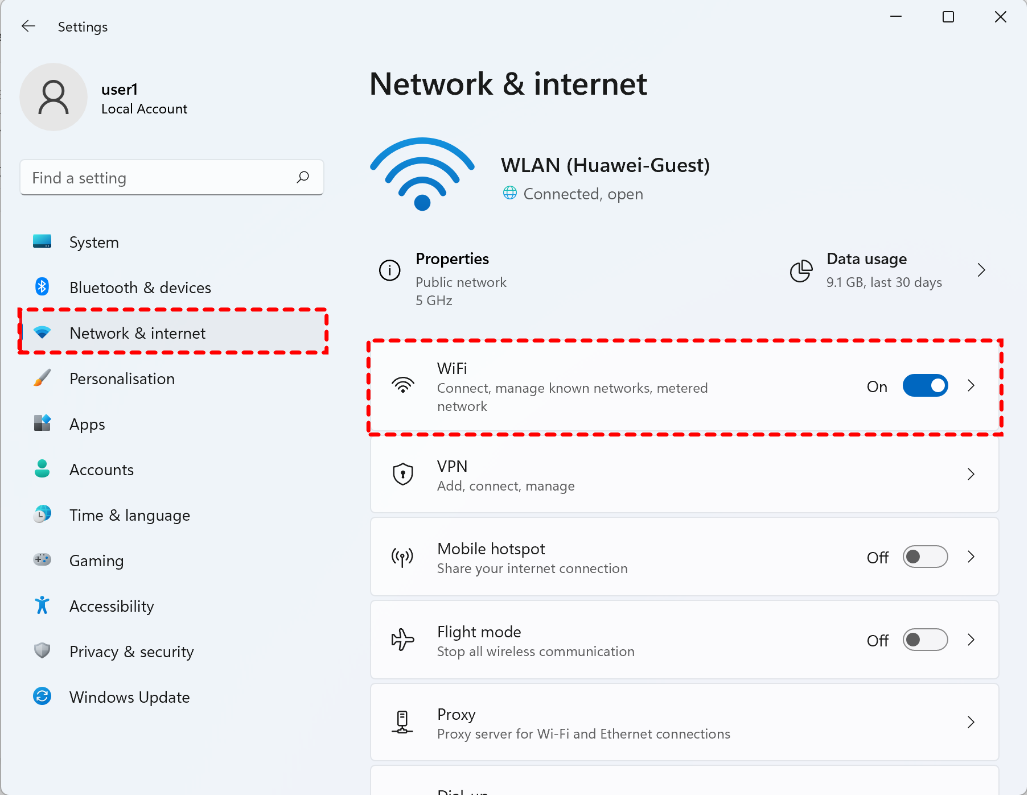
Step 1. Launch Settings, click Network & internet on the left pane, and click the Wi-Fi or Ethernet option on the right.
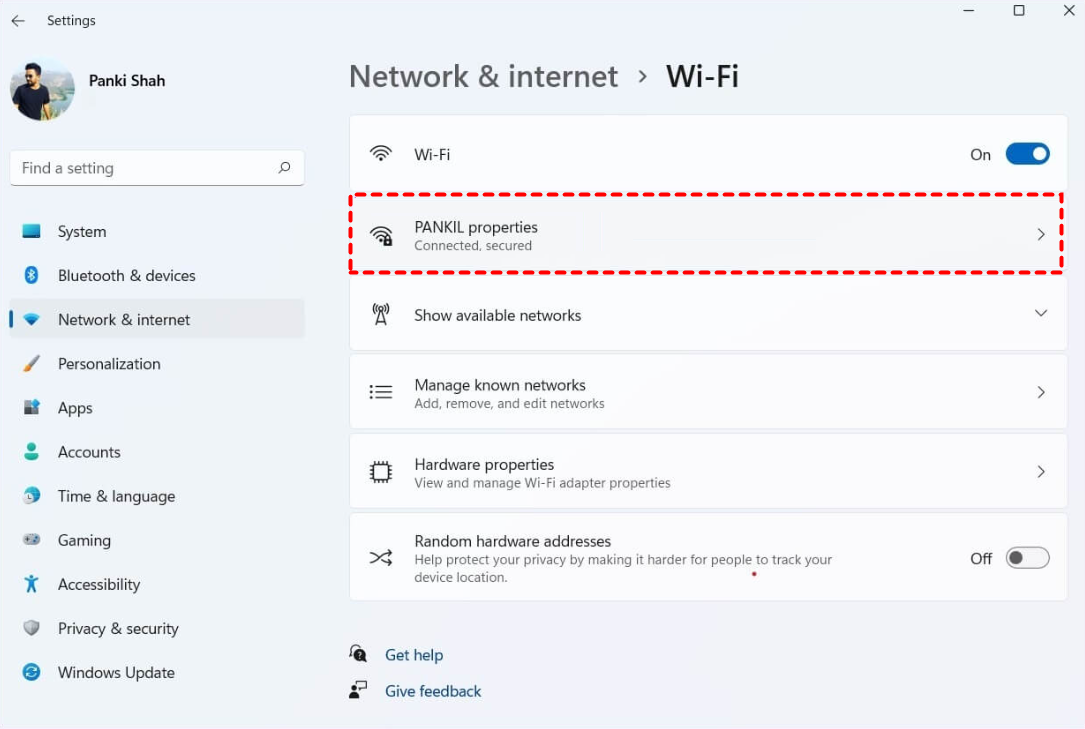
Step2. Click your connected network properties.
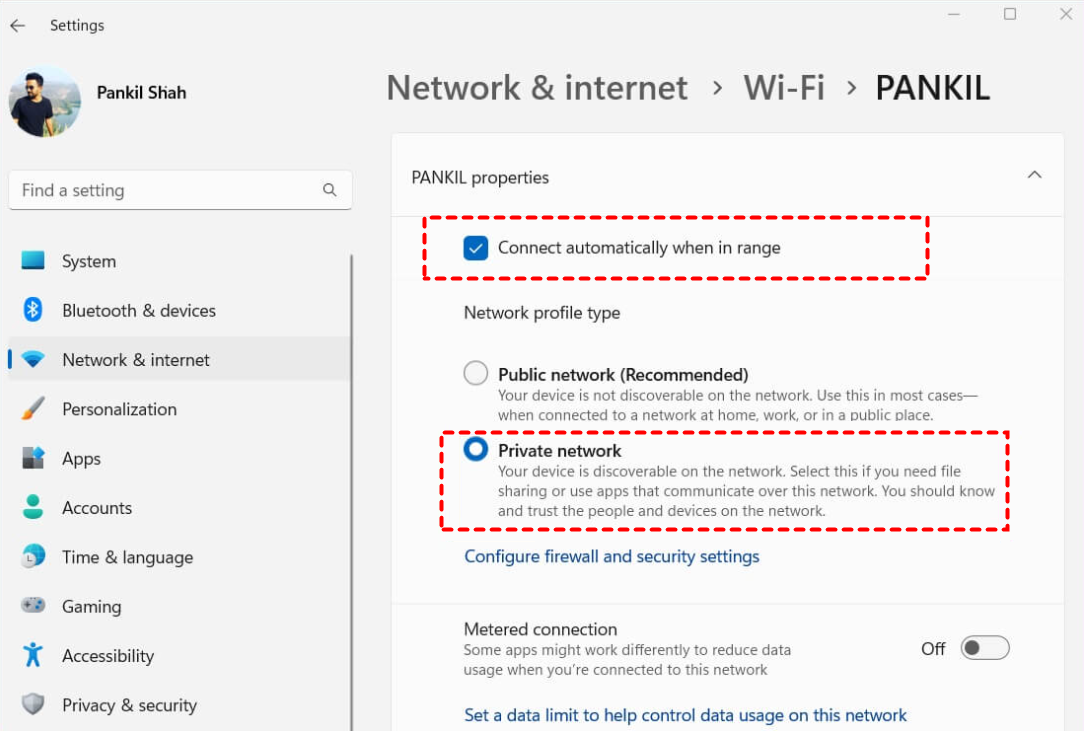
Step 3. Check Connect automatically when in range and tick Private network under Network profile type. Then you can share files with other computers on that network.
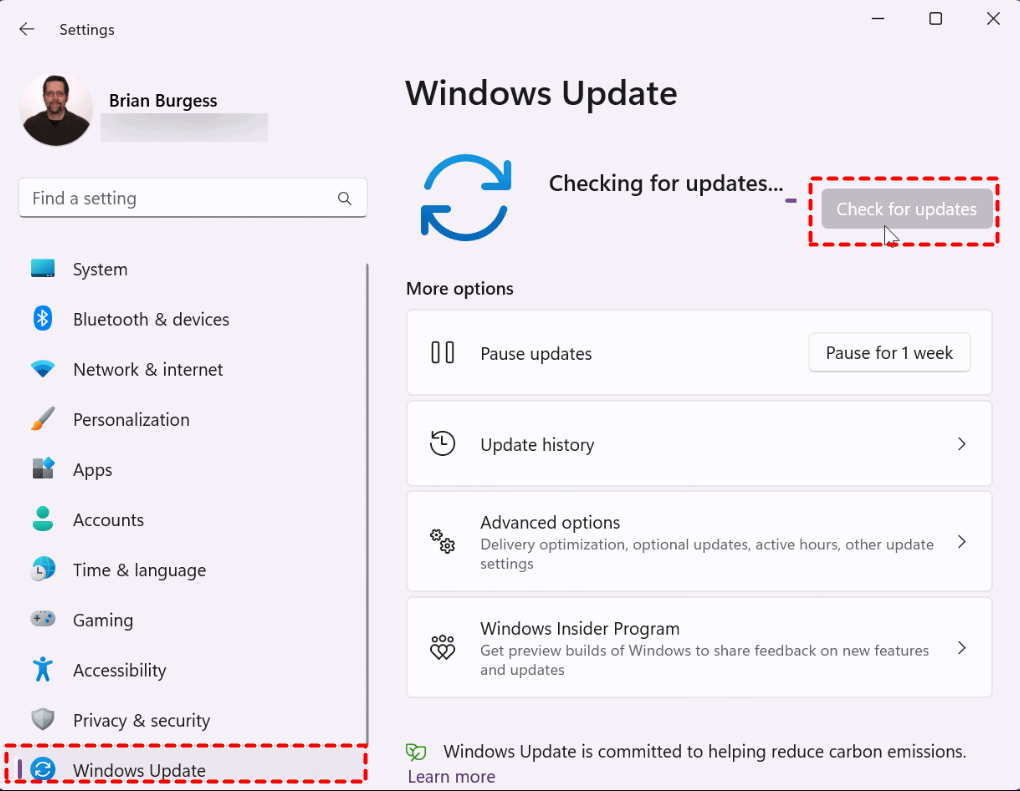
Solution 2. Check for Windows updates
To get the most recent feature upgrades, security patches, and bug fixes, you should always make sure Windows is updated.
Go to Settings > Windows Update, and click Check for updates. Download and install any available updates.
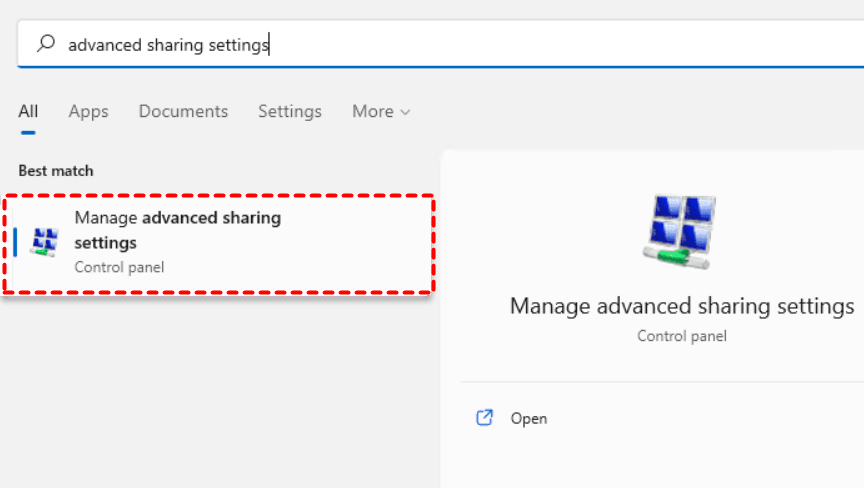
Solution 3. Check the advanced sharing settings
On Windows 11, the network and file sharing ability is turned on by default for private networks. You can recheck the settings and re-enable them if file sharing not working on Windows 11.
Step 1. Search for Manage advanced sharing settings in the search bar and open it.
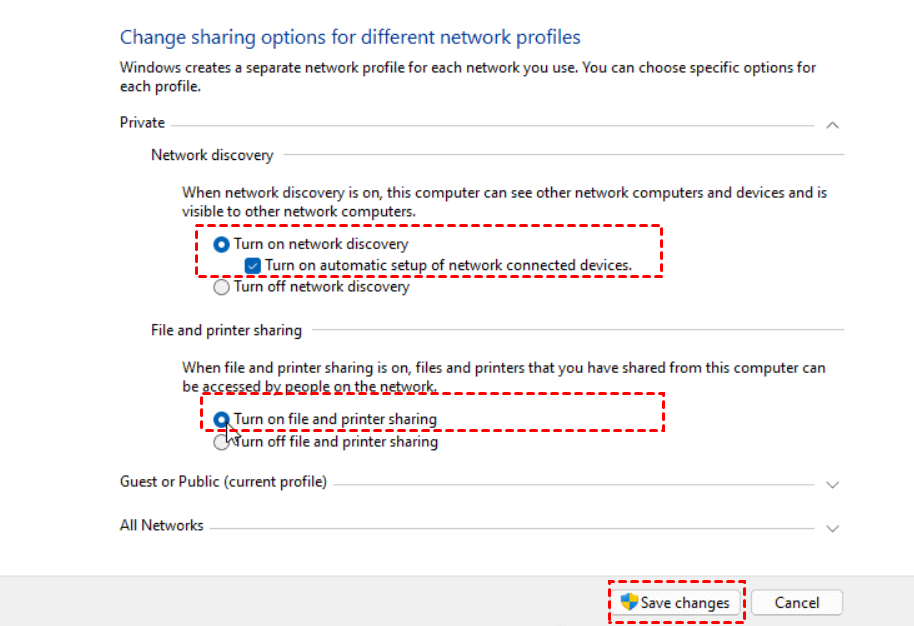
Step 2. Expand the Private menu and tick the following options. Then click Save changes.
- Turn on network discovery
- Turn on automatic setup of network connected devices.
- Turn on file and printer sharing
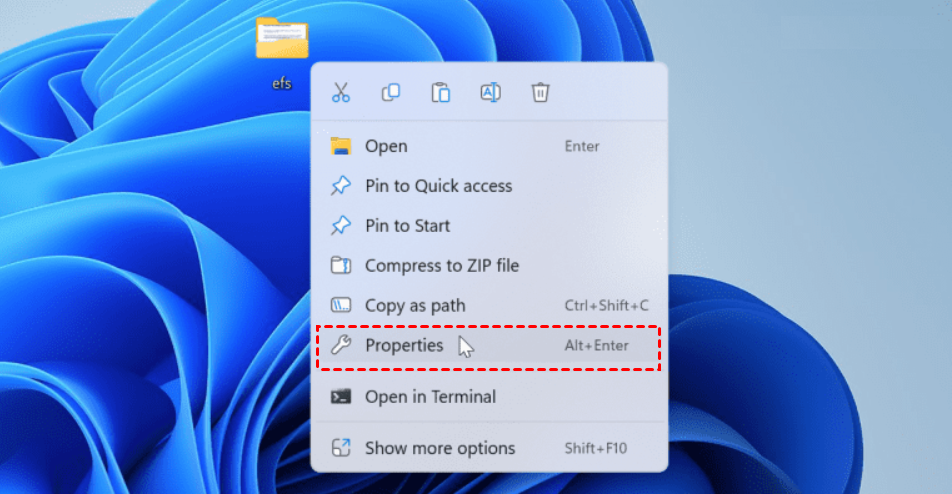
Solution 4. Give permission to the sharing folder
Another problem you can have is that the folder you want to share needs the proper settings or permissions.
Step 1. Right-click the folder you want to share, then select Properties.
Step 2. Go to the Sharing tab and click Advanced Sharing.
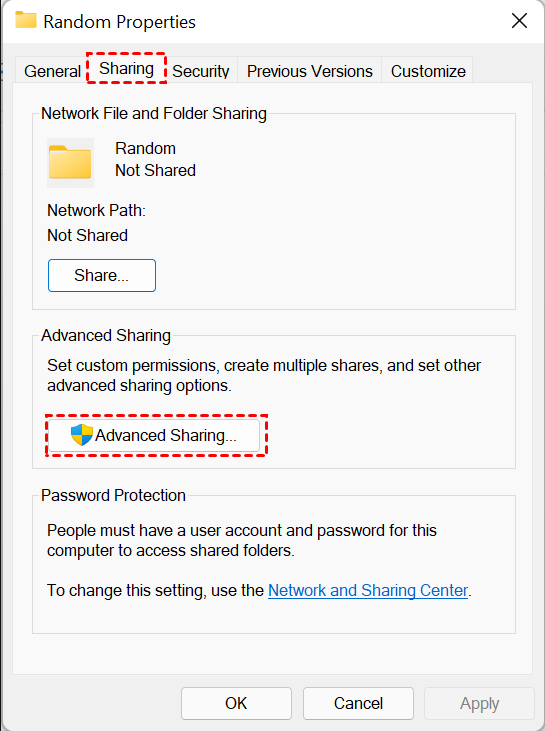
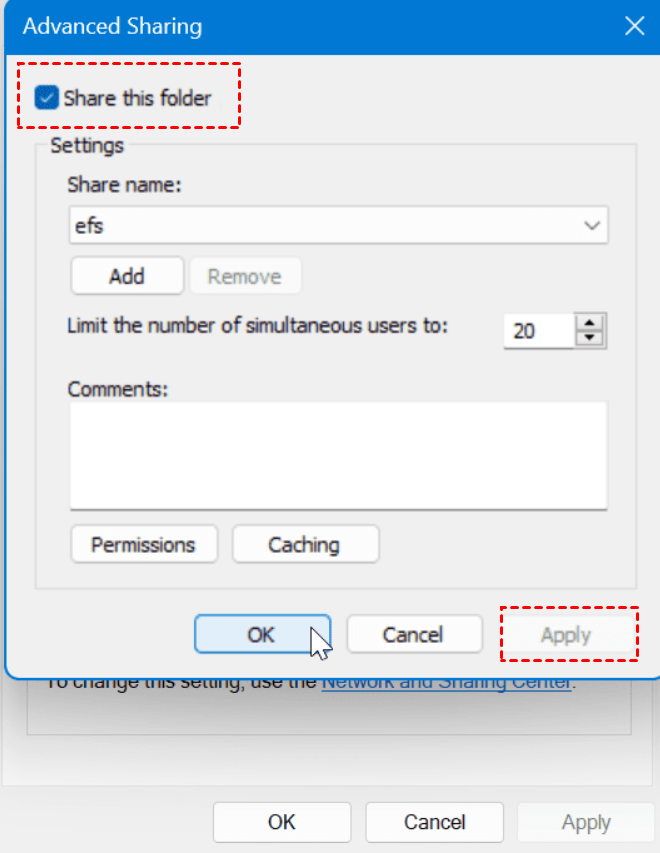
Step 3. Check Share this folder and click Apply. Then click Permissions.
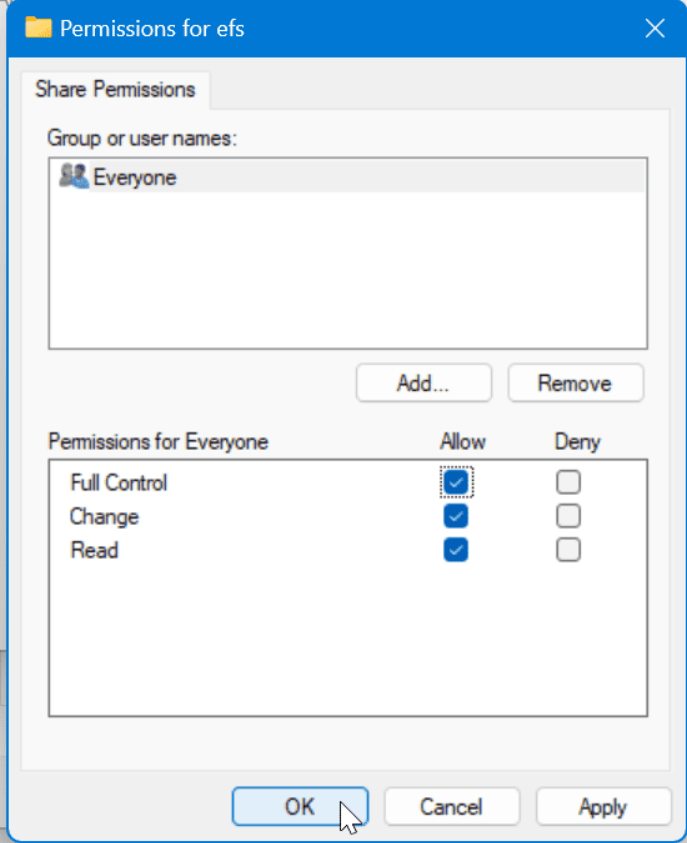
Step 4. Check the options under Permissions for Everyone.
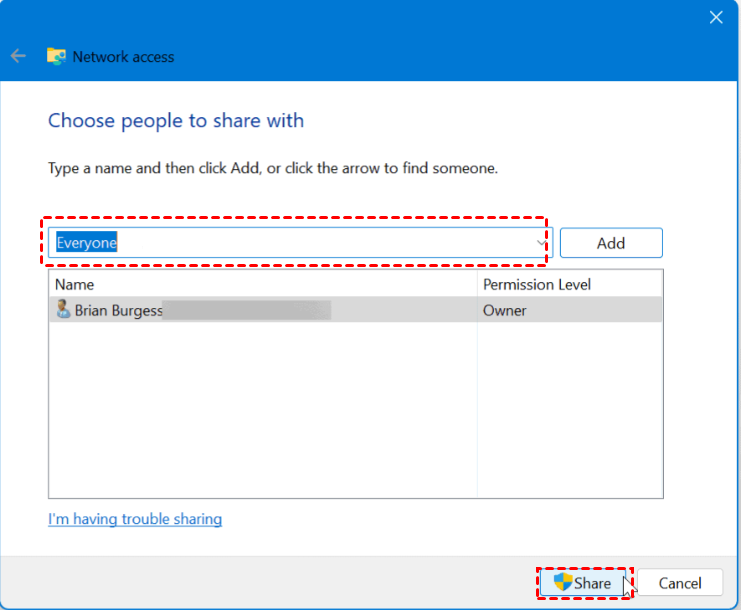
Step 5. Back to the Sharing interface and click Share.
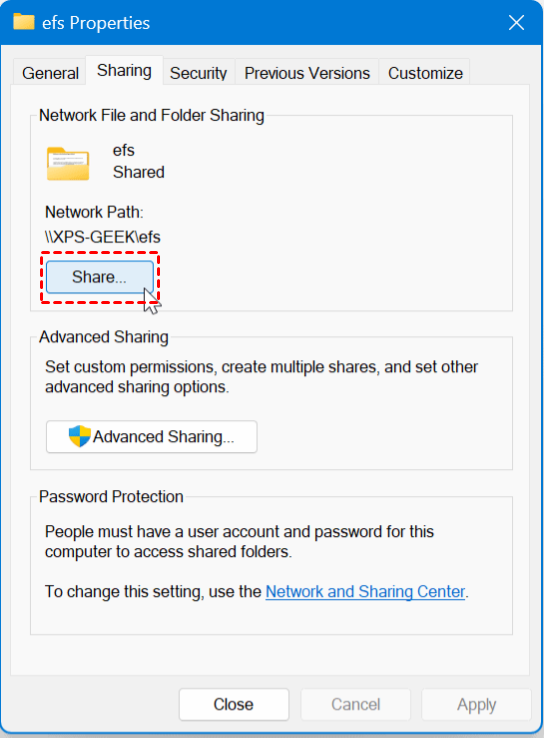
Step 6. Open the dropdown menu and select Everyone can access this folder. Then click Share.
Solution 5. Disable IPv6
You can disable IPv6 connectivity to fix the network sharing issue.
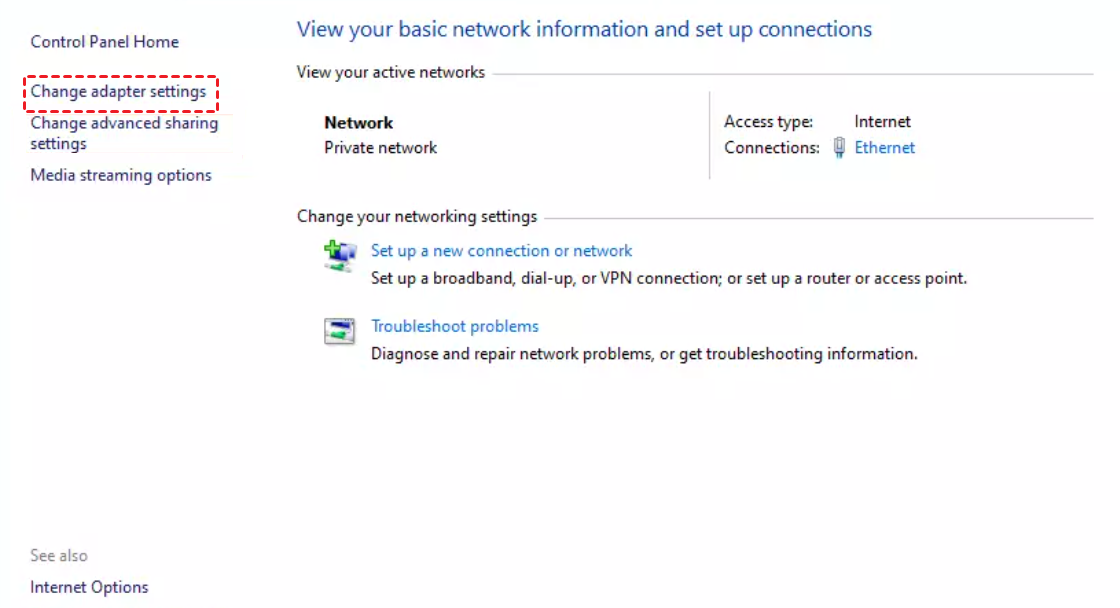
Step 1. Launch Control Panel and navigate to Network and Internet > Network and Sharing Center. Then click Change adapter settings.
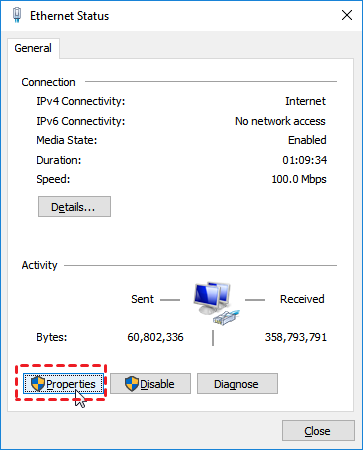
Step 2. Double-click the network connection you're using now, then select Properties.
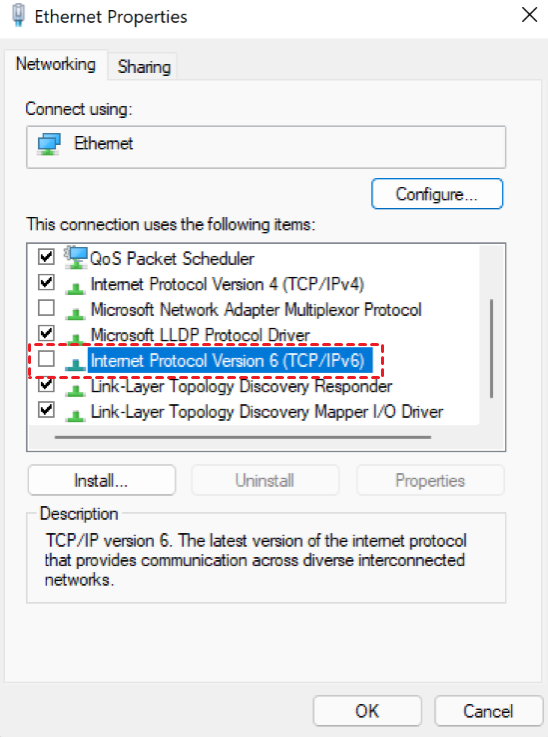
Step 3. Disable Internet Protocol Version 6 and click OK.
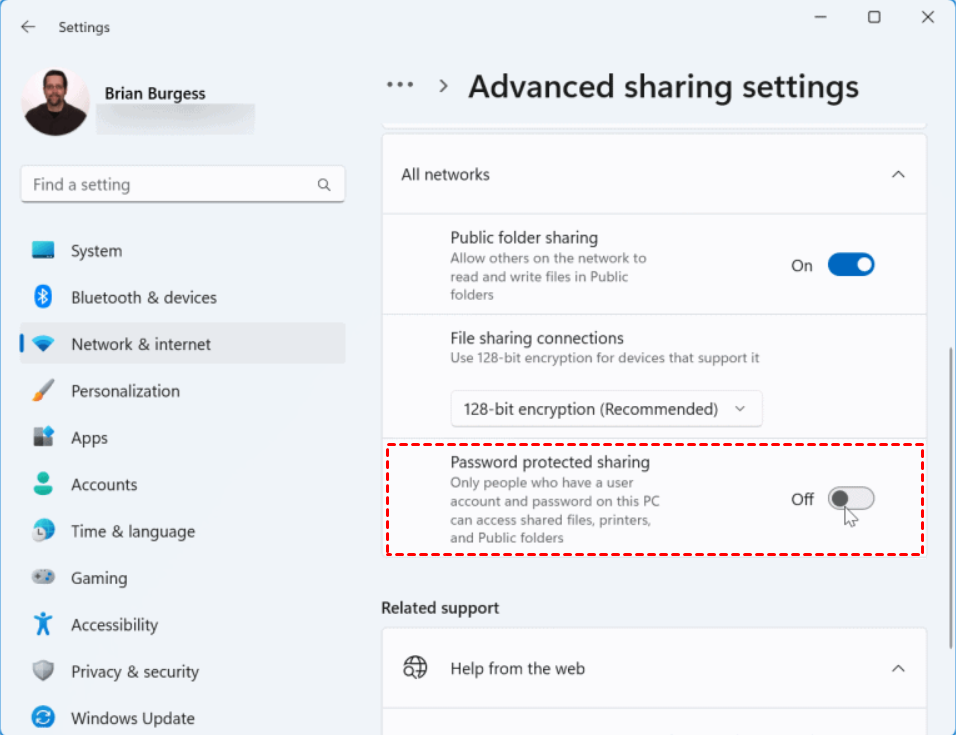
Solution 6. Disable password protected sharing
The individual attempting to access a file on the network must have the credentials if password-protected sharing is enabled. To fix the issue, you can disable it.
Search for Advanced sharing settings and press Enter. Expand All networks and turn off Password protected sharing.
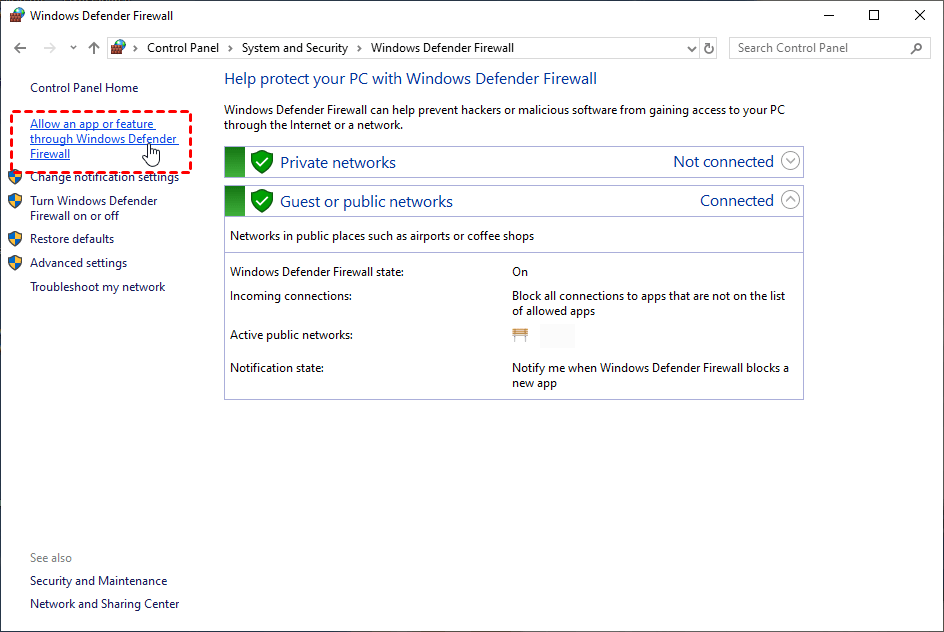
Solution 7. Allow network sharing in Windows Firewall
In addition to File Sharing, the Windows Firewall can interfere with the efficient operation of Windows features. You may always enable the option in the Windows Firewall settings to resolve the issue.
Step 1. Go to System and Security > Windows Defender Firewall in Control Panel. Select Allow an app or feature through Windows Defender Firewall.
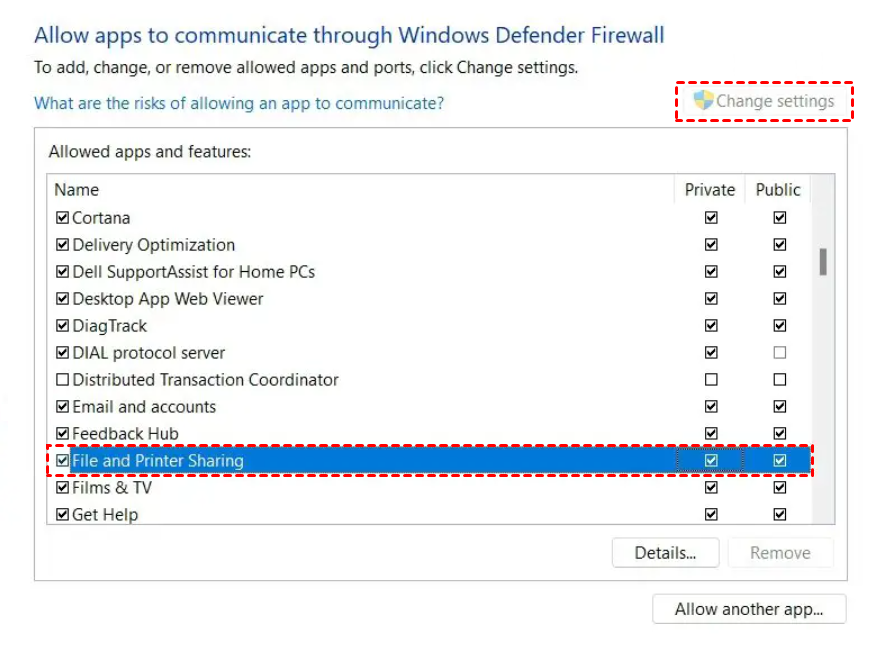
Step 2. Click the Change settings button, and check File and Printer Sharing.
Solution 8. Turn on the SMB 1.0/CIFS File Sharing Support
With the most recent Windows OS update, Microsoft has chosen to disable the SMB feature. One of the most important components of file sharing is it. However, you can still choose to enable SMB 1.0.
Step 1. Input Turn Windows features on or off in the search bar and open it.
Step 2. Locate and check SMB 1.0/ CIFS File Sharing Support. Then click OK.

Solution 9. Check the network drivers
Do you still have problems with file sharing not working Windows 11? There may be some faulty or incompatible network drivers on your PC.You could fix the issue by updating your PC's problematic network drivers in this situation.
Step 1. Press Win + X and select Device Manager.
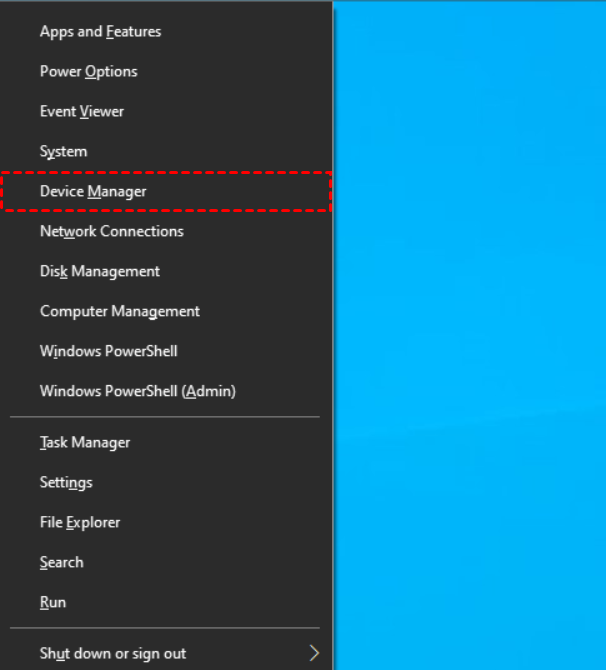
Step 2. Locate and right-click the relevant network driver and click Update driver.
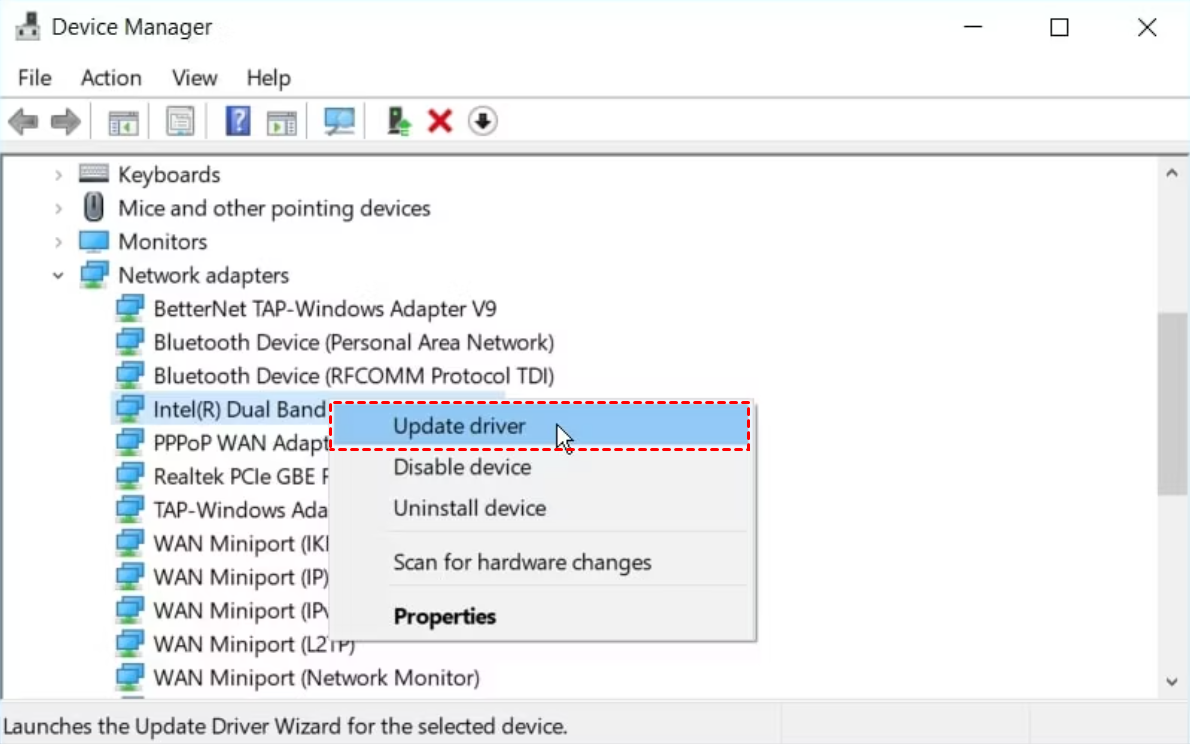
Step 3. Select Search automatically for updated driver software, then accomplish the instructions on the next screen.
Bonus tip: One-click to share your resources between devices
Suppose you need to share resources between the devices frequently. In that case, we recommend using the best remote access software AnyViewer which allows you to easily send or receive files between Windows computers with one click.
AnyViewer is not only a professional file transfer tool. It also allows you to perform unattended access, file transfer in a remote session, multiple sessions, and more, significantly improving work productivity.
You may be concerned about data security, but AnyViewer is a very secure product because it has strong end-to-end encryption with 256-Bit Elliptic Curve Cryptography (ECC) algorithm.
Download AnyViewer on your devices and see how to achieve one-click file transfer.
Step 1. On the host device, launch AnyViewer, sign up for an account by clicking Sign up, and log in.

Step 2. Utilize the same login credentials as the host to sign in to AnyViewer on the client device.

Step 3. Navigate to the Device interface to see a list of your assigned devices. Click the remote device you want to share files with, then click File transfer.

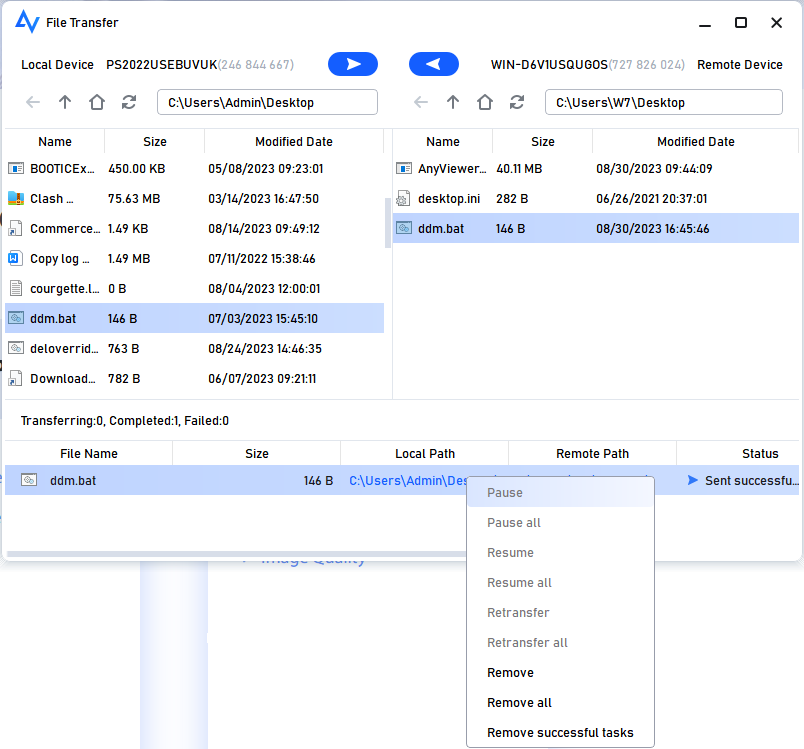
Step 4. Then a File Transfer window will show up. The remote PC is shown on the right, and the local PC is shown on the left. Click the right arrow to send the chosen files from the local PC to the remote PC and vice versa.

At the bottom of the box is the relevant status. To control the transfer procedure, use the right-click menu.
Conclusion
This post introduced how to fix Windows 11 network sharing not working. Since the Windows file sharing feature needs to be smoother, AnyViewer is a better choice to quickly and safely transfer files between devices.
