
2026 Top 9 Software to Work Remotely from Home
Want to know the best software to work remotely from home? This article introduces the top 9 best software to work remotely from home. Keep reading to discover the best work remotely software.
By AnyViewer / Updated on December 26, 2025
Which software is best for remote work?
Staying connected as a remote team can pose challenges, but the increasing availability of tools for remote teams has addressed many of these issues. The advantages of working from any location are significant, and with the right work apps, your remote team can enhance productivity and collaboration.
The best way to work remotely from home is to use remote desktop software. This type of application empowers users to access and control a computer or device from any remote location. The software facilitates tasks such as viewing the desktop interface, launching applications, transferring files, and more on remote computers as if the user were physically present.
The "best" remote desktop software for remote work depends on the specific needs and preferences of your team. Different teams may find different tools more suitable based on their workflows, collaboration requirements, and industry. In this article, we will introduce you to the top 9 best software to work remotely from home. you can choose according to your different needs.
What is the best software to work remotely from home? [9 options]
To help you make an informed choice, we've compiled a list of the top 9 remote desktop software options. Read on to find the one that suits your needs.
Option 1. AnyViewer
AnyViewer will be highly recommended. AnyViewer is a safe and free all-in-one work remotely software. No matter where you are, Any Viewer allows users to remotely view and control their computer at any time. Not only can you control your work computer remotely from home, but you can also control your computer remotely from your mobile device and vice versa.
AnyViewer offers secure remote access and support for various Windows versions, including Home and Standard, as well as iOS and Android. Its user-friendly interface requires no complex setup or learning process. Additionally, AnyViewer stands out with its comprehensive and excellent set of features.
- One-click control. Utilize one-click control for swift initiation of remote unattended access. This feature provides the flexibility to lock, shut down, or restart the remote computer with ease.
- Unattended file transfer. AnyViewer enables convenient and unattended file transfers during remote access. You can utilize drag-and-drop or click-to-transfer functionality, automatically saving files to a designated path of your choice.
- Remote sound. AnyViewer ensures seamless synchronization of remote device sounds during remote access, providing a comprehensive and immersive user experience.
- Text chat. AnyViewer enhances communication during remote access with real-time text dialogue chat, promoting efficient collaboration and productivity.
- Multi-session. With AnyViewer, you can engage in multiple remote sessions simultaneously, providing the flexibility to view different or multiple remote screens concurrently. This multi-session capability contributes to improved efficiency and multitasking during remote access.
- ...
These highlighted features represent just a glimpse of AnyViewer's capabilities, with numerous other functionalities waiting for you to explore and experience firsthand.
Crucially, AnyViewer extends free plans for both personal and commercial use, ensuring that users have access to comprehensive features without incurring additional costs. This commitment to providing robust free plans enhances the accessibility of AnyViewer for a diverse range of users.
Step 1. Commence by downloading, installing, and initiating AnyViewer on your respective devices. When prompted to log in, opt for "Sign up."

Step 2. Complete the registration form to create a new account. Ensure you use the same account to log in on both devices.

Step 3. After successfully logging in, your devices will be automatically linked to the same account.

Step 4. On your local device, go to "Device," select the target device, and click "One-click control" to establish unattended remote access.

- ★Tips: Upgrade your AnyViewer account to a professional or enterprise plan for enhanced privileges:
- Allocate additional devices for screen sharing.
- Access remote capabilities in Privacy Mode.
- Benefit from faster file transfer speeds for efficient data exchange.
- Streamline device management in organizations by creating groups to oversee a large number of devices effectively.
- ... (additional benefits not listed)
Option 2. Microsoft Remote Desktop
Microsoft Remote Desktop stands out as a powerful solution for remote desktop viewing, allowing seamless access and control of Windows-based computers from anywhere. With the Remote Desktop technology built into the Windows operating system, users can easily view the computer screen, control the mouse, and access files and software.
However, Microsoft Remote Desktop has limited support for some Windows versions, such as Windows 11/10 Home Edition. Accessing a computer from an external network requires very complex setup and operation, lacking useful features such as chatting and parsing changes during a remote session. Although it is free to use, it is not your best option.
On the remote computer:
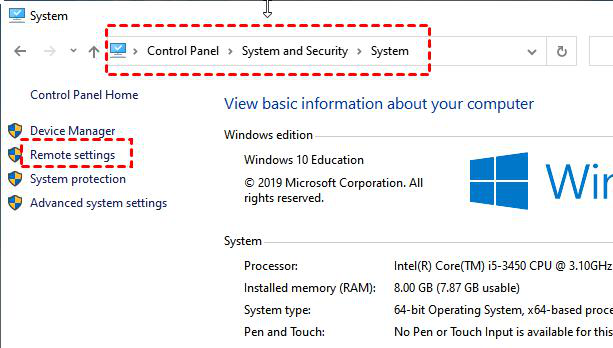
Step 1. Open "Settings" and go to "System" > "Remote Desktop." Enable the "Remote Desktop" option.

Step 2. Visit "Control Panel" > "System and Security" > "System." Under the System section, click on "Remote Settings."
On the local computer:
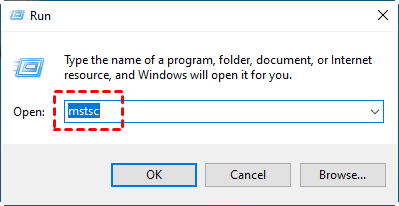
Step 1. Press "Win+R" together and type "mstsc" in the Run box to initiate the Remote Desktop connection.
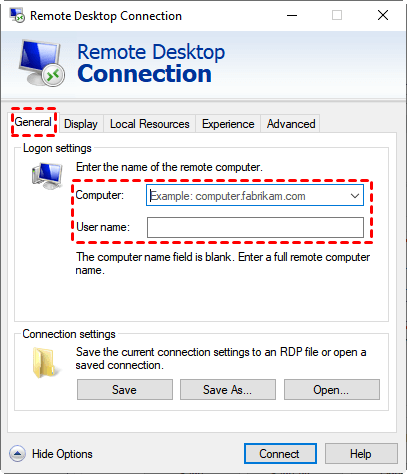
Step 2. Click "Show Options," input the IP of the target PC, and then click "Connect." Follow the prompts to finalize the remote access process.
Option 3. Chrome Remote Desktop
Chrome Remote Desktop stands out as a versatile solution in the realm of remote desktop viewing software, crafted to provide seamless access to your computer from any location. Originating from the labs of Google, this browser-centric tool empowers users to securely oversee and manipulate their desktop via the Chrome browser. Tailored especially for Windows users utilizing Chrome, it emerges as a user-friendly choice for screen sharing. Remarkably, this tool extends its compatibility umbrella to diverse operating systems such as Microsoft Windows, OS X, Linux, and ChromeOS.
Despite its versatility, Chrome Remote Desktop does come with certain limitations compared to dedicated remote desktop software. Notably, it lacks robust features such as alerts or notifications during large file transfers, potentially causing unforeseen delays. Additionally, its support for multi-monitor setups is somewhat limited, posing a challenge for users with intricate desktop configurations.
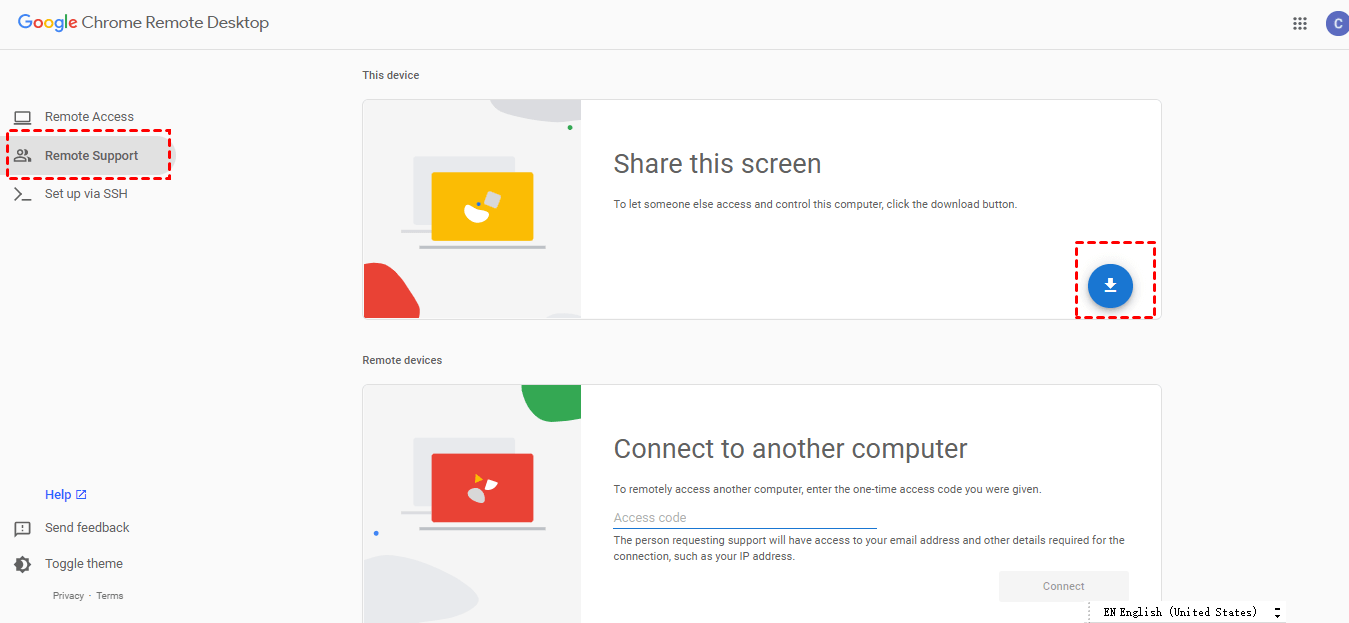
Step 1. Ensure that you are signed in to the identical Google Account on both devices. Next, Visit the Chrome Remote Desktop download page and choose "Remote Support." Click the "blue download" button to begin the download.
Step 2. Add the Chrome Remote Desktop extension to your Chrome browser by clicking "Add to Chrome."
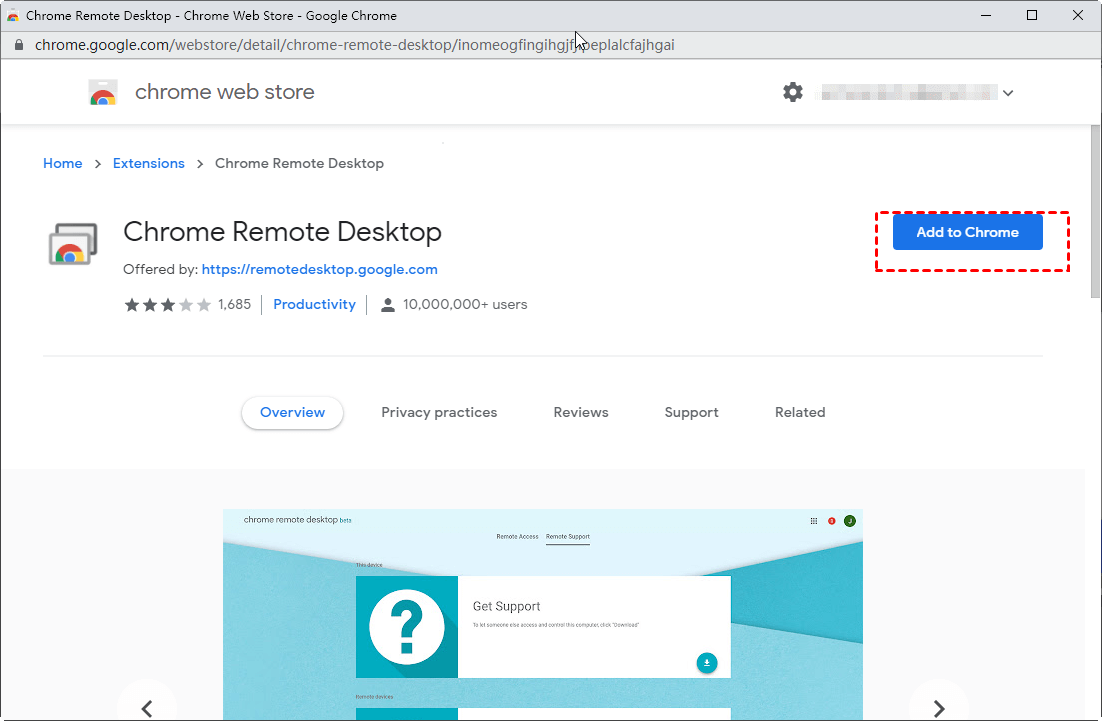
Step 3. Confirm the installation by clicking "Add extension."

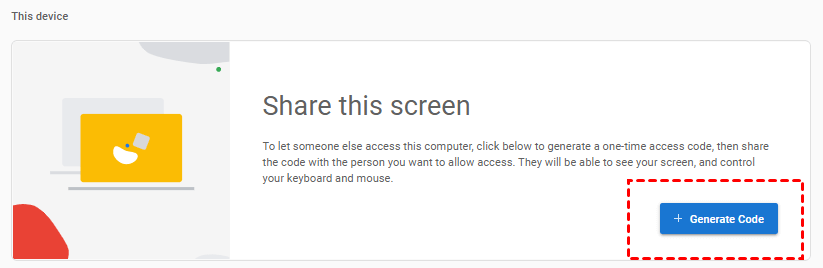
Step 4. After adding it, generate a sharing code by clicking "+ Generate Code" under "Share this screen."
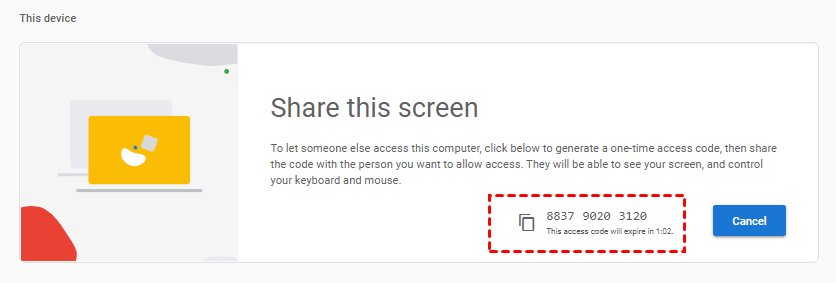
Step 5. Share the code with the PC you want to screen share with (note: the code expires in 5 minutes).
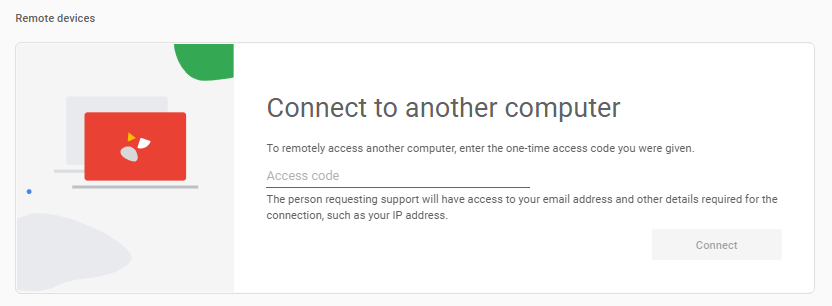
Step 6. Enter the access code on the remote computer and click "Connect."
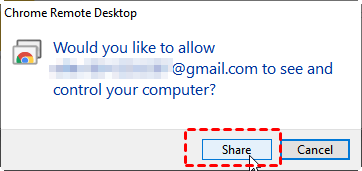
Step 7. Acknowledge the sharing invitation on your computer by selecting "Share."
Option 4. TeamViewer
TeamViewer stands out as a highly versatile remote desktop application, granting users the ability to remotely access and manage computers and various devices. This all-encompassing solution provides an array of features, including seamless file transfers, remote audio and video communication, and a diverse set of functionalities.

However, TeamViewer may pose a challenge for users in terms of cost, particularly for commercial usage. The pricing structure, while comprehensive in features, might be perceived as relatively high compared to alternative remote desktop solutions.
Users may encounter difficulties when attempting to cancel their subscription through self-service, and occasional warnings about commercial use may be triggered, necessitating periodic validation, even for individual users. Additionally, the software's resource-intensive nature, especially during high-definition remote sessions, is worth noting.
Step 1. Download TeamViewer on your device, choosing the purpose (business or personal) during the installation.

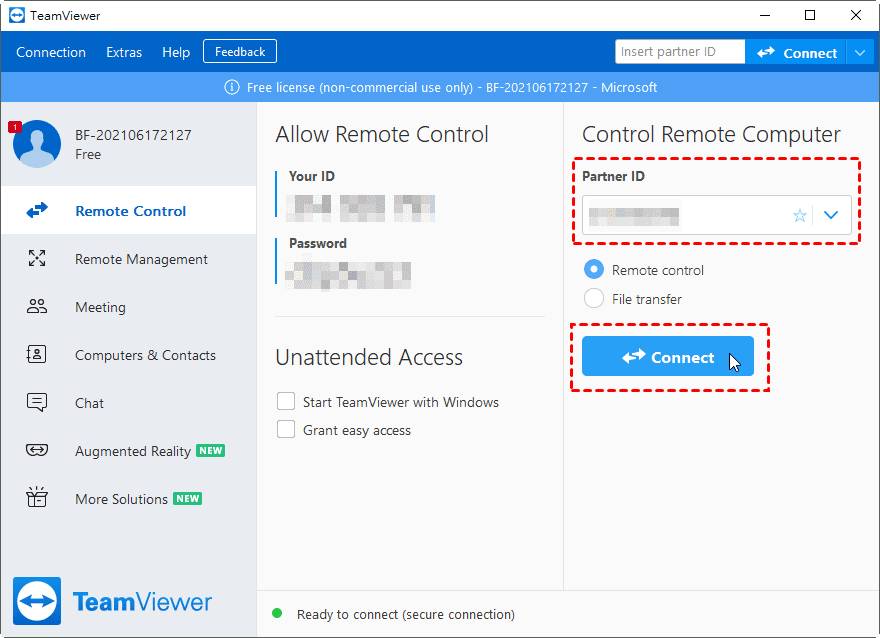
Step 2. After logging into your TeamViewer account, go to the left side of the main interface on the client computer. Click on "Remote Control," enter the host ID under "Partner ID," and initiate the connection by clicking "Connect" to establish remote access.
Option 5. Zoho Assist
Zoho Assist is a reliable and secure remote desktop solution that excels in providing both on-demand and scheduled remote connections. It caters to organizations by offering simple on-demand remote support, empowering them to efficiently enhance their service support capabilities.
![]()
While Zoho Assist offers a dependable remote desktop solution, its free version may come with limitations compared to the more comprehensive features available in the paid plans. Users might encounter connectivity issues, particularly on less stable networks, and the software may demand significant system resources, especially during HD remote sessions. Additionally, the pricing structure might be perceived as relatively higher when compared to some alternative remote desktop solutions.
Step 1. Start by downloading, installing, and launching Zoho Assist on your device.
Step 2. After logging into your account, enter the address of the remote device and click "Start Now" to initiate the connection.

Option 6. Splashtop
Splashtop excels as a remote access and assistance solution, providing a smooth and seamless experience when connecting to remote desktops. Its versatility is evident through various versions, each tailored to meet specific needs and functionalities. This flexibility empowers users to choose and customize their purchase according to individual requirements, ensuring a comprehensive and satisfying remote desktop viewing experience.

However, accessing Splashtop's complete set of premium features may necessitate a paid subscription, potentially posing a drawback for certain users. The pricing structure might be perceived as relatively high in comparison to some other remote desktop solutions. The free version may offer limited functionality when compared to its premium counterpart. Additionally, users might encounter occasional connectivity issues, impacting the overall reliability of remote sessions.
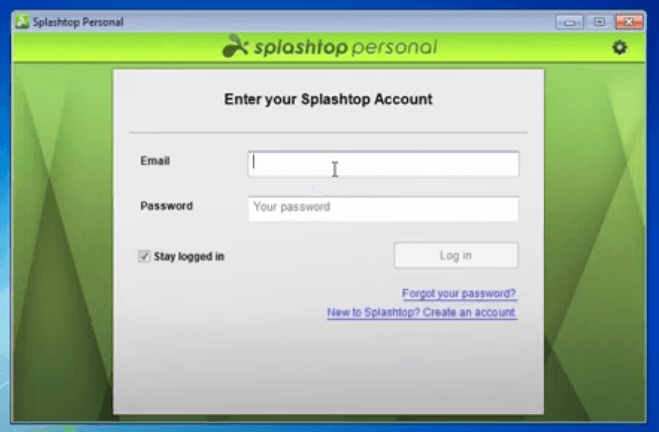
Step 1. Initiate the process by downloading and installing Splashtop on your device, then proceed with the login steps.
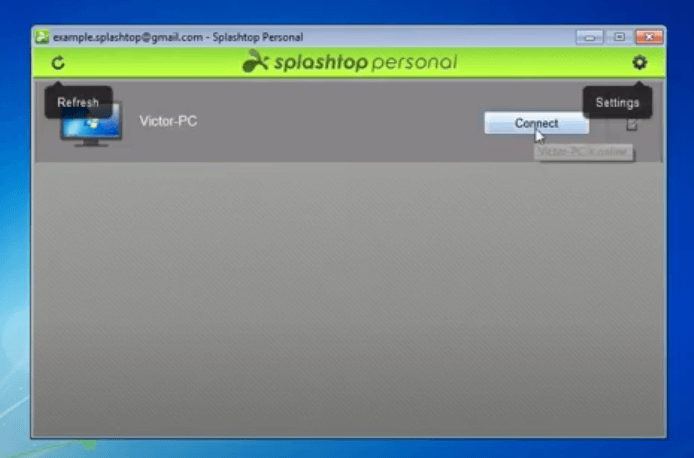
Step 2. Upon successful login, you'll gain visibility into other devices with Splashtop installed. Click the "Connect" button to establish a successful connection with a remote device on your home network.
Option 7. Zoom
Zoom is renowned for its versatile video calling features, allowing users to share their iPhone screens during a video call. If you're the meeting host, you possess the authority to grant screen-sharing permissions to yourself or other participants. This functionality extends to facilitating remote work scenarios as well.
![]()
It's crucial to note that the no-cost version of Zoom enforces a 40-minute time constraint on meetings. To conduct longer meetings, users might need to opt for a paid plan. Compared to other remote desktop software, Zoom doesn't have a relatively full range of features as well as specialization. Hence, it might not be the most suitable option for your needs.
Step 1. Install Zoom on your devices by downloading and completing the installation.
Step 2. Sign in to your Zoom account on your control device and start a meeting. Then, choose the "Share Screen" option.

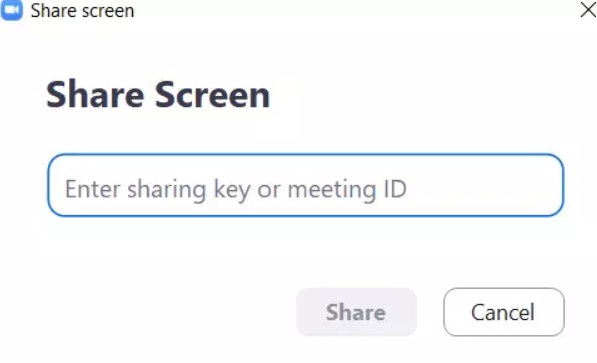
Step 3. Input your sharing key or meeting ID in the appearing window, and click "Share" to begin the screen-sharing session.
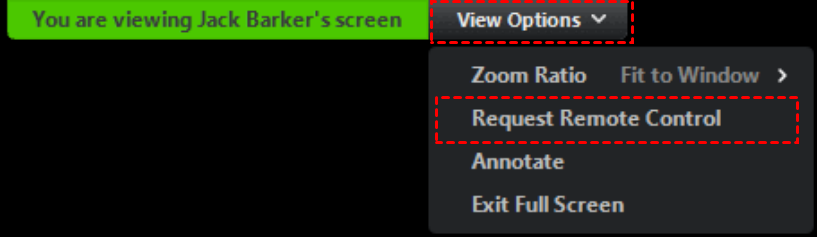
Step 4. On the client PC, select Join and input the sharing key or ID. Then, navigate to "View Options" > "Request Remote Control" in the upper toolbar.
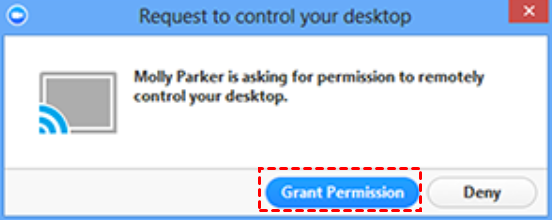
Step 5. Once the request is sent, the host will receive a notification and proceed to click Grant Permission. (If there's an extra administrator prompt, select Yes.)
Option 8. LogMeIn
LogMeIn is a leading company in the realm of remote access and collaboration solutions. Offering a suite of products and services, LogMeIn empowers both individuals and businesses to effortlessly access and oversee computers and networks from virtually any location. Tailored to facilitate remote work, IT support, and collaboration, LogMeIn boasts a comprehensive array of tools and features to elevate connectivity.

Regrettably, to unlock the full array of premium features, users might find themselves needing a paid subscription with LogMeIn, presenting a potential drawback for some. Additionally, users could encounter connectivity issues, particularly on networks that lack stability. When considering pricing, LogMeIn's structure may be perceived as relatively high compared to alternative remote desktop solutions.
Step 1. Start by downloading and installing LogMeIn on both the remote and local computers.
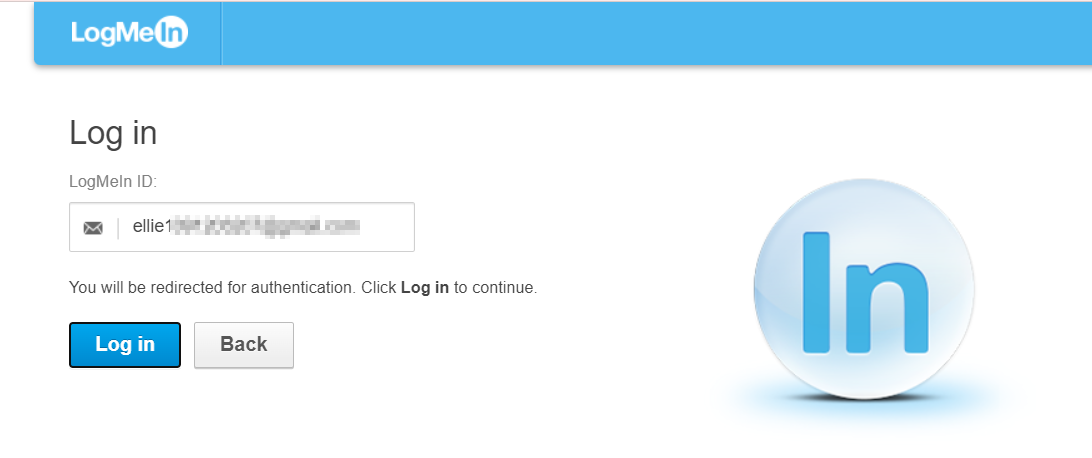
Step 2. On your local computer, go to the login page and enter your account credentials.
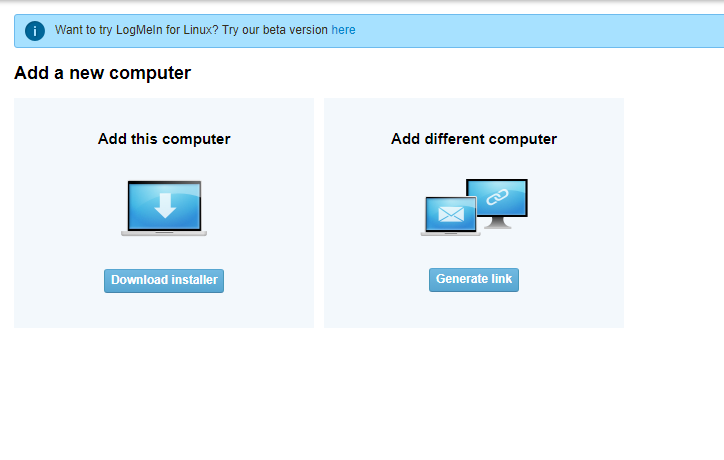
Step 3. After logging in, you'll be directed to a page where you can add a new computer.
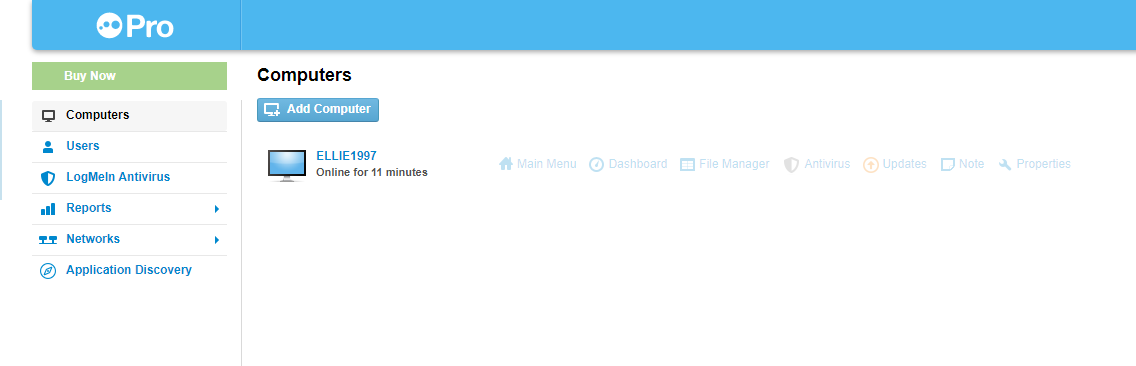
Step 4. Select the "Download Installer" option to commence the installation process on the distant computer.
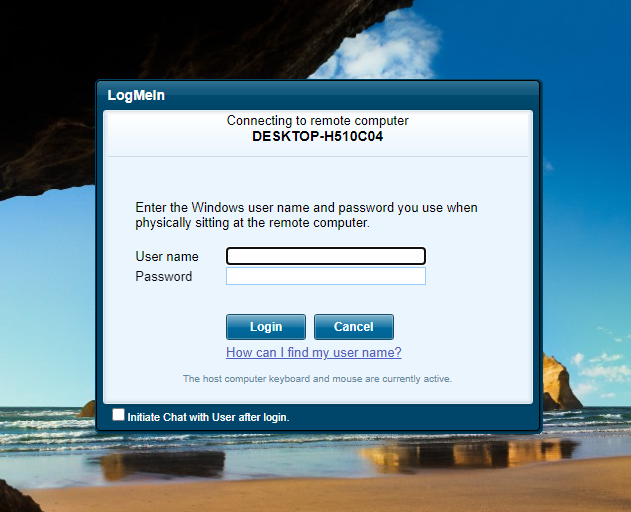
Step 5. You will then see a list with two computers on it. Click on the one you wish to access remotely.

Step 6. Enter the designated username and password to establish a successful connection for remote access.
Option 9. RemotePC
RemotePC is a reliable remote desktop software that allows secure access to your desktop computer from any remote device. It offers a comprehensive set of features similar to TeamViewer, with a particular focus on seamless connectivity between Windows devices. Notably, RemotePC presents a cost-effective option, especially if you only need to access a few of your own devices.
![]()
While the free version of RemotePC has certain limitations in comparison to the paid plans, users might encounter connectivity issues, especially on less stable networks. Additionally, some users may find the interface less intuitive when compared to alternative remote desktop solutions.
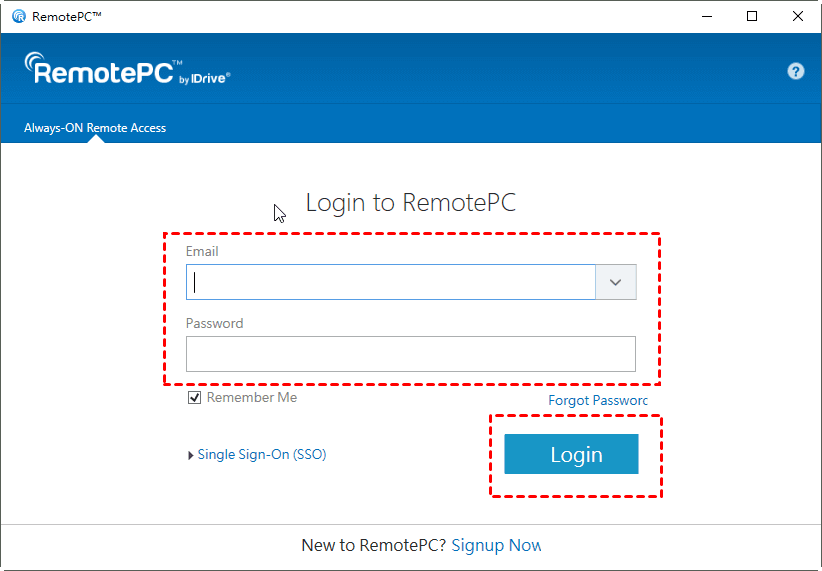
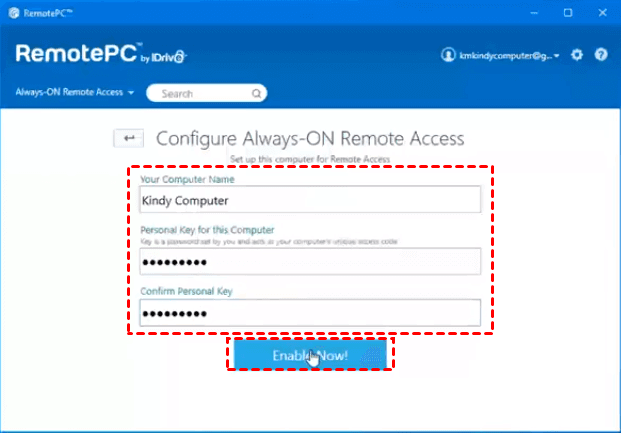
Step 1. Start by downloading and installing RemotePC on your device. After launching the application, enter your account credentials to sign in.
Step 2. Input your personal key and computer name to enable remote access, then click "Enable Now."
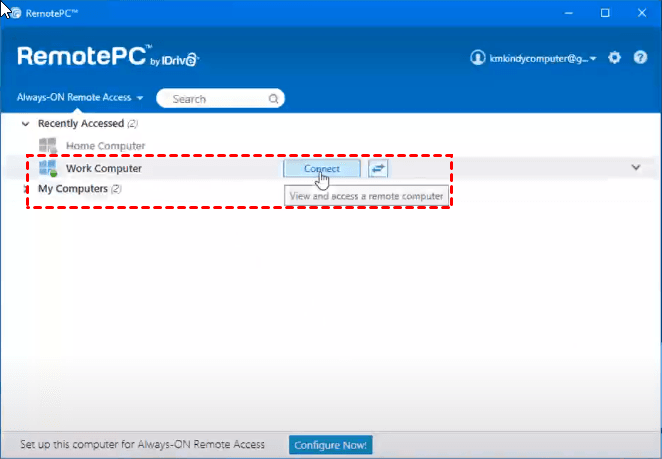
Step 3. On your local PC, launch RemotePC, sign in to your account, and find the remote computer you want to connect to. Initiate the connection by selecting "Connect," then input the personal key of the remote computer within the ensuing pop-up window to establish a seamless remote connection.
Conclusion
In this guide, we present the top 9 best software to work remotely from home, outlining their pros and cons to assist you in selecting the most fitting solution. AnyViewer stands out among its counterparts, providing not just free plans for personal and business use but also comprehensive features and permissions tailored to user needs, all without imposing overly restrictive limitations. In conclusion, AnyViewer emerges as the preferred choice for individuals in search of the best software to work remotely from home.
