
Answered: Is There A Quick Assist for Mac?
Do you want to use Quick Assist on Mac? Here in this post, we’ll uncover the answer of the question “Is there a Quick Assist for Mac”. Let’s find the answer together.
By Ellie / Updated on December 17, 2024
Can you use Quick Assist on a Mac?
I'm curious if it's possible to use Quick Assist, a Windows feature for remote assistance, on a Mac computer. Does anyone know if there's a similar tool or workaround available for Mac users? I'd appreciate any insights or recommendations you might have. Thanks!"
- Question from Microsoft Support

Is there a Quick Assist for Mac?
Quick Assist was created as a Windows-to-Windows support application. It only works when connecting from one Windows 10/11 computer to another Windows 10/11 computer remotely.
According to Microsoft, somehow, you can use the Web version of Quick Assist on MacOS. Quick Assist web app supports Mac with browsers Safari 13.1+ and Safari 14+. If you go to the Microsoft Quick Assist web page on your Mac, you’ll see the following interface asking you to enter the 8-digit security code that was provided to you to get assistance:
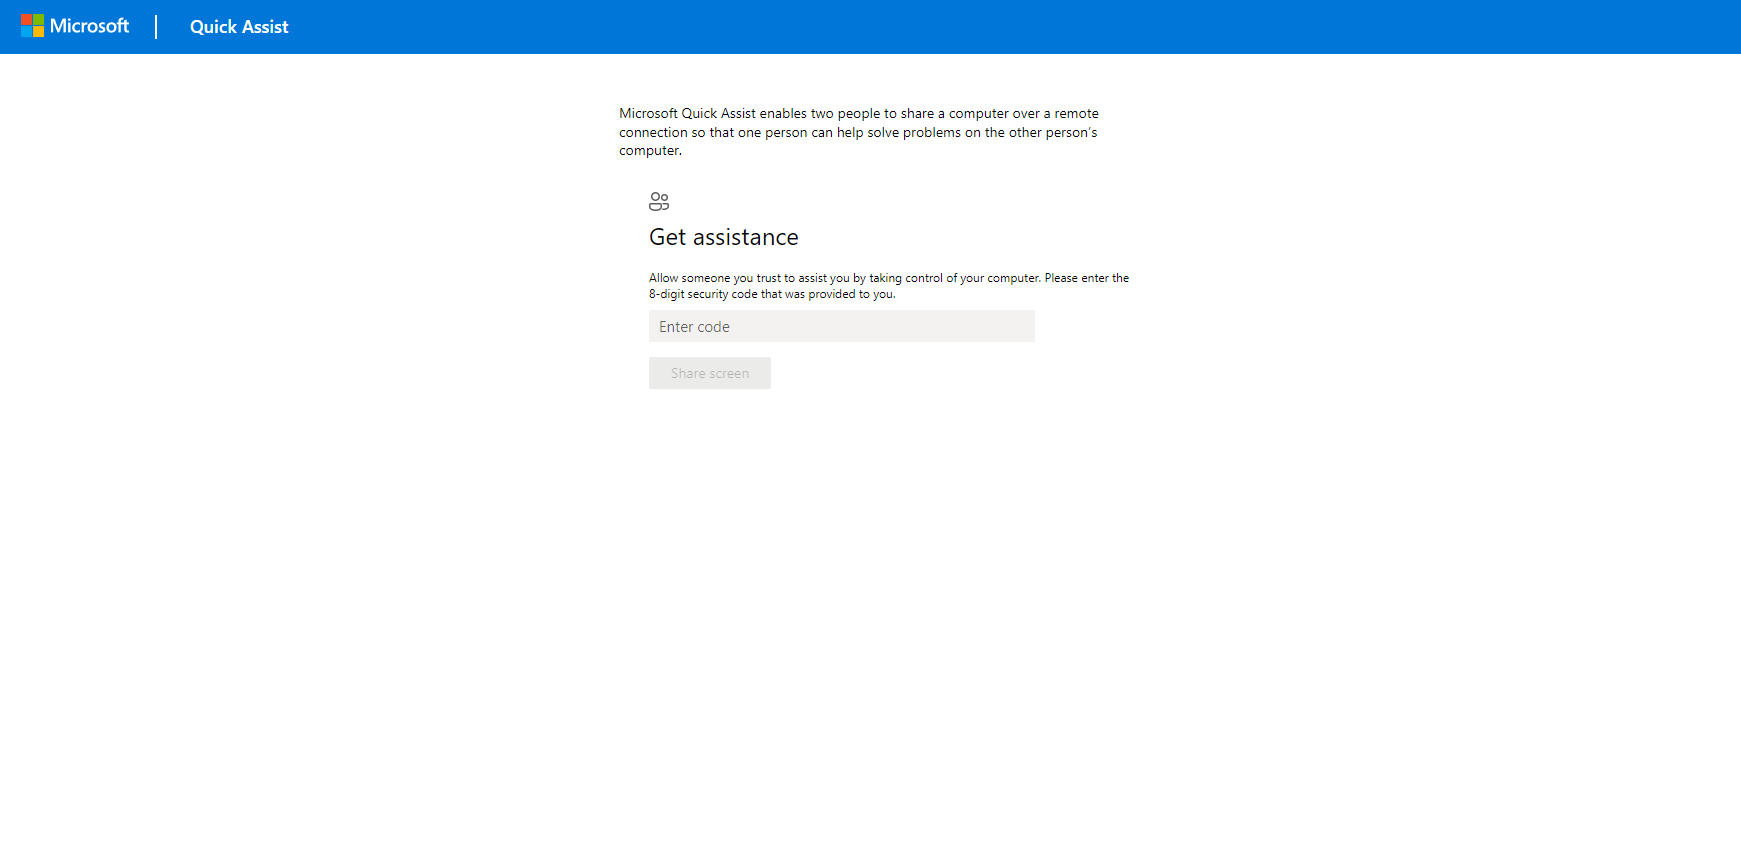
Some of you may wonder why it is asking for an 8-digit code and the app only provided a 6-digit code. Because the Quick Assist web app is not designed for regular users. Only authorized Microsoft Representative/Support can generate 8-digit codes. So basically, the web app can be used if they (MS Support) want to remote our PC, but we can’t use it if we want to remote someone’s PC.
In short words, there’s no Windows Quick Assist for Mac that was designed for regular users.
4 alternative ways to provide remote assistance from Mac to Mac
Unfortunately, there isn't a Quick Assist option for Mac users. Nevertheless, Apple offers several methods for viewing and controlling another Mac through a network connection. Here are the top four ways:
Way 1. AnyViewer [Best option]
For fast and stable remote assistance between Mac computers, it is recommended to use the free remote support software AnyViewer as an alternative to Quick Assist.
Compared to other popular alternatives, it has the following advantages:
- Multi-Platform Support: AnyViewer is compatible with a wide range of platforms, including Windows, macOS, iOS, and Android. This flexibility makes it an ideal solution for accessing and supporting a Mac from various devices.
- Feature-Rich: Packed with a variety of useful tools, AnyViewer provides features such as screen sharing, text chat, mobile screen mirroring, multi-session support, and remote rebooting. These capabilities make it an all-in-one solution for remote support and collaboration.
- Commercial Use: AnyViewer offers both free and premium versions, with the paid versions unlocking additional features and customization. It’s well-suited for both personal use and business environments.
- Security: AnyViewer uses robust encryption protocols to safeguard remote connections, ensuring secure data transfer and protection from unauthorized access.
Step 1. Download, install, and open AnyViewer on both Macs.
Step 2. On the local Mac, click "Log in," then select "Sign up." Afterward, log in using the same account on the remote Mac.

Step 3. On your local Mac, select the remote Mac from the device list and click on "One-click control" to enable unattended remote support.
To offer on-demand remote support, you can send a control request to the remote device or connect using a security code.
Way 2. Message app
For those who don't want to mess with system settings, the Messages chat app may be the most convenient option. Both Macs used for remote assistance require Apple ID accounts and must be logged into the Messages app.
If you are the one providing the technical assistance:
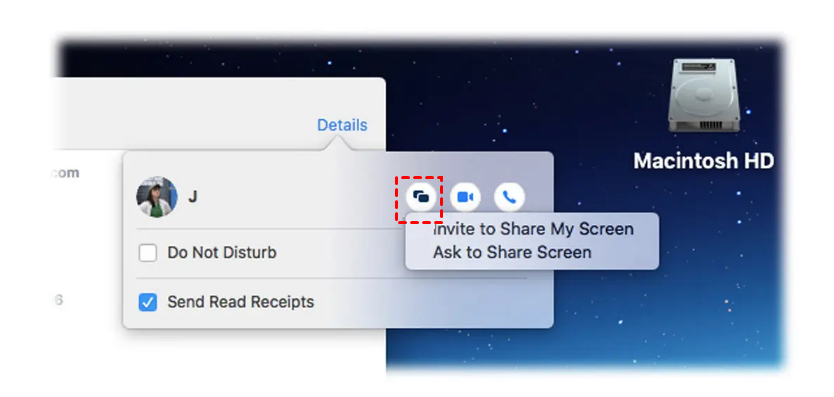
Step 1. Launch Messages on your Mac. To begin a conversation, click the name of the person you want to help or type a new message. Click the Details button in the upper right corner of the window. When you click the Screen Share button, which looks like two overlapping rectangles, and select Ask to share screen.
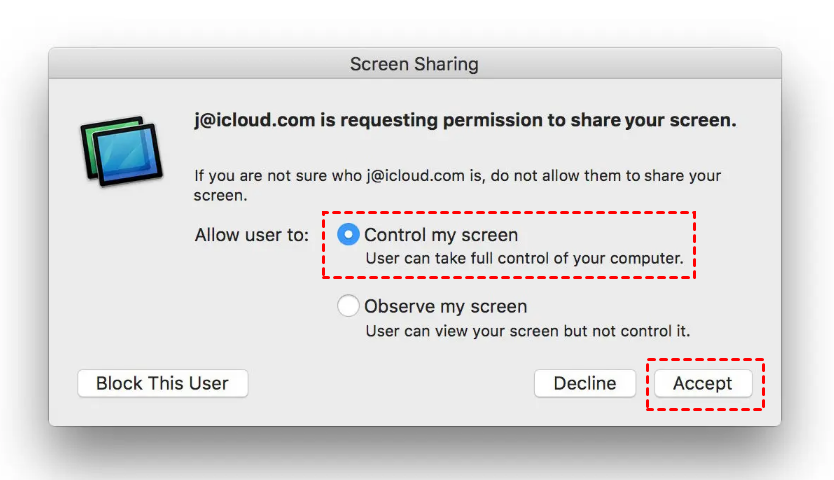
Step 2. On the receiver’s Mac, tick Control my screen, and then click Accept to complete.
If you’re the one needing the help, you can also reach out via a Messages buddy and use the “Invite to Share My Screen” option.
Way 3. Screen Sharing app
To remotely control another Mac, utilize the Screen Sharing app on your computer. This built-in utility on Mac computers enables users to view and control another Mac's screen over a network connection. It facilitates collaboration, troubleshooting technical issues, or providing assistance by accessing the desktop interface of the remote Mac from a different location.
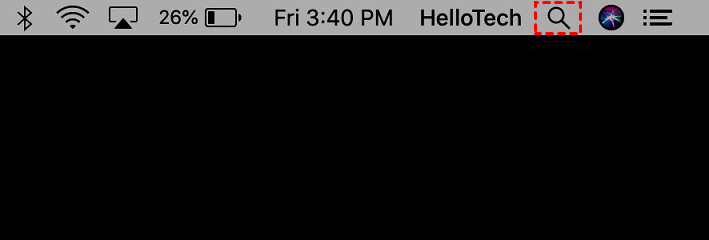
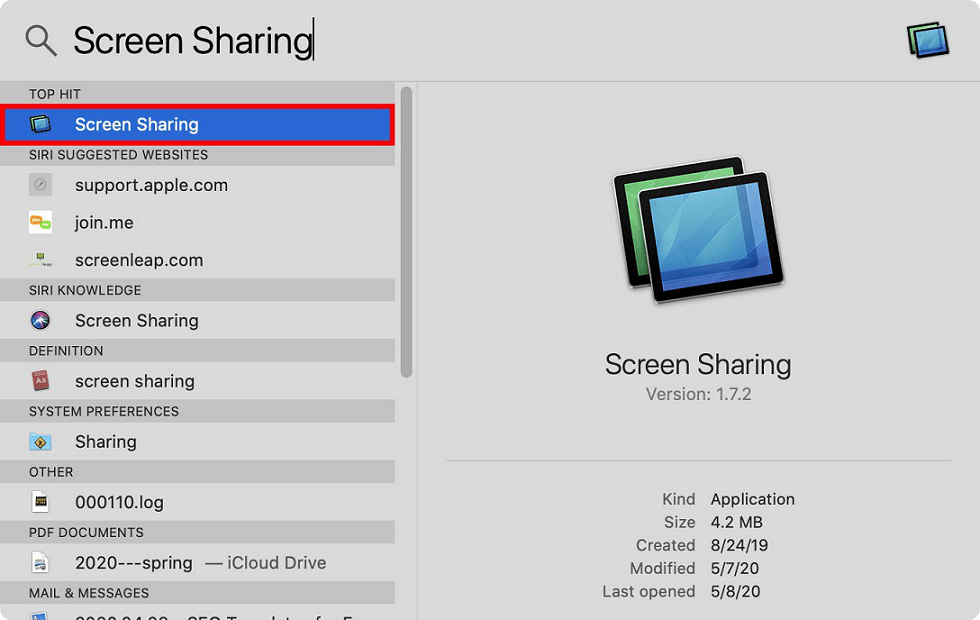
Step 1. Start by opening Spotlight on your Mac. You can do this by clicking the magnifying glass icon at the top-right corner of your screen. Alternatively, press the Command + Space Bar keys simultaneously on your keyboard.
Step 2. After that, simply type "Screen Sharing" into the search bar and hit "Enter". Alternatively, you can click on the app using your mouse.
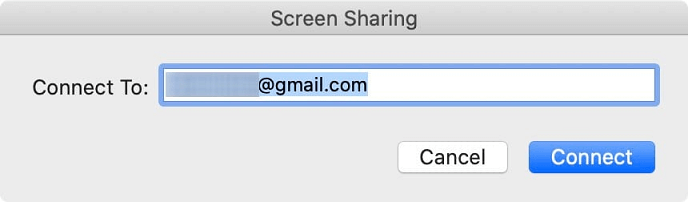
Step 3. Enter the Apple ID of the other Mac you want to access, then click "Connect."
If you're not sure about the Apple ID, find it by clicking the Apple logo at the top-left corner of your screen, then go to "System Preferences" > "Apple ID".
Step 4. The other Mac will then receive a notification in the top-right corner of its screen.
Step 5. Click on "Accept".

Step 6. Opt for "Control my screen".
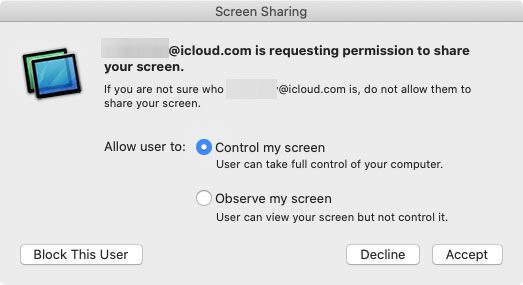
Step 7. After the other Mac clicks "Accept," you'll be able to control its screen from your Mac and provide remote support.
Way 4. Apple Remote Desktop app
Apple Remote Desktop is the built-in remote access solution in macOS, developed by Apple Inc. It's a robust tool enabling users to manage and control Mac computers remotely within a network. Administrators can leverage its capabilities for tasks like software deployment, remote assistance, system monitoring, and maintenance.
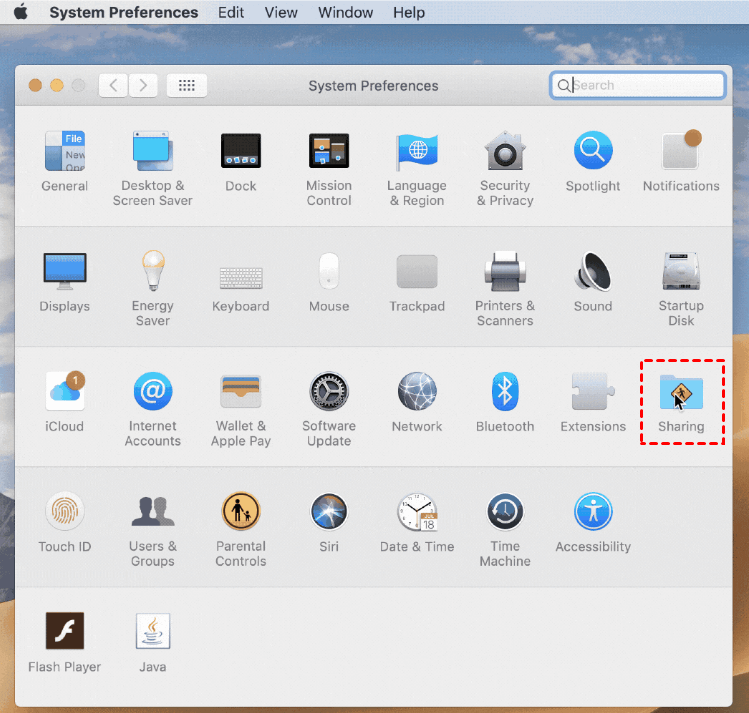
Step 1. Navigate to "System Preferences" and select "Sharing."
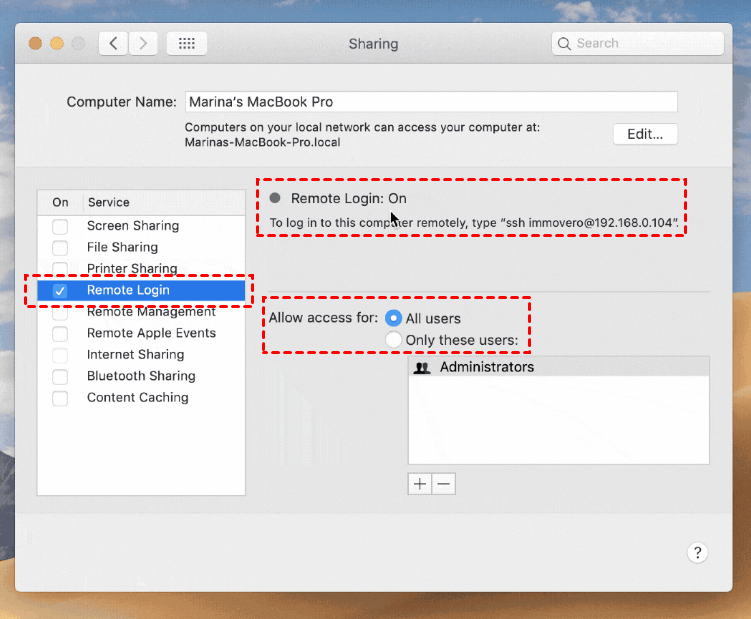
Step 2. Check the box next to "Remote Login" and choose "Allow access for: All users."
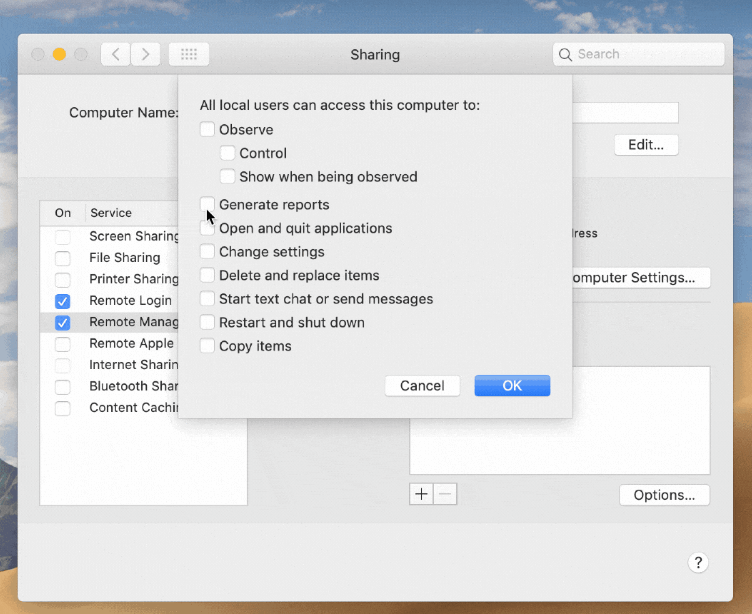
Step 3. Next, check the box next to "Remote Management" and configure the settings according to your preferences, including user access permissions.
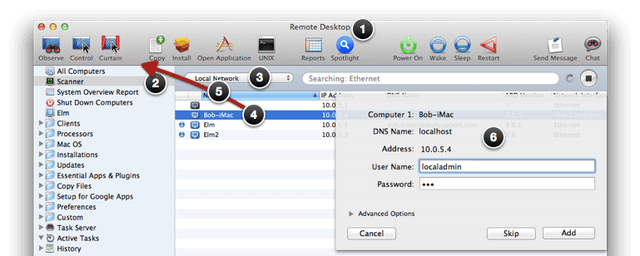
Step 4. Open the Apple Remote Desktop application on your administrator Mac.
Step 5. Click on "Scanner."
Step 6. Choose "Local Network."
Step 7. Select the computer(s) you wish to add.
Step 8. Drag the selected computers to "All Computers" or a specific group on the sidebar.
Step 9. Enter the standard username and password, then click "Add."
Step 10. Once the remote computers are added, select the one you want to control from the list and click the "Control" button.
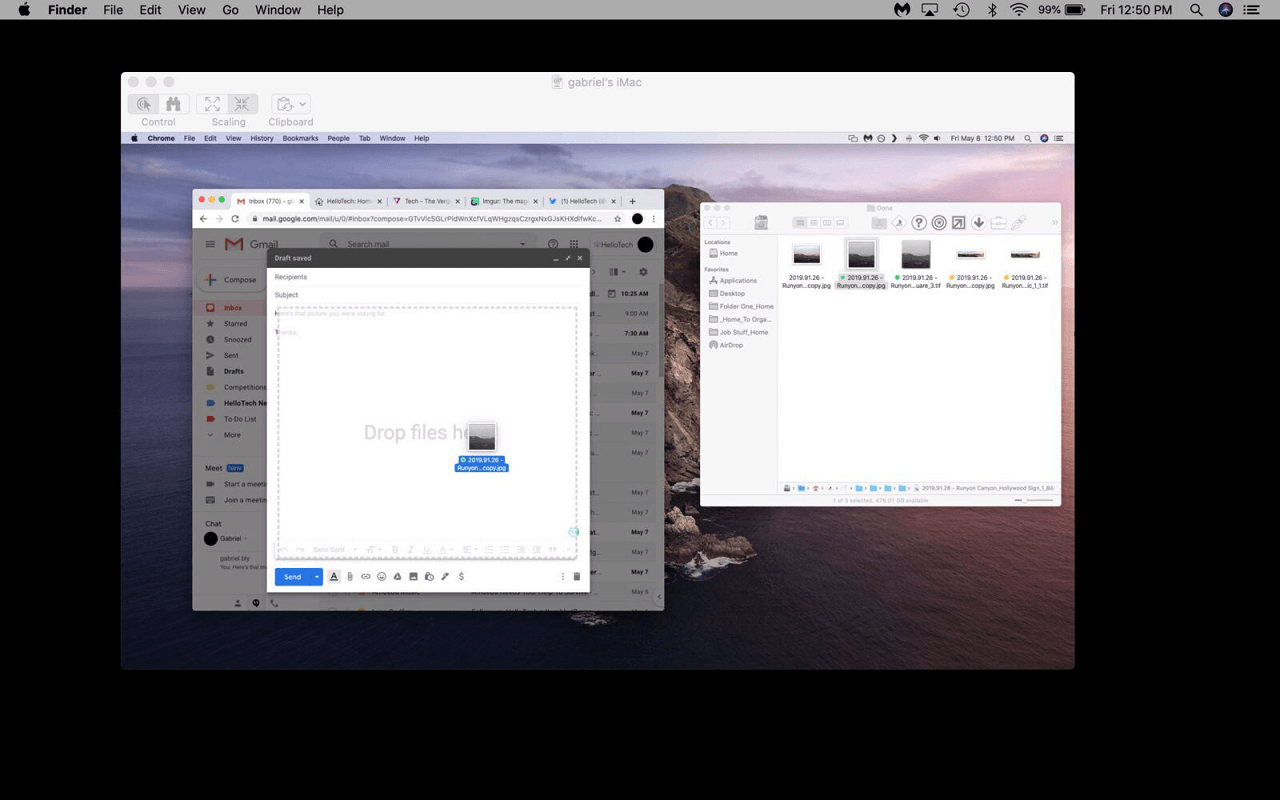
Step 11. After establishing a connection, you will gain remote control of the selected Mac computer.
The bottom line
Is there a Quick Assist for Mac? In conclusion, while Quick Assist is not available for Mac users, there are several effective alternatives for providing remote assistance. AnyViewer stands out as the best option for seamless Mac-to-Mac support, offering robust features like multi-platform compatibility, security, and ease of use. Other options include Apple's built-in tools like Messages, Screen Sharing, and Apple Remote Desktop, each catering to different needs. By choosing the right method, Mac users can ensure smooth remote assistance and troubleshooting across devices.
