
Tutorial: How to Remote Access Mac Not on Same Network
This post focuses on introducing how to remote access Mac not on the same network. If you're looking to access a remote Mac from another location, continue reading to find a step-by-step tutorial.
By Ellie / Updated on December 17, 2024
How do I remote into a Mac on a different network?
How do you remote into another Mac outside of your home network? Need to set this up to be able to help my parents. Any help?”
- Question from Reddit
In today's digital age, remote access has become an indispensable tool for individuals and businesses alike. Whether you're a freelancer, a remote worker, or managing a team from a distance, the ability to access your Mac remotely can greatly enhance productivity and flexibility.
However, remote access on a Mac becomes challenging when you're not on the same network. This article delves into the different methods for remote access on Mac and offers step-by-step instructions.
How to remote access Mac not on same network [4 options]
Discover the top four widely-used methods for remote access Mac not on same network. Continue reading to uncover the comprehensive step-by-step instructions.
Option 1. AnyViewer [highly-recommended]
For accessing a Mac remotely outside the network, AnyViewer stands out as the top option. This free yet powerful remote desktop software supports Mac, Windows, iOS, and Android devices. It offers an easy and reliable way to control and manage a Mac from another Mac, a Windows PC, or a mobile device, whether you're using iOS or Android, from anywhere in the world.
AnyViewer offers a multitude of impressive features, such as:
- Secure measures: AnyViewer prioritizes security by employing robust end-to-end 256-bit Elliptic Curve Cryptography (ECC) encryption, ensuring the privacy of your data during transmission. Additionally, it enhances account security with two-factor authentication, thwarting unauthorized access attempts.
- Access beyond the local network: AnyViewer allows for access beyond the local network, enabling remote control of devices over the internet, even if they are located behind firewalls or NAT routers, without the need for port forwarding or a VPN.
- Additional features: AnyViewer is packed with supplementary features aimed at enhancing the remote access experience. These include convenient screen-sharing capabilities, integrated chat functionality, multiple concurrent sessions, etc.
To remotely access Windows from Mac, follow the steps below:
Step 1. Start by downloading AnyViewer on your Mac. After installing, sign in or register.

Step 2. On your Windows PC, download and log in to AnyViewer as well.

Step 3. After logging into both devices, go to the "Device" tab on your Mac. Your Windows PC should appear in the list. Click on it and select "One-click control." You can remotely access a Mac not on the same network now.

- Notes:✎...
- For businesses with increased requirements, it's advisable to consider upgrading to a Professional or Enterprise plan. This upgrade provides extended capabilities, such as the ability to monitor multiple devices simultaneously, group management functionalities, mass deployment options, and much more.
Option 2. Screen Sharing
To share your screen on a Mac remotely, use the Screen Sharing app on your computer. The Screen Sharing app is a built-in utility on Mac computers that allows users to remotely view and control another Mac's screen over a network connection. This feature enables users to collaborate, troubleshoot technical issues, or provide assistance to others by accessing their Mac's desktop interface from a different location. With the Screen Sharing app, users can interact with the remote Mac as if they were physically present, making it a convenient tool for remote work, IT support, and collaboration purposes.
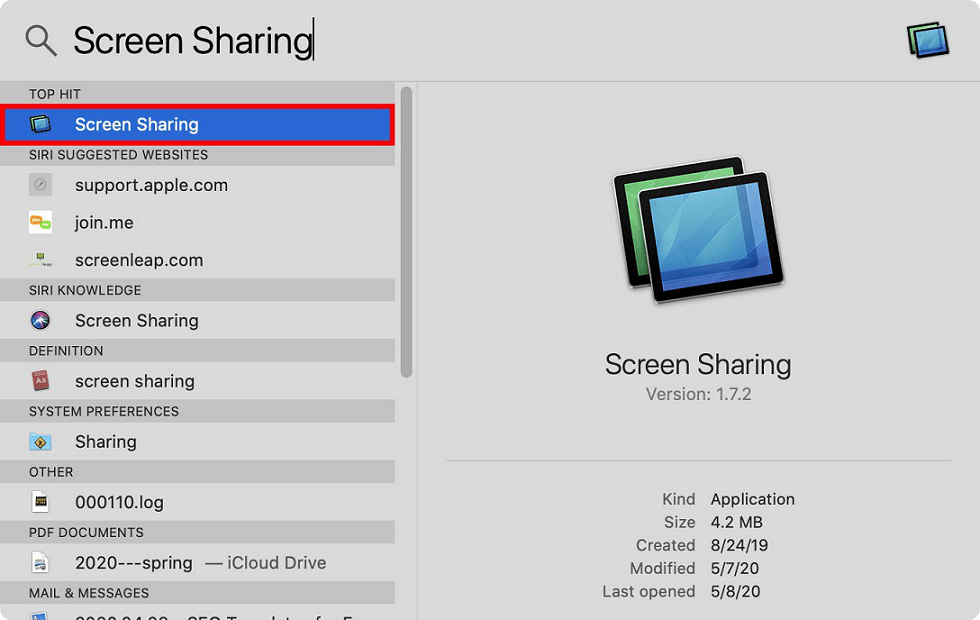
Step 1. Begin by opening Spotlight on your Mac. You can achieve this by clicking the magnifying glass icon located in the top-right corner of your screen. Alternatively, press the Command + Space Bar keys simultaneously on your keyboard.

Step 2. Next, type "Screen Sharing" into the search bar and press Enter on your keyboard. Alternatively, you can select the app using your mouse.
Step 3. Type in the Apple ID of the user's computer you wish to access remotely and then click on "Connect." If you're unsure of the Apple ID, you can find it by clicking the Apple logo in the top-left corner of your screen. Then navigate to System Preferences > Apple ID. The Apple ID will be located just below the profile picture and username in the left sidebar.
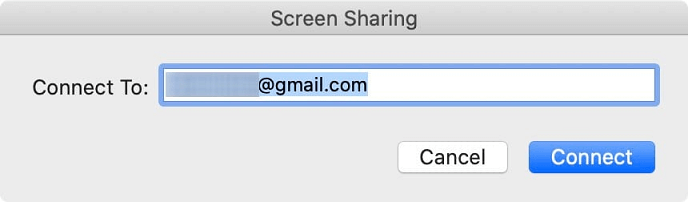
Step 4. Click on "Connect" or press Enter on your keyboard. The other computer will then receive a notification in the top-right corner of their screen.
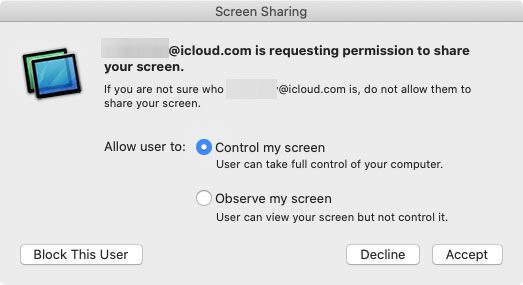
Step 5. The other user needs to click on "Accept" when they receive the notification.

Step 6. Subsequently, the other user can choose whether to allow you to control or observe their screen. If they opt for "Control my screen," you'll gain full control over their computer, enabling you to open apps, move files and folders, and more. If they select "Observe my screen," you'll be able to view their screen without control over their computer.
Step 7. Once the other user clicks "Accept," you'll be able to see their screen from your computer.
Option 3. Messages conversation
Another Mac built-in feature that allows you to remotely access a Mac is the Messages app. Through the Messages app, users can leverage the Screen Sharing functionality to control another Mac computer. This feature comes in handy for providing remote assistance, collaborating on projects, or accessing Mac files and applications on a distant Mac device.
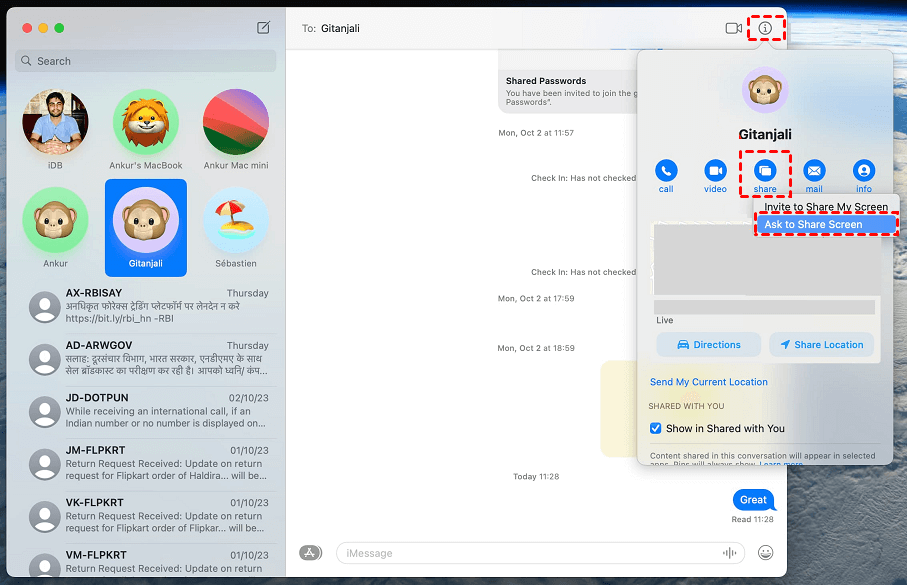
Step 1. Start by opening the Messages app and navigating to the conversation with the person you want to assist.
Step 2. Click on the info button located next to their name.
Step 3. Then, click on "Share" and select either "Ask to Share Screen" or "Invite to Share My Screen." Since you're assisting, opt for the "Ask to Share Screen" option.
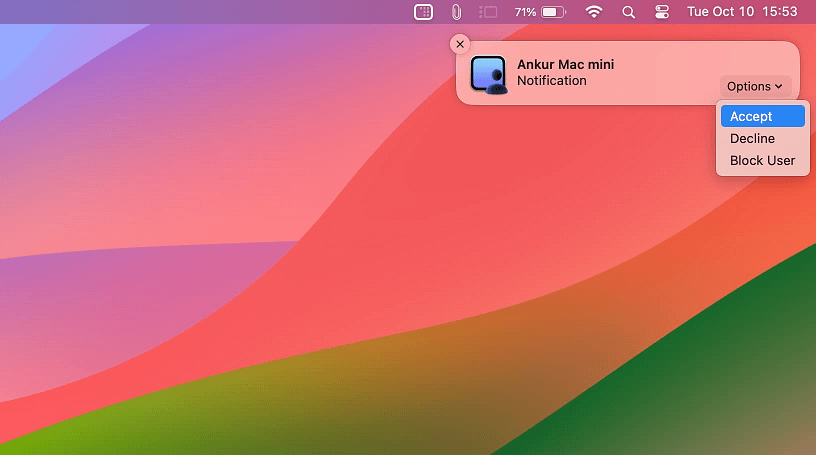
Step 4. The other person will receive a notification on their Mac indicating that you've requested to share their screen. They should click on "Options" and then "Accept" on that notification.
Step 5. Subsequently, they'll encounter a menu window offering two options. They should choose "Control my screen" and then click "Accept."
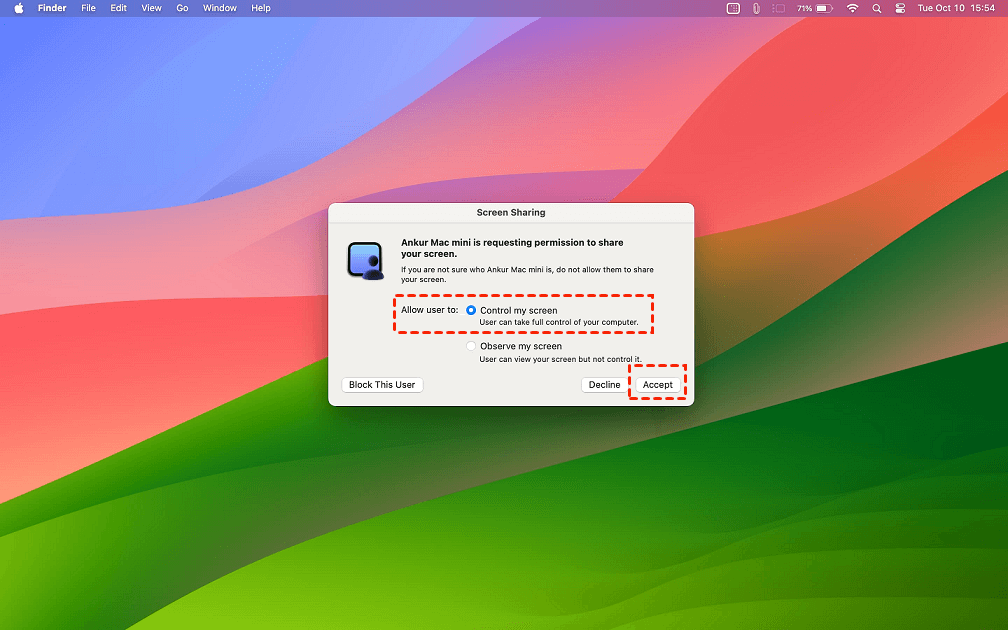
Step 6. Once the person accepts your screen control request, you'll gain access to and control their screen directly from your Mac.
Option 4. Remote Login
Remote Login is a frequently utilized method to permit a remote Mac running the same macOS to access your Mac files. By activating this feature, you can access your Mac from another device using SSH (Secure Shell Protocol) or SFTP (SSH File Transfer Protocol). These two protocols support most file sharing operations on your Mac.
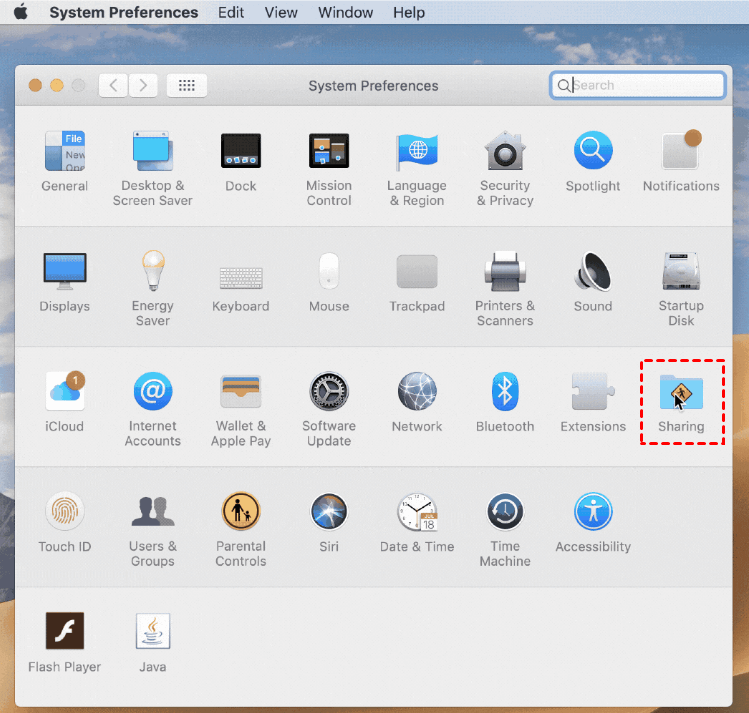
Step 1. Navigate to "System Preferences" and select "Sharing."
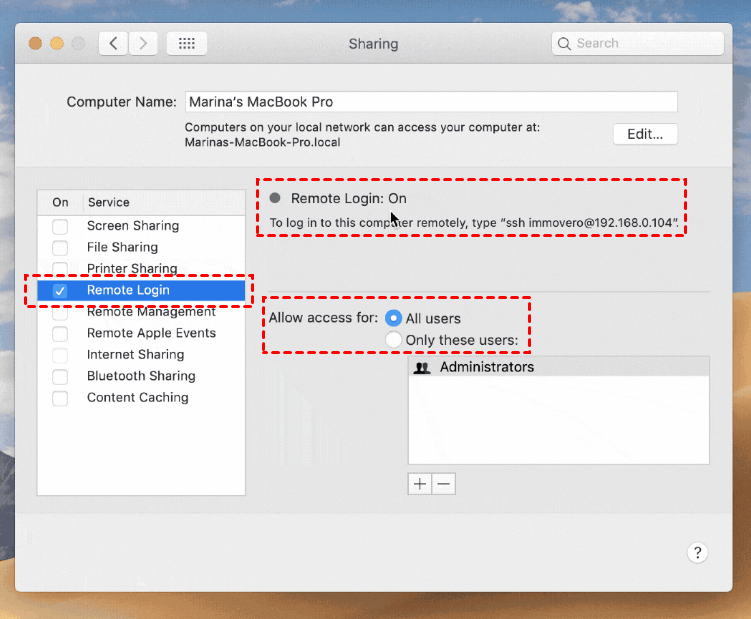
Step 2. Enable Remote Login, then click on the Info button located on the right.
Step 3. Click the “Allow access for” pop-up menu, then choose one of the following:
- To allow everyone to log in to your computer, select “All users” from the pop-up menu.
- To choose specific users who can log in to your computer, select “Only these users.” Click the Add button, select the users, then click Select.
Step 4. Launch Terminal on another Mac or utilize an SSH application.
Step 5. Type in the following ssh command and press Return:
ssh username@hostname
Note: Substitute your personal information for the username and hostname. The username is what displays at login. You can locate the hostname under Remote Login in System Preferences.
Step 6. Enter your password and press Return.
The bottom line
In conclusion, remote access Mac not on same network is essential for troubleshooting, support, and collaboration. While several methods exist, AnyViewer stands out as the most secure and efficient solution, offering easy access across devices and platforms. Other options, like Screen Sharing, Messages app, and Remote Login, are also viable but come with limitations in terms of functionality and ease of use. Whether you're helping family or managing business tasks, these remote access methods ensure you can stay connected and productive no matter where you are.
