
How to Transfer Data from Mac to MacBook Air: 7 Easy Ways
How do I transfer data from iMac to MacBook Air? Transferring data from a Mac to MacBook Air is simple. This guide shows you 7 easy methods, such as using AnyViewer for remote access, Migration Assistant for a complete transfer, and AirDrop for quick file sharing.
By Ellie / Updated on March 28, 2025
How to transfer data from a Mac to a MacBook Air?
How do I transfer data from iMac to MacBook Air? Transferring files from one Mac to another can be an essential task when you upgrade to a new MacBook Air, move your data between devices, or simply want to share files between Macs. Thankfully, macOS offers several methods to make this process simple, efficient, and hassle-free. In this article, we'll explore 7 practical ways to transfer your files, with detailed instructions for each, so you can pick the method that best suits your needs.
7 ways to transfer data from Mac to MacBook Air
Here's a detailed guide to 7 methods for transferring data from a Mac to a MacBook Air.
Way 1. Use AnyViewer for Mac remote file transfer
While many methods are available for transferring data between Macs, there are instances when you may want to remotely access one Mac from another or transfer files across devices that are not on the same local network. AnyViewer is an excellent remote desktop solution for such scenarios. It is a versatile remote access tool that allows you to control your Mac from another device or transfer files securely over the internet.
Why Choose AnyViewer?
- Cross-Platform Compatibility: AnyViewer supports not only macOS but also Windows, iOS, and Android. This makes it a powerful tool for accessing multiple types of devices from your MacBook Air or vice versa.
- Secure File Transfer: With AnyViewer, you can easily transfer files between devices using its intuitive drag-and-drop feature. All transfers are protected with high-level encryption, ensuring your files are safe from unauthorized access.
- Remote Desktop Control: Need to access applications or files on your old Mac from your new MacBook Air? AnyViewer allows you to remotely control your Mac, providing full access to your desktop as if you were sitting right in front of it.
- Easy Setup: Setting up AnyViewer is simple and doesn't require any complicated configurations. Once installed, you can connect to your Mac from anywhere in the world, making it perfect for business or personal use.
- Free Version Available: AnyViewer offers a free version with essential features, which makes it a great option for basic remote access and file transfer needs without any extra cost.
How to transfer data from Mac to MacBook Air using AnyViewer:
Step 1. Install AnyViewer: Download and install AnyViewer on both the source and destination Macs.
Step 2. Create an Account: Sign up for a free AnyViewer account or use the software without an account for limited features.

Step 3. Establish a Connection: On the old Mac, sign in to AnyViewer, then select the device you want to transfer files to (in this case, your MacBook Air).
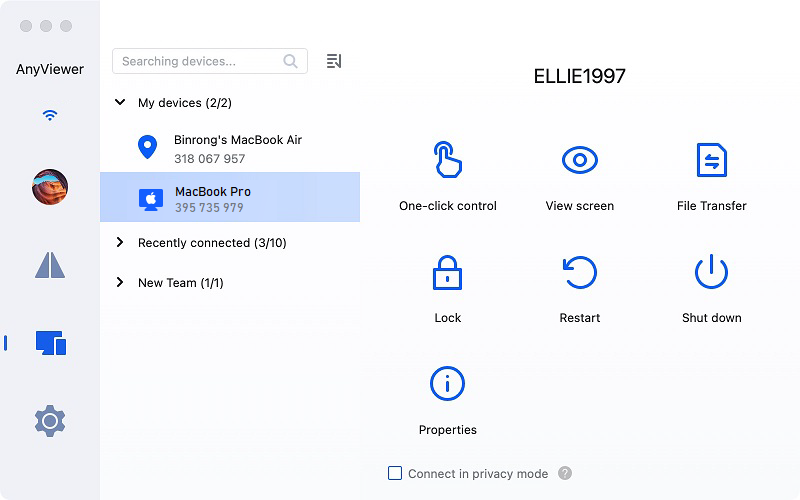
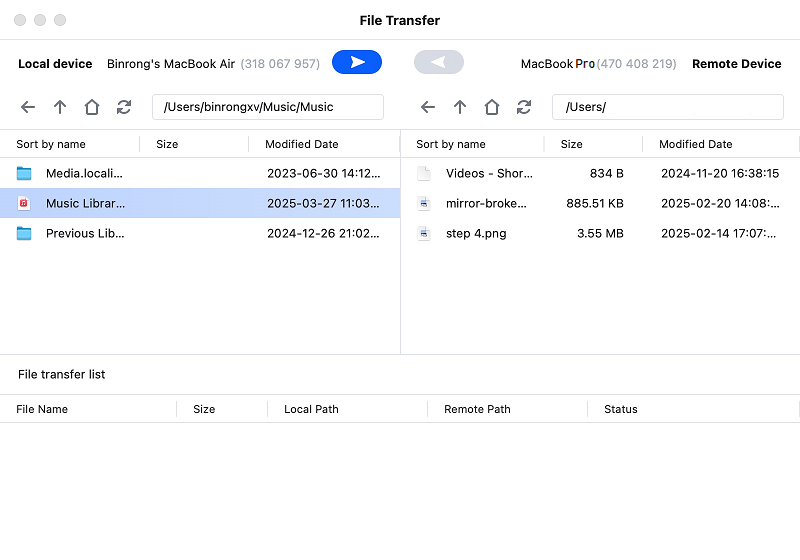
Step 4. Transfer Files: Once connected, you can access the remote Mac's files and drag-and-drop them to your local machine or vice versa.
With AnyViewer, the process of transferring data becomes smoother and more convenient, especially when you need to manage multiple devices or access them remotely. Whether you're at home, in the office, or on the go, AnyViewer provides a seamless experience for transferring files and controlling your devices from anywhere.
To boost transfer speed and overall performance, consider upgrading to an AnyViewer Professional or Enterprise plan. These premium plans offer several advantages, including:
- Maximum transfer speed: Up to 10 MB/s
- Simultaneous transfers: Transfer up to 5 files at the same time
- Unlimited files per transfer: Move as many files as needed in a single session
- Large file support: Transfer individual files up to 1 TB in size
Way 2. Use Migration Assistant to move files between Macs
One of the easiest and most comprehensive ways to migrate files from your old Mac to a new MacBook Air is by using Apple's Migration Assistant. This built-in tool allows you to transfer everything—from documents and applications to system settings—without the need for manual copying.
How to transfer files from old Mac to new MacBook Air using Migration Assistant:
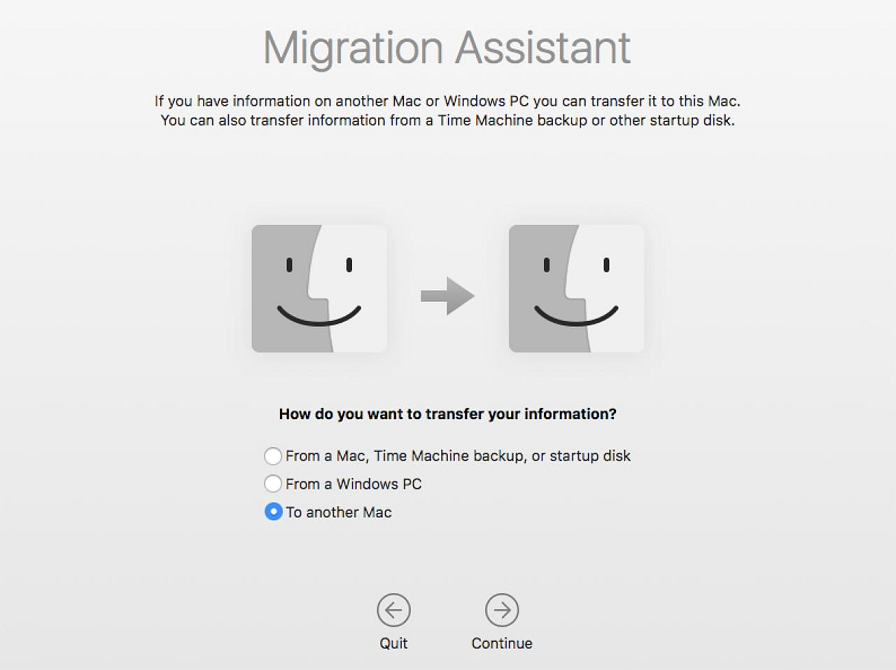
Step 1. Launch Migration Assistant: On both your old Mac and the MacBook Air, open Migration Assistant, located in the Utilities folder within Applications.
Step 2. Choose Your Transfer Method: On the old Mac, select To another Mac and follow the on-screen prompts to allow access.
Step 3. Connect the Devices: You can connect the two Macs via Wi-Fi or use a cable (USB-C or Thunderbolt). Ensure both devices are connected to the same network.
Step 4. Enter Security Code: Once both Macs detect each other, a security code will appear on both screens. Ensure the codes match, then click Continue.
Step 5. Select What to Transfer: On your new MacBook Air, choose which files, apps, and settings you want to transfer.
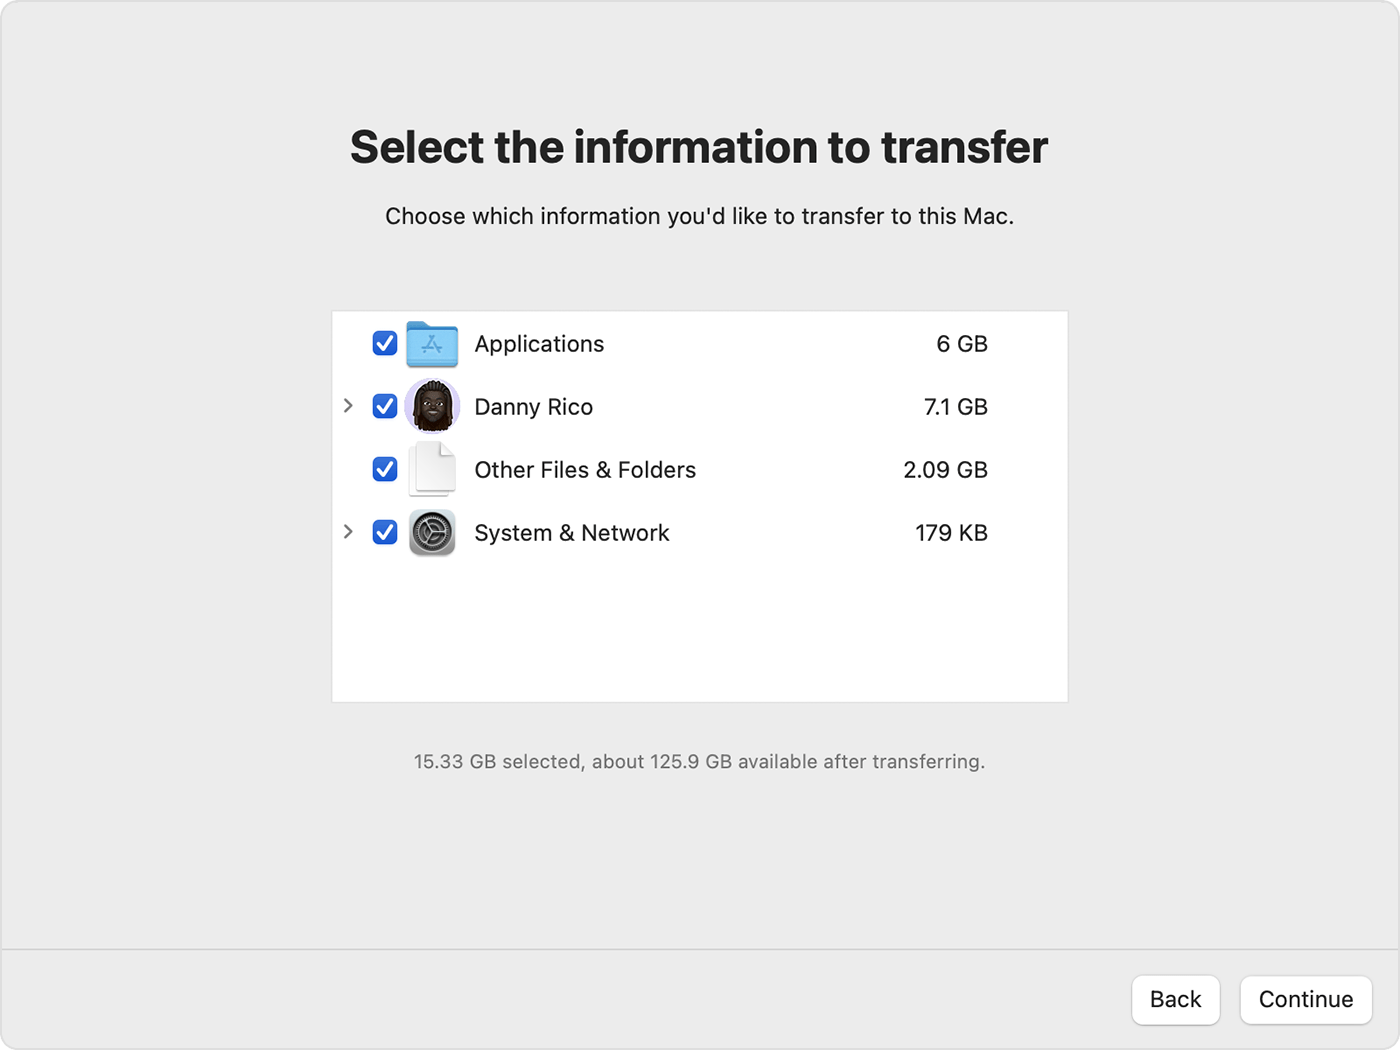
Step 6. Start Transfer: Click Continue to start the transfer process. Depending on the size of the data, it could take anywhere from a few minutes to several hours. Be sure to leave both Macs powered on and connected throughout the process.
Step 7. Complete the Transfer: Once the transfer is complete, you'll be able to access your files and settings on the new MacBook Air.
Way 3. Transfer files from Mac to MacBook Air with AirDrop
If you only need to move a few files or folders and both Macs are nearby, AirDrop is a quick and easy option. It uses a direct Wi-Fi and Bluetooth connection to transfer files between Macs without needing an internet connection.
How to use AirDrop:
Step 1. Activate AirDrop: On both Macs, open Finder, then click AirDrop in the left sidebar. Ensure both Macs have Bluetooth and Wi-Fi turned on.
Step 2. Drag and Drop Files: On the source Mac, drag the files or folders you want to transfer into the AirDrop window. When your new MacBook Air appears, drop the files there.

Step 3. Accept the Transfer: On the MacBook Air, accept the file transfer. Once completed, the files will be available in the Downloads folder.
AirDrop is great for smaller, more manageable transfers, but for large files, it may not be as efficient as other methods.
Way 4. Use iCloud to sync files between Macs
For a seamless cloud-based transfer, iCloud allows you to access files across multiple devices signed into the same Apple ID. This is perfect if you want to sync your documents, photos, and other important files automatically.
Steps for using iCloud:
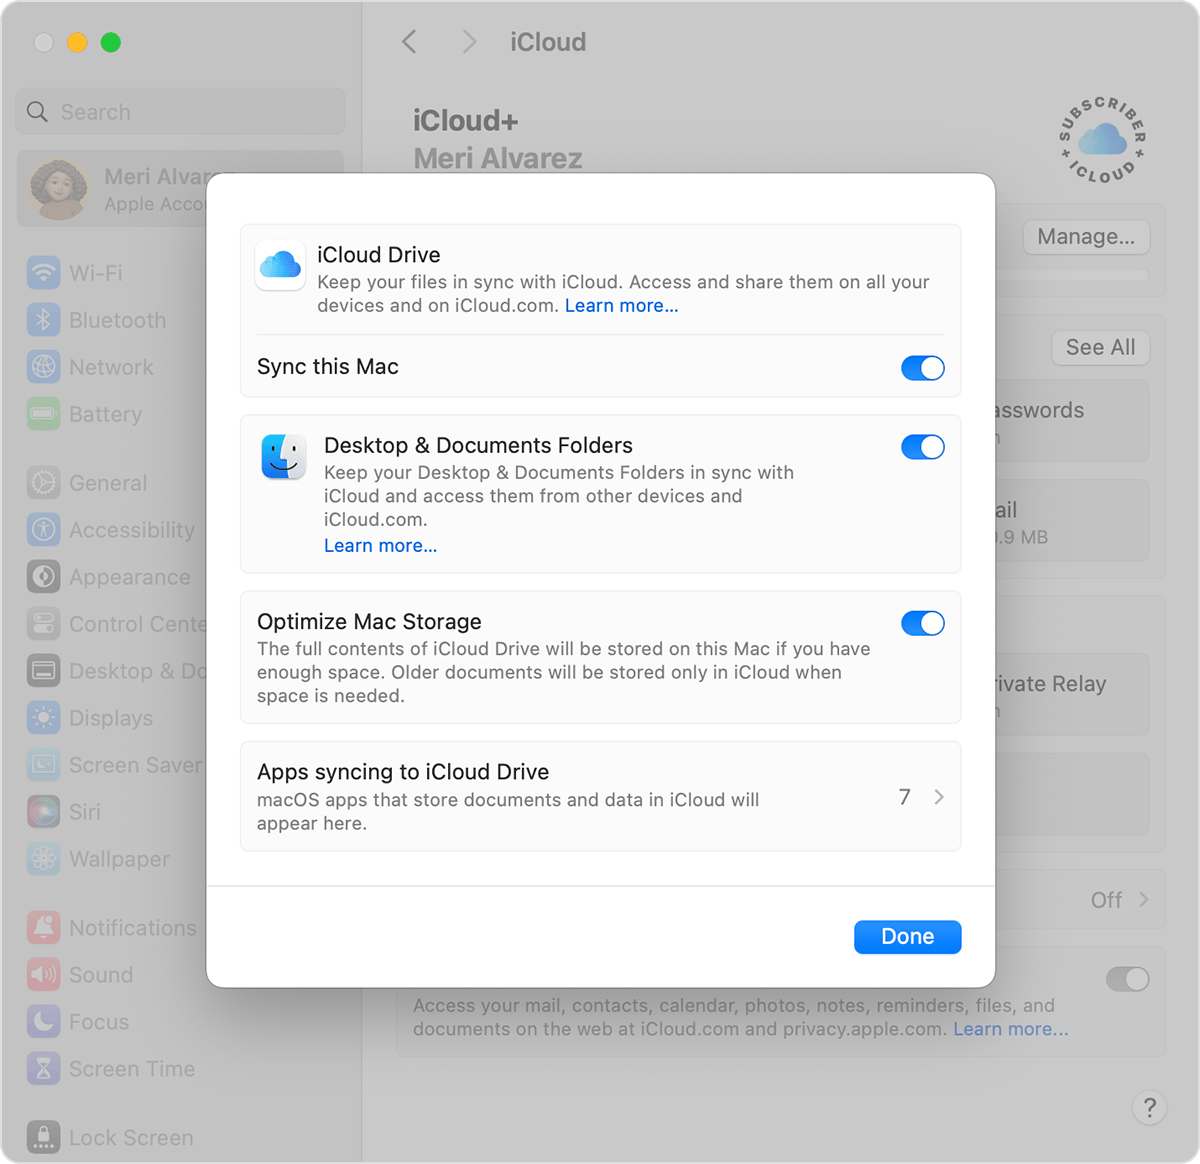
Step 1. Set Up iCloud: On both Macs, go to System Preferences > Apple ID > iCloud. Make sure iCloud Drive is enabled.
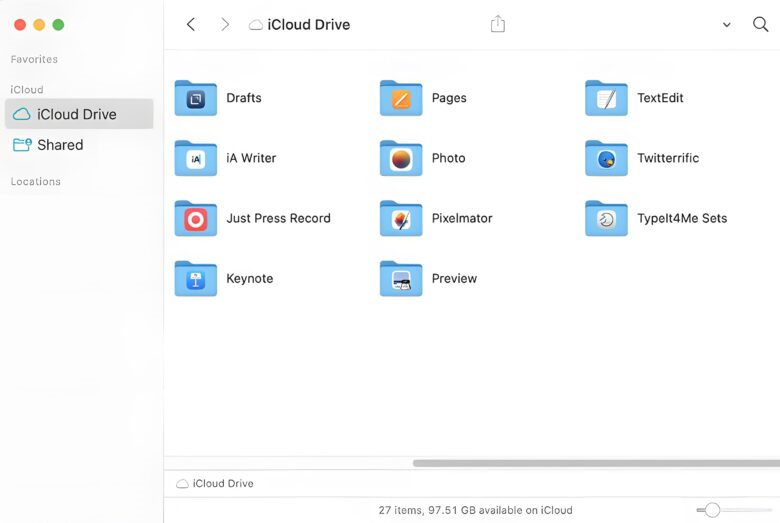
Step 2. Upload Files: On your old Mac, move the files you want to transfer into the iCloud Drive folder. These files will upload to the cloud.
Step 3. Access on New MacBook Air: On the new MacBook Air, open Finder and click on iCloud Drive in the sidebar. The transferred files will be available to download or edit.
While iCloud is convenient, it does require an internet connection and may incur additional costs if you exceed your free storage limit (5GB).
Way 5. Bluetooth file sharing between Macs
If both Macs are not on the same network, Bluetooth can still provide a quick solution for transferring small files. This method is slower than others but can work in a pinch.
How to transfer files using Bluetooth:
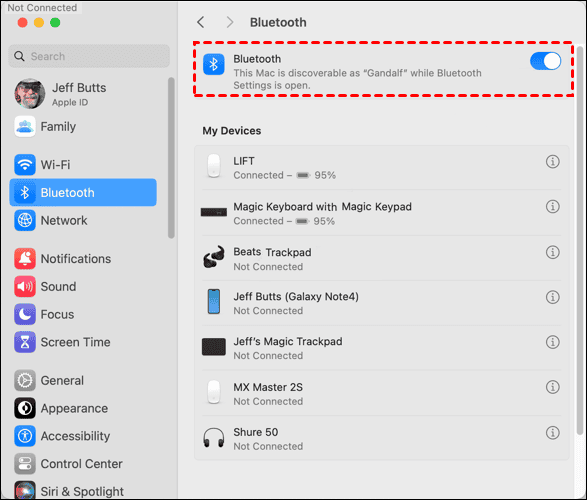
Step 1. Enable Bluetooth: On both Macs, turn on Bluetooth by going to System Preferences > Bluetooth.
Step 2. Open Bluetooth File Exchange: On the sending Mac, go to Applications > Utilities > Bluetooth File Exchange.

Step 3. Select Files to Send: Choose the files you wish to send and click Send.
Step 4. Accept the Files: On your MacBook Air, accept the incoming transfer. Files will be saved in the Downloads folder.
Since Bluetooth has slower transfer speeds (around 40MB/s), this method is better suited for small file transfers.
Way 6. File Sharing using network connections
If both Macs are connected to the same Wi-Fi network, you can use macOS' built-in File Sharing feature to transfer files. This method is efficient and perfect for larger file transfers.
How to set up File Sharing:
Step 1. Enable File Sharing: On the source Mac, go to System Preferences > Sharing, and check File Sharing.
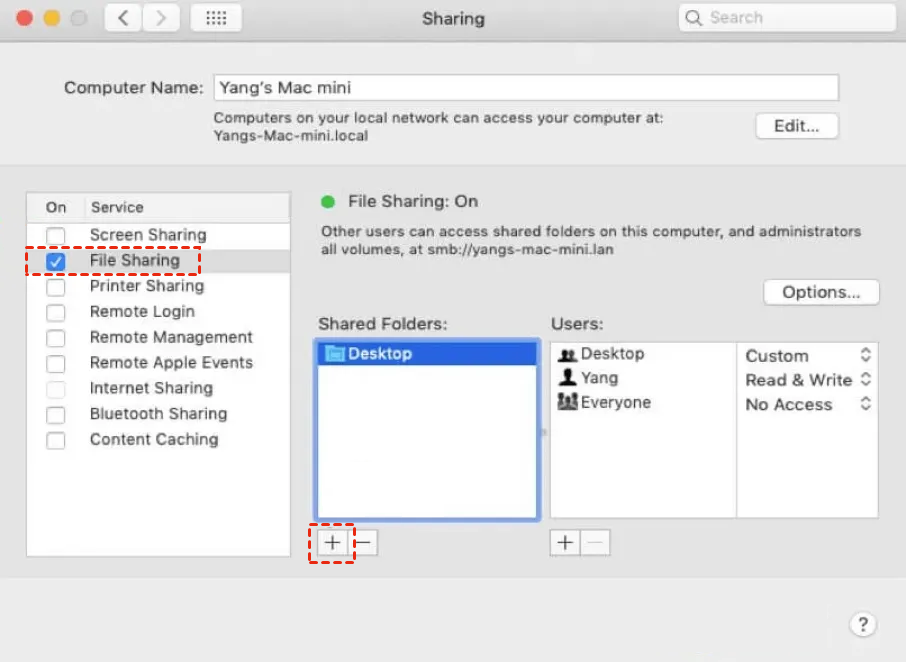
Step 2. Choose Folders to Share: In the File Sharing section, click the + button to select the folders you want to share.
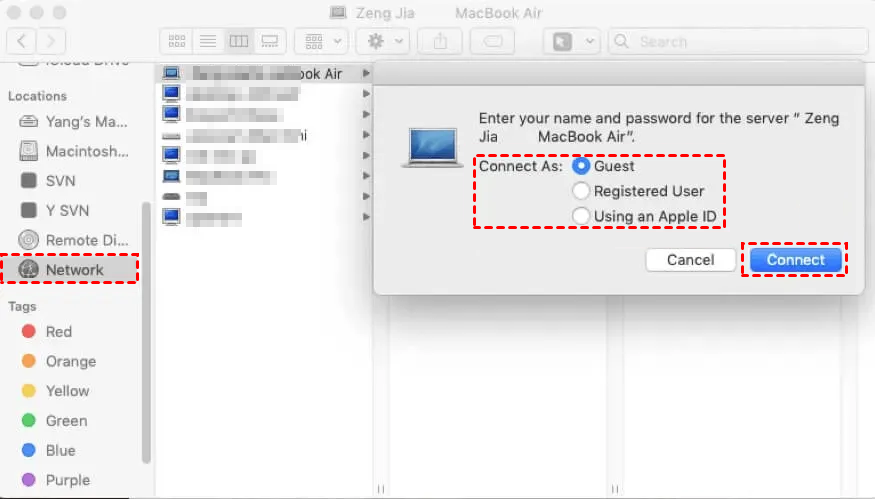
Step 3. Access Shared Files: On the new MacBook Air, open Finder, then click Go > Network. Select the other Mac and drag the files to your new device.
File sharing over a local network is one of the fastest and most reliable ways to transfer data between Macs.
Way 7. Use iMessage for simple file transfers
For smaller files, iMessage can also be used to send files between Macs. This method works especially well for transferring documents or images and is ideal if you only need to send a few items.
Steps to send files via iMessage:
Step 1. Open Messages: Launch the Messages app on both Macs.
Step 2. Start a Conversation: Create a new message or select an existing conversation.
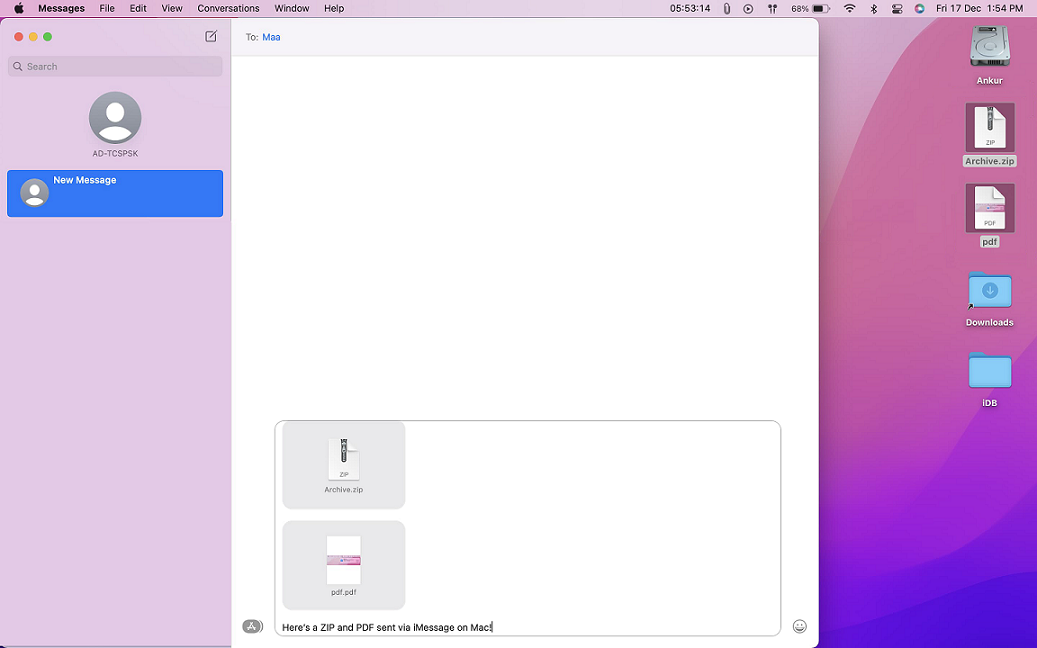
Step 3. Attach Files: Drag and drop the files you want to transfer into the message box and press Return to send them.
Step 4. Save Files on New Mac: On the receiving MacBook Air, click on the file attachment to download and save it.
While iMessage is great for quick transfers, it may not be suitable for larger files due to limitations in file size.
Conclusion
In conclusion, knowing how to transfer data from Mac to MacBook Air is essential when upgrading or moving files between devices. Whether you use AnyViewer for remote file transfers, Apple's Migration Assistant for a comprehensive move, or iCloud for cloud-based syncing, there are multiple methods to suit your needs. By choosing the right option for your file size and requirements, you can easily transfer your data and get your MacBook Air set up quickly and efficiently.
