
Simple Steps: How to Open Firewall Ports for Remote Desktop
Do you know how to open firewall ports for Remote Desktop? Learn the simple steps to enable Remote Desktop port in Windows Firewall and the router. Gain control of your RDP settings with this easy-to-follow guide.
By AnyViewer / Updated on December 13, 2024
How do I allow Remote Desktop through firewall?
Hello everyone! I'm having trouble with Windows Remote Desktop. I'm trying to figure out how to open firewall ports for Remote Desktop so that I can securely connect to my office computer from home. Can anyone provide a step-by-step guide or offer any advice on resolving this issue? Thanks in advance for your help!”
- Question from a user

How to open firewall ports for Remote Desktop
Microsoft has developed a proprietary protocol known as Remote Desktop Protocol (RDP) that facilitates remote connections to Windows systems via a graphical user interface. In order to utilize this protocol, the default port number 3389 must be opened within the Windows Firewall to enable RDP accessibility within the local area network.
However, it is important to note that exposing RDP to the Internet poses security risks. To establish proper functionality, the RDP port needs to be forwarded through the primary Internet router.
Now, let's delve into how to allow Remote Desktop through firewall Windows 10, 11, as well as the router configuration.
Part 1. Allow RDP port in Windows Firewall
Follow these steps to change the Remote Desktop firewall settings:
Step 1. Open the Control Panel and go to the "System and Security" section. From there, access "Windows Defender Firewall." Then click "Allow an app or feature through Windows Defender Firewall" located in the left pane.
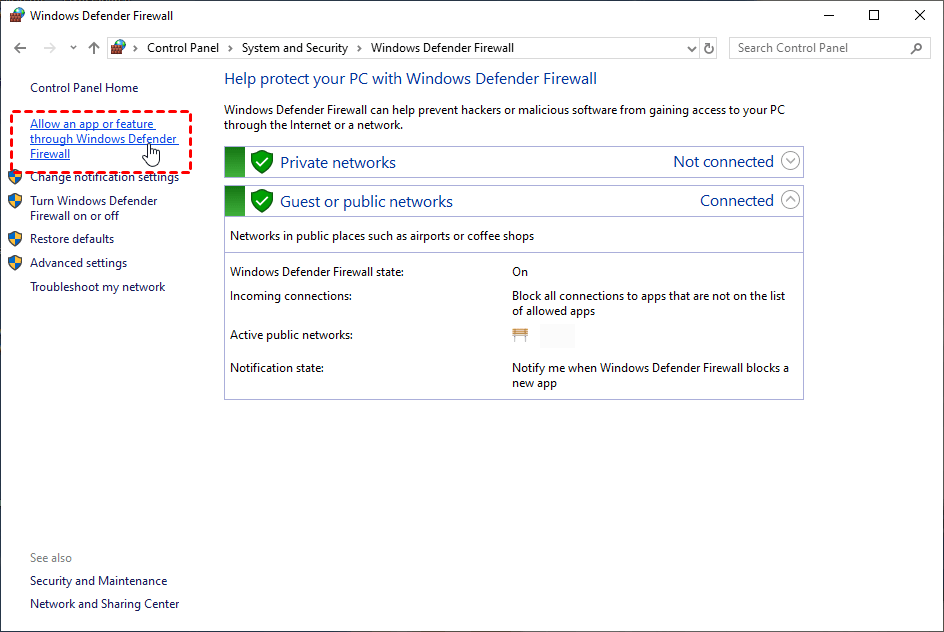
Step 2. Click the"Change settings" button and locate the entry for "Remote Desktop." If you wish to enable Remote Desktop solely within the local network, check the "Private" checkbox. However, if you intend to make it accessible to the public, select both the "Private" and "Public" checkboxes.

Part 2. Allow RDP port through router
To utilize Windows Remote Desktop over the Internet while connected through routers, an additional step of performing Remote Desktop port forwarding is required.
Note: The port configuration process may vary for different routers, although the terminology is usually similar. Here is a general overview of what to do.
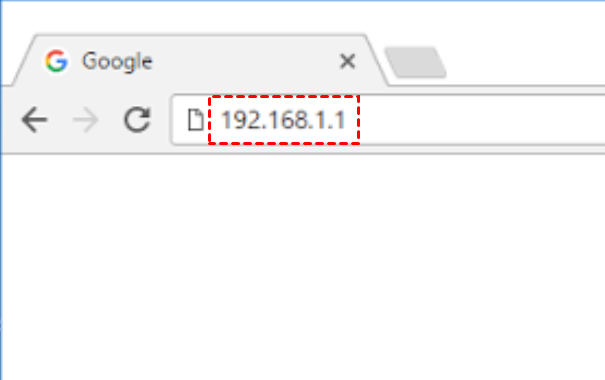
Step 1. Open your preferred web browser and enter the router's address in the URL bar. Press "Enter" to access the router's login page. You cancheckyour router's user manual for related information.
Step 2. Enter the designated username and password, then click on the "Login" button to access the router's settings.

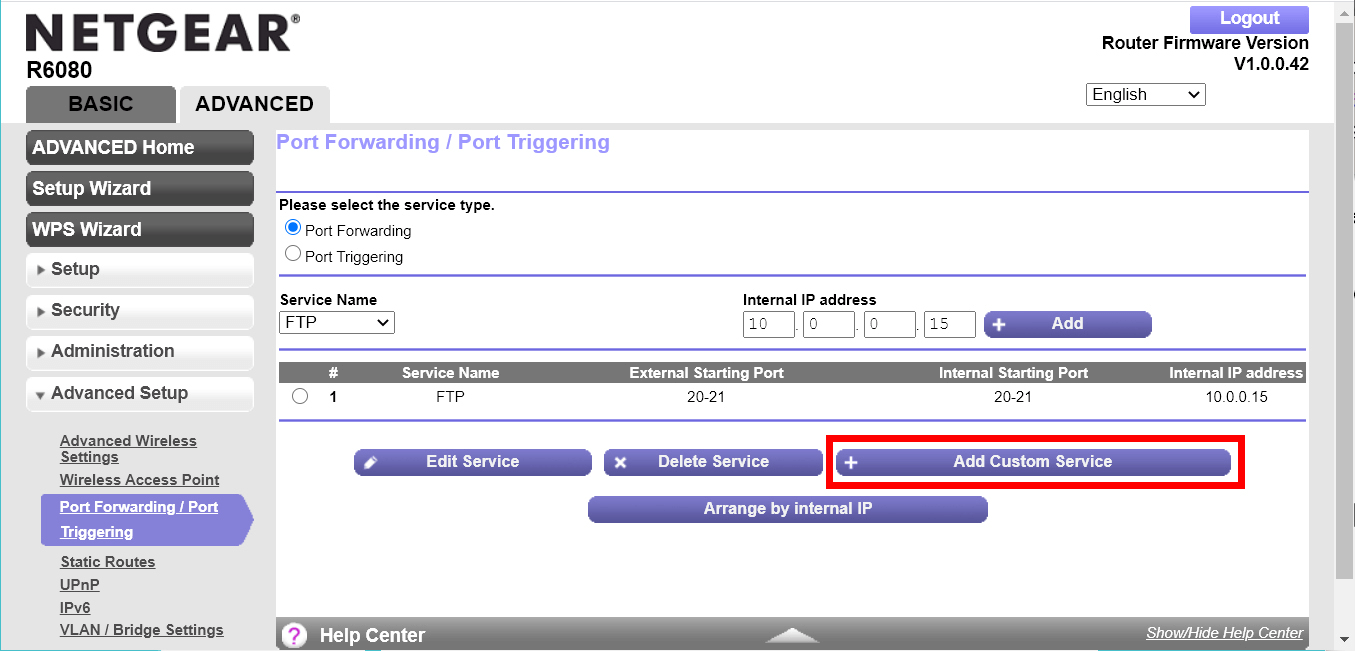
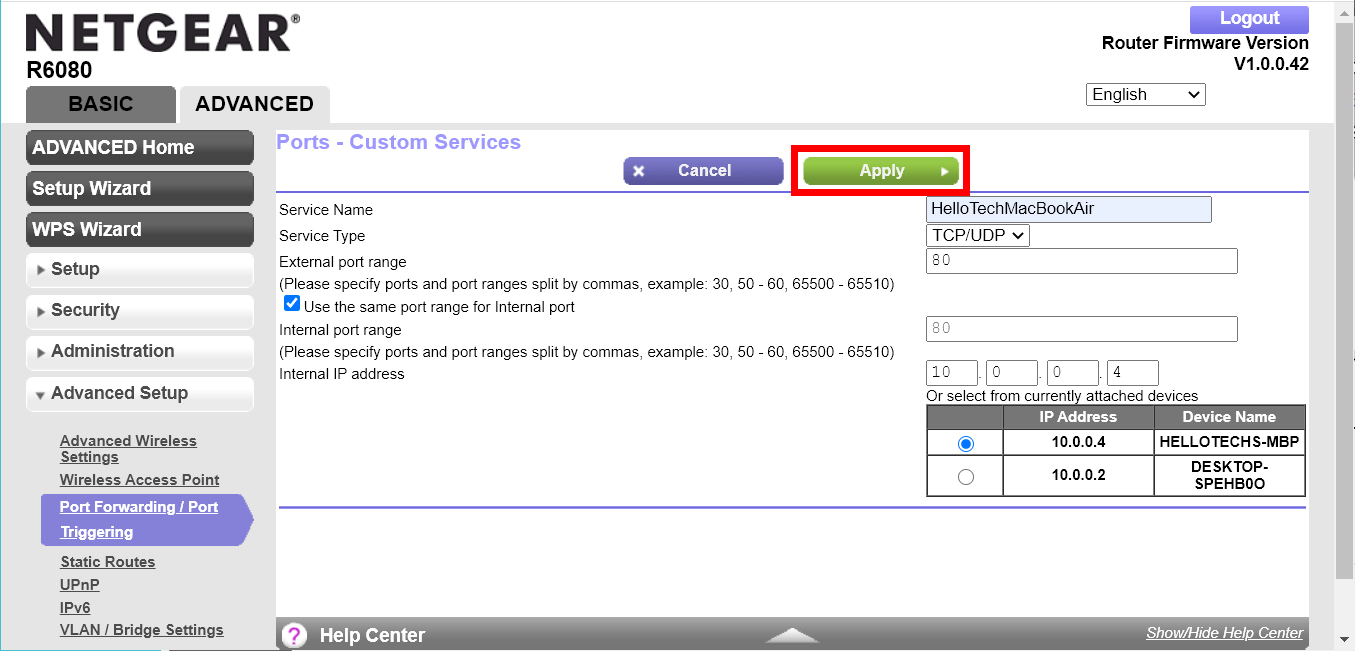
Step 3. Once logged in, navigate to the "Port Forwarding/Port Triggering" option in the left pane. Next, select "Add" or "Add Custom Service" to create a new service.
Step 4. Provide a name for the section, select either "TCP/UDP" or "Both" under the "Service Type" setting, and input the port number 3389. Additionally, enter the IP address of your device.
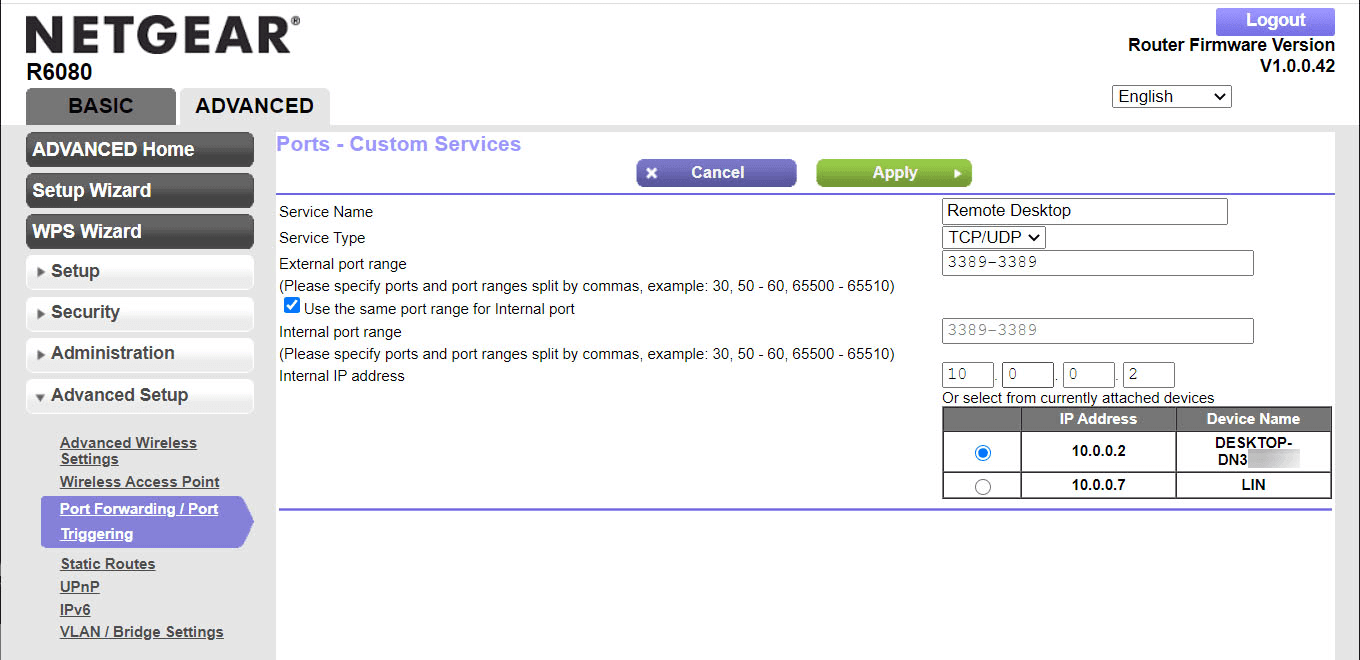
Step 5. Click "Apply" to save the settings. If required, consider restarting the router to ensure the changes take effect.
Part 3. Change the RDP default port (optional)
When opening RDP over the Internet, using the default port 3389 can pose security risks. To enhance security, it is advisable to change the default port to a value above 10000. Opting for a port number between 30000 and 40000 is generally considered safer, as most port scanners initiate scanning from port 1.
If you wish to change the RDP port, follow the steps outlined below:
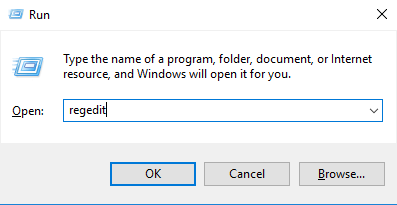
Step 1. Press the "Win + R" keys simultaneously, then enter "regedit" in the Run dialog box and press "Enter."
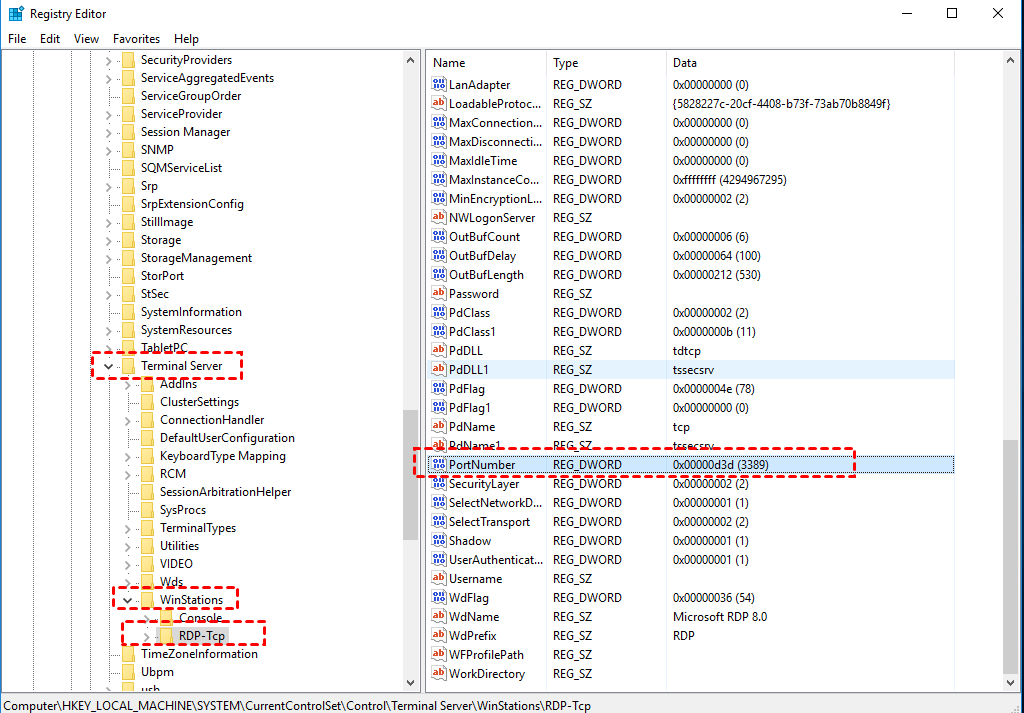
Step 2.In the Registry Editor, navigate to the following location in the left pane: HKEY_LOCAL_MACHINE\System\CurrentControlSet\Control\Terminal Server\WinStations\RDP-Tcp. Double-click on the "PortNumber" key displayed on the right side.
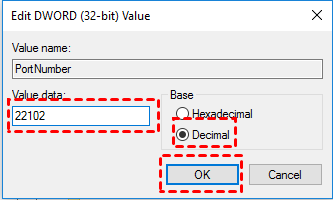
Step 3. A window for editing the key value will appear. Replace the current port value with a new number. Ensure that the "Decimal" option is selected under the "Base" category. Click "OK" to apply the changes.
Part 4. Verify that port 3389 is open and active
In certain situations, despite successfully opening the RDP port, you may encounter difficulties connecting to the remote computer. To troubleshoot this issue, it is important to verify whether port 3389 (or the customized port if you have made changes) is open and actively listening. Follow the steps below to perform the necessary checks.
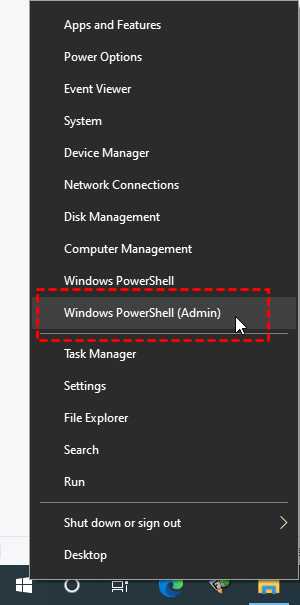
Step 1. Right-click on the Start button and select "Windows PowerShell (Admin)."
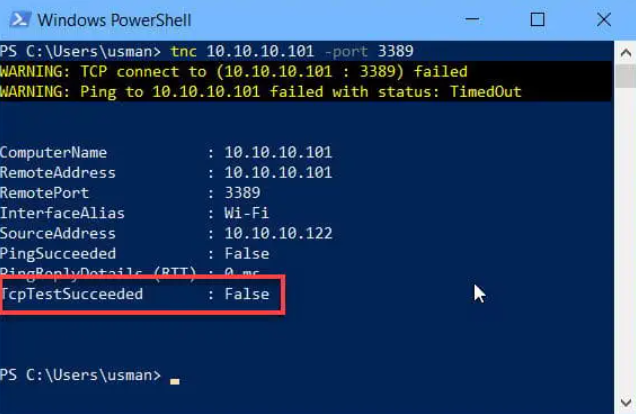
Step 2. In the PowerShell window, execute the following command:
- tnc 192.168.1.2 -port 3389
Ensure that you replace the IP address "192.168.1.2" with the IP address of your own computer. Alternatively, if you have permitted public access to your computer through the router, use your router's public IP address instead. A successful test will display the value of "TcpTestSucceeded" as "True."
No more complicated setups: Easy and secure remote access over the internet
The aforementioned steps outline how to open firewall ports for Remote Desktop and use RDP in different networks. However, if you find the process complex or are unsatisfied with the RDP connection quality, there are several Remote Desktop alternatives available for consideration.
One such alternative is AnyVeiwer, a remote access software that offers seamless PC management across different network conditions without requiring port forwarding or VPN setup. To bolster security, AnyViewer employs Elliptic Curve Cryptography (ECC) encryption, safeguarding your remote sessions from unauthorized access.
Furthermore, AnyViewer boasts additional free features not present in RDP, such as direct file transfer, support for multiple sessions, multi-monitor navigation, and real-time chat.
Free download AnyViewer on your devices:
Embarking on your AnyViewer journey is remarkably straightforward. To get going, just adhere to these simple steps:
Step 1. Launch AnyViewer on the remote computer. Create a new account and log in using your credentials.

Step 2.Open AnyViewer on your local computer and login in using the new account you just made. The computer will be immediately assigned to your account.

Step 3. Navigate to the Device section. From there, select the specific computer you wish to connect to, and opt for the One-click control feature to establish a seamless connection.

- Notes:✎...If you have over tworemote PCs, we highly recommend upgrading your AnyViewer account to unlock exclusive benefits and enhanced functionality. With an upgraded account, you'll enjoy the following advantages:
- Easy access to assigned devices: Gain convenient access to a maximum of 100 assigned devices with just a single click.
- More simultaneous connections: Seamlessly connect and multitask across up to 10 devices simultaneously.
- Limitless file transfers: Enjoy the freedom of unrestricted file transfers, with support for file sizes of up to a staggering 1TB per file.
- Privacy mode: Take advantage of the privacy mode feature, which enhances security by concealing the host PC screen and disabling keyboard and mouse inputs.
Conclusion
That’s all for how to open firewall ports for Remote Desktop. If you're seeking a hassle-free remote access method, look no further than AnyViewer. With its seamless connectivity, enhanced security features, and effortless internet-based connections, AnyViewer is the ultimate choice for a user-friendly and secure remote access experience. Try it today and unlock a world of convenience at your fingertips.
