
Can I Transfer Files Using Remote Desktop Connection? – Yes
Can I transfer files using Remote Desktop Connection? The answer is absolutely yes. You can get detailed guides on how to transfer files using RDP and tested solutions for file transfer not working over RDP.
By Ellie / Updated on December 26, 2025
Can I transfer files using Remote Desktop Connection?
My friend recommended to me the Remote Desktop in the MS Store to transfer files remotely between computers. When I used it, I found that I couldn’t transfer files to the host computer. I checked the Microsoft Remote Desktop and Windows versions I used, and nothing is wrong. I really don’t know why this happens. Why can’t I transfer files using Remote Desktop Connection?”
- Question from a user
Can you transfer files through Remote Desktop Connection? Actually, the answer is YES! RDP can breakthrough space limitations, and allow you to remotely control other computers anytime, anywhere. You can easily transfer files, provide technical support for others or ask for remote help from others. But the fact is that many users still don't know how to do it. Based on this, this tutorial will teach you how to transfer files from a Remote Desktop Connection session.
How to transfer files from Remote Desktop Connection?
How can I transfer files using Remote Desktop Connection? Next, we will give you a detailed introduction to the operation steps.
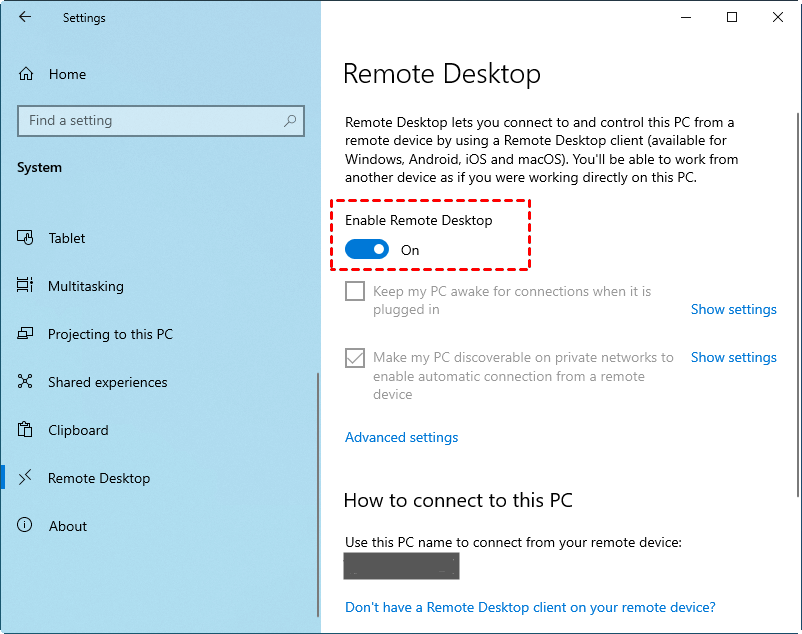
Step 1. On the host computer, navigate here: Start > Settings > System > Remote Desktop, and turn on Enable Remote Desktop.
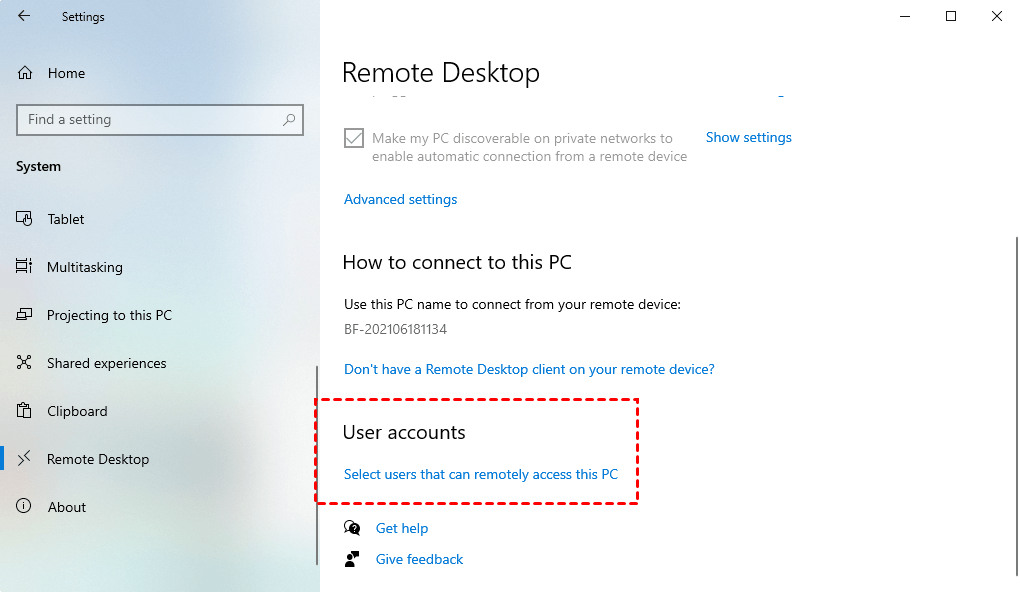
Step 2. Find User accounts and click Select users that can remotely access this PC.
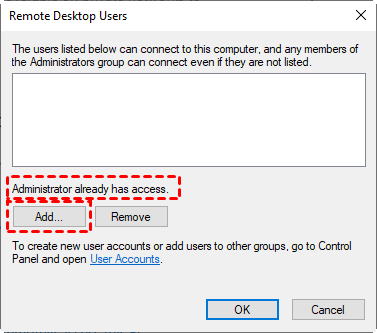
Step 3. After opening the Remote Desktop Users window, click Add to add users who are allowed to access this computer (you need to add already existing users to realize remote desktop).
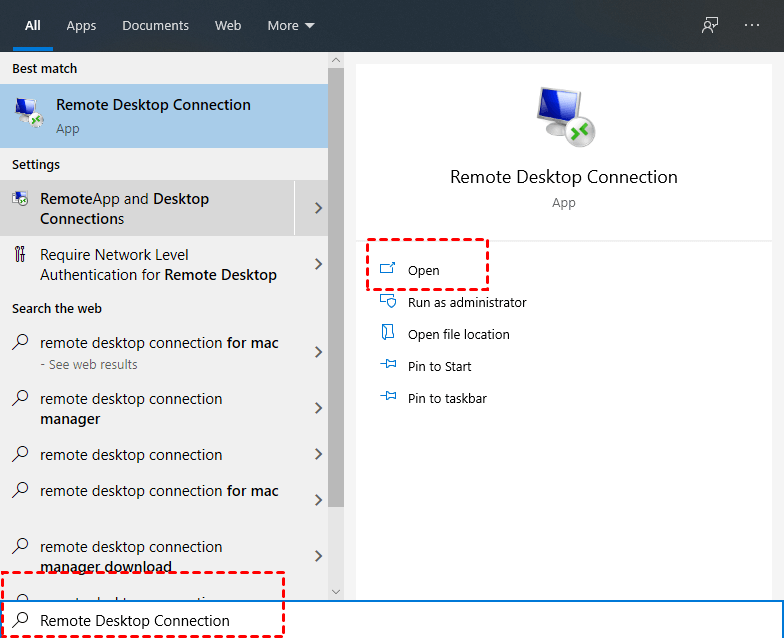
Step 4. On the client computer, search for Remote Desktop Connection in the Search box. And then open it.
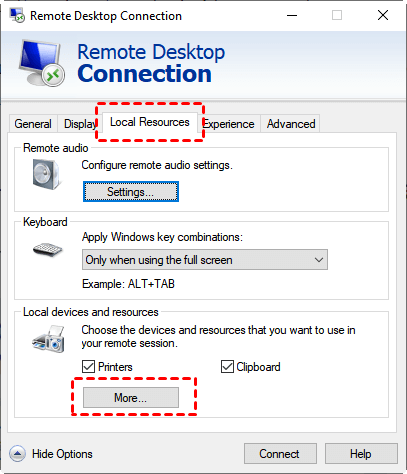
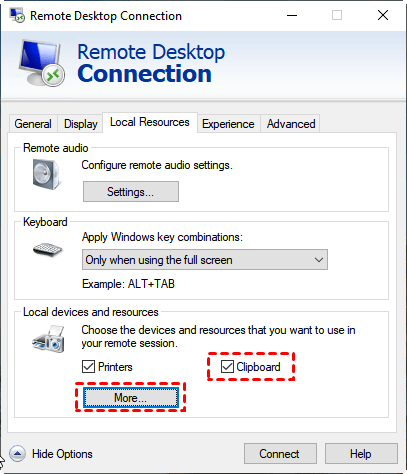
Step 5. On the main interface of Remote Desktop Connection, switch from the General tab to the Local Resources tab, and in the Local Devices and Resources column, click More.
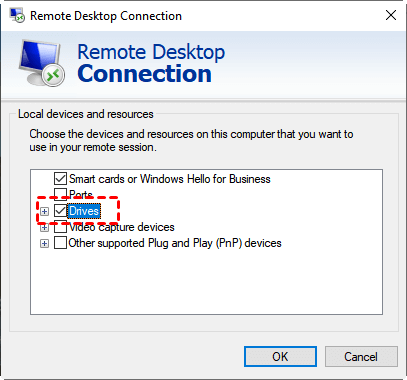
Step 6. On the Local Devices and Resources interface, check the Drives and click OK.
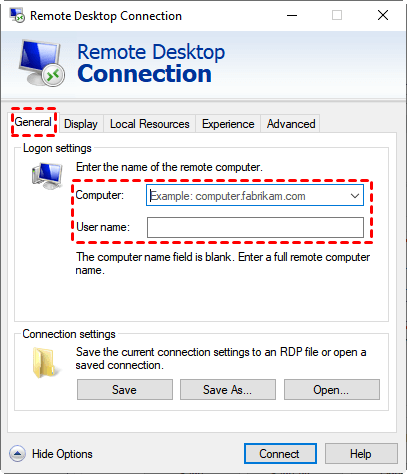
Step 7. Go back to the General tab. Enter the IP address and user name in the Remote Desktop Connection interface to achieve connection. (The detailed steps to find the IP address and user name will be introduced later in case you don’t know how to find them.)
Step 8. After the connection is successful, click This Computer on the host computer desktop, and find the previously checked disk.
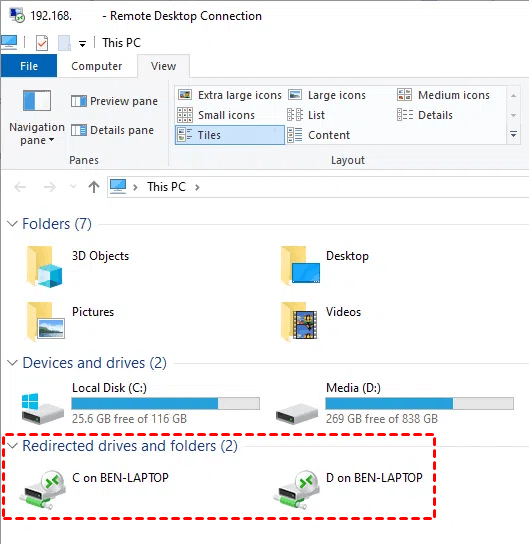
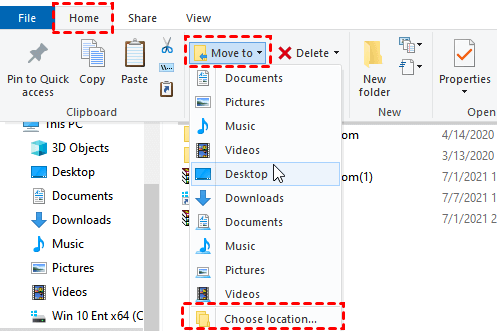
Step 9. Find the disk that stores the files you need and select the file you want to transfer, click the Home tab above, and then click Move to. Click Choose Location in the drop-down menu to realize remote desktop file transfer.
How to query IP address and user name?
When using Remote Desktop Connection to transfer files, the first thing we need to do is to find the IP address and user name of the host computer.
Step 1. Press Win + R to invoke the Run dialog box. Type in “cmd” and press OK.

Step 2. Then type “ipconfig” and press Enter. Now you can see a group of IP addresses, of which the IPv4 address is the one you need.

Step 3. Then type “query user” to see the username.

Tips: If you think this method is troublesome, you can also use Ctrl + C to copy the specified file, and Ctrl + V to paste the specified file to transfer files back and forth between the local computer and the remote computer. But you need to pay attention that the size of a single file being copied and pasted should be no more than 2 GB.
Although using RDP to transfer files is not complicated, some people still encounter problems during using it, such as the question raised by the user we mentioned at the beginning of this post. Next, I will introduce to you how to solve this problem when copying files from a remote desktop to a local does not work.
What to do if I failed to transfer files using Remote Desktop Connection?
Sometimes, you may find it unable to copy and paste to a remote desktop session. Generally speaking, such problems are caused by incorrect settings. If you failed to use Remote Desktop Connection to transfer files, we provide 3 solutions to ensure the normal use of the file transfer function of RDP.
- Enable the clipboard on the local computer.
- Restart the RDP clipboard monitoring program process.
- Disable the “Do not allow clipboard redirection” service.
Method 1. Enable the clipboard on the local computer.
Not enabling the clipboard on the local computer is one of the main reasons that copy and paste the remote desktop does not work. Therefore, enabling the clipboard on the local computer is a feasible solution.
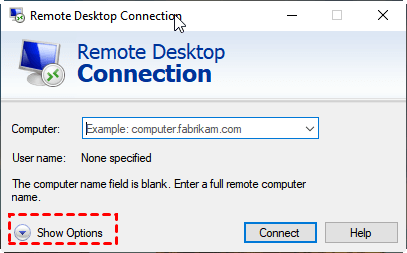
Step 1. Search for Remote Desktop Connection in the Search box. And then open it. In the pop-up window, click Show Options in the lower-left corner to expand the detailed settings.
Step 2. Switch to the Local Resources tab, confirm whether the Clipboard below is checked, if not, please check it.
Method 2. Restart the RDP clipboard monitoring program process
In some user feedback, restarting the RDP clipboard monitoring program process helps to solve the problem of copy and paste not working.
Step 1. Use the Ctrl + Shift + Esc key combination to open the Task Manager.
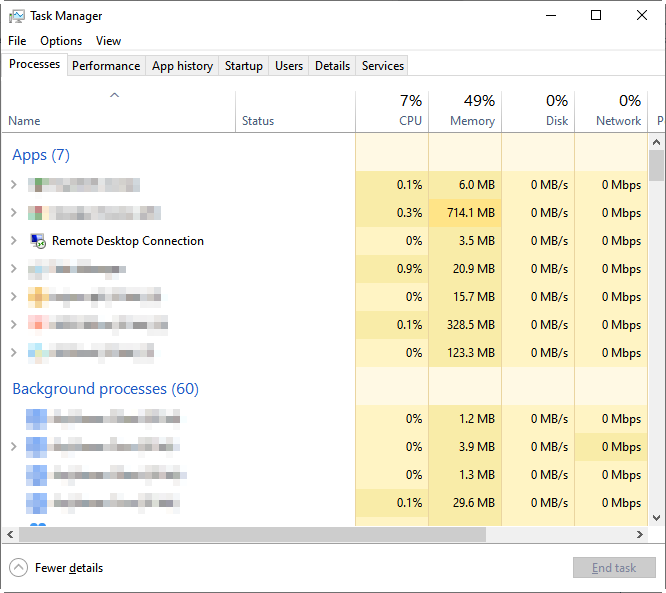
Step 2. Go into the Details tab and find the task named “rdpclip.exe”.
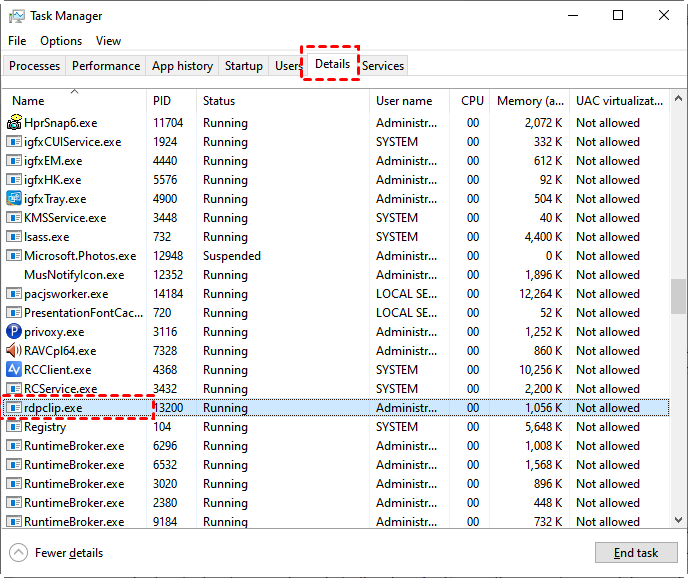
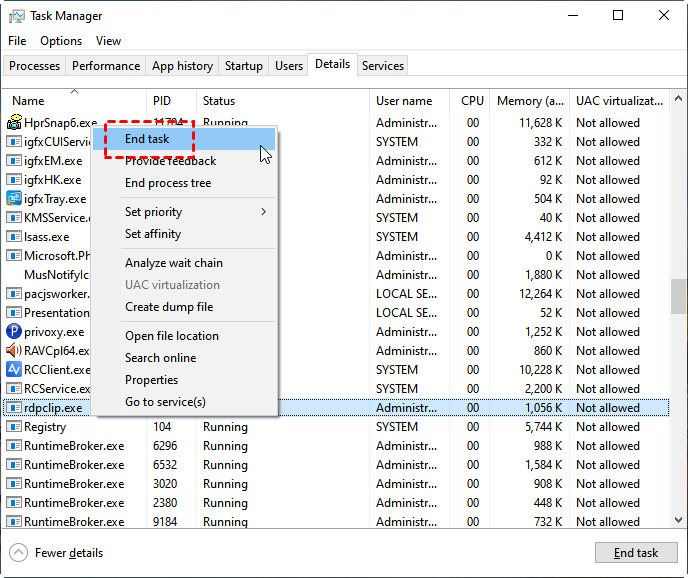
Step 3. Right-click the “rdpclip.exe” task and then click End task.
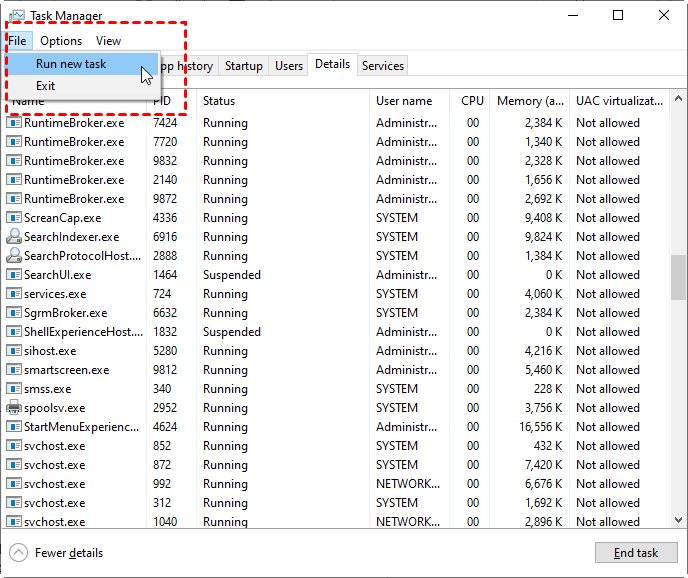
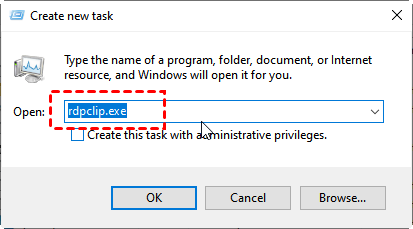
Step 4. Go to File and then click Run new task. A Create new task window will pop up. Type in “rdpclip.exe” in the box and then click OK to restart Remote Desktop Clipboard.
Method 3. Disable the “Do not allow clipboard redirection” service
The so-called "clipboard redirection" means that the user can use the clipboard on the local computer while using the remote computer. After disabling the "Do not allow clipboard redirection" service, you can solve the problem that copy and paste do not work.
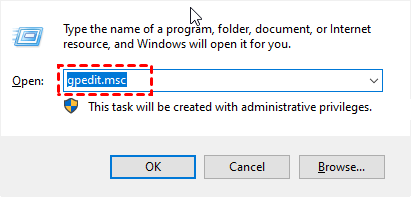
Step 1. Press Win + R to invoke the Run dialog box. Type in “gpedit.msc” and press OK. This will open up the Local Group Policy Editor window.
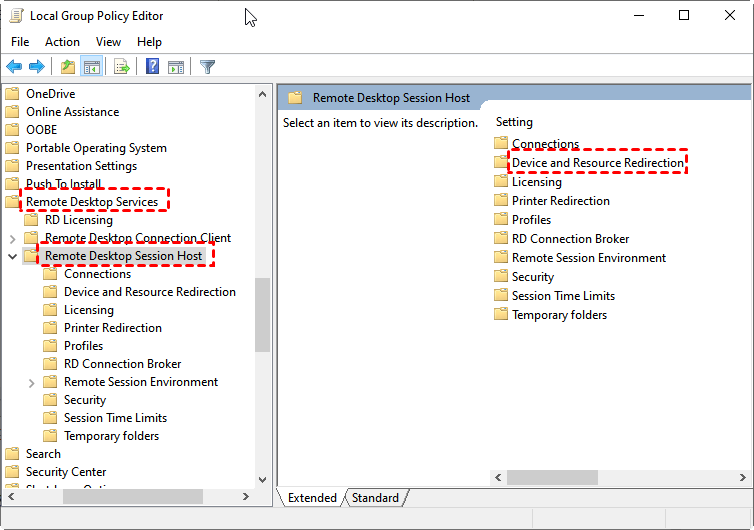
Step 2. Navigate here: Computer Configuration > Administrative Templates > Windows Components > Remote Desktop Services > Remote Desktop Session Host > Device and Resource Redirection.
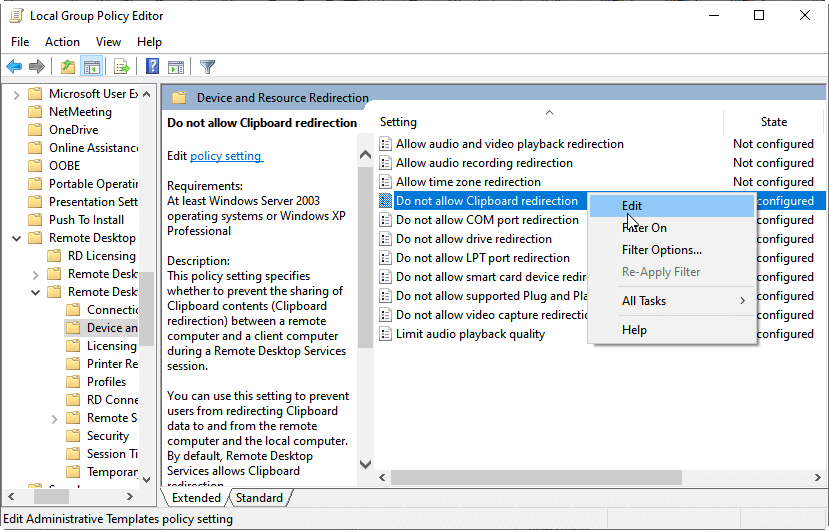
Step 3. Double click Device and Resource Redirection, you’ll see Do not allow Clipboard redirection and Do not allow drive redirection in the right pane. You need to change the state of the two settings separately.

Step 4. Change the state of Do not allow Clipboard redirection. Right-click it, and click Edit. Then change the state of it from Not configured or Enable to Disable. Click OK to save the change.
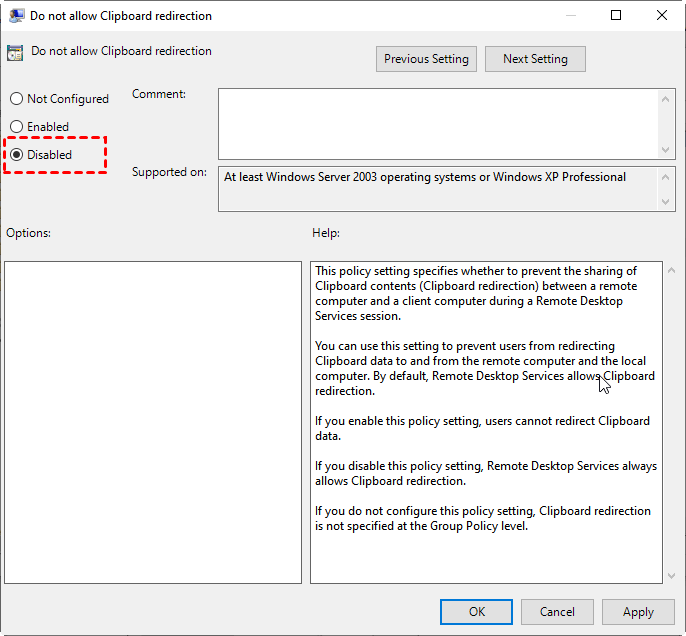
Step 5. Repeat the same step to Do not allow drive redirection.
Bonus tips: RDP alternative to transfer files between remote devices
You've got an RDP alternative to transfer files between remote devices, AnyViewer. As an RDP alternative, it has the following advantages over RDP:
- RDP requires an IP address or computer name to achieve remote connection, while AnyViewer doesn’t.
- RDP requires the two devices to be under the same network, otherwise, users need to set up port forwarding or use VPN, while AnyViewer can be directly used even if the two devices are under different networks.
- RDP can’t be used to connect to Windows 10 Home edition (some other editions as well), while AnyViewer supports devices running multiple Windows versions on PCs.
- RDP is relatively slow in transfer speed compared to AnyViewer. For example, it only costs about 20 seconds to transfer a 2 GB zip file from the local to the remote computer via AnyViewer, while it takes almost 15 mins to transfer a 1.4 GB zip file via RDP according to a user.
Note: The file transfer function requires version 3.0 and above. If your version is lower, please upgrade first.
Download, install and launch AnyViewer on both computers.
Part 1. Sign up for AnyViewer for file transfer
To use the file transfer feature, you need to sign up for AnyViewer and log in to the account on the Controller computer.
Step 1. On the Controller computer, go to Log in, and then click Sign up. (If you already have signed up on its official website, you can log in directly.)

Step 2. Fill in the signup information.

Step 3. Then you can see you successfully logged in to AnyViewer. Your device will automatically be assigned to the account you’ve logged in to.

Part 2. Transfer files with AnyViewer
After signing up for an AnyViewer account and logging in to AnyViewer on the Controller computer, you can start to transfer files. Depending on different situations, you can choose different ways to achieve file transfer.
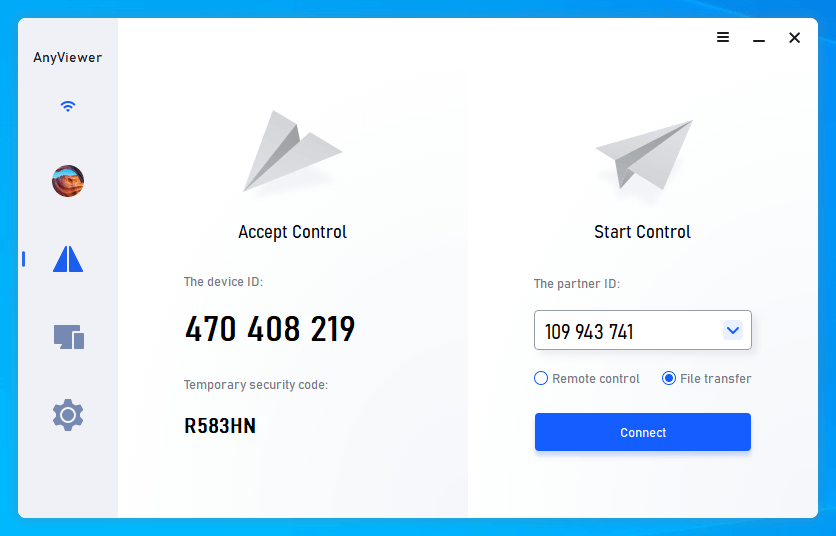
Option 1. Directly transfer files with a partner ID
When you need to transfer files to a stranger or anyone that you do not completely trust, you are suggested to use this method to transfer files directly without logging into the other computer to ensure security and protect privacy.
Step 1. Enter the device ID of the recipient on the blank box, and then choose File Transfer.
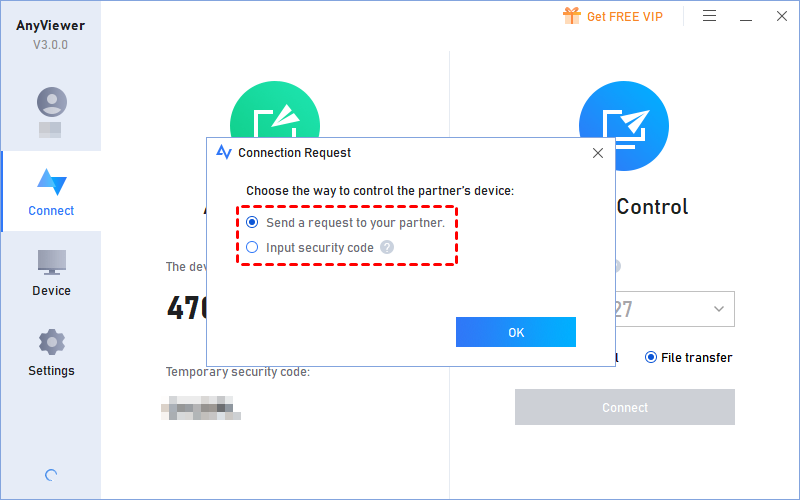
Step 2. Then you’ll be asked whether to Send a request to your partner or Input security code.
- Send a request to your partner: The Recipient computer will receive a pop-up window asking whether he/she allows you to control his/her computer.
- Input security code: You can input the security code set by the Recipient in advance and achieve a direct connection.
Whether you choose, you’ll then be able to transfer files between the two devices.
Option 2. Transfer files with a shared account
When you need to frequently access your own remote computers and transfer files, you are recommended to use this method to ensure convenience and improve proficiency.
Step 1. On the Recipient computer, log in to the same account as you’ve logged in to on the Controller computer.
Step 2. On the Controller computer, go to the Device tab, choose your target computer, and click File Transfer to start transferring files.

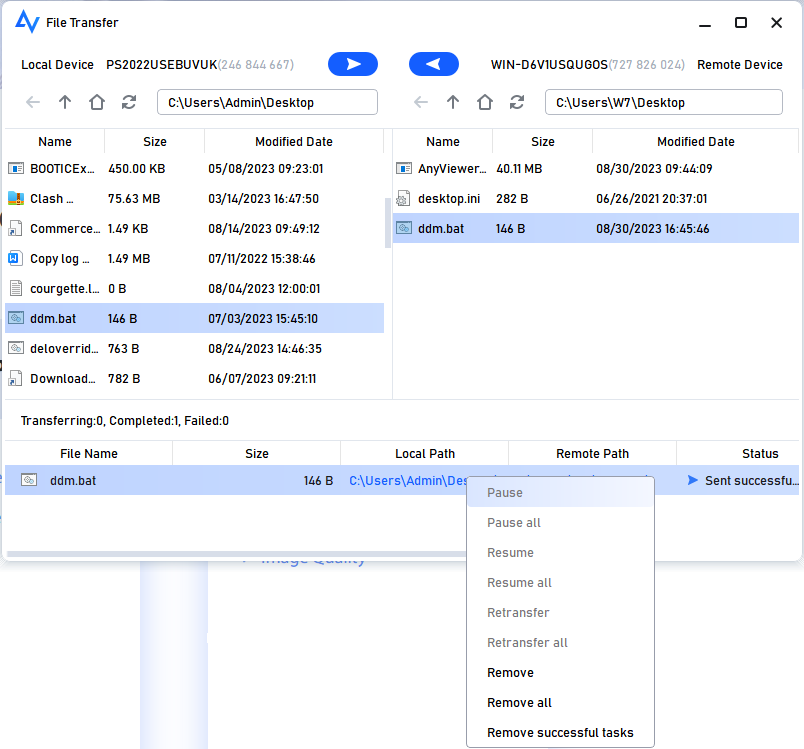
Whatever options you select, a File Transfer dialog box will appear. The path of the Controller computer is shown on the left of the box, and the path of the Recipient computer is shown on the right. You’re able to transfer files between devices (from the Controller computer to the Recipient computer or from the Recipient computer to the Controller computer) freely by clicking the arrows after choosing the target files.

You can see the transfer status at the bottom of the File Transfer dialog box. Right-click to pause or remove the transfer task. The dialog can be closed when the transfer is complete.
- Notes:✎...
-
The maximum size of a single file that can be transferred for the free account is 100 MB, and the maximum number of files that can be transferred per time is 100. If you want to transfer more larger files, please upgrade to a Professional or Enterprise plan.
What can a professional or enterprise plan brings to you:
- Faster transmission speed. Transfer speed for a free account is 500 KB/s, and for a paid account is 10 MB/s.
- Increasing number of files transferred in bulk.
- Larger size of a single file that can be transferred.
- More devices can be assigned to the same account for unattended remote access.
- More Currently connected devices are displayed for management.
- Connect in privacy mode to protect privacy.
Conclusion
Can I transfer files using Remote Desktop Connection? From this post, you can find the explicit answer to the question. And you also get 3 effective and easy solutions when you can’t transfer files using Remote Desktop Connection. In the end, we also introduce a great RDP alternative to you. Therefore, if you would like to try a free and easy remote desktop tool, you can give AnyViewer a try.
