
Stepwise Tutorial: Uninstall TeamViewer
Looking for how to completely uninstall TeamViewer? You have come to the right place, this article may help you a lot. It provides a full tutorial to teach you how to uninstall TeamViewer.
By AnyViewer / Updated on December 13, 2024
How do I uninstall TeamViewer?
TeamViewer is a remote desktop software that enables users to remotely access and control computers and other devices. It also supports remote screen casting, file transfer, and more. However, many users encounter various problems when using TeamViewer, such as TeamViewer sound not working.

It seems that many users have questions about how to completely remove TeamViewer from their computers. Some of them have problems during the uninstallation process while others have problems after the program is removed. So how to remove TeamViewer completely from the computer?
How to completely uninstall TeamViewer from Windows [4 ways]
TeamViewer removal has been a tricky problem on your computer. Do you need a simple and fast way to successfully uninstall TeamViewer? Don't worry, with the help of the following ways you will be able to solve the problem of how to completely remove TeamViewer.
Way 1. Uninstall TeamViewer from Windows Apps & features
First of all, you can uninstall it by using the Windows Apps feature, please follow the steps below:
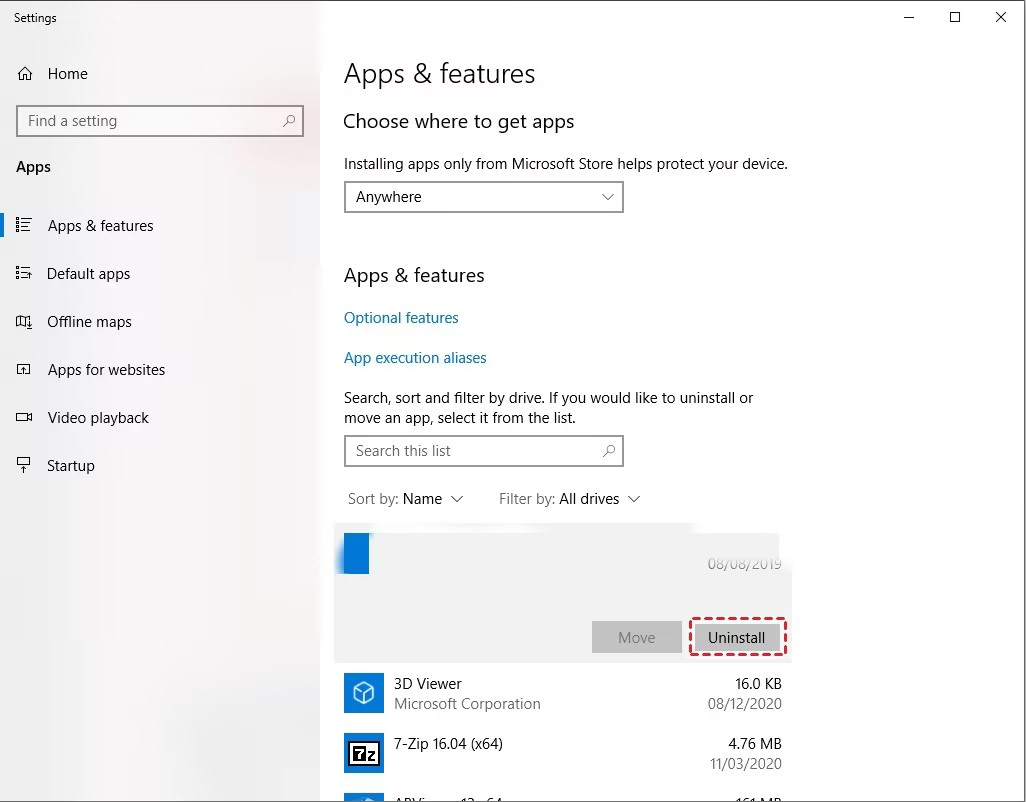
Step 1. Search for "Apps and features" in the Start menu and open it.
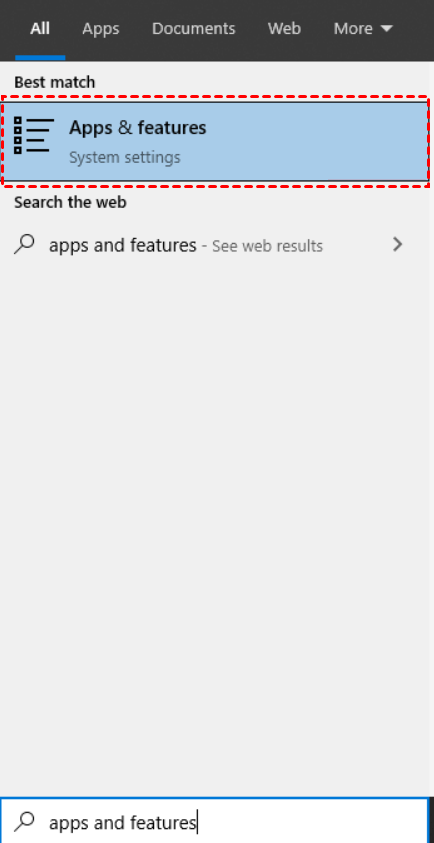
Step 2. Find TeamViewer in the list and click on it. Then click on the “Uninstall” option to start the removal process.
Way 2. Uninstall TeamViewer from the Control Panel
Alternatively, you can uninstall TeamViewer using the "Add/Remove Programs" feature in the Control Panel, please follow the steps below for a smooth removal process:
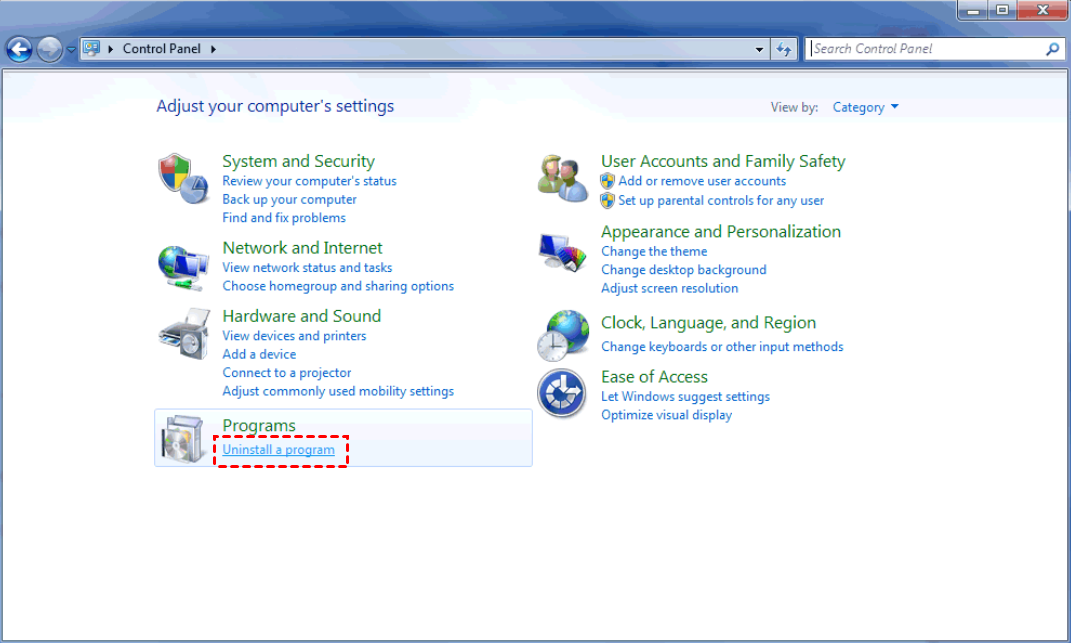
Step 1. Open the Control Panel, find “Programs” and click “Uninstall a program”.
Step 2. Locate any components named "TeamViewer", right-click on them, and select "Uninstall".
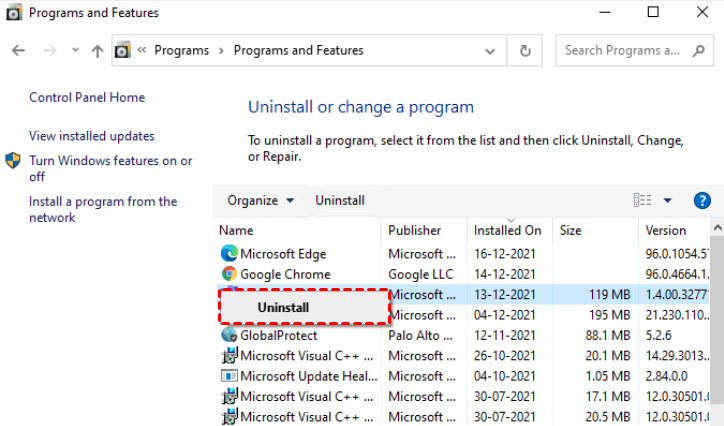
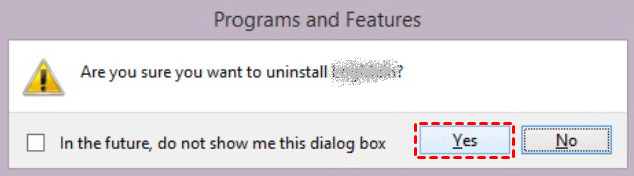
Step 3. Select “Yes” to confirm the operation and continue with the uninstallation.
Way 3. Uninstall TeamViewer with uninstaller.exe
In most cases, the installation folder of a computer program contains uninstall.exe or uninst000.exe files. Starting the uninstall process involves executing these files. Please follow the steps below to successfully uninstall TeamViewer:
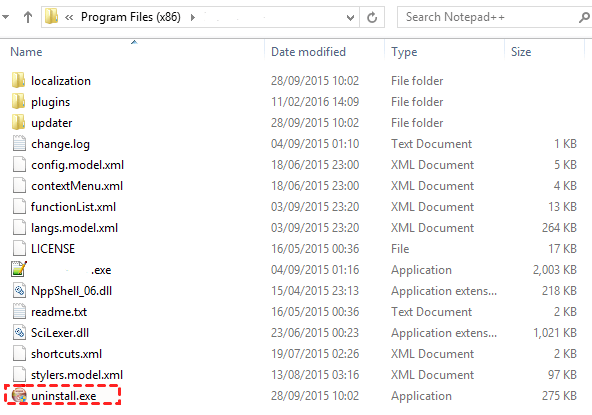
Step 1. Navigate to the TeamViewer installation folder. Most of the time it is located in C:\Programs files or C:\Program files(x86).
Step 2. Locate the "uninstall.exe or uninst000.exe" file and double-click on it to start the uninstall process.
Way 4. Uninstall TeamViewer via Run command
Start the TeamViewer uninstallation process by using the Run command and following the steps below:
Step 1. Open the Run command window by holding down “Win+R” at the same time.
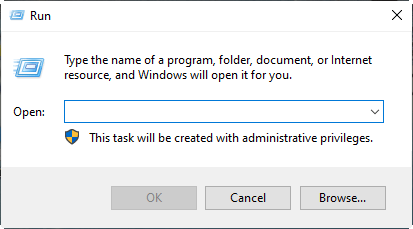
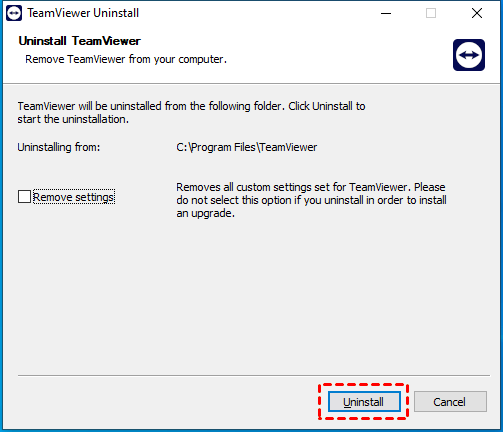
Step 2. Then, copy and paste the uninstall string "C:\Program Files (x86)\TeamViewer\uninstall.exe" into the Run command and click “OK”.
Step 3. To finish the uninstallation process, adhere to the on-screen directions.
How to completely uninstall TeamViewer from Mac
To completely uninstall TeamViewer from your Mac, you'll first need to uninstall it using the appropriate option in Preferences, and then manually remove the application's support files.
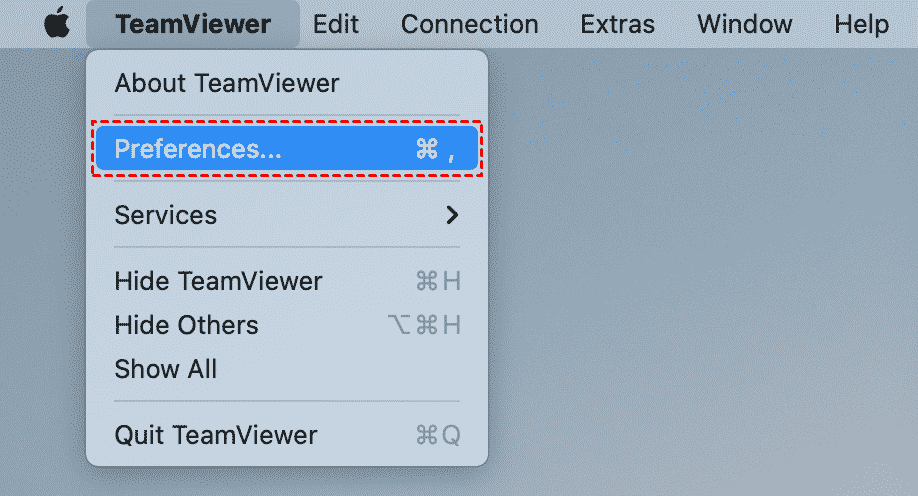
Step 1. Open TeamViewer's Preferences. To do this, go to the TeamViewer menu and select "Preferences".
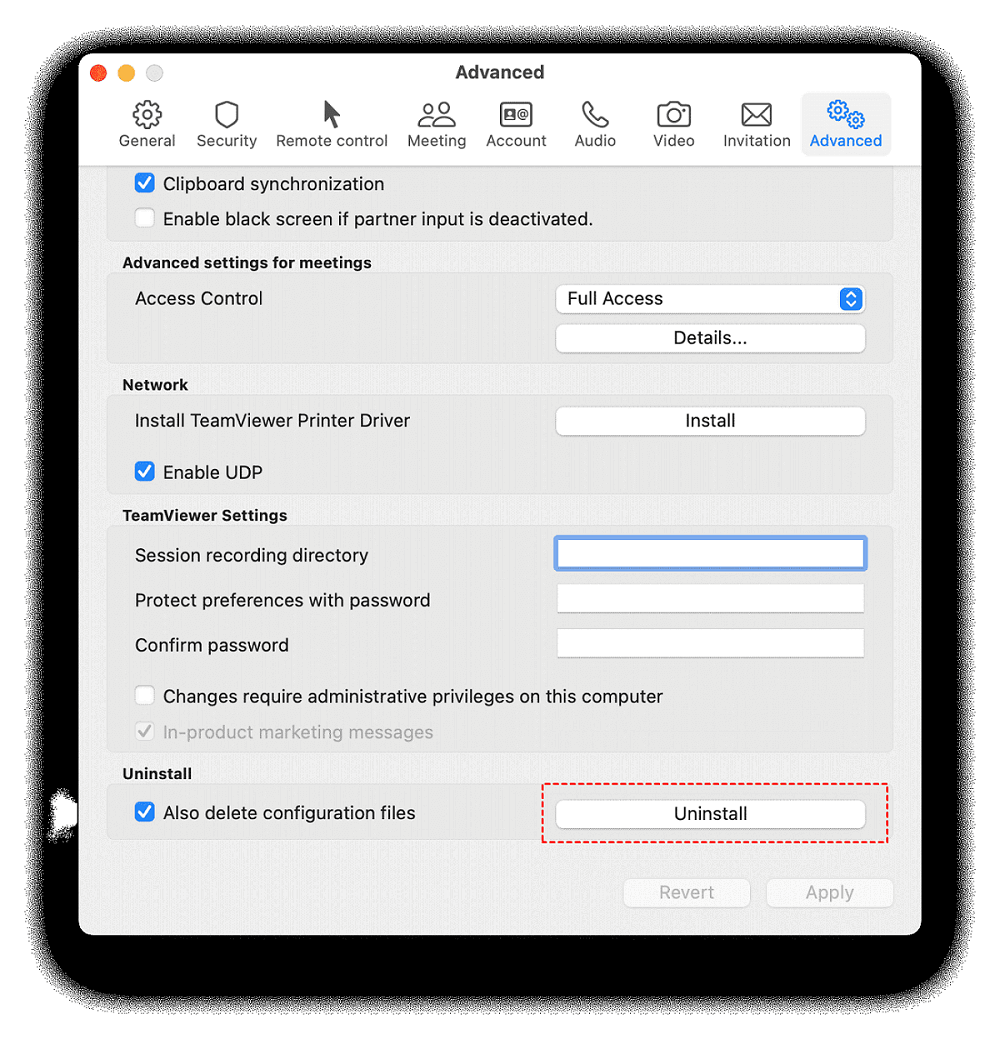
Step 2. In the Preferences window switch to the Advanced tab, scroll down, and find the “Uninstall” option. Enable “Also delete configuration files” and click the “Uninstall” button.
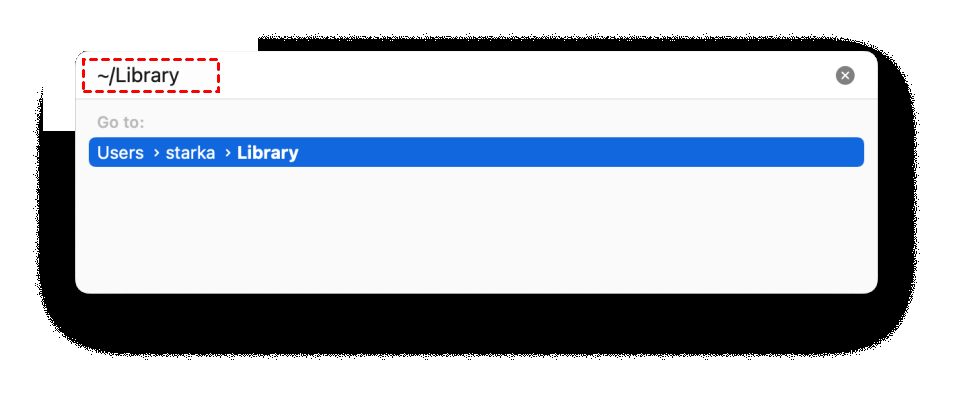
Step 3. Then locate the remaining files for TeamViewer. By default, the application stores its support files in the hidden “Library” folder. To open the “Library” folder in the Finder, press the “Command+Shift+G” shortcut, then type “~/Library” in the search field that appears and press “Enter”.
Step 4. Check each subfolder and remove all files associated with TeamViewer from it:
~/Library/Application Support/TeamViewer
~/Library/Caches/ com.teamviewer.TeamViewer
~/Library/Preferences/com.teamviewer10.plist
~/Library/Preferences/com.teamviewer.TeamViewer.list
~/Library/Logs/TeamViewer
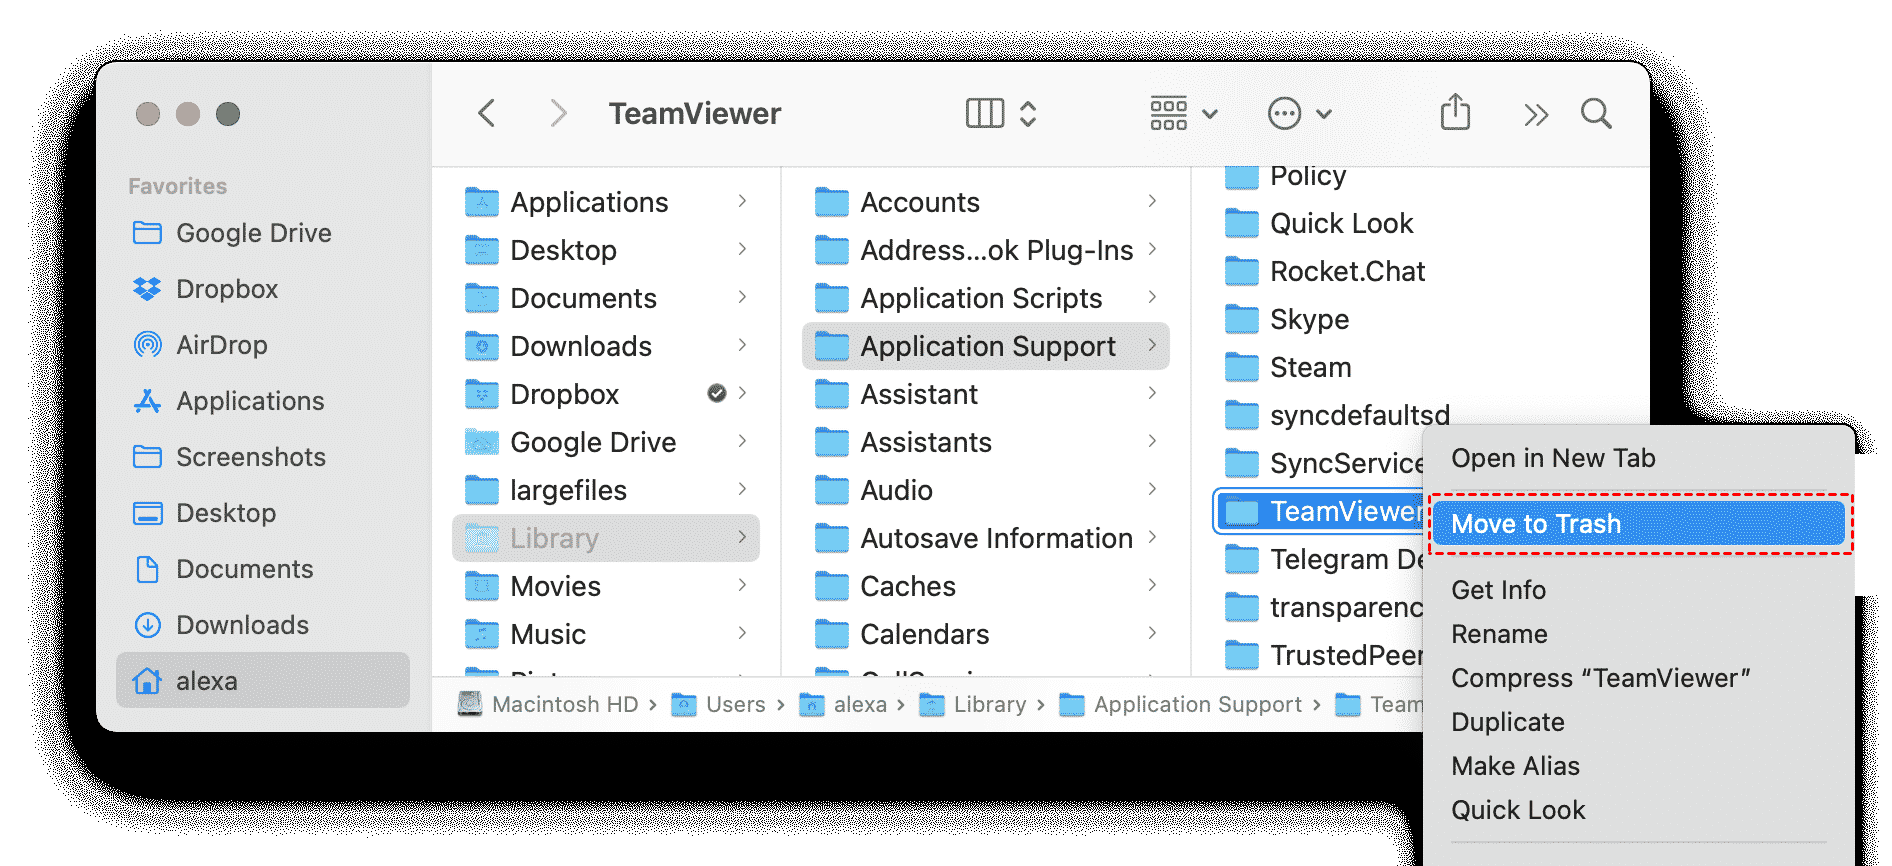
Step 5. After deleting all TeamViewer support files, please don't forget to empty the trash.
Bonus tips: The best free TeamViewer alternative
Are you looking for a powerful TeamViewer alternative that goes beyond the features of TeamViewer? Look no further! Switch to AnyViewer, the all-in-one free remote desktop software with a range of advanced features and a clean, intuitive interface designed to take your remote access experience to the next level.
In addition, AnyViewer offers a wide range of free features including unattended remote access, file transfer, remote sound, multiple sessions, text chat, and more to enhance your productivity and experience. It is a reliable and secure remote desktop application for Windows, iOS, and Android. And AnyViewer offers a free plan for all users, whether for personal or commercial use without spending a cent, while TeamViewer is only free for non-commercial use.
Step 1. Install and open AnyViewer on each of your devices. Go to “Log in” and click “Sign up”(if you have already joined its official website, you can log in immediately).

Step 2. Fill in the registration form and click “Sign up” to create an AnyViewer account and log into the same account on both your devices.

Step 3. After successfully logging in to AnyViewer, your device will be automatically assigned to the account you logged in with.

Step 4. Then Go to “Device” and choose the device you want to connect to. Selecting "One-click control" after clicking on it will allow unattended remote access.

- ★Tips: To unlock more advantages, you can upgrade your account to a Professional or Enterprise plan:
- For unattended access, more devices can be added to the same account.
- There is no limit to the number of devices that can be controlled by one computer at the same time.
- Enjoy faster file transfer speeds.
- Enjoy access to another device in Privacy Mode.
- Create groups for organizations to better manage large numbers of devices.
- ...
Conclusion
Now you may figure out how to completely uninstall TeamViewer using several of the above ways. To avoid the hassle, it is recommended that you use the reliable AnyViewer as an alternative, which provides you with seamless remote access, top-notch security, and unparalleled user-friendliness. Download AnyViewer to instantly enhance your remote experience!
